
How to Clean Dryer Floors
To clean your dryer floor effectively, first unplug and carefully pull the dryer away from the wall. Use a vacuum with a crevice tool to remove lint and debris, especially in corners and seams. Wipe the surface with a mild detergent and microfiber cloth to eliminate grease or residue. Don’t forget to inspect and clean the vent hose to maintain airflow. Regularly checking for moisture or mold helps prevent damage and fire risks. For thorough steps and tips, there’s more detailed guidance ahead.
Gather Necessary Cleaning Supplies

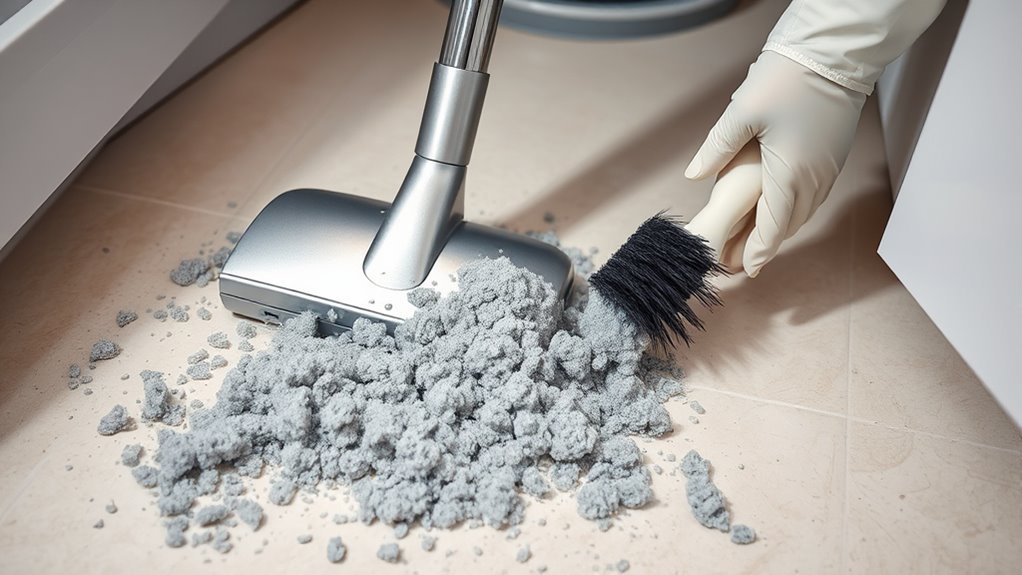
Before you begin cleaning your dryer floor, gather the essential supplies to guarantee an efficient process. For effective dryer maintenance, you’ll need a vacuum with a narrow nozzle attachment to remove lint and debris from tight spaces. A stiff-bristled brush helps dislodge stubborn particles adhering to the floor surface. Prepare a bucket with a mild detergent solution to tackle grease or grime buildup without damaging the floor material. Microfiber cloths are ideal for wiping down surfaces after cleaning. Additionally, keep a flashlight handy for better visibility under the dryer. These cleaning techniques assure thorough removal of lint and dirt, reducing fire hazards and prolonging dryer efficiency. By assembling these supplies beforehand, you’ll streamline the maintenance process and maintain a safe, clean laundry area.
Unplug and Move the Dryer
Before you start cleaning, make sure to unplug the dryer to eliminate any electrical hazards. Carefully move the unit away from the wall, ensuring you don’t strain the vent or power cord. Position the dryer so you have adequate space to access and clean the floor beneath it effectively.
Safety First Steps
Although it might seem straightforward, unplugging your dryer and carefully moving it away from the wall are critical safety steps that prevent electrical hazards and provide access to the floor area beneath. Before you begin, equip yourself with proper safety gear, such as gloves and slip-resistant shoes, to reduce injury risk. Verify the dryer is fully disconnected from power to avoid accidental shocks or fire hazards during cleaning. When moving the dryer, do so slowly and steadily to prevent damage to the power cord or vent hose. This cautious approach minimizes the potential for sparks or disconnections that could lead to fire hazards. Taking these safety-first steps empowers you to clean effectively and maintain a hazard-free laundry space.
Proper Dryer Positioning
A essential part of proper dryer positioning involves unplugging the appliance and carefully moving it away from the wall. Before you start, verify the power is disconnected to avoid electrical hazards. When repositioning, pay close attention to dryer placement—maintain adequate clearance to optimize airflow considerations, which are critical for efficient drying and preventing overheating. Position the dryer so that the vent hose is straight and unobstructed, reducing lint buildup risks and enhancing ventilation. Proper alignment also facilitates easier access for cleaning the floor beneath and behind the unit. By thoughtfully managing dryer placement and respecting airflow requirements, you not only improve operational efficiency but also gain the freedom to maintain a cleaner, safer laundry area with minimal effort.
Remove Lint From Around the Dryer
Two key areas around your dryer often accumulate lint: the floor edges and the gap between the appliance and the wall. Efficient lint removal techniques here are essential for ideal dryer performance and safety. Follow these dryer maintenance tips to remove lint effectively:
- Unplug the dryer to guarantee safety before starting.
- Use a flexible brush or vacuum attachment to reach tight spaces around the floor edges.
- Carefully pull the dryer forward to access and clear lint in the gap behind it.
- Dispose of collected lint properly to prevent fire hazards.
Regularly performing these steps not only safeguards your home but also extends your dryer’s lifespan, granting you the freedom from frequent malfunctions and costly repairs.
Vacuum the Dryer Floor Thoroughly
Start by thoroughly vacuuming the dryer floor to remove dust, lint, and debris that accumulate over time. Effective dryer floor maintenance depends on using proper vacuuming techniques to prevent buildup that can impede airflow and pose fire risks. Use a vacuum with a crevice tool attachment to access tight corners and edges where lint gathers. Move methodically across the entire floor surface, ensuring no area is overlooked. Pay special attention to the seams and beneath the dryer’s edges without moving the appliance. Consistent vacuuming not only improves dryer efficiency but also extends its lifespan, giving you freedom from costly repairs. Incorporate this step into your regular cleaning routine to maintain a safe and efficient laundry area.
Clean Underneath the Dryer

Before cleaning underneath, carefully move your dryer away from the wall, ensuring you disconnect the power source and gas line if applicable. Use a vacuum with a narrow attachment to remove dust and lint buildup from the floor beneath the unit. This prevents fire hazards and improves dryer efficiency.
Move Dryer Safely
Although moving your dryer may seem straightforward, doing so safely is essential to prevent damage to the appliance and avoid injury. Prioritize dryer safety during appliance relocation to guarantee a smooth process.
- Unplug the dryer and turn off the gas or electrical supply to eliminate hazards.
- Disconnect the vent hose carefully to avoid damage or blockages.
- Use a dolly or get assistance to lift the dryer, minimizing strain and preventing falls.
- Move the appliance slowly, avoiding dragging that can damage flooring or the dryer’s feet.
Vacuum Dust Buildup
Once you’ve safely moved the dryer, the next step is to address the dust and debris that accumulate underneath. Effective dust removal in this area requires specific vacuum techniques to guarantee thorough cleaning. Use a vacuum cleaner with a narrow nozzle attachment to reach tight spaces beneath the dryer. Begin by loosening compacted dust with a soft brush or cloth, then vacuum systematically from back to front. Pay close attention to corners and edges where lint tends to collect. Maintaining consistent suction power is essential to capture both fine particles and larger debris. This process not only enhances the dryer’s efficiency but also reduces fire hazards, granting you greater freedom from maintenance worries. Regularly applying these vacuum techniques keeps the area clean and safe over time.
Wipe Down the Dryer Floor Surface
Start by removing any loose debris or lint from the dryer floor surface using a vacuum or soft brush. This initial step is essential for effective dryer maintenance and surface cleaning. Next, follow these steps:
- Dampen a microfiber cloth with a mild detergent solution.
- Wipe the entire dryer floor surface thoroughly, focusing on corners and edges.
- Rinse the cloth with clean water, then wipe again to remove detergent residue.
- Dry the surface completely with a clean, dry cloth to prevent moisture buildup.
This precise method guarantees the dryer floor remains free of dust and grime, optimizing dryer function and safety. By performing this routine, you maintain freedom from costly repairs and keep your laundry area clean and efficient.
Inspect and Clean Dryer Vent Hose
After thoroughly cleaning the dryer floor surface, it’s important to focus on the dryer vent hose, as blockages here can greatly reduce dryer efficiency and pose fire hazards. Begin your dryer vent maintenance by disconnecting the hose from both the dryer and the wall vent. Conduct a careful hose inspection, checking for lint buildup, kinks, or damage that could obstruct airflow. Use a vacuum or a specialized dryer vent brush to remove any accumulated debris inside the hose. If you find cracks or severe wear, replace the hose to maintain ideal airflow and safety. Reattach the hose securely, ensuring no gaps that could leak exhaust. Regular hose inspection and cleaning are essential steps to preserve your dryer’s performance and avoid unnecessary risks.
Check for Signs of Moisture or Mold
Why is it essential to check for signs of moisture or mold around your dryer? Moisture detection is critical because excess dampness can lead to mold growth, compromising air quality and structural integrity. To guarantee effective mold prevention, follow these steps:
- Visually inspect the dryer floor and surrounding walls for discoloration or black spots.
- Use a moisture meter to detect hidden dampness beneath the flooring or wall surfaces.
- Smell the area for musty odors, a common indicator of mold presence.
- Check the dryer vent and hose for condensation buildup, which can contribute to moisture accumulation.
Maintain Dryer Floor Cleanliness Regularly
Although it may seem routine, maintaining dryer floor cleanliness regularly is essential to prevent lint buildup, reduce fire hazards, and guarantee peak dryer performance. Establish a consistent cleaning schedule as part of your dryer maintenance routine. Inspect the dryer floor weekly or biweekly, depending on usage frequency, to remove accumulated lint and debris. Use a vacuum with a narrow attachment or a microfiber cloth to reach tight corners effectively. This disciplined approach minimizes moisture retention and mold growth risks, preserving the integrity of your laundry area. By integrating these precise cleaning intervals, you not only enhance safety but also extend the dryer’s lifespan. Staying proactive with your dryer floor maintenance empowers you to avoid costly repairs and maintain ideal operational efficiency.
Frequently Asked Questions
Can Dryer Floor Cleaning Prevent Fire Hazards?
Yes, you can greatly reduce fire hazards through proper fire prevention by regularly using effective cleaning techniques. Lint and debris buildup under your dryer create combustible conditions, increasing fire risk. By maintaining a clean dryer floor area, you eliminate potential ignition sources, ensuring safer operation. Adopting precise, consistent cleaning practices empowers you with freedom from worry about dryer-related fires, enhancing household safety and peace of mind.
How Often Should Dryer Floors Be Professionally Inspected?
You wouldn’t want to wait a million years before checking your dryer floors, right? According to professional guidelines, the inspection frequency should be at least once a year to guarantee safety and peak performance. Regular professional inspections help identify potential fire hazards and maintain efficiency. Sticking to these recommendations gives you the freedom to use your dryer without worry, knowing experts have verified everything’s in top shape and compliant with safety standards.
Are There Eco-Friendly Cleaning Products for Dryer Floors?
Yes, you can definitely choose eco friendly solutions for maintaining your dryer floors. Natural cleaners like white vinegar, baking soda, and lemon juice work effectively without harsh chemicals. These options reduce environmental impact while ensuring thorough cleaning. By opting for biodegradable ingredients, you not only protect your home’s ecosystem but also enjoy safer air quality. So, selecting natural cleaners aligns with your desire for freedom from toxic substances and supports sustainable living practices.
What Symptoms Indicate a Clogged Dryer Vent?
Imagine your dryer gasping for breath—that’s a prime sign of clogged indicators. You’ll notice longer drying times, excessive heat, or a burning smell, all signaling poor airflow from vent blockage. Regular vent maintenance prevents these issues and guarantees safety. If your clothes come out damp or your dryer overheats frequently, it’s time to inspect and clean the vent. Staying vigilant grants you the freedom of efficient, worry-free drying.
Can Dryer Floor Issues Affect Appliance Efficiency?
Yes, dryer floor issues can impact dryer performance considerably. When lint accumulation occurs on the dryer floor, it restricts airflow, causing the appliance to work harder and less efficiently. This buildup can lead to longer drying times, increased energy consumption, and potential overheating risks. Keeping the dryer floor clean guarantees ideal airflow, maintains efficient heat distribution, and prolongs your dryer’s lifespan, giving you more freedom from maintenance hassles.


