
How to Clean With Dry Cleaning Sponges for Delicate Surfaces
You’ll want to start by choosing a soft, non-abrasive dry cleaning sponge suitable for delicate surfaces. Remove any loose dirt first, then gently rub the sponge in one direction without applying too much pressure. Avoid using water or chemicals to prevent damage. Regularly replace or tap off debris from the sponge to keep it effective. If you want to confidently care for fragile items and avoid common pitfalls, there are smart strategies to make your cleaning safer and more efficient.
Understanding Dry Cleaning Sponges and Their Benefits

Although you might not have used one before, dry cleaning sponges are incredibly effective tools for removing dirt and stains without water or chemicals. When you choose to work with dry cleaning, you embrace a method that respects delicate surfaces while granting you the freedom to clean anywhere, anytime. These sponges are made from specialized sponge materials designed to lift and trap dirt effortlessly. Unlike traditional cleaners, they don’t rely on liquids, so you avoid damage caused by moisture or harsh substances. By using these sponges, you maintain control over your cleaning process, effortlessly restoring surfaces without complicated steps or restrictions. Dry cleaning sponges offer a simple, liberated way to refresh your belongings while preserving their integrity.
Choosing the Right Dry Cleaning Sponge for Your Surface
Selecting the right dry cleaning sponge is vital to protect your surfaces and achieve the best results. You’ll want to evaluate sponge material types carefully—melamine sponges are great for tough stains but might be too abrasive for delicate finishes. On the other hand, softer sponge materials, like polyurethane foam, offer gentle cleaning without scratching. Surface compatibility evaluations matter most; always match the sponge type to the texture and fragility of your surface. For example, a delicate wood or painted surface needs a softer sponge, while harder surfaces like stone can handle firmer options. Taking this approach guarantees you clean effectively without damage, giving you the freedom to maintain your cherished items confidently and effortlessly.
Preparing the Surface Before Cleaning

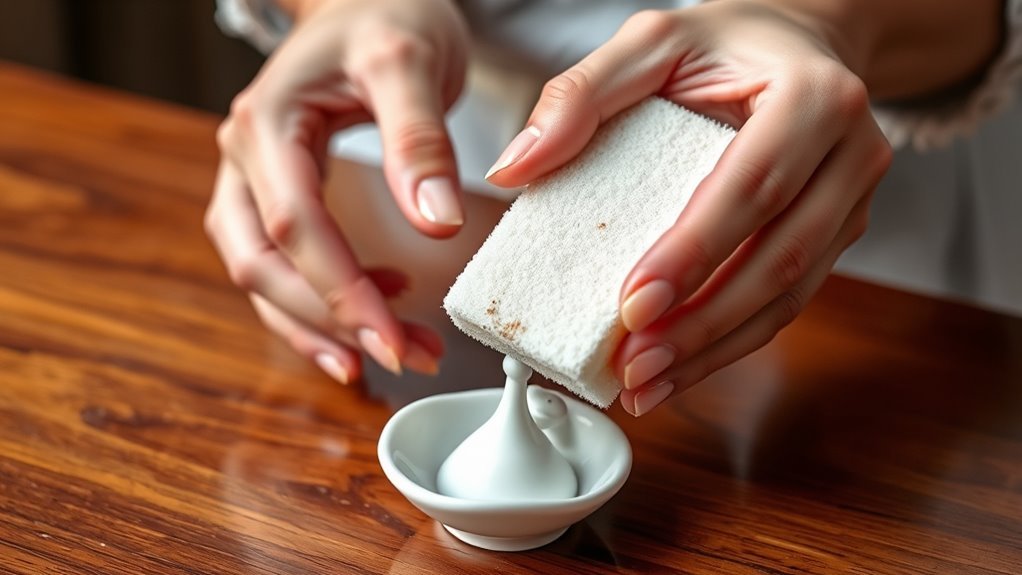
Before you start cleaning, make certain to remove any loose debris from the surface to avoid spreading dirt. You’ll also want to test the dry cleaning sponge on a small, hidden area to guarantee it won’t damage the material. Taking these simple steps helps protect your surface and makes cleaning more effective.
Remove Loose Debris
Start by removing any loose debris from the surface to guarantee your dry cleaning sponge works effectively. This step is essential for dust removal and surface protection, ensuring that the sponge doesn’t push dirt deeper or cause scratches. Use a soft brush or a gentle shake to clear away crumbs, dust, and particles without damaging delicate materials. Taking a moment here gives you the freedom to clean confidently, knowing you’ve prepped your surface properly. Remember, skipping this step can lead to smudges or uneven cleaning, so be thorough but gentle. By clearing loose debris first, you set the stage for your dry cleaning sponge to glide smoothly, preserving the integrity of your delicate surfaces and giving you the clean finish you want without hassle.
Test Sponge on Area
Once you’ve cleared away loose debris, you’ll want to test the dry cleaning sponge on a small, inconspicuous area. This step guarantees surface compatibility and prevents any unwanted damage. Before diving into full cleaning, check these test areas to confirm the sponge works well:
- Choose a hidden corner or edge
- Gently rub the sponge without pressing hard
- Observe for color changes or texture shifts
- Wait a few minutes to see if residue appears
- Confirm no damage or dullness occurs
Taking time to test areas lets you clean confidently, preserving delicate surfaces. It’s your freedom to refresh belongings without risking harm—just a simple, smart move before the full clean.
Proper Technique for Using Dry Cleaning Sponges
Using a dry cleaning sponge correctly can make all the difference in restoring surfaces without damage. Start by gently rubbing the sponge in a single direction—avoid scrubbing back and forth, which can harm delicate materials. Keep your pressure light but consistent, allowing the sponge’s texture to lift dirt naturally. Remember, dry cleaning techniques rely on the sponge’s ability to absorb grime, not harsh abrasion. After each use, maintain your sponge by tapping it gently to remove debris, ensuring it stays effective for your next clean. Avoid washing the sponge with water, as moisture can reduce its performance. By mastering these simple steps, you’ll enjoy the freedom of cleaning delicate surfaces confidently, without risking damage or wasting effort.
How to Handle Stubborn Dirt and Stains
When you face stubborn dirt or stains, gentle scrubbing with your dry cleaning sponge can make a big difference without damaging the surface. Focus on the specific spots that need extra attention, using small, controlled motions. This targeted approach helps lift tough grime effectively while preserving the material’s integrity.
Soft Scrubbing Techniques
Tackling stubborn dirt and stains with a dry cleaning sponge takes patience and a gentle touch. To protect delicate surfaces, you’ll need to rely on soft surface protection and gentle cleaning techniques. Here’s how you can master soft scrubbing without causing damage:
- Use light pressure to avoid abrasion
- Move the sponge in small, circular motions
- Frequently check your progress to prevent over-scrubbing
- Rinse or replace the sponge when it becomes dirty
- Work slowly to let the sponge lift dirt naturally
Targeted Stain Removal
Although dry cleaning sponges excel at gentle cleaning, some stubborn stains need a more focused approach. Start with accurate stain identification to choose the right method. Test your cleaning product’s compatibility on a hidden spot before applying it widely. Use the sponge gently to avoid damage while targeting the stain.
| Stain Type | Recommended Action | Notes on Product Compatibility |
|---|---|---|
| Ink | Dab with alcohol-based solution | Avoid bleach; test first |
| Grease | Use mild detergent | Verify detergent suits surface |
| Dirt | Dry sponge + soft brush | Safe for most delicate surfaces |
| Food stains | Spot clean with vinegar | Check for colorfastness |
This way, you keep freedom in cleaning without risking delicate surfaces.
Cleaning Antique and Fragile Items Safely
Since antique and fragile items require extra care, using a dry cleaning sponge is a smart way to remove dirt without causing damage. This approach supports your goal of antique care and fragile preservation by gently lifting grime without moisture or harsh chemicals. To clean safely, keep these tips in mind:
- Test the sponge on a small, hidden area first.
- Use gentle, sweeping motions to avoid abrasion.
- Replace the sponge frequently to prevent dirt buildup.
- Avoid pressing too hard, which can cause breakage.
- Work in a well-lit area to spot dirt and damage easily.
Maintaining and Storing Your Dry Cleaning Sponges
When you want your dry cleaning sponges to last and work effectively, proper maintenance and storage are key. After each use, gently tap the sponge to remove any loosened dirt instead of washing it, as water can break down its texture. For sponge maintenance, avoid squeezing or twisting; let it air dry completely in a well-ventilated area. This keeps the sponge fresh and ready for your next cleaning session. When storing sponges, keep them in a dry, dust-free container away from direct sunlight to prevent drying out or contamination. By following these simple steps, you maintain your sponge’s integrity and guarantee it stays efficient, giving you the freedom to clean delicate surfaces without worry. Proper sponge maintenance lets you enjoy effortless, long-lasting cleaning power.
Common Mistakes to Avoid When Using Dry Cleaning Sponges
Taking good care of your dry cleaning sponge is just one part of getting the best results. Avoiding common misconceptions will save you time and frustration. For instance, don’t expect it to clean greasy or heavily stained surfaces — that’s not its purpose. Also, improper storage can ruin the sponge’s effectiveness quickly. Here are some mistakes to steer clear of:
- Using the sponge on wet surfaces, which can damage delicate materials
- Applying too much pressure, risking surface abrasion
- Assuming one sponge fits all cleaning tasks without checking material compatibility
- Neglecting to keep the sponge in a dry, dust-free container
- Reusing a dirty sponge without proper maintenance
Tips for Extending the Life of Delicate Surfaces
Although delicate surfaces require gentle care, you can still keep them looking pristine by using the right techniques and tools. Incorporate preventive maintenance into your routine by regularly cleaning with dry cleaning sponges to remove dust and dirt before buildup occurs. Always handle surfaces with care, avoiding harsh chemicals or abrasive tools that could cause damage. Consider applying surface protection like a gentle sealant or protective coating when appropriate to shield from scratches and stains. Store items away from direct sunlight and extreme temperatures to prevent fading or warping. By staying proactive and consistent, you’ll extend the life of your delicate surfaces, preserving their beauty without sacrificing your freedom to enjoy them fully. With these tips, you’re set to maintain your treasured items effortlessly and effectively.
Frequently Asked Questions
Can Dry Cleaning Sponges Be Used on Electronic Screens?
You might hesitate to use dry cleaning sponges on electronic screens because of screen sensitivity, but they can be surprisingly effective if you’re careful. These sponges gently lift dirt without harsh chemicals, preserving your screen’s delicate surface while boosting cleaning effectiveness. Just avoid pressing too hard, and you’ll enjoy a smudge-free screen without risking damage. This lets you clean freely without worrying about ruining your device’s display.
Are Dry Cleaning Sponges Safe for Use on Painted Walls?
Oh sure, why not treat your painted walls like an experimental canvas for dry cleaning sponges? Before you release that sponge, remember paint compatibility matters—some paints might throw a tantrum and peel. You’re free to explore, but it’s wise to do surface testing in a hidden spot first. That way, you avoid unintended art projects and keep your walls looking flawless, all while enjoying the liberty of choosing your cleaning method.
How Often Should Dry Cleaning Sponges Be Replaced?
You’ll want to keep an eye on your dry cleaning sponge’s condition to determine the best replacement frequency. Generally, sponge longevity depends on how often you use it and what you clean. If it starts to crumble or lose effectiveness, it’s time to replace it. By swapping it out regularly, you’ll enjoy a fresher, more efficient cleaning experience—giving you the freedom to keep surfaces spotless without worry.
Can Dry Cleaning Sponges Remove Mold or Mildew?
Ever wonder if dry cleaning sponges can tackle mold removal or mildew prevention? While these sponges are great at lifting surface dirt without water, they’re not designed to kill mold or mildew. You’ll need specialized cleaners or solutions for that. However, using dry cleaning sponges regularly can help keep surfaces clean and dry, reducing conditions where mold and mildew thrive. So, they’re a helpful part of your mold-fighting routine but not the whole answer.
Are There Eco-Friendly Alternatives to Traditional Dry Cleaning Sponges?
You’ll be glad to know there are sustainable cleaning alternatives to traditional dry cleaning sponges that won’t weigh you down. Biodegradable options made from natural materials like cellulose or plant fibers let you clean freely without harming the planet. These eco-friendly sponges break down easily, so you can enjoy effective cleaning while embracing a low-impact lifestyle. Choosing them means you get to keep your space spotless and your conscience clear.


