
How to Clean Your Coffee Machine in 10 Minutes
To clean your coffee machine in 10 minutes, start by unplugging and disassembling removable parts like the water reservoir and drip tray. Soak these in warm, soapy water while wiping the machine’s exterior with a damp cloth. Prepare a vinegar-based cleaning solution and run a full cleaning cycle, followed by several rinse cycles with fresh water. Dry all parts thoroughly before reassembling, then do a test brew to verify everything’s working smoothly. Keep going to uncover expert tips for deeper maintenance.
Gather Your Cleaning Supplies
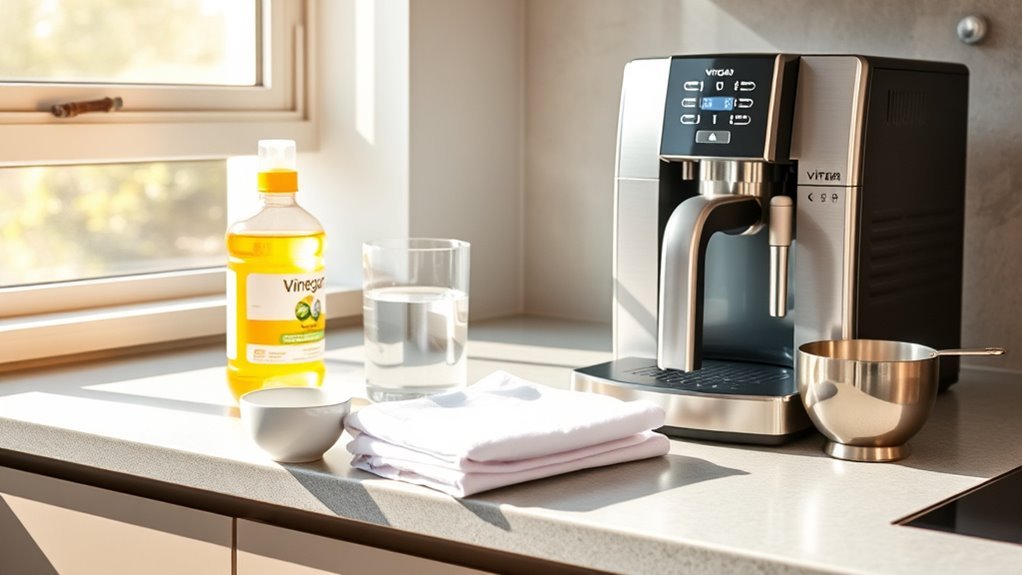
Before you begin cleaning your coffee machine, you’ll need to gather a few essential supplies. Having the right cleaning tools ready guarantees you tackle coffee residues effectively and save time. Start with a soft cloth or sponge to wipe surfaces without scratching. A small brush or toothbrush helps reach crevices where residues hide. Use a mild dish soap or a specialized coffee machine cleaner to break down oils and stains. Avoid harsh chemicals that can damage your machine or affect flavor. You’ll also want a container to catch water during rinsing and a measuring cup for precise cleaning solution use. With these tools in hand, you’re set to maintain your machine’s performance and enjoy fresh coffee without hassle or limits on your freedom.
Unplug and Disassemble the Coffee Machine
Before you start cleaning, make sure your coffee machine is unplugged to avoid any electrical hazards. Next, carefully remove all detachable parts like the water reservoir, drip tray, and filters. Set up a clean workspace where you can organize these components and clean them efficiently.
Ensure Machine Is Unplugged
Start by unplugging your coffee machine to guarantee safety during cleaning. This vital step prevents electrical hazards and protects you from accidental shocks, assuring proper safety precautions. Always confirm the machine is completely disconnected from power before proceeding with maintenance.
To keep your coffee maker in top condition, follow these quick tips:
- Check the power cord for any damage before unplugging.
- Wait a few minutes after use to allow the machine to cool down.
- Unplug from the wall outlet, not the machine’s cable, to avoid wear.
Taking these simple actions guarantees your freedom from accidents and extends your machine’s lifespan, making every cleaning session safe and efficient.
Remove Detachable Components
Two key steps follow unplugging: carefully removing and disassembling the detachable components of your coffee machine. Start by consulting your user manual to identify all detachable parts, such as the water reservoir, drip tray, and filter basket. Gently detach each part to avoid damage. Handling these parts separately allows you to apply targeted cleaning techniques that remove coffee oils and mineral buildup effectively. Use warm, soapy water or recommended cleaning solutions to soak and scrub each piece. Avoid harsh abrasives that could scratch surfaces or impair functionality. Removing these components also gives you access to hidden areas, ensuring a thorough clean. Taking this step not only maintains your machine’s performance but also grants you the freedom to enjoy fresh, flavorful coffee every time.
Prepare Cleaning Area
Once you’ve removed and cleaned the detachable parts, it’s time to set up your cleaning area. Start by unplugging your coffee machine to guarantee safety. Next, disassemble any remaining components carefully, laying them out in an organized manner. A well-prepared workspace makes the process faster and more efficient.
Focus on these key elements for workspace organization:
- Clear a flat surface with ample lighting to arrange parts and cleaning tools
- Gather essential cleaning tools like brushes, microfiber cloths, and descaling solution
- Use trays or containers to separate small parts and prevent loss
Clean the Removable Parts
Start by carefully detaching all removable parts to avoid damage. Soak them in warm, soapy water for at least 15 minutes to loosen residue. Then, use a soft brush or cloth to scrub away any remaining buildup before rinsing thoroughly.
Detach Components Carefully
Before you begin cleaning, carefully detach all removable components of your coffee machine, such as the filter basket, carafe, and drip tray. Proper detachment techniques prevent damage and guarantee a smooth cleaning process. Gently release clips or latches, avoiding force that might crack parts. Once removed, conduct a parts inspection to spot wear, buildup, or cracks that could affect performance.
Keep these tips in mind:
- Handle each component with care to avoid breakage.
- Check seals and gaskets for wear during inspection.
- Note any stubborn attachments requiring special attention.
Soak and Scrub Parts
Although soaking your coffee machine’s removable parts might seem straightforward, using the right solution and timing is key to loosening stubborn coffee oils and residue effectively. Start by filling a basin with warm water mixed with a gentle dish soap or a vinegar solution for tougher buildup. Submerge the parts and let them soak for 15-20 minutes—this soaking technique softens grime without damaging components. After soaking, use a soft brush or sponge to apply scrubbing methods that target crevices and hard-to-reach areas. Avoid abrasive tools that could scratch surfaces. Rinse thoroughly under running water to remove all soap or vinegar traces. Dry parts completely before reassembling your machine. Mastering these soaking techniques and scrubbing methods guarantees your coffee maker stays clean, functional, and ready to brew fresh coffee freely and quickly.
Wipe Down the Exterior

Grab a soft, damp cloth to gently wipe down the exterior of your coffee machine, removing dust, coffee stains, and fingerprints. This simple step prevents buildup and keeps your machine looking fresh. Focus on areas prone to spills and splashes, like near the drip tray and control panel.
Remember these maintenance tips for the best results:
- Use a microfiber cloth to avoid scratches.
- Avoid harsh chemicals that can damage surfaces.
- Wipe spills immediately to prevent stubborn coffee stains.
Regularly wiping down your machine not only maintains its appearance but also supports hygiene and longevity. By dedicating just a few minutes to this task, you keep your coffee machine in prime condition and enjoy a cleaner, more inviting brewing experience every day.
Prepare a Cleaning Solution
A simple cleaning solution can make all the difference in maintaining your coffee machine’s performance and hygiene. You don’t need harsh chemicals; effective cleaning solutions include natural alternatives that protect both your appliance and health. Here’s how to prepare them:
| Cleaning Solution | Ingredients |
|---|---|
| Vinegar Solution | 1 part white vinegar + 2 parts water |
| Baking Soda Paste | 1 tbsp baking soda + a little water |
| Lemon Juice Mixture | 1 part lemon juice + 3 parts water |
Choose vinegar for descaling, baking soda for stubborn stains, or lemon juice for a fresh scent. Mix thoroughly, and you’re ready to clean. These options offer freedom from toxins while maintaining your coffee machine’s efficiency.
Run a Cleaning Cycle

Once you’ve prepared your cleaning solution, you’ll need to run a cleaning cycle to thoroughly remove buildup inside your coffee machine. This step is essential for effective machine maintenance and guarantees your coffee tastes fresh every time. Start by pouring the solution into the water reservoir. Then, activate the cleaning cycle according to your machine’s instructions. During this process, the solution will break down oils, limescale, and residues.
Keep these tips in mind:
- Use the recommended cleaning cycles specific to your model.
- Avoid interrupting the cycle to guarantee a deep clean.
- Repeat monthly for consistent maintenance and performance.
Running regular cleaning cycles not only extends your coffee machine’s life but also gives you the freedom to enjoy rich, flavorful coffee without hassle.
Rinse With Fresh Water
After completing the cleaning cycle, it’s important to flush out any remaining cleaning solution to prevent unwanted flavors in your coffee. Start by filling the reservoir with fresh, high-quality water—filtered water is best to avoid mineral buildup. Use proper rinse techniques: run multiple rinse cycles to make certain all residues are removed. Between each cycle, discard the water to prevent recontamination. Avoid using tap water if it’s hard or heavily chlorinated, as it can affect both taste and machine longevity. Focus on thoroughly rinsing components like the brew head and water lines. This step guarantees your coffee tastes pure and your machine stays in top shape, letting you enjoy freedom from off-flavors and unnecessary maintenance down the road.
Dry and Reassemble the Machine
Two key steps remain to get your coffee machine back in working order: drying and reassembling. Effective drying is essential for coffee machine maintenance to prevent mold and guarantee longevity. Use a clean, lint-free cloth to thoroughly dry all removable parts. Let smaller components air dry completely before reassembling to avoid trapped moisture.
When reassembling, follow these tips:
- Reattach parts in the correct order, referring to your machine’s manual if needed
- Verify all seals and gaskets are properly seated to prevent leaks
- Double-check that the water reservoir and drip tray are securely in place
Taking these careful steps guarantees your machine is ready for its next brew, giving you freedom to enjoy your coffee without worry.
Perform a Test Brew
Start by running a test brew to verify your coffee machine is functioning correctly after cleaning. This step ascertains all cleaning residues are flushed out and that internal components work smoothly. Fill the water reservoir with fresh water and run a full brewing cycle without coffee grounds. The test brew benefits include confirming ideal water flow and temperature, critical for your preferred brewing techniques. Pay attention to any unusual noises or leaks during the process. If everything runs well, your machine is ready to deliver great coffee again. If not, repeat cleaning or check for buildup in less accessible parts. Performing this quick test brew guarantees your machine operates efficiently, giving you the freedom to enjoy consistently excellent coffee without interruption or maintenance delays.
Frequently Asked Questions
How Often Should I Descale My Coffee Machine?
Imagine your coffee machine like a car engine—it needs regular tune-ups to run smoothly. When it comes to descaling frequency, aim for every 1-3 months, depending on your water hardness and usage. Sticking to this schedule prevents mineral buildup, ensuring ideal coffee flavor and prolonging your machine’s life. Prioritize coffee machine maintenance; it frees you from unexpected breakdowns and keeps your brew tasting fresh, letting you enjoy your coffee rituals without hassle.
Can I Use Vinegar Instead of Commercial Cleaners?
You can use vinegar as a cleaner alternative for your coffee machine, thanks to vinegar benefits like breaking down mineral deposits and disinfecting. However, it’s important to dilute it with water (usually one part vinegar to two parts water) to avoid damaging your machine. Rinse thoroughly afterward to remove any vinegar taste. While vinegar is effective and budget-friendly, some prefer commercial cleaners designed specifically for coffee machines to guarantee maximum safety and performance.
What if My Machine Has a Built-In Grinder?
If your machine has a built-in grinder, regular grinder maintenance is essential to keep flavors pure and performance smooth. Clean the grinder every 1-2 weeks depending on usage to avoid buildup of oils and grounds. Use a small brush to remove residue and follow your manual for disassembly tips. Keeping up with cleaning frequency guarantees your coffee tastes fresh and your machine lasts longer, giving you the freedom to enjoy perfect brews hassle-free.
How Do I Clean the Water Reservoir?
To clean the water reservoir, first remove it from your machine and discard any old water. Rinse thoroughly with warm water, then use a mild cleaning solution or diluted vinegar to wipe down the inside, avoiding harsh chemicals. If your reservoir has a water filter, take it out and rinse separately. Let everything air dry before reassembling. This keeps your coffee tasting fresh and your machine running smoothly without hassle.
Is It Safe to Clean With a Dishwasher?
Think of your coffee machine parts as delicate dancers—not all can handle the dishwasher’s heat and harsh detergent. When it comes to dishwasher safety, always check the manufacturer’s guidelines before tossing any component inside. Many water reservoirs and removable parts are dishwasher-safe on the top rack, but others aren’t. For reliable cleaning methods, hand-washing with warm soapy water guarantees freedom from damage, keeping your machine performing perfectly without risks.


