
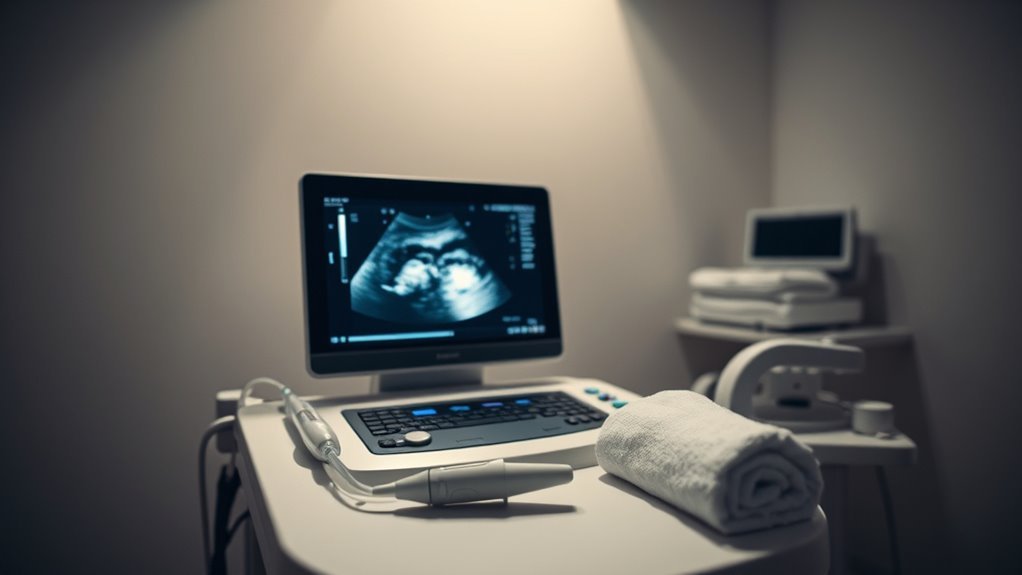
How to Get a Clear Ultrasound of Baby
To get a clear ultrasound of your baby, stay well-hydrated before your appointment and wear comfortable clothing. Avoid heavy meals as they can affect visibility. Follow the technician’s instructions closely for ideal results. High-quality ultrasound gel will enhance image clarity, so verify it’s available. Your preparation plays a critical role in capturing detailed images. There’s more to discover about securing the best experience for both you and your baby during the ultrasound process.
##

Preparing for an ultrasound appointment is crucial for ensuring a clear and detailed image of your baby. In this article, you’ll discover essential tips and techniques that can significantly enhance the quality of your ultrasound experience. From staying well-hydrated to wearing comfortable clothing, we’ll guide you through the necessary steps to optimize your scan. Additionally, you’ll learn the importance of following the technician’s instructions and avoiding heavy meals before the appointment. By adhering to these guidelines, you’ll be empowered to achieve the best possible results, allowing you to see your baby clearly during this exciting moment.
Preparation For Cleaning
A thorough preparation for cleaning your ultrasound equipment is essential to confirm ideal image quality and safety. To guarantee a successful cleaning process, follow these steps:
- Gather necessary materials: Collect all items needed for cleaning, such as soft cloths and cleaning solutions.
- Turn off the equipment: Always power down your ultrasound machine before starting the cleaning process to prevent damage and confirm safety.
- Remove detachable parts: Take off any removable components for a more thorough clean, including transducers and gel holders.
- Review manufacturer guidelines: Check the manual for specific instructions related to your model to avoid any mistakes that could affect image quality.
Tools and Chemical Required
Having gathered the necessary materials for cleaning your ultrasound equipment, it’s time to focus on the specific tools and chemicals required for effective maintenance. To guarantee peak performance and longevity of your equipment, you’ll need a combination of proper cleaning solutions and tools. Here’s a quick overview:
| Tool/Chemical | Purpose | Notes |
|---|---|---|
| Ultrasound Gel | Enhances image clarity | Use a high-quality gel |
| Soft Cloth | Wipe down transducers | Lint-free preferred |
| Disinfectant Wipes | Sanitize surfaces | Confirm they’re safe for electronics |
| Isopropyl Alcohol | Deep cleaning | Use 70% concentration |
How to Clean:

How to Clean Your Ultrasound Equipment
Cleaning your ultrasound equipment is essential for maintaining ideal image quality and ensuring patient safety. Follow this step-by-step guide for effective cleaning of your ultrasound system:
Step 1: Remove Ultrasound Gel
- Gather Materials: Obtain a soft, lint-free cloth specifically designed for cleaning delicate surfaces.
- Wipe Transducer: Gently wipe the transducer with the cloth to remove any remaining ultrasound gel.
- Clean Surrounding Surfaces: Use the same cloth to wipe down any surfaces of the ultrasound machine that may have come into contact with gel.
- Prevention of Buildup: Ensure all gel is removed to prevent residue buildup, which can adversely affect image clarity.
Step 2: Disinfect Transducer
- Select Disinfectant: Choose a suitable disinfectant wipe that is confirmed to be compatible with your ultrasound equipment to prevent any damage to sensitive components.
- Wipe the Transducer: Carefully apply the disinfectant wipe over the entire surface of the transducer, ensuring complete coverage.
- Follow Instructions: Adhere to the manufacturer’s instructions regarding contact time to effectively eliminate pathogens.
- Drying: Allow the transducer to air dry completely before using it again.
Step 3: Clean the Monitor
- Microfiber Cloth: Use a clean microfiber cloth to prevent scratches and ensure a gentle cleaning process.
- Screen-Safe Cleaner: Apply a screen-safe cleaner to the microfiber cloth, not directly onto the monitor, to avoid excess liquid damaging the equipment.
- Wipe the Screen: Gently wipe the monitor in a circular motion to remove any smudges or fingerprints, ensuring a clear display for optimal image quality.
Step 4: Check Connections
- Inspect Cables: Regularly check all cables connected to the ultrasound machine for any signs of dirt or wear.
- Clean Connectors: Use a dry cloth to wipe the connectors and ensure they are free of dust and debris.
- Look for Damage: Examine cables for any fraying or damage that could affect performance; replace any damaged cables promptly.
- Performance Assurance: Keeping connections clean and in good condition guarantees peak performance and enhances image clarity.
Safety Consideration

While guaranteeing the cleanliness of your ultrasound equipment is essential, safety considerations should never be overlooked. Ultrasound safety is paramount, as improper use or maintenance can lead to inaccurate results or even harm. Always follow the manufacturer’s guidelines for equipment maintenance to guarantee ideal performance. Regularly check for any wear and tear on transducers, as faulty equipment can compromise both safety and image quality. Also, make sure to educate yourself on the correct settings and techniques to minimize any potential risks during scans. Remember, prioritizing safety not only protects you but also your unborn baby, guaranteeing a reliable and positive imaging experience. By adhering to these safety protocols, you can enjoy the freedom of thorough and effective ultrasound assessments.
Tips to keep clean for long time
To guarantee your ultrasound equipment remains in peak condition for a long time, it’s important to implement effective cleaning and maintenance practices. Here are some tips for preventive maintenance and long-term care:
- Regularly clean transducers with approved disinfectants to avoid contamination.
- Store equipment properly, making sure it’s in a dust-free environment to protect sensitive components.
- Perform routine checks on cables and connectors, replacing any damaged parts immediately to prevent further issues.
- Follow manufacturer guidelines for software updates and calibration to ensure peak performance.
Frequently Asked Questions
What Is the Best Time for an Ultrasound During Pregnancy?
The best time for an ultrasound during pregnancy is typically between 18 to 20 weeks, which falls in the second trimester. Statistically, around 95% of expectant parents find out their baby’s sex during this period. While some ultrasounds can be performed in the first trimester, the clarity and detail increase considerably later on. This timing allows you to bond with your baby while gaining essential insights into their development.
Can I Eat or Drink Before the Ultrasound Appointment?
Yes, you can eat or drink before your ultrasound appointment, but follow the specific ultrasound preparation instructions given by your healthcare provider. Typically, hydration guidelines suggest drinking water to maintain adequate fluid levels, especially for certain types of ultrasounds. However, avoid heavy meals or foods that could cause gas, as they might interfere with imaging clarity. Always confirm your specific dietary needs with your doctor for the best results.
How Long Does an Ultrasound Session Typically Last?
An ultrasound session typically lasts between 20 to 60 minutes, depending on the type of examination and the technician’s efficiency. To guarantee a smooth experience, arrive early and follow ultrasound appointment tips like drinking water beforehand to fill your bladder, which can enhance image clarity. Staying relaxed is key, as it helps the technician work efficiently. Remember, a calm environment contributes to a quicker and more effective ultrasound session duration.
Will I Be Able to Hear the Baby’s Heartbeat During the Ultrasound?
When it comes to hearing your baby’s heartbeat, you’re in for a treat! Thanks to advanced ultrasound technology, you should be able to hear the fetal heartbeat during your appointment. Typically, this happens around the 6 to 8-week mark, as the sound waves capture the rhythmic beats. It’s a thrilling moment, and you’ll likely find it hard to contain your excitement. So, get ready for that unforgettable sound!
How Many Ultrasounds Will I Have During My Pregnancy?
You’ll typically have two to three ultrasounds during your pregnancy. The first trimester ultrasound serves multiple purposes, including confirming your due date and checking for fetal heartbeat and viability. Subsequent ultrasounds, usually in the second and third trimesters, assess growth, anatomy, and overall health. Your healthcare provider might recommend additional ultrasounds if there are concerns, but in most cases, these three are standard for monitoring your pregnancy’s progress.


