
How to Make Homemade Garage Cleaner
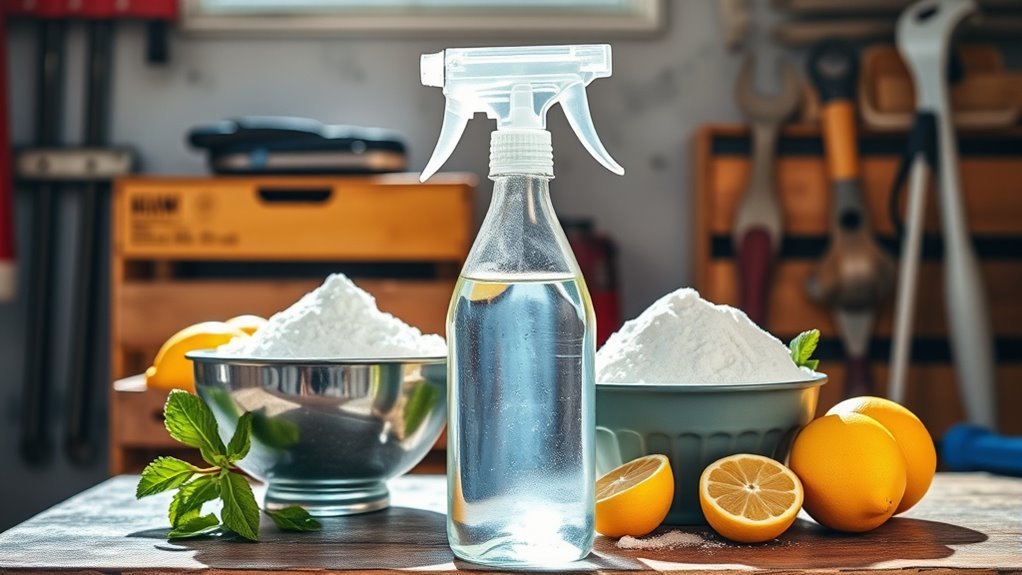
You can make an effective homemade garage cleaner by mixing white vinegar, baking soda, liquid castile soap, and lemon juice. These simple ingredients cut through grease and grime safely and eco-friendly. Use a stiff brush or spray bottle to apply the cleaner on surfaces like concrete floors, wooden shelves, and metal tools. Wearing gloves is key to protect your skin. Keep the right tools handy, and you’ll maintain a fresh, tidy garage with ease. For tips on stain removal and storage, keep going.
Benefits of Using Homemade Garage Cleaner
Although commercial cleaners can be convenient, making your own garage cleaner offers several advantages. When you look at the effectiveness comparison, homemade solutions can be just as powerful at tackling grease, grime, and stains but without harsh chemicals. You get to control what goes into your cleaner, ensuring it’s safe for your space and environment. Plus, the cost savings are significant—you use common household ingredients instead of pricey commercial products, saving you money over time. This freedom to customize your cleaner means you’re not locked into a one-size-fits-all formula. By making your own, you’re empowered to maintain a cleaner garage with fewer expenses and greater control over what you’re using, giving you true independence in your cleaning routine.
Essential Ingredients for Homemade Garage Cleaner
To make an effective homemade garage cleaner, you’ll need just a few essential ingredients that you probably already have at home. Start with white vinegar—it’s a powerful natural alternative that cuts through grease and grime without harsh chemicals. Baking soda is another must-have; it offers gentle abrasion and deodorizing power, boosting cleaning effectiveness. A few drops of liquid castile soap add extra grease-fighting punch while staying eco-friendly. For tougher stains, a bit of lemon juice helps break down dirt naturally and leaves a fresh scent. Mixing these ingredients gives you a versatile, free-spirited cleaner that’s safe for your garage and the environment. With these simple, natural alternatives, you’re free to maintain a spotless garage without compromising your values or health.
Tools and Supplies Needed
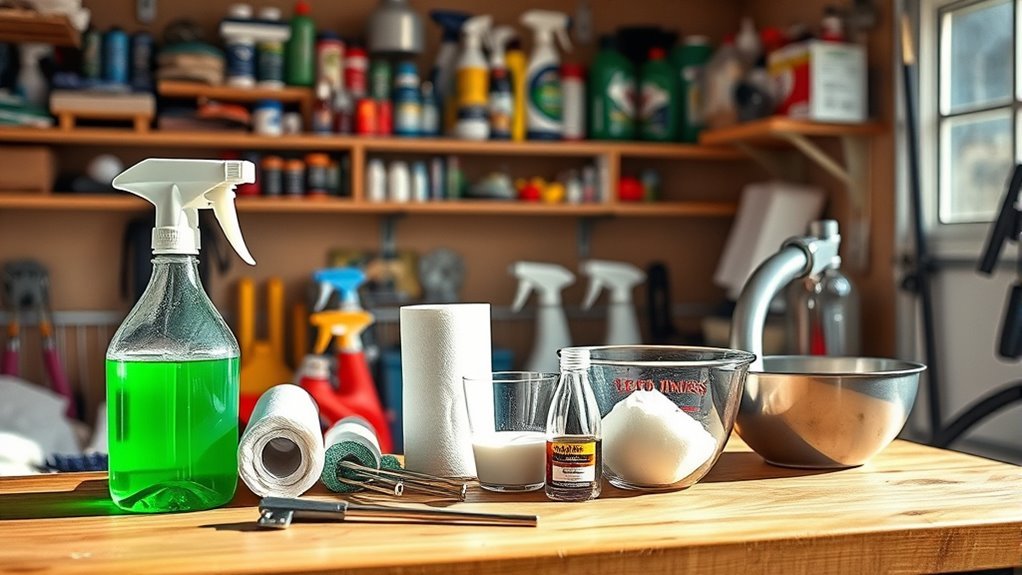
You’ll need a handful of basic tools and supplies to get started with your homemade garage cleaner. Having the right cleaning tools simplifies your work and keeps you efficient. Below is a supply checklist to make certain you’re fully equipped for the job and ready to embrace that freedom of a spotless garage.
| Item | Purpose | Notes |
|---|---|---|
| Bucket | Mixing cleaner | Use a sturdy, leak-proof bucket |
| Scrub brush | Removing grime | Preferably with stiff bristles |
| Spray bottle | Applying cleaner | Choose one with adjustable nozzle |
| Rubber gloves | Protecting hands | Essential for chemical safety |
| Microfiber cloths | Wiping surfaces | Lint-free for best results |
Grab these, and you’re set to tackle your garage cleaning project with confidence!
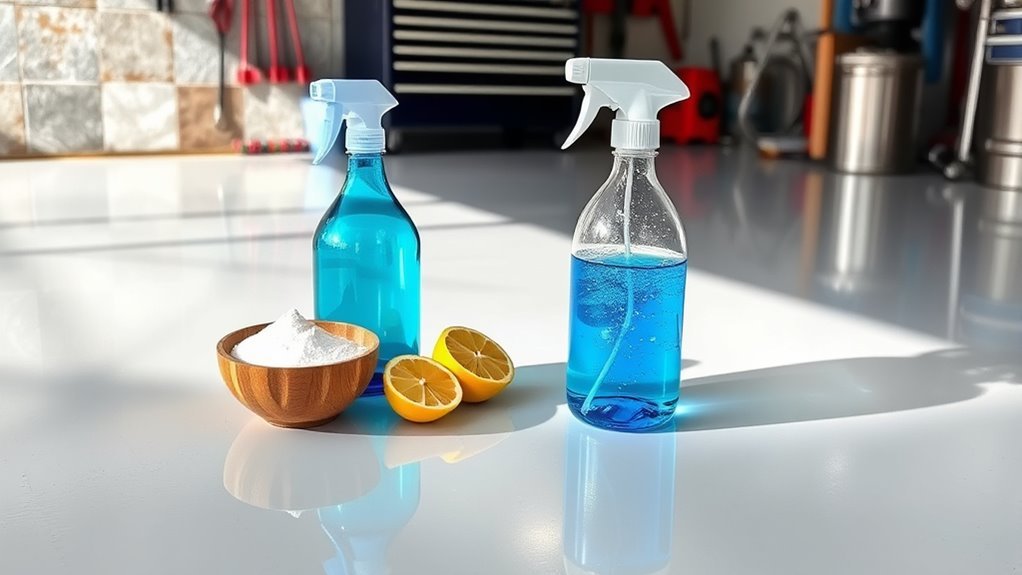
Step-by-Step Guide to Mixing Your Cleaner
You’ll need a few essential ingredients like baking soda, vinegar, and dish soap to get started. Mixing them in the right order and proportions is key to creating an effective cleaner. Let’s walk through the simple process step-by-step so you can make your solution with ease.
Essential Ingredients Needed
Although mixing your own garage cleaner might seem tricky at first, gathering the right ingredients is simpler than you think. You don’t need fancy chemicals to achieve a spotless, fresh space. Embrace the freedom to use natural, effective components that are easy to find and safe to handle. Here’s what you’ll need:
- Cleaning vinegar: a powerful, natural degreaser and deodorizer
- Baking soda: excellent for scrubbing and neutralizing odors
- Liquid dish soap: cuts through grime and grease effortlessly
- Warm water: to dissolve and activate ingredients
- Essential oils (optional): for a pleasant, personalized scent
With these essentials, you’re set to create a cleaner that’s both effective and eco-friendly, giving your garage a fresh start on your terms.
Mixing Process Explained
Now that you’ve gathered all the ingredients, it’s time to combine them properly to create your homemade garage cleaner. Start by measuring your liquids carefully, following the recommended mixing ratios—typically one part vinegar to two parts water, with a few drops of dish soap. Pour these into a spray bottle or bucket. Next, use gentle blending techniques: swirl or stir slowly to avoid creating excess foam or bubbles. This guarantees the ingredients mix evenly without losing their cleaning power. Avoid shaking vigorously; instead, take your time to blend the solution thoroughly. By respecting the mixing ratios and applying careful blending techniques, you’ll craft a powerful cleaner that helps you regain control over your space—cleaning your garage efficiently and freely.
Techniques for Cleaning Different Garage Surfaces
When tackling your garage, different surfaces call for specific cleaning methods to avoid damage and guarantee effectiveness. Understanding cleaning techniques based on surface types lets you maintain your garage with confidence and freedom.
- Concrete floors: Use a stiff brush and a mixture of your homemade cleaner with water; rinse thoroughly.
- Wooden shelves: Wipe gently with a damp cloth and mild cleaner, avoiding excess moisture.
- Metal tools and surfaces: Apply cleaner with a soft cloth to prevent rust or scratches.
- Painted walls: Use a soft sponge and diluted cleaner to protect the paint finish.
- Rubber mats or flooring: Scrub lightly with a soft brush and your cleaner diluted to avoid deterioration.
Tailoring your cleaning techniques to each surface type guarantees a safe, effective garage cleanup every time.
Tips for Removing Tough Stains
Many stubborn stains in your garage, like oil spots or rust marks, can seem impossible to remove at first. To tackle these tough stain types, start by identifying the exact nature of the stain—oil requires a degreasing cleaning method, while rust needs an acid-based approach. For oil, sprinkle baking soda or kitty litter to absorb excess, then scrub with a mix of dish soap and warm water. Rust stains respond well to lemon juice or vinegar, which break down the iron deposits when left to sit briefly. Remember, applying the right cleaning method based on the stain type saves you time and effort. With these targeted tips, you’ll regain control over your garage’s look and keep it free from persistent grime.
Safety Precautions When Using Homemade Cleaners
Using homemade cleaners can be effective, but you should always take at least a few safety precautions to protect yourself and your space. Wearing proper protective gear is essential to avoid skin irritation or accidental ingestion. Also, make sure to meet ventilation requirements by working in well-aired areas or opening windows to prevent inhaling fumes. Keep your workspace organized and avoid mixing ingredients unless the recipe specifies it. Here are five key safety tips:
- Wear gloves and eye protection.
- Guarantee good airflow by opening doors or windows.
- Label containers clearly to avoid confusion.
- Store ingredients safely out of children’s reach.
- Test cleaners on small areas to check for adverse reactions.
Eco-Friendly Storage and Disposal Methods
You’ll want to store your homemade cleaner safely in clearly labeled, sealed containers to prevent spills and contamination. When it comes to disposal, choose green methods like composting or using designated hazardous waste facilities. This way, you keep your garage clean without harming the environment.
Safe Chemical Storage
Although homemade garage cleaners are often safer than commercial products, it’s important that you store and dispose of their ingredients responsibly to protect both your health and the environment. Using proper storage containers with tight seals keeps chemicals fresh and prevents spills. Always apply clear chemical labeling on each container, so you know exactly what’s inside and avoid dangerous mix-ups. Store your cleaners in a cool, dry place away from direct sunlight and out of reach of children or pets. Make sure to keep incompatible substances separated to prevent reactions.
- Use airtight, durable storage containers
- Clearly label all chemical mixtures
- Store in a well-ventilated, shaded area
- Keep away from heat sources and flames
- Separate incompatible chemicals to avoid hazards
Green Waste Disposal
Proper storage sets the foundation for safe handling, but managing the leftover materials from your cleaning process is just as important. To truly embrace freedom and responsibility, you should explore composting options for organic waste like rags soaked in natural cleaners or plant-based residues. This way, you’re returning nutrients to the earth instead of adding to landfills. For non-organic waste, tap into local recycling initiatives—many communities offer special programs for hazardous or chemical-laden materials. Always separate recyclables carefully and avoid mixing them with regular trash to keep the process efficient. By adopting these eco-friendly storage and disposal methods, you reduce your environmental footprint and maintain a clean, safe garage space. It’s about taking control and making choices that support both your freedom and the planet’s health.
Maintenance Tips to Keep Your Garage Clean Longer
Since keeping your garage clean can feel like a constant battle, adopting simple maintenance habits will save you time and effort in the long run. Sticking to a cleaning schedule helps prevent clutter buildup, while organizational tips guarantee everything has its place, making your space feel more open and free. Here’s how you can keep your garage tidy longer:
- Set a weekly or biweekly cleaning schedule to stay consistent
- Use clear bins and labels for easy item identification
- Install wall-mounted shelves to free up floor space
- Sweep or vacuum regularly to avoid dirt accumulation
- Encourage everyone to return tools and gear after use
With these habits, your garage stays clean, organized, and ready for whatever freedom-filled projects you want to tackle next.
Frequently Asked Questions
Can Homemade Garage Cleaner Damage Painted Surfaces?
Think of your painted surfaces like a delicate butterfly’s wings—easy to damage if you’re not careful. When using homemade garage cleaner, you’ve got to take into account paint compatibility to avoid harming the finish. Some ingredients can strip or dull paint, so always test a small area first. Protecting your surfaces means choosing gentle, non-abrasive ingredients. That way, you keep your freedom to clean boldly without sacrificing your paint’s beauty.
How Long Does Homemade Garage Cleaner Last Once Mixed?
Once mixed, your homemade garage cleaner typically has a shelf life of about one to two weeks. To keep it effective, store it in a tightly sealed container and keep it in a cool, dark place away from direct sunlight. Avoid freezing temperatures, as they can break down the ingredients. Following these storage tips will help you maintain its cleaning power and give you the freedom to clean whenever you want without worrying about wasted solution.
Is Homemade Cleaner Safe to Use Around Pets and Children?
Imagine a gentle breeze that carries no harm—that’s the ideal when thinking about pet safety and child safety with homemade cleaners. You’ll want to guarantee all ingredients are non-toxic and natural, avoiding harsh chemicals. While many homemade cleaners are safer than commercial ones, you should still store them out of reach and rinse surfaces well. That way, your freedom to clean won’t come at the cost of your loved ones’ well-being.
Can I Use Homemade Garage Cleaner on Outdoor Furniture?
You can definitely use homemade garage cleaner on outdoor furniture, but you’ll want to test it first to make sure it doesn’t damage the material. Its cleaning effectiveness varies depending on what you’re dealing with—wood, metal, or plastic. Since you value freedom and control, homemade solutions let you tweak ingredients for safe, effective cleaning without harsh chemicals. Just spray a small area, wait, and see how it holds up before tackling the whole piece.
How Do I Neutralize Odors After Cleaning the Garage?
Did you know that 90% of people say odors affect their comfort at home? To neutralize odors after cleaning your garage, try odor absorption methods like placing bowls of baking soda or activated charcoal around the space—they’re natural deodorizing agents that trap smells without harsh chemicals. You can also use vinegar sprays or essential oils to freshen the air. This way, you keep your garage smelling clean and enjoy the freedom of a fresh, inviting space.


