How to Make Homemade Mold Cleaner
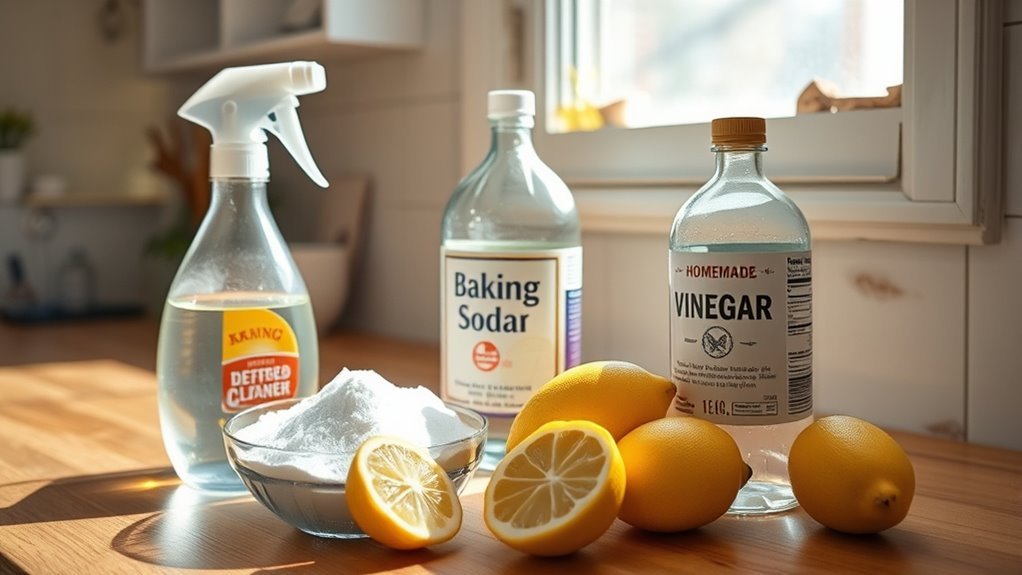
You can make an effective homemade mold cleaner with vinegar and baking soda, both common household ingredients. Mix equal parts vinegar and water in a spray bottle, then add baking soda carefully for scrubbing power. Spray the affected area, let it sit, scrub gently, rinse, and dry thoroughly to prevent mold regrowth. Don’t forget gloves for safety and good ventilation. If you want to tackle mold problems thoroughly, there are simple steps and tips you can follow next.
Understanding the Causes of Mold Growth
Although mold can appear suddenly, it only grows when certain conditions are met. You’ll find that mold spores are everywhere—they’re airborne and waiting for the right environment to thrive. What you need to watch out for are moisture sources like leaks, condensation, or high humidity. These wet conditions give mold spores the perfect opportunity to settle and multiply. If you want to maintain control and freedom from mold’s grip, it’s essential to identify and eliminate these moisture sources quickly. By understanding what triggers mold growth, you empower yourself to prevent it before it takes hold. Taking charge of your environment means you won’t be at the mercy of mold’s silent spread.
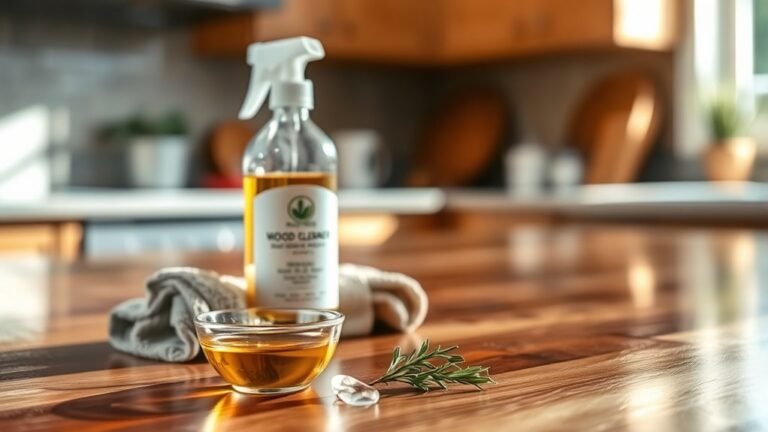
Essential Ingredients for Homemade Mold Cleaners
When tackling mold with homemade solutions, knowing the right ingredients is key to effectiveness and safety. You don’t need complicated chemicals to fight mold; simple household staples like a vinegar solution and baking soda can do the trick. Vinegar solution, with its natural acidity, breaks down mold spores and prevents regrowth without harsh fumes. Baking soda adds a scrubbing power and deodorizes areas affected by mold, making it a perfect companion. These ingredients are affordable, easy to find, and give you control over what goes into your cleaner—freeing you from reliance on commercial products filled with unknown additives. By choosing these essentials, you’re taking a straightforward, eco-friendly approach to mold removal that respects your freedom to maintain a clean, healthy space naturally.
Step-by-Step Guide to Mixing Your Mold Cleaner

Now that you know which ingredients work best for homemade mold cleaners, let’s look at how to combine them effectively. Start by measuring your ingredients carefully to maintain proper mixing ratios; this guarantees your cleaner works well on different cleaning surfaces without causing damage. For example, when using vinegar and water, a 1:1 ratio is usually effective for most surfaces. If you’re adding essential oils for extra mold-fighting power, keep them to a few drops per cup of liquid to avoid overpowering scents or residues. Always mix your ingredients in a spray bottle or a non-reactive container to keep things safe and simple. By following these steps, you’ll create a powerful, balanced cleaner that lets you tackle mold with freedom and confidence.
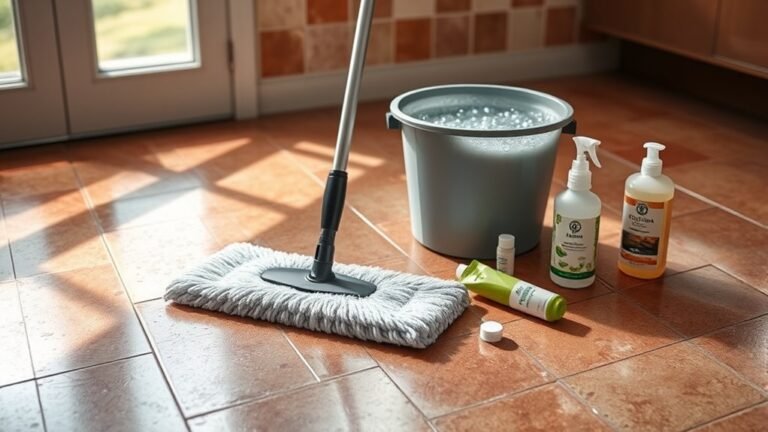
Application Techniques for Effective Mold Removal
Start by thoroughly spraying the homemade mold cleaner onto the affected area, guaranteeing full coverage. Use spray bottles for even distribution, reaching cracks and crevices easily. Let it sit for a few minutes to break down mold. Next, apply scrubbing techniques with a stiff brush or sponge to loosen stubborn mold without damaging surfaces. Rinse the area with clean water and dry completely to prevent regrowth. Here’s a quick guide to boost your mold removal freedom:
| Step | Tool | Tip |
|---|---|---|
| Spray | Spray bottles | Hold 6-8 inches away |
| Wait | None | 5-10 minutes for effectiveness |
| Scrub | Brush or sponge | Use firm, circular motions |
| Rinse & Dry | Cloth or towel | Guarantee no moisture remains |
Safety Tips When Using Natural Mold Cleaners

After applying and removing mold with natural cleaners, taking safety precautions helps protect you and your surroundings. Even though you’re using natural ingredients, some can still irritate your skin or eyes. Make sure to wear protective gear like gloves and goggles to shield yourself from splashes. Work in a well-ventilated area to avoid inhaling any airborne spores or fumes. If you’re mixing ingredients, measure carefully to prevent unexpected reactions. Keep your homemade mold cleaner out of reach of children and pets to avoid accidental ingestion. Finally, wash your hands thoroughly after cleaning, even if you wore gloves. By respecting these safety tips, you maintain your freedom to clean naturally without risking your health or your home’s safety.
Preventative Measures to Keep Mold at Bay
To keep mold from coming back, you’ll want to control indoor humidity and boost air circulation. Using a dehumidifier or opening windows can make a big difference. These simple steps help create an environment where mold struggles to grow.
Control Indoor Humidity
Although mold thrives in damp environments, you can keep it in check by controlling indoor humidity levels. Maintaining ideal humidity levels not only prevents mold growth but also creates a more comfortable living space. One of the best ways to do this is by using a dehumidifier, which effectively reduces moisture in the air and offers dehumidifier benefits like improved air quality and less musty odors.
Here’s how to manage humidity levels:
- Use a dehumidifier in damp areas like basements
- Fix leaks and seal windows to prevent moisture entry
- Ventilate bathrooms and kitchens during and after use
- Avoid drying clothes indoors
- Monitor indoor humidity with a hygrometer, aiming for 30-50%
Improve Air Circulation
When you improve air circulation in your home, you reduce the chances of mold settling in hidden, damp spots. You can start by opening windows and doors whenever possible to encourage natural air flow. This simple step allows fresh air to replace stagnant, moisture-heavy indoor air. Installing or upgrading ventilation systems is another powerful way to keep your space mold-free. Efficient ventilation systems actively pull out humid air and bring in drier air, preventing the damp conditions mold loves. Ceiling fans or portable fans also help by keeping air moving in rooms prone to moisture buildup. By taking control of your home’s air flow, you’re not only discouraging mold but also creating a healthier, freer living environment where you can breathe easy and live without worry.
Frequently Asked Questions
Can Homemade Mold Cleaner Damage Painted Surfaces?
You might worry that homemade mold cleaner could cause paint damage, but it really depends on your surface preparation. If you don’t properly test or prepare the area, the cleaner’s ingredients might strip or discolor your paint. To keep your freedom intact, always spot-test first and avoid harsh scrubbing. Being cautious lets you enjoy effective mold removal without sacrificing your painted surfaces or your peace of mind.
How Long Does Homemade Mold Cleaner Stay Effective?
They say, “A stitch in time saves nine,” and when dealing with mold lifespan, acting quickly is key. Your homemade mold cleaner’s potency typically lasts about a week if stored properly, but it’s best to use it within 24-48 hours for maximum effectiveness. Over time, its active ingredients lose strength, so don’t let it sit around. Staying proactive guarantees you keep your space mold-free and enjoy the freedom of a clean environment.
Is Homemade Mold Cleaner Safe for Pets?
You’ll want to be cautious with pet safety when using homemade mold cleaner since some ingredients, like vinegar or essential oils, can irritate or harm your furry friends. If you’re worried, consider alternative solutions like pet-safe commercial cleaners or just using baking soda and water, which tend to be gentler. Always keep pets away during cleaning, and ventilate the area well so everyone stays free and safe in your home.
Can I Use Homemade Mold Cleaner on Fabric?
You can use homemade mold cleaner on fabric, but you’ve got to be careful with fabric care. Test a small, hidden area first to avoid damage or discoloration. Different cleaning techniques work better depending on the fabric type—delicate materials might need gentler methods. When you’re free to experiment, just remember: always rinse thoroughly and air dry to keep your fabrics fresh without risking harm.
How Often Should I Reapply Mold Cleaner for Prevention?
Think of mold prevention like watering a garden—you’ve got to keep at it regularly. For effective preventive measures, you should reapply your mold cleaner every two to four weeks, depending on humidity and ventilation. Sticking to a cleaning schedule not only keeps mold at bay but gives you the freedom to enjoy your space without worry. Adjust frequency if you notice mold returning sooner or after heavy moisture exposure.