
How to Make Homemade Oven Cleaner
You can make homemade oven cleaner by mixing about half a cup of baking soda with enough water to form a thick paste. Apply this paste evenly to a cool oven’s interior, focusing on greasy spots. Let it sit for at least 30 minutes to break down grime. Then, wipe it off with a damp cloth, rinsing frequently. Adding white vinegar helps neutralize odors and boost cleaning power. For detailed steps and maintenance tips, keep exploring further guidance.
Ingredients Needed for Homemade Oven Cleaner
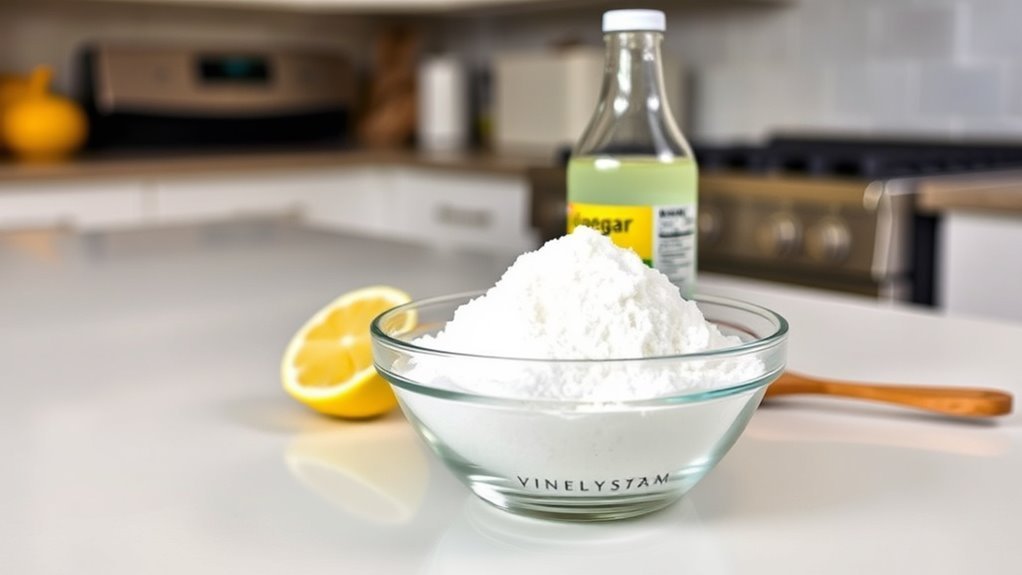
To make an effective homemade oven cleaner, you’ll need three primary ingredients: baking soda, white vinegar, and water. Baking soda acts as a mild abrasive and alkaline agent, essential for breaking down grease and baked-on residues. White vinegar provides acetic acid, which reacts chemically with baking soda to loosen grime and neutralize odors. Water serves as a solvent and diluent, allowing you to adjust consistency for application. These ingredients combine to form a powerful yet non-toxic cleaning solution, giving you control over the cleaning process without relying on commercial chemicals. By selecting these simple components, you maintain freedom from harmful additives while achieving thorough oven cleaning. Understanding their individual properties guarantees you can precisely tailor your cleaner for ideal performance.
Preparing the Cleaning Paste
Creating the cleaning paste starts by measuring about half a cup of baking soda and gradually adding water until you achieve a spreadable consistency similar to thick toothpaste. This step is critical in mastering preparation techniques for effective cleaning. Aim for a paste consistency that clings well to oven surfaces without dripping. To get it right, follow these guidelines:
- Add water slowly, mixing thoroughly after each addition to avoid a runny mixture.
- Adjust the amount of baking soda if the paste feels too watery or too stiff.
- Use a non-metallic spoon to mix, preventing any unwanted reactions.
Applying the Cleaner to Your Oven
Start by dividing the oven into manageable sections so you can apply the cleaning paste evenly. Use a brush or your gloved hand to control the applying technique, ensuring consistent pressure for uniform cleaner distribution. Focus on areas with heavy grime, spreading a thin, even layer to maximize contact. Avoid oversaturating, which can cause drips and uneven drying. For corners and crevices, apply the paste carefully with a small brush or spatula to reach all surfaces. Maintain a systematic approach, working from top to bottom, so no spot is missed. This methodical application guarantees thorough coverage, optimizing the cleaner’s effectiveness. By mastering your applying technique, you retain freedom from harsh chemicals and save time during later cleaning stages.
Letting the Cleaner Work
Once you’ve applied the cleaner evenly, allow it to sit undisturbed for at least 30 minutes to break down grease and baked-on residue effectively. This cleaning duration is essential; too short, and the cleaner won’t penetrate; too long, and it may dry out, reducing effectiveness. Consider these factors to optimize results:
Allow cleaner to sit for at least 30 minutes for best grease and residue breakdown.
- Oven temperature: Confirm the oven is cool; heat can alter chemical activity.
- Residue thickness: Heavier buildup may require extended cleaning duration.
- Ventilation: Proper airflow prevents fumes from accumulating, enhancing safety and cleaner performance.
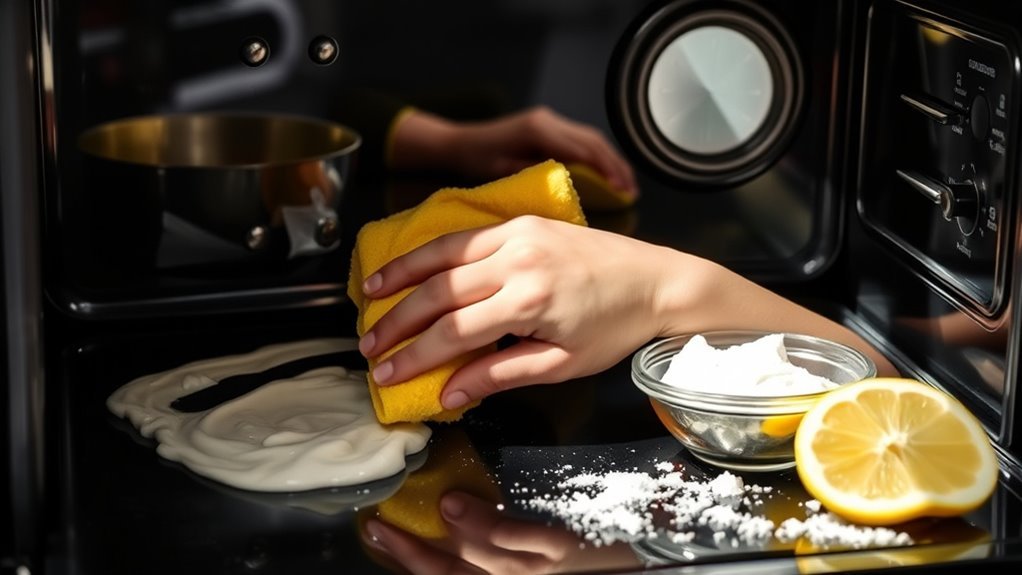
Removing the Cleaner and Residue

Begin by loosening the softened grime with a damp sponge or cloth, carefully wiping away the cleaner and dissolved residue. Use non-abrasive cleaning tools to avoid damaging oven surfaces. Rinse the sponge frequently in clean water to prevent redepositing grime. After the initial wipe, switch to a clean cloth or paper towel to remove any remaining cleaner. For stubborn spots, repeat the process methodically, guaranteeing thorough removal. Proper residue disposal is essential; collect used cleaning materials and rinse water in a designated container to prevent environmental contamination. Dispose of these responsibly according to local guidelines. This systematic approach guarantees your oven is free of cleaner traces and grime, restoring it to prime condition without harsh chemicals or damage. Your freedom to maintain a clean oven safely starts here.
Tips for Maintaining a Clean Oven
Ensuring your oven remains clean over time requires consistent care following thorough residue removal. Incorporating effective oven maintenance tips into your routine will extend your oven’s efficiency and lifespan. Focus on regular cleaning to prevent buildup and avoid stubborn stains.
To maintain peak cleanliness, consider these key practices:
- Wipe spills immediately after the oven cools to prevent hardened residue.
- Use a damp cloth with mild detergent weekly for light surface cleaning.
- Schedule a deep clean monthly using your homemade oven cleaner to tackle grease and grime.
Frequently Asked Questions
Is Homemade Oven Cleaner Safe for All Oven Types?
Though not from the era of Aristotle, you should know that homemade oven cleaner isn’t universally safe for all oven types. Its cleaner effectiveness varies depending on your oven’s finish and materials. For example, self-cleaning ovens often require gentler agents to avoid damage, while traditional models tolerate stronger mixtures. Always check your oven’s manual and test a small area first, ensuring you maintain both safety and the freedom to clean effectively.
Can I Use This Cleaner on Glass Oven Doors?
You can use this cleaner on glass oven doors, but you’ll want to be cautious. Avoid abrasive scrubbing to prevent scratches. Apply the cleaner gently with a soft cloth or sponge, then rinse thoroughly to remove residue. For best results, follow specific glass oven cleaning tips like using a vinegar-water solution afterward to restore shine. This method guarantees effective cleaning without compromising your glass oven’s integrity or your freedom to maintain it safely.
How Often Should I Deep Clean My Oven?
You should establish a deep cleaning frequency that matches your oven’s use, maintain an oven cleaning schedule that prevents buildup, and perform thorough cleanings every three to six months. If you cook frequently or notice residue, increase frequency accordingly. Regular maintenance saves effort and extends your oven’s life. Staying methodical with your cleaning routine guarantees peak performance and gives you the freedom to enjoy cooking without the hassle of stubborn grime.
Are There Any Ventilation Requirements During Cleaning?
Yes, proper ventilation is essential during cleaning for safety. You’ll want to open windows and doors to guarantee fresh air circulation, reducing inhalation of fumes. Use a fan if possible to direct air outside. These ventilation tips help minimize exposure to chemicals or odors, maintaining cleaning safety. Never clean in a confined space without airflow, as it could lead to respiratory irritation or discomfort, limiting your freedom to clean effectively and safely.
What Should I Do if I Get Cleaner on My Skin?
Imagine the sharp sting of cleaner on your skin—don’t panic. Immediately rinse the area with cool, running water for at least 15 minutes to flush out chemicals. Use gentle soap to cleanse and avoid scrubbing, which can worsen irritation. Apply soothing skin irritation remedies like aloe vera gel if redness persists. Always follow cleaner safety precautions: wear gloves and protective clothing to prevent contact, ensuring your freedom to clean confidently and safely next time.


