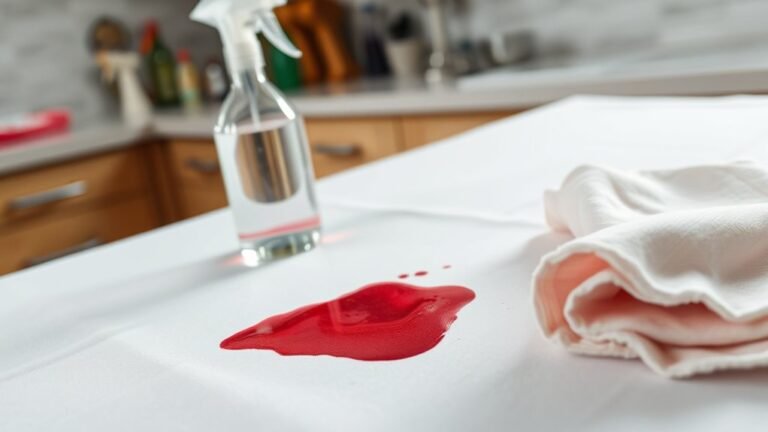
How to Make Homemade Tile Cleaner
You can easily make an effective homemade tile cleaner by mixing 1 cup white vinegar, 1 cup warm water, and 1 tablespoon baking soda in a spray bottle. This natural blend cleans, deodorizes, and tackles tough stains without harsh chemicals. Use it cautiously on small areas first and rinse well to avoid residue. Adding lemon juice or hydrogen peroxide targets specific stains. Keep it safely stored, and you’ll discover how to maintain spotless tiles with eco-friendly, cost-effective methods.
Benefits of Using Homemade Tile Cleaner

Although commercial tile cleaners are widely available, using a homemade tile cleaner offers several key benefits that you might not have considered. First, you gain control over the ingredients, enabling you to choose eco friendly options that reduce environmental impact and indoor toxins. This aligns with a lifestyle that values freedom from harsh chemicals. Second, homemade cleaners provide significant cost savings. You utilize common household ingredients, avoiding expensive branded products. This approach is both economical and sustainable, empowering you to maintain clean tiles without recurring high expenses. Finally, you benefit from the flexibility to adjust formulations based on your specific needs, enhancing effectiveness while preserving safety. Embracing homemade tile cleaners can consequently promote both your financial independence and environmental responsibility. Additionally, many natural ingredients like baking soda and vinegar offer effective cleaning power while being safe for most tile surfaces, making them ideal for regular maintenance with eco-friendly benefits.
Essential Ingredients for Homemade Tile Cleaner
To create an effective homemade tile cleaner, you’ll need natural cleaning ingredients like vinegar, baking soda, and essential oils. These components not only clean thoroughly but also tackle tough stains without harsh chemicals. Understanding their roles guarantees you make a safe and powerful solution for your tiles. Additionally, selecting the right ingredients based on your tile type ensures optimal results and prevents damage to natural stone tiles.
Natural Cleaning Ingredients
Three natural ingredients stand out as essential for making an effective homemade tile cleaner: white vinegar, baking soda, and liquid Castile soap. You’ll appreciate the vinegar benefits—it cuts through grime and disinfects without harsh chemicals. Baking soda acts as a gentle abrasive, lifting dirt without scratching tiles. Liquid Castile soap binds everything together, providing a mild yet effective cleaning base.
| Ingredient | Key Benefit |
|---|---|
| White Vinegar | Natural disinfectant, removes mineral deposits |
| Baking Soda | Mild abrasive, deodorizes |
| Liquid Castile Soap | Cleans and emulsifies dirt |
Using these natural ingredients grants you control over what touches your floors, ensuring a safer, eco-friendly clean that aligns with your desire for freedom from toxic products.
Effective Stain Removers
When tackling stubborn stains on your tiles, you’ll need ingredients that go beyond basic cleaning to break down and lift tough residues. Understanding different stain types helps you apply the right removal techniques effectively. Incorporate these essential stain removers into your homemade tile cleaner for excellent results:
- White vinegar: Cuts through mineral deposits and soap scum.
- Baking soda: Acts as a gentle abrasive for grease and grime.
- Hydrogen peroxide: Targets organic stains like mold and mildew.
- Lemon juice: Naturally breaks down rust and hard water stains.
Tools Needed for Mixing and Application

You’ll need basic mixing tools like a measuring cup and a sturdy container to combine your ingredients accurately. For application, options include spray bottles, sponges, or mop heads suited to your tile type. Don’t forget safety gear such as gloves and goggles to protect your skin and eyes during preparation and use. Using the right scrubbing pads can enhance the effectiveness of your homemade tile cleaner during application.
Essential Mixing Tools
Gathering the right mixing tools is essential for preparing an effective homemade tile cleaner. Having reliable equipment guarantees accurate measurements and thorough blending, which directly impacts the cleaner’s performance. You’ll need durable tools that can withstand acidic or alkaline ingredients without reacting or breaking down.
Here are the essential mixing tools you should have:
- Mixing bowls (preferably glass or stainless steel)
- Measuring cups for liquids and solids
- A sturdy whisk or spoon for blending
- A funnel for transferring liquids into storage containers
Using proper mixing bowls and measuring cups assures precision, giving you control over ingredient ratios. These tools empower you to customize your cleaner confidently, freeing you from store-bought limitations while maintaining safety and effectiveness in your cleaning routine.
Application Equipment Options
After assembling the right tools for mixing your homemade tile cleaner, it’s equally important to equip yourself with the proper application tools. Spray bottles are ideal for even distribution, allowing you to target grout lines and corners with precision. Choose a bottle with an adjustable nozzle to control spray intensity, adapting to various tile surfaces. For larger areas, mop pads provide efficient coverage. Opt for reusable, microfiber mop pads—they trap dirt effectively and hold the cleaner without excess dripping. Verify your mop handle is compatible to maintain ease of use and maneuverability. Combining spray bottles and mop pads gives you versatile control, enabling both spot cleaning and broad surface treatment. This approach maximizes cleaning efficiency while preserving your freedom to customize based on your tile type and space size.
Safety Gear Recommendations
How should you protect yourself while mixing and applying homemade tile cleaner? Taking proper safety precautions is essential to avoid skin irritation, respiratory issues, or accidental spills. Using the right protective gear guarantees you maintain your freedom to work confidently and safely.
Here’s what you need:
- Rubber gloves to shield your hands from harsh ingredients
- Safety goggles to protect your eyes from splashes
- A mask or respirator to avoid inhaling fumes or dust
- Long-sleeved clothing to minimize skin exposure
Always mix your homemade tile cleaner in a well-ventilated area and keep children and pets away. Following these safety precautions permits you to handle your cleaning solution responsibly while enjoying the freedom of DIY.
Step-by-Step Guide to Mixing Your Cleaner

To create an effective homemade tile cleaner, you’ll need just a few simple ingredients combined in the right proportions. Following these homemade recipes guarantees your tile maintenance routine is both economical and eco-friendly. Here’s a precise step-by-step guide:
| Step | Action |
|---|---|
| 1 | Measure 1 cup white vinegar |
| 2 | Add 1 cup warm water |
| 3 | Mix 1 tablespoon baking soda |
| 4 | Stir gently to dissolve |
| 5 | Pour into spray bottle |
This mixture balances acidity and abrasion, tackling grime without harsh chemicals. By controlling each ingredient, you’re embracing freedom from commercial cleaners and customizing your tile care. Stick to these exact ratios to preserve your tiles’ finish and prolong their life. Using natural disinfectants like vinegar ensures effective cleaning while being safe for both your family and surfaces.
How to Apply Homemade Tile Cleaner on Tiles
Start by spraying the homemade tile cleaner evenly across the tile surface, ensuring full coverage without oversaturating. Proper application techniques maximize cleaning power while protecting your tiles. Use a soft-bristle brush or microfiber cloth to gently scrub in circular motions, loosening dirt and grime effectively.
Pay attention to these key points during application:
- Work in small sections to maintain control and thoroughness
- Avoid letting the cleaner sit too long to prevent residue buildup
- Rinse with warm water promptly after scrubbing
- Dry tiles with a clean towel to prevent water spots
Adjust your cleaning frequency based on foot traffic and tile type, typically once a week for high-use areas. This disciplined approach keeps your tiles looking fresh and extends their lifespan. For best results, always test the cleaner on a small, hidden area first to avoid any potential damage.
Tips for Removing Tough Stains and Grime
Although regular cleaning keeps most tiles spotless, tough stains and grime often require targeted techniques to restore their original shine. To tackle these challenges effectively, apply specific grime removal techniques and follow essential stain prevention tips. Here’s a quick guide:
| Challenge | Solution |
|---|---|
| Grease Stains | Use baking soda paste, scrub gently |
| Mold & Mildew | Apply vinegar spray, let sit 10 mins |
| Hard Water Deposits | Rub with lemon juice, rinse thoroughly |
| Deep Grime | Scrub with a brush dipped in homemade cleaner |
Regular cleaning and sealing are crucial for protecting grout and extending the life of tile surfaces, especially in high-moisture areas like bathrooms and kitchens where grout maintenance is essential.
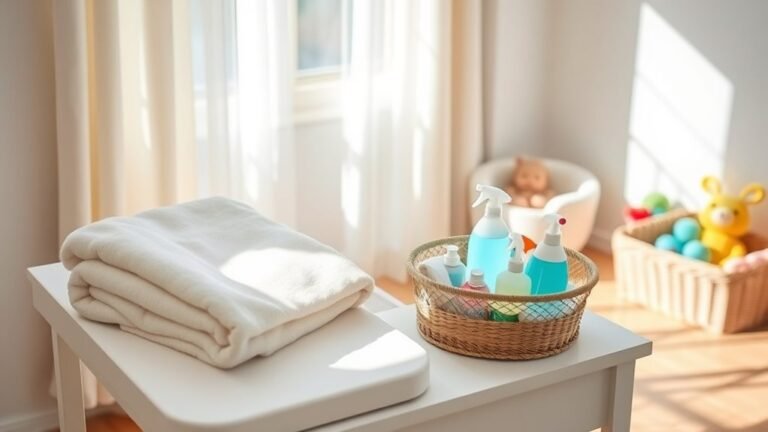
Safe Storage Practices for Your Cleaner
Since homemade tile cleaners often contain natural but potent ingredients, you’ll need to store them properly to maintain their effectiveness and guarantee safety. Choosing the right cleaner containers and storage location is essential to preserve your cleaner’s quality and prevent accidents. Here’s how to do it right:
- Use airtight, labeled cleaner containers made of durable materials like glass or high-density plastic.
- Store your cleaner in a cool, dark storage location away from direct sunlight and heat sources.
- Keep the cleaner out of reach of children and pets to avoid unintended ingestion or contact.
- Avoid mixing leftover cleaner with other substances to prevent chemical reactions or degradation.
- Proper storage protects the cleaner’s integrity and ensures it remains safe and effective for future use.
Environmental Advantages of Natural Cleaning
When you choose natural cleaning solutions, you’re reducing your household’s impact on the environment by avoiding harsh chemicals that can contaminate water sources and soil. Using eco friendly alternatives supports sustainable cleaning practices, helping preserve ecosystems while maintaining a healthy home. These natural ingredients break down more easily, reducing pollution and waste. You gain freedom from toxic exposure and contribute to a cleaner planet. Many natural cleaners, such as the All-Purpose Vinegar Spray, also offer cost-effective and versatile cleaning options that replace multiple commercial products.
| Benefit | Eco Friendly Alternatives | Sustainable Cleaning Impact |
|---|---|---|
| Water Safety | No harmful runoff | Protects aquatic life |
| Soil Health | Biodegradable ingredients | Maintains natural soil balance |
| Indoor Air Quality | Free from VOCs and toxins | Safer breathing environment |
Troubleshooting Common Cleaning Challenges
Choosing natural cleaning solutions not only benefits the environment but also changes how you tackle common cleaning problems. When dealing with tiles, you’ll face common issues like stubborn stains, grout discoloration, residue buildup, and uneven shine. Addressing these requires effective solutions tailored to each challenge. You can:
- Use a vinegar and baking soda paste for tough stains, letting it sit before scrubbing
- Apply a lemon juice rinse to brighten grout lines naturally
- Rinse tiles thoroughly after cleaning to avoid residue buildup
- Buff tiles with a microfiber cloth to restore an even shine
For long-term maintenance, applying a grout sealant after cleaning can protect grout lines from stains and moisture.
Frequently Asked Questions
Can Homemade Tile Cleaner Damage Grout or Tile Surfaces?
You might wonder if homemade tile cleaner causes grout damage or affects tile safety. If you use harsh acids or abrasive ingredients, you risk compromising grout integrity and scratching tile surfaces. To maintain tile safety and avoid grout damage, choose gentle, pH-balanced components and test on a small area first. With thoughtful preparation, homemade cleaners can be both effective and safe, giving you freedom to clean confidently without harming your tiles.
How Often Should I Clean Tiles Using Homemade Cleaner?
You should adjust your cleaning frequency based on foot traffic and tile type, but generally, cleaning tiles with homemade cleaner once a week keeps them fresh and grime-free. For maintenance tips, mop high-traffic areas more often and spot-clean spills immediately to prevent stains. Regular cleaning not only preserves your tiles’ appearance but also extends their lifespan, giving you the freedom to enjoy a spotless, healthy space without harsh chemicals.
Is Homemade Tile Cleaner Safe for Pets and Children?
You’ll want to prioritize pet safety and child safety when using any cleaner. Homemade tile cleaners often use natural ingredients, making them generally safer than harsh chemicals. However, you should still keep pets and children away during cleaning and guarantee the floor is dry before they roam freely. Always store homemade cleaners out of reach to avoid accidental ingestion, and test on a small area first to prevent any harmful reactions.
Can I Use Homemade Cleaner on All Types of Tiles?
Did you know 60% of homeowners prefer ceramic tiles for their durability? When using homemade cleaner, you can safely clean ceramic tiles and porcelain tiles, but be cautious. Porcelain is denser and less porous, so mild solutions work best to avoid damage. Avoid acidic or abrasive ingredients on sensitive surfaces. Always test a small area first to verify your cleaner won’t harm the finish, giving you freedom to maintain your tiles confidently.
How Long Does Homemade Tile Cleaner Remain Effective After Mixing?
Your homemade tile cleaner’s shelf life typically lasts about one to two weeks after mixing. To keep it effective, store it in a sealed container away from direct sunlight and extreme temperatures. Always label it with the mixing date so you know when to replace it. Following these storage tips guarantees you maintain its cleaning power and avoid any degradation, giving you freedom to clean confidently without worrying about reduced effectiveness.