How to Remove a Clear Bra from Your Car
Removing a clear bra from your car can be a straightforward process if done correctly. The key is to be patient and use the right tools to avoid damaging your vehicle’s paint. In this article, you’ll learn the best methods and tips for safely removing a clear bra.
Gather the Necessary Tools

Before embarking on the process of removing a clear bra, it’s essential to gather the necessary tools to ensure a smooth experience. Here’s what you’ll need:
– Heat Gun or Hairdryer: These tools will help soften the adhesive, making it easier to peel off the clear bra without damaging the paint underneath.
– Plastic Razor Blades or Soft Cloth: These items are crucial for careful peeling. Plastic razor blades can help lift edges without scratching the paint, while a soft cloth can assist with gentle handling.
– Adhesive Remover or Rubbing Alcohol: After the clear bra is removed, there will likely be leftover adhesive. An adhesive remover or rubbing alcohol will help clean this residue efficiently.
Having these tools on hand will prepare you for the task and reduce the risk of damaging your vehicle during the removal process.
Prepare Your Vehicle


Preparation is key when it comes to removing a clear bra. Follow these steps:
– Wash the Car Thoroughly: Before starting, wash your vehicle thoroughly to remove any dirt and debris that could potentially scratch the paint during the removal process. Use a gentle car soap and ensure the surface is clean.
– Park in a Shaded Area: It’s advisable to work in a shaded area, especially on warm days. This prevents the adhesive from hardening too quickly, allowing you more time to work with it.
A clean and well-prepared surface will make the removal process smoother and more effective.
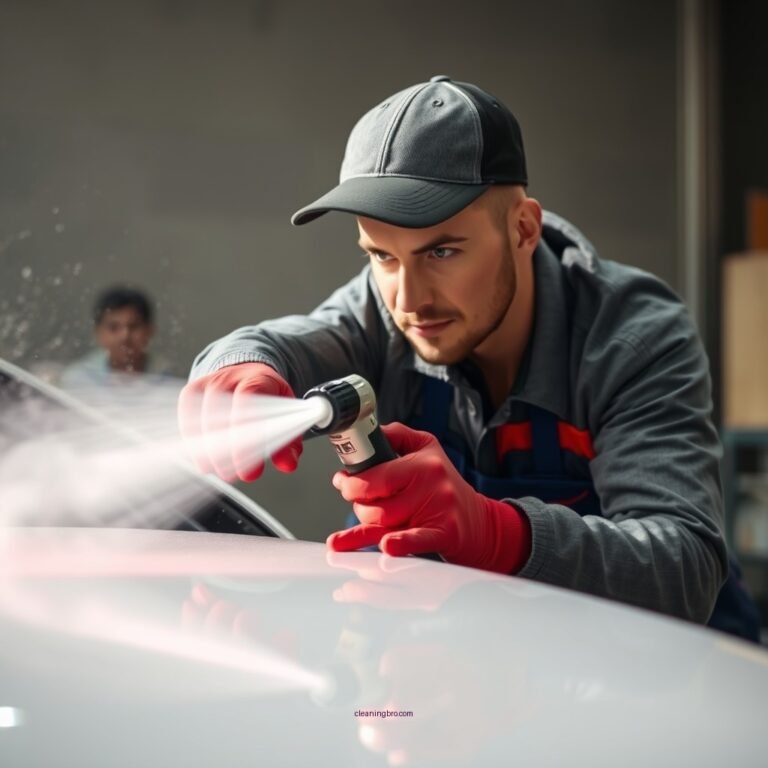
Soften the Adhesive

Soften the adhesive before attempting to peel off the clear bra. This is a critical step that can significantly ease the removal process:
– Use the Heat Gun or Hairdryer: Set the heat gun or hairdryer to a low setting and target the edges of the clear bra. Keep the tool at a reasonable distance (about 6 inches) to avoid overheating the paint.
– Work in Small Sections: Focus on small sections at a time, applying heat for about 30 seconds. This localized heating will loosen the adhesive effectively, making it easier to lift the film.
By softening the adhesive, you minimize the risk of damaging the paint, allowing for a cleaner removal.
Common Clear Bra Adhesives: Removal Difficulty (2024)
| # | Adhesive Type | Heat Requirement | Peeling Difficulty | Residue Left |
|---|---|---|---|---|
| 1 | 3M Scotchgard | Moderate | Easy | Minimal |
| 2 | XPEL Ultimate | High | Moderate | Low |
| 3 | SunTek | Moderate | Difficult | Minimal |
| 4 | Avery Dennison | Low | Easy | Very Low |
| 5 | LLumar | Moderate | Difficult | Low |
| 6 | Paint Protection Film (PPF) | High | Moderate | Moderate |
| 7 | Stek | Moderate | Easy | Low |
Peel Off the Clear Bra
Once the adhesive is softened, you can begin peeling off the clear bra:
– Start at One Corner: Select a corner of the clear bra and gently lift it using either a plastic razor blade or your fingers. It’s important to start at the edge to avoid tearing the material.
– Pull the Film Back Slowly: As you pull the film back, keep it at a 180-degree angle relative to the surface of your vehicle. This technique reduces stress on the paint and helps prevent damage.
Take your time during this step. Rushing can lead to tears in the film and potential scratches on your car’s paint.
Clean Up Residue
After successfully removing the clear bra, you’ll likely encounter some adhesive residue. Here’s how to clean it up effectively:
– Apply Adhesive Remover or Rubbing Alcohol: Soak a soft cloth in adhesive remover or rubbing alcohol and use it to wipe away any leftover adhesive. This step is crucial to ensure a clean finish.
– Rinse the Area: After removing the adhesive, rinse the area with water to ensure no cleaning product remains. This will help maintain your vehicle’s paint health.
A clean surface will not only look better but will also prepare your vehicle for any future protective coatings or wax.
Inspect for Damage
Once the clear bra and any residue have been removed, it’s time to inspect your vehicle for potential damage:
– Check for Signs of Damage: Look closely at the paint for any scratches, scuffs, or lifted clear coat. It’s essential to address any issues immediately to prevent further deterioration.
– Consider Touch-Up Paint or Professional Help: If you notice any damage, consider using touch-up paint to fix minor issues. For more significant damage, it may be wise to consult with a professional detailing service.
Regular inspections can help ensure your vehicle maintains its aesthetic appeal and value.
Maintain Your Vehicle’s Appearance
After removing the clear bra, it’s vital to maintain your vehicle’s appearance:
– Consider Applying a New Protective Film or Wax: If you wish to continue protecting your paint, consider applying a new clear bra or a quality wax. These products will shield your vehicle from future damage and enhance its shine.
– Regular Maintenance: Establishing a routine maintenance schedule will help prevent future issues with paint protection and keep your vehicle looking its best.
Investing in proper maintenance will contribute to your vehicle’s longevity and aesthetic appeal.
Removing a clear bra from your car doesn’t have to be a daunting task. By following these steps, you can protect your vehicle’s paint and maintain its appearance. Remember to work slowly and carefully, and don’t hesitate to seek professional assistance if needed. Taking the time to do it right will ensure your car looks great for years to come.
Frequently Asked Questions
How do I know when it’s time to remove a clear bra from my car?
You should consider removing the clear bra when you notice significant discoloration, peeling edges, or if it has become damaged and is no longer protecting your vehicle’s paint. Additionally, if the film has yellowed or if dirt and grime are trapped underneath, it’s a sign that it’s time for removal to ensure your car’s appearance and protection are maintained.
What tools do I need to remove a clear bra from my car?
To effectively remove a clear bra, you’ll need a heat gun or hairdryer to soften the adhesive, a plastic razor blade or trim tool to lift the film, and adhesive remover to clean any residue left behind. It’s also helpful to have microfiber towels on hand to wipe down the surface and protect your car’s finish during the process.
Why is it important to remove a clear bra properly?
Properly removing a clear bra is crucial to avoid damaging your car’s paint underneath. If you pull the film off too quickly or without sufficient heat, you risk peeling the paint along with the film, which can lead to costly repairs. Taking your time and using the right techniques ensures the integrity of your vehicle’s surface is preserved.
What is the best method to remove a clear bra without damaging the paint?
The best method to remove a clear bra involves heating the film gently with a heat gun or hairdryer to loosen the adhesive, then slowly peeling it away from the surface. Use a plastic razor blade to help lift the edges and minimize the risk of scratching the paint. Follow up by using an adhesive remover to clean any leftover residue, ensuring a smooth finish.
Which adhesive remover is recommended for cleaning up after clear bra removal?
For cleaning up after clear bra removal, it’s recommended to use an automotive adhesive remover that is safe for use on paint, such as Goo Gone Automotive or 3M Adhesive Remover. These products are formulated to dissolve adhesive residues without damaging the vehicle’s finish, making them ideal for ensuring your car looks pristine after the removal process.
References
- https://www.autoblog.com/2020/06/24/how-to-remove-clear-bra-paint-protection-film/
https://www.autoblog.com/2020/06/24/how-to-remove-clear-bra-paint-protection-film/ - https://www.detailingworld.com/frequently-asked-questions-about-paint-protection-film/
https://www.detailingworld.com/frequently-asked-questions-about-paint-protection-film/ - https://www.edmunds.com/car-care/how-to-remove-paint-protection-film.html
https://www.edmunds.com/car-care/how-to-remove-paint-protection-film.html - Google Scholar Google Scholar
https://scholar.google.com/scholar?q=how+to+remove+a+clear+bra+from+a+car - Google Scholar Google Scholar
https://scholar.google.com/scholar?q=paint+protection+film+removal - Google Scholar Google Scholar
https://scholar.google.com/scholar?q=clear+bra+car+removal+techniques - https://www.carsguide.com.au/car-advice/how-to-remove-a-clear-bra-80522
https://www.carsguide.com.au/car-advice/how-to-remove-a-clear-bra-80522 - how to remove a clear bra from a car – Search results
https://en.wikipedia.org/wiki/Special:Search?search=how+to+remove+a+clear+bra+from+a+car - https://www.ncbi.nlm.nih.gov/search/research-articles/?term=how+to+remove+a+clear+bra+from+a+car
https://www.ncbi.nlm.nih.gov/search/research-articles/?term=how+to+remove+a+clear+bra+from+a+car