How to Remove Holiday Decor From Attic
To remove holiday decor from your attic efficiently, start by clearing and lighting your workspace well. Gather sturdy containers, packing materials, and a step stool. Sort decorations by type and wrap fragile items carefully before packing. Use proper lifting techniques to avoid injury. Label containers clearly and group them by theme or room for easier access next season. Clean the attic space to prevent damage and dispose of damaged items responsibly. Keep these basics in mind, and you’ll be set to manage your holiday storage smoothly.
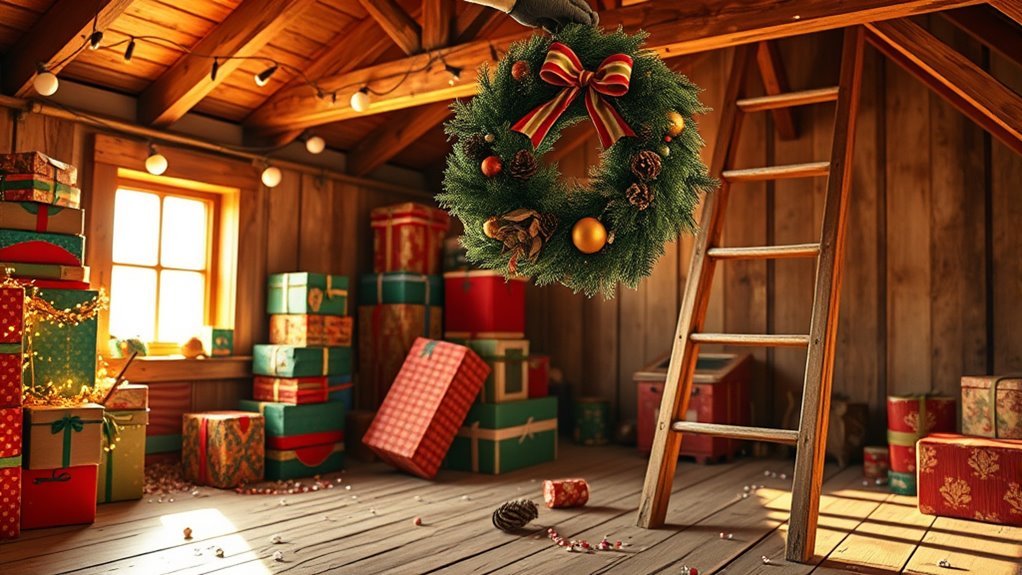
Prepare Your Workspace
Before you begin taking down your holiday decorations, make certain you clear and organize the area where you’ll be working. Prioritize workspace safety by removing any obstacles that could cause trips or falls. Confirm the floor is stable and free from clutter. Good lighting is essential—use portable lamps or headlamps if the attic’s natural light is limited. Proper lighting considerations help you spot fragile items and prevent accidents. Keep a clear path for moving decorations and tools, so you can work efficiently without unnecessary stops. Maintaining an orderly workspace not only protects you but also speeds up the process, giving you the freedom to finish faster and enjoy your space sooner. Focus on these practical steps before you start, so your holiday decor removal goes smoothly and safely.
Gather Necessary Supplies
Three essential supplies you’ll need to efficiently remove your holiday decor are sturdy storage containers, protective wrapping materials, and a reliable step stool. Start by gathering materials like plastic bins with secure lids to keep decorations safe and dust-free. Use bubble wrap, tissue paper, or old newspapers as protective wrapping to prevent breakage. A step stool or small ladder is an essential tool to reach high shelves or attic rafters comfortably and safely. Additionally, keep packing tape and permanent markers handy for sealing and labeling your containers. Gathering these essential tools before you begin will streamline the process, reduce the risk of damage, and help you maintain order. With the right supplies, you’re set to remove your holiday decor swiftly and free up your attic space efficiently.
Sort Decorations Before Removing

Before you start taking down decorations, sort them by type to keep things organized. Handle fragile items separately to prevent damage during removal. Also, group seasonal decorations apart from general ones to streamline storage and future use.
Categorize by Decoration Type
Start by sorting your holiday decorations into clear categories like lights, ornaments, wreaths, and garlands. This step lets you handle each decoration type efficiently and keeps your storage organized. Grouping by decoration type also helps maintain your favorite holiday themes and decoration styles, making next year’s setup quicker and more enjoyable.
Focus on these categories to simplify your process:
- Strings of lights: untangle and check for damage
- Ornaments: group by size or theme
- Wreaths and garlands: coil carefully for storage
Separate Fragile Items Carefully
Since fragile items require extra care, you’ll want to separate them before taking down your decorations. Start by identifying all delicate pieces—glass ornaments, ceramic figurines, and anything easily breakable. Use sturdy containers lined with bubble wrap or soft cloths for fragile item handling. Pack each item individually to prevent contact and damage during transport and storage. Label these boxes clearly so you know which need careful handling later. Avoid stacking heavy boxes on top of fragile ones to maintain their integrity. Taking the time for careful packing now saves you from dealing with broken decorations later. By organizing your fragile decor separately and securely, you maintain your freedom to enjoy these items year after year without hassle or disappointment.
Group Seasonal vs. General
Once fragile items are safely packed, focus on sorting your decorations into seasonal and general groups. This step helps you manage storage efficiently and keeps your attic organized for future use. Seasonal themes like Halloween, Christmas, or Easter have unique decoration trends that deserve their own space. General decorations, such as lights or ribbons, can be reused across seasons.
To streamline the process, consider:
- Labeling boxes by holiday or season for quick access
- Grouping popular decoration trends together to update or replace easily
- Separating multi-season items to minimize clutter
Use Proper Lifting Techniques

Although holiday decor may seem light, using proper lifting techniques is crucial to prevent injury and protect your decorations. Start by evaluating the weight and size before lifting to guarantee lifting safety. Bend your knees, keep your back straight, and use your leg muscles to lift rather than your back. Avoid twisting your torso while carrying items; instead, pivot with your feet to change direction. Keep the load close to your body to maintain balance and reduce strain. If an item feels too heavy or awkward, don’t hesitate to ask for help. Employing these ergonomic practices minimizes risk and keeps you injury-free, allowing you to enjoy the freedom of a safe, efficient decorating routine year after year. Additionally, ensuring your attic has structural integrity can help prevent accidents when moving and storing decorations.
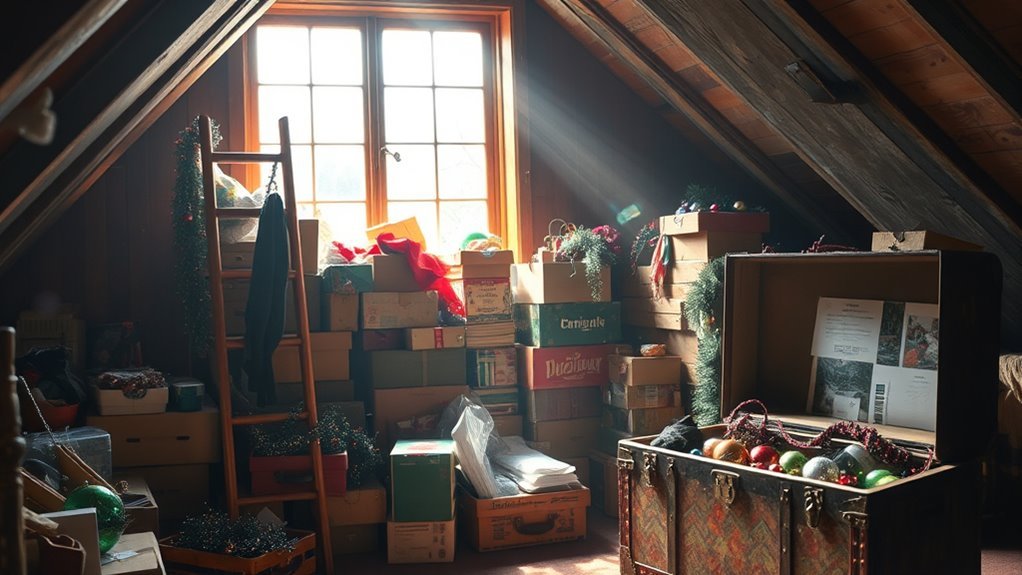
Pack Decorations Securely
Before storing your holiday decorations, you’ll want to pack them securely to prevent damage and make unpacking easier next season. Start by selecting appropriate storage containers that offer durability and protection against moisture and pests. Use quality packing materials like bubble wrap, tissue paper, or foam peanuts to cushion fragile items.
- Wrap each delicate decoration individually to avoid scratches or breaks.
- Fill empty spaces in storage containers with packing materials to prevent shifting.
- Avoid overpacking containers to reduce pressure on items inside.
Proper ventilation in storage areas is also important to prevent moisture buildup and mold and mildew growth on your decorations.
Label Storage Containers Clearly
You’ll want to use durable labels that won’t peel or fade over time. Clearly write the contents and the date on each container to make future decorating easier. This simple step saves you from digging through boxes next season.
Use Durable Labels
When organizing your holiday decorations, using durable labels on storage containers guarantees you can quickly identify contents without opening each box. Choose labels made from durable materials like waterproof vinyl or laminated paper to withstand attic conditions. Employ clear labeling techniques, such as bold fonts and color coding, to enhance visibility and speed. This practical approach saves you time and frustration during both storage and retrieval.
Consider these tips for effective labeling:
- Use permanent markers or printed labels for legibility
- Apply labels on multiple sides of containers for easy spotting
- Include basic category names without excessive details
Include Content Details
Although durable labels help you find boxes quickly, including specific content details on each container makes retrieval even easier. When you clearly note what’s inside—like “Christmas lights,” “Hanukkah candles,” or “Halloween wreaths”—you save time and reduce attic trips. This thoughtful holiday organization not only streamlines your decorating process but also minimizes the risk of accidents by limiting unnecessary climbing or heavy lifting. Be precise: list types, quantities, or fragile items to avoid surprises. Marking contents clearly supports attic safety by preventing hurried, unsafe searches in cramped spaces. When packing away holiday decor, take a moment to jot down exact details on each label. Doing so guarantees you enjoy a free, stress-free holiday setup next season without compromising your well-being or wasting time hunting through unlabeled boxes.
Date Each Container
Adding specific content details to your holiday storage containers sets the stage for another important step: dating each box. Dating helps you track when you last used or updated your holiday memories and decoration themes, making future decorating effortless. When labeling, include:
- The year or season to identify the age of decorations
- Notes on any new or fragile items added that year
- A reminder of the decoration themes inside to align with your style
This system lets you quickly decide what to keep, update, or retire, freeing you from unnecessary clutter. By dating each container, you gain control over your holiday decor rotation and guarantee your attic stays organized. It’s a simple habit that saves time and preserves the joy of your holiday traditions year after year.
Clean the Attic Space
The attic is often where holiday decorations find their long-term storage, so cleaning this space thoroughly is essential before putting everything away. Start by removing dust and debris using a broom or vacuum to prevent damage to your decor. Check for any signs of moisture or pests—address these immediately to protect your items. Inspect insulation and structural elements as part of routine attic maintenance, ensuring the area remains safe and dry. Consider upgrading your storage solutions with sturdy, stackable containers or shelving to maximize space and accessibility. A clean, organized attic not only safeguards your decorations but also frees you from future clutter headaches. Taking these steps now gives you peace of mind and a smooth start when it’s time to decorate again. Additionally, maintaining proper attic ventilation helps prevent moisture buildup and protects your stored decorations from damage.
Organize Decorations for Next Year
Once you’ve cleaned the attic, it’s important to organize your holiday decorations efficiently to save time and frustration next year. Start by grouping items based on your preferred decorating themes. This makes it easier to locate exactly what you need when the season returns. Choose storage solutions that maximize space and protect delicate items. Label each container clearly to avoid guessing later.
- Use stackable, clear bins for visibility and space-saving.
- Separate decorations by theme or room for streamlined decorating.
- Store fragile items with padding to prevent damage.
Dispose of Broken or Unwanted Items
Before you start packing, sort through your decorations and set aside any broken or unwanted items. This step frees up space and lightens your load. Inspect each piece carefully—discard anything beyond repair to avoid clutter next season. For items still usable but no longer wanted, consider donating them. Many charities gladly accept holiday decor, helping others celebrate while you clear your attic. Broken items made of recyclable materials like glass, metal, or certain plastics should be recycled properly. Check your local recycling guidelines to guarantee correct disposal. Avoid tossing these in general trash to reduce environmental impact. By systematically deciding what to keep, donate, or recycle, you maintain freedom from unnecessary clutter and contribute positively to your community and environment. Choosing non-toxic options when cleaning and handling your holiday decor can improve indoor air quality and protect your health.
Frequently Asked Questions
When Is the Best Time to Start Removing Holiday Decorations?
You’ll want to start removing holiday decorations right after the season ends, but the best time aligns with your spring cleaning. This way, you can combine tasks and streamline your decoration organization. Tackling it early prevents clutter buildup and frees your space sooner. By staying systematic—sorting, packing, labeling—you’ll enjoy a smooth shift from festive to fresh, giving you more freedom and less stress in your home.
How Can I Prevent Pests in Stored Holiday Decorations?
Did you know that over 40% of pest infestations start from improperly stored items? To keep pests away from your holiday decorations, focus on pest control by sealing everything in airtight containers. Use storage tips like adding cedar blocks or lavender sachets to deter insects naturally. Keep your storage area clean and dry, and check decorations regularly. These steps help you protect your decor and enjoy pest-free freedom year-round.
What Are Eco-Friendly Ways to Dispose of Holiday Decor?
If you want to dispose of holiday decor eco-friendly, start by recycling ornaments made from glass, metal, or plastic through local recycling programs. For natural items like wreaths or garlands, composting greenery is a smart choice—it returns nutrients to the soil. Avoid tossing everything in the trash; instead, separate materials systematically. This way, you reduce waste and enjoy freedom from clutter while caring for the planet effectively.
Can I Store Holiday Lights Outdoors Safely?
Don’t put all your eggs in one basket when it comes to storing holiday lights outdoors. You can store them outside safely if you prioritize weather protection. Use waterproof, airtight containers or weatherproof storage bins to shield your lights from moisture and temperature changes. Elevate them off the ground to avoid water damage. This practical approach gives you the freedom to keep decorations handy without risking damage from the elements.
How Do I Prevent Mold or Mildew in Stored Decorations?
To prevent mold and mildew in stored decorations, focus on mold prevention by keeping your storage area dry and well-ventilated. Use airtight containers or sealable plastic bags to protect items from moisture. Include silica gel packs or moisture absorbers inside boxes to control humidity. Regularly inspect your decorations for any signs of dampness. Following these storage tips will help you keep your decor fresh and ready to enjoy year after year, giving you freedom from mold worries.


