
How to Remove Stubborn Stains From Washer
To remove stubborn washer stains, first identify the type—like detergent buildup, mold, or rust—which guides your approach. Start by emptying the drum and wiping seals. Use a mixture of white vinegar and baking soda in a hot water cycle to break down deposits and neutralize odors. Clean door gaskets with a vinegar solution and a brush for trapped grime. Regular maintenance prevents recurrence, but persistent issues may require professional help. Discover detailed techniques and prevention tips to keep your washer spotless.
Identifying Common Types of Washer Stains

Stains in washers often stem from specific sources like detergent buildup, mold, rust, or fabric residues. To effectively tackle common stains, you need to recognize their distinct stain causes. Detergent buildup usually appears as white, chalky deposits, resulting from using excess soap or incompatible formulas. Mold stains manifest as black or gray spots, typically in moisture-retentive areas, caused by poor ventilation and infrequent cleaning. Rust stains show as reddish-brown marks, originating from corroded metal parts or water with high iron content. Fabric residues, including lint or dye transfer, create colored smudges and are linked to improper sorting or washing cycles. Identifying these common stains precisely lets you apply targeted removal techniques, freeing you from recurring washer stain issues and maintaining peak appliance performance.
Preparing Your Washer for Stain Removal
Before you start removing stains, make certain to clear the washer drum of any laundry or debris. Next, choose appropriate cleaning agents based on the type of stain and your washer’s material. Proper preparation guarantees effective stain removal and protects your machine from damage. Additionally, using gentle, non-abrasive cleaners helps maintain the washer’s finish and prevents corrosion.
Clear Washer Drum
Although it might seem straightforward, clearing the washer drum is an essential step to guarantee effective stain removal. Before tackling stains, you need a clean, unobstructed drum that allows cleaning agents to work efficiently. Residue buildup or foreign objects can hinder drum cleaning and compromise washer maintenance.
To prepare your washer drum effectively:
- Remove any clothing or debris stuck inside the drum.
- Inspect the drum for grime or detergent buildup and wipe it down with a damp cloth.
- Check the drum seals and edges for trapped dirt, which can cause odors or stains.
Select Cleaning Agents
Once you’ve confirmed the washer drum is spotless, you’ll need to choose the right cleaning agents to tackle stubborn stains effectively. Opt for products designed specifically for washing machine stain removal to guarantee compatibility and avoid damage. If you prefer natural alternatives, consider white vinegar or baking soda, both proven for breaking down residue without harsh chemicals. Use these agents in measured amounts according to manufacturer guidelines or tested household recipes. Avoid abrasive cleaners that can scratch the drum or seals, potentially causing leaks. Applying the correct cleaning agent not only removes stains but also preserves your washer’s functionality, giving you freedom from repeated maintenance. Selecting precise, safe agents is vital to maintaining efficiency and extending the lifespan of your machine while achieving the best stain removal results.
Using Vinegar and Baking Soda to Clean Your Washer
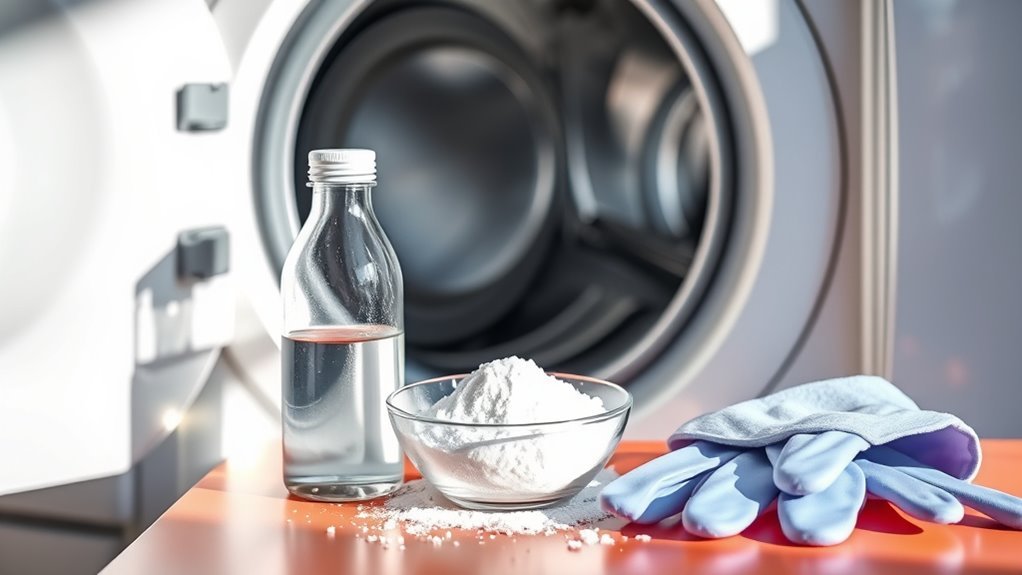
You can effectively remove stubborn stains by using vinegar’s natural acidity combined with baking soda’s abrasive cleaning power. This duo breaks down residue and eliminates odors without harsh chemicals. Follow a step-by-step guide to apply these agents correctly for ideal washer maintenance.
Benefits of Vinegar
Because vinegar is a natural acid, it effectively breaks down mineral deposits, soap scum, and residue that accumulate inside your washer. Understanding vinegar benefits helps you maintain a clean, efficient machine without harsh chemicals. It eliminates odors and prevents mold growth, ensuring your washer runs smoothly and your clothes come out fresh.
Consider these points when choosing vinegar over vinegar alternatives:
- It’s affordable and widely available, offering cost-effective maintenance.
- Vinegar’s mild acidity won’t damage washer components, unlike some commercial cleaners.
- It’s eco-friendly, reducing your environmental impact while providing powerful cleaning action.
Baking Soda Cleaning Power
Combining one cup of baking soda with a cup of vinegar creates a potent cleaning solution that tackles stubborn stains and buildup inside your washer. Baking soda benefits include its mild abrasiveness and ability to neutralize odors, making it ideal for breaking down grime without damaging surfaces. Its uses extend beyond stain removal; it helps balance pH levels in your washer, preventing residue accumulation. When combined with vinegar’s acidic properties, this mixture dissolves mineral deposits and soap scum effectively. You’ll appreciate how this natural duo cleans deep within your washer’s drum and detergent dispensers, restoring efficiency and freshness. Utilizing baking soda and vinegar empowers you to maintain your washer with minimal chemicals, giving you control over a cleaner, stain-free appliance that supports your desire for freedom from harsh cleaning agents.
Step-by-Step Cleaning Guide
The powerful reaction between baking soda and vinegar is best harnessed through a systematic cleaning process to maximize stain removal and deodorization within your washer. To implement effective washer maintenance tips and reinforce stain prevention strategies, follow these steps precisely.
- Add 1 cup of baking soda directly into the drum to neutralize odors and loosen residue.
- Pour 2 cups of white vinegar into the detergent compartment; its acidity breaks down mineral deposits and grime.
- Run a hot water cycle without clothes to allow the chemical reaction to clean internal surfaces thoroughly.
This method targets stubborn stains and buildup systematically, helping you maintain a fresh, efficient washer that supports your freedom from frequent repairs or replacements.
Removing Mold and Mildew From the Washer Drum
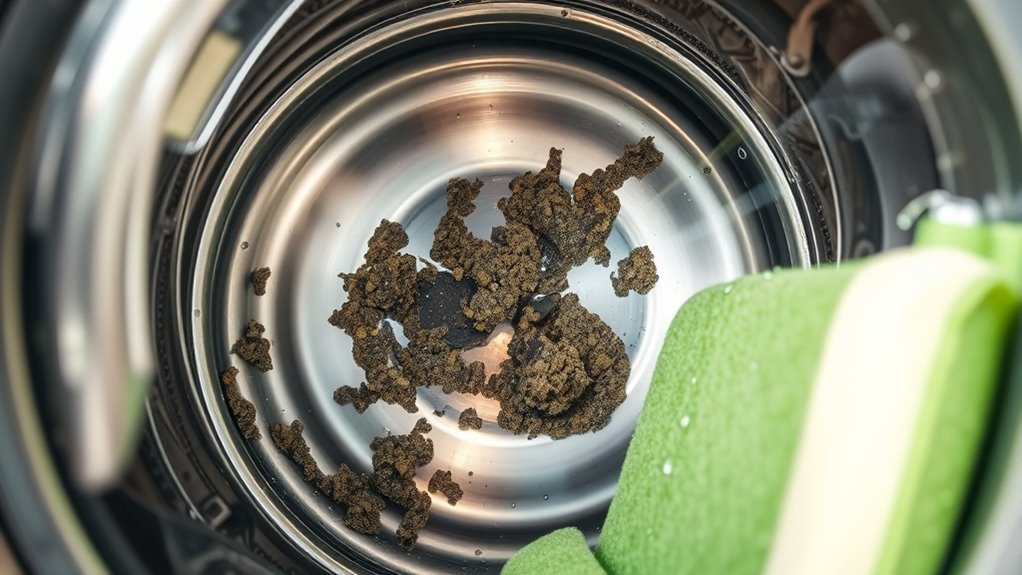
Although mold and mildew thrive in damp environments, you can effectively eliminate them from your washer drum by following targeted cleaning steps. Start with a thorough mold removal: run a hot water cycle with two cups of white vinegar to break down mold spores. Next, sprinkle half a cup of baking soda inside the drum and run another hot cycle for deodorizing and scrubbing residues. Afterward, wipe the drum, door seal, and detergent dispenser with a bleach solution (1 part bleach to 10 parts water) to kill any remaining mold. For mildew prevention, always leave the washer door open after use to promote air circulation and reduce moisture buildup. Regularly clean the drum and seals every month to maintain a fresh, mold-free environment and guarantee your washer operates efficiently. Additionally, incorporating natural deodorizers like baking soda and vinegar helps maintain freshness and prevent odor buildup.
Tackling Detergent and Fabric Softener Residue
Once you’ve tackled mold and mildew, it’s important to address detergent and fabric softener buildup, which can impair your washer’s performance and leave clothes feeling stiff or sticky. Detergent buildup and fabric softener residue accumulate over time, reducing cleaning efficiency and causing unpleasant odors. To effectively remove these residues, you should:
Address detergent and fabric softener buildup to maintain your washer’s performance and keep clothes fresh and soft.
- Run a maintenance wash using hot water and a washing machine cleaner or white vinegar to dissolve deposits.
- Clean the detergent dispenser drawer thoroughly, as trapped residues often hide there.
- Use less detergent and fabric softener in future loads to prevent buildup and guarantee proper rinsing.
- Regular maintenance not only improves performance but also helps prevent persistent bad smells caused by residue and buildup.
Cleaning the Washer Door Seal and Gasket
Since moisture and detergent residues tend to accumulate in the washer door seal and gasket, you’ll need to clean these areas regularly to prevent mold growth and unpleasant odors. Start by inspecting the rubber gasket closely for trapped debris, hair, or detergent buildup. Use a soft cloth dampened with a solution of equal parts water and white vinegar to wipe down the seal thoroughly. For stubborn grime, a small brush can aid in dislodging dirt within the folds. Gasket maintenance is essential; make certain the seal is dry after each wash cycle to inhibit microbial growth. Avoid harsh chemicals that could degrade the rubber. Prioritize seal cleaning as part of your routine to maintain washer hygiene, extend gasket life, and keep your machine operating efficiently without lingering stains or odors. Incorporating regular cleaning routines helps prevent the buildup of harmful bacteria and extends the life of your washer components.
Preventing Future Stains With Regular Maintenance
Keeping the washer door seal and gasket clean helps reduce moisture buildup, but preventing stains requires a consistent maintenance routine beyond this area. To guarantee your washer remains stain-free, establish routine checks and apply effective preventive measures regularly. This proactive approach extends your washer’s lifespan and keeps its interior pristine.
Incorporate these steps into your maintenance routine:
- Inspect and clean detergent dispensers monthly to avoid residue buildup.
- Run an empty hot-water cycle with a washing machine cleaner or vinegar every few weeks.
- Leave the washer door open after use to promote drying and deter mold growth.
- Regularly inspecting and cleaning washer components helps maintain optimal function and prevents damage.
When to Call a Professional for Washer Cleaning
If you notice persistent stains or odors despite regular cleaning, it might be time to call a professional for washer cleaning. Signs professional help is needed include mold growth deep within the drum, buildup in hard-to-reach areas, or malfunctioning components affecting cleaning efficiency. Attempting to fix these issues without expertise can risk damage or void warranties. A specialized cleaning service uses advanced tools and cleaning agents to thoroughly remove grime, sanitize internal parts, and restore peak function. By recognizing these signs professional intervention is necessary, you free yourself from ineffective DIY attempts and guarantee your washer operates at peak performance. Don’t hesitate to schedule a cleaning service if stains or odors persist after your routine maintenance—this keeps your appliance efficient and your laundry truly clean. Regular maintenance tips such as inspecting hoses and cleaning filters can help prevent the need for professional cleaning.
Frequently Asked Questions
Can Stain Removal Damage My Washer’s Warranty?
When it comes to warranty protection, you don’t want to rock the boat by using harsh chemicals for stain removal in your washer. Many warranties have specific guidelines about what cleaning agents you can use. If you deviate from the manufacturer’s recommendations, you risk voiding your warranty protection. Always check your manual or contact customer support before applying any stain removal method, ensuring you keep your washer covered while maintaining its performance.
Are There Any Natural Alternatives to Vinegar for Cleaning?
Yes, you can use baking soda and lemon juice as natural alternatives to vinegar for cleaning. Baking soda acts as a mild abrasive and deodorizer, while lemon juice offers natural acidity and antibacterial properties. Combine them for effective stain and odor removal without harsh chemicals. This approach gives you freedom from synthetic cleaners while ensuring your washer stays fresh and functional, aligning with practical, eco-friendly maintenance practices.
How Often Should I Deep Clean My Washing Machine?
Imagine you run a busy household where laundry piles up daily—neglecting maintenance quickly leads to odors and inefficiency. For ideal washing machine maintenance, aim for a deep cleaning frequency of once every one to three months, depending on usage. This routine prevents residue buildup and preserves performance. Sticking to this schedule gives you freedom from unexpected malfunctions, keeping your machine fresh and functioning smoothly without constant worry or hassle.
Can Harsh Chemicals Affect My Laundry’S Color?
Yes, harsh chemicals can definitely affect your laundry’s color. Chemical reactions between strong detergents or bleach and fabric dyes often cause color fading, making clothes look dull or uneven. To protect your garments, avoid excessive use of aggressive cleaners and follow label instructions carefully. Opt for color-safe detergents to maintain vibrancy while effectively cleaning. This way, you preserve your freedom to wear your favorite colors without worry.
Is It Safe to Use Bleach for Stubborn Stains?
Like wielding fire, using bleach demands respect and caution. For bleach safety, always dilute it properly and spot-test fabrics to avoid color damage. It’s effective for stain removal, especially on whites, but never mix it with ammonia or other cleaners. Use in a well-ventilated area and follow manufacturer instructions strictly. By handling bleach wisely, you’ll liberate your laundry from stubborn stains without compromising fabric integrity or your freedom from worry.


