
How to Tackle Greasy Range Hood Filters
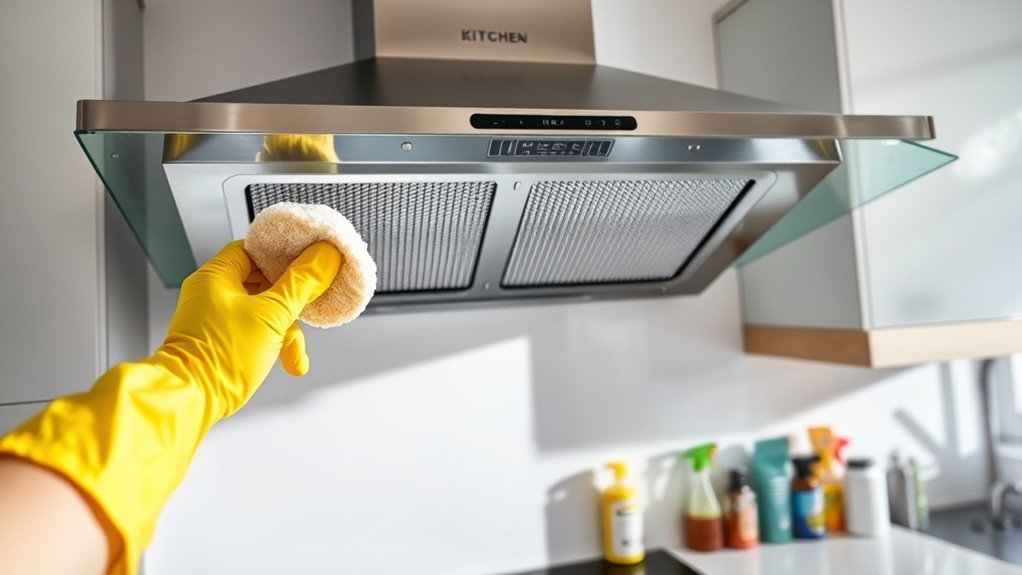
To tackle greasy range hood filters, start by turning off the power and wearing gloves for safety. Soak the filters in hot water mixed with dish soap or a degreaser for 15 to 30 minutes to loosen grime. Then, gently scrub with a non-abrasive brush, focusing on corners and crevices. Rinse well and air-dry completely to avoid mold. Proper cleaning restores airflow and kitchen freshness. Keep going to discover tips on natural cleaners, drying tricks, and maintenance.
Understanding the Importance of Clean Range Hood Filters
Although it might seem like a small detail, keeping your range hood filters clean is essential for maintaining good air quality in your kitchen. When you stay on top of range hood maintenance, you’re not just preventing grease buildup—you’re ensuring the air you breathe stays fresh and free from harmful particles. Dirty filters reduce airflow, making your hood less effective and shortening the filter lifespan. If you let grime accumulate, you’ll need to replace filters more often, which costs you freedom from extra expenses and hassle. By understanding the importance of clean filters, you take control of your kitchen environment and enjoy better ventilation. It’s a simple, empowering step that keeps your cooking space healthy and your range hood working at its best.
Tools and Materials Needed for Cleaning
To clean your greasy range hood filters effectively, you’ll need a few essential supplies like brushes, cloths, and a good degreasing agent. Don’t forget to wear protective gear such as gloves to keep your hands safe from harsh chemicals. Choosing the right degreaser will make the job easier and guarantee your filters come out spotless.
Essential Cleaning Supplies
Before you start cleaning your greasy range hood filters, you’ll need the right supplies to make the job easier and more effective. Start with a degreasing detergent or a heavy-duty kitchen cleaner that’s safe for your filter types—metal mesh, baffle, or charcoal filters all have different needs. A sturdy scrub brush or sponge will help break down stubborn grease, while a basin or large container is perfect for soaking filters. Don’t forget dish soap and hot water to loosen grime during your cleaning routine. Knowing your cleaning frequency is key; regular maintenance prevents buildup and keeps your filters working smoothly. With these essential supplies, you’ll reclaim your freedom from grease without hassle or delay.
Protective Gear Requirements
When tackling greasy range hood filters, you’ll want to protect your skin and eyes from harsh chemicals and grime. Start by slipping on a pair of durable protective gloves to shield your hands from irritants and prevent slipping when handling oily filters. Don’t forget eye protection—wear safety goggles or glasses to keep stubborn splashes from reaching your eyes. This gear lets you work confidently without worrying about burns or irritation, giving you the freedom to clean thoroughly and efficiently. By putting on the right protective gloves and eye protection, you guarantee your safety while maintaining your independence in the kitchen. It’s a simple but essential step that makes the whole process safer and more effective.
Degreasing Agents Options
Although greasy range hood filters can seem tough to clean, choosing the right degreasing agents makes the job much easier. You don’t have to rely on harsh chemicals; DIY degreasers made from simple household items like baking soda, vinegar, and lemon juice are effective and budget-friendly. If you want to stay eco-friendly, plenty of green cleaning products are designed to break down grease without harming the environment or your health. These eco friendly options let you clean confidently, knowing you’re reducing your carbon footprint. Whether you pick store-bought solutions or mix your own, just make sure the degreaser targets tough grease buildup. With the right agent, you’ll enjoy freedom from stubborn grime and a sparkling clean range hood filter in no time.
Preparing Your Range Hood Filters for Cleaning
Since greasy filters can be tough to clean, you’ll want to start by carefully removing them from your range hood. Proper preparation is key to effective filter maintenance. Use this preparation checklist to set yourself up for success:
- Turn off power to the range hood for safety.
- Consult your hood’s manual for filter removal instructions.
- Lay out a clean workspace with old towels or newspapers.
- Wear gloves to protect your hands from grease and cleaning agents.
- Have your degreasing agents and tools ready nearby.
Following these filter maintenance tips guarantees you avoid damage and make the cleaning process smoother. By prepping your filters thoughtfully, you’re taking the first empowering step toward a fresh, grease-free kitchen environment.
Soaking Techniques to Loosen Stubborn Grease
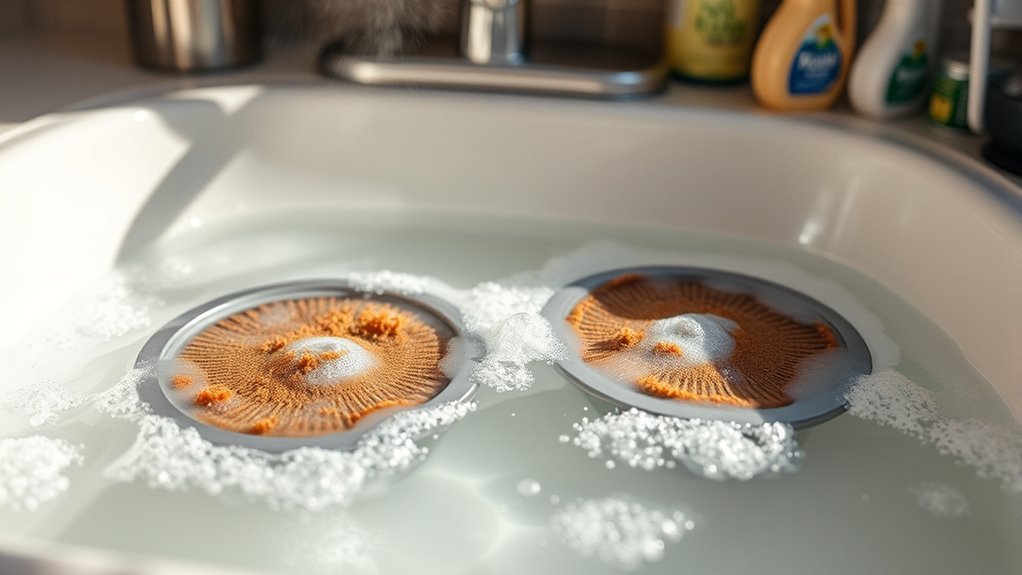
To break down tough grease, you’ll want to soak your filters in the right solution—hot water mixed with a degreasing agent works best. Letting them soak for at least 15 to 30 minutes gives the solution time to work its magic. Avoid rushing this step, as proper soaking makes scrubbing much easier later on.
Best Soaking Solutions
Often, the toughest grease on your range hood filters won’t budge without a good soak. Choosing the right soaking solution depends on your filter types and the soaking temperatures you can safely use. You want a mix that’s powerful yet gentle enough not to damage your filters.
Try these effective soaking solutions:
- Hot water with dish soap for aluminum or stainless steel filters
- Baking soda and warm water for deep grease breakdown
- Vinegar mixed with water to cut through oil residue
- Commercial degreasers designed for kitchen appliances
- A blend of lemon juice and hot water for natural, fresh cleaning
These options respect your freedom to clean effectively without harsh chemicals, ensuring your filters stay in top shape.
Optimal Soak Duration
Choosing the right soaking solution is just one part of the process; knowing how long to let your filters soak can make all the difference in breaking down stubborn grease. You want to give your range hood filters enough soak duration to soften that built-up grime without wasting time. Typically, a 20 to 30-minute soak works well for most filters, allowing the solution to penetrate and loosen grease effectively. If your filters are heavily coated, extending the soak duration up to an hour can boost grease removal without damaging the material. Avoid rushing this step—patience here means less scrubbing later. Adjust your soak time based on the grease thickness, and you’ll enjoy the freedom of clean, efficient filters with minimal effort.
Effective Scrubbing Methods for Deep Cleaning
Although soaking your range hood filters loosens grease, you’ll need effective scrubbing methods to remove stubborn buildup completely. Mastering the right scrubbing techniques guarantees thorough filter maintenance, keeping your kitchen fresh and functional. Here’s how to do it efficiently:
- Use a non-abrasive scrub brush to avoid damaging the filter.
- Focus on corners and crevices where grease hides.
- Apply consistent pressure but don’t over-scrub to prevent wear.
- Rinse frequently to check progress and avoid redistributing grease.
- Dry filters completely before reinstalling to prevent mold growth.
Using Natural Cleaners vs. Commercial Degreasers
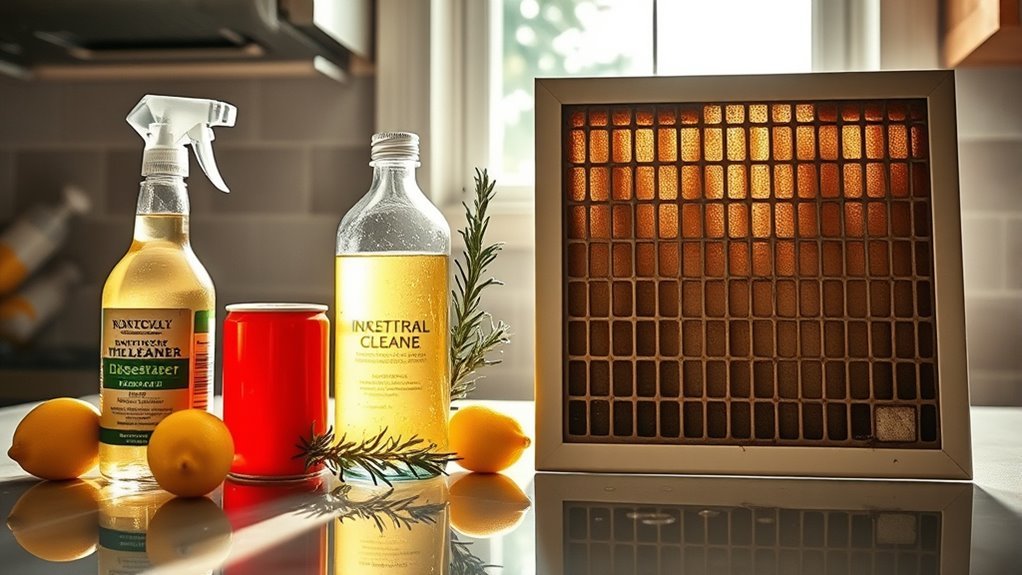
Whether you prefer natural cleaners or commercial degreasers depends on your priorities for effectiveness, safety, and environmental impact. If you value freedom from harsh chemicals, natural alternatives like vinegar, baking soda, and lemon juice offer a safer, eco-friendly way to break down grease. They’re gentle on your skin and the environment, though they might require a bit more elbow grease. On the other hand, commercial degreasers bring powerful commercial effectiveness, cutting through stubborn grease quickly and with less effort. These products are designed for heavy-duty cleaning but can contain strong chemicals, so you’ll want to guarantee proper ventilation and gloves to protect yourself. Ultimately, the choice is yours—whether you prioritize natural simplicity or the convenience of commercial strength.
Drying and Reinstalling Your Filters Safely
Once your filters are thoroughly cleaned, you’ll want to dry them completely before reinstalling to prevent mold and guarantee peak performance. Proper drying techniques confirm your filters stay fresh and function efficiently, giving you the freedom to cook without worry. Here’s how to master drying and filter installation safely:
Thoroughly drying your filters before reinstalling prevents mold and ensures optimal performance for worry-free cooking.
- Pat filters gently with a clean towel to remove excess water.
- Air-dry filters in a well-ventilated area, avoiding direct sunlight.
- Use a fan to speed up drying if needed, but don’t use heat sources.
- Double-check filters are fully dry before reinstalling to avoid moisture buildup.
- Align and secure filters carefully during filter installation to maintain proper airflow.
Frequently Asked Questions
How Often Should Range Hood Filters Be Cleaned for Optimal Performance?
They say, “A stitch in time saves nine,” and that’s true for your range hood filters. For best performance, you should follow a regular cleaning frequency—usually every one to three months, depending on how often you cook. Keeping up with this maintenance tip guarantees your kitchen stays fresh and your hood works efficiently. Don’t wait until grease buildup slows you down; freedom in your kitchen means staying on top of filter care!
Can Dishwasher-Safe Filters Be Cleaned in a Dishwasher?
You can definitely clean dishwasher-safe filters in your dishwasher, making filter maintenance a breeze. Just pop them in on a gentle cycle with your regular detergent. This cleaning technique saves you time and effort, letting you enjoy a grease-free range hood without the hassle. Just make sure to check your filter’s instructions first, so you don’t accidentally damage it. This way, you keep your kitchen fresh and free to cook however you want.
What Are the Signs That a Range Hood Filter Needs Replacing?
Think of your range hood filter like a sponge soaked with grease—when it’s clogged and darkened, it’s time for filter maintenance or replacement. If you notice reduced airflow, persistent odors, or the filter looks damaged or overly greasy even after cleaning, it’s a clear sign you need replacement. For freedom in your kitchen, follow replacement tips like checking manufacturer guidelines and swapping filters regularly to keep your air fresh and your cooking space hassle-free.
Are There Any Health Risks Associated With Dirty Range Hood Filters?
Yes, dirty range hood filters can lead to health implications you don’t want to ignore. When filters get clogged with grease and grime, they can’t trap airborne particles effectively, which means you could be breathing in contaminants. This buildup increases the risk of respiratory issues, especially if you have asthma or allergies. Keeping your filters clean helps maintain fresh air, so you can cook freely without worrying about your health.
Can Greasy Filters Cause Fire Hazards in the Kitchen?
Greasy range hood filters are like ticking time bombs in your kitchen—they can definitely increase fire risks. When grease builds up, it becomes highly flammable, making your kitchen a hotspot for potential fires. If you want to keep your cooking space safe and enjoy your freedom without worry, regularly cleaning those filters is a must. Prioritizing kitchen safety means you’re protecting your home and peace of mind from unexpected fire hazards.


