How to Remove Range Hood From Front Porch
To remove a range hood from your front porch, start by turning off its power supply to stay safe. Next, clear your workspace and gather tools like screwdrivers and pliers. Carefully disconnect any ductwork or vent covers attached. Then, locate and remove the screws or brackets holding the hood to the mounting surface. Once detached, clean up debris and plan for responsible disposal or recycling. Keep going to uncover helpful tips for a smooth and safe removal process.
Assessing the Range Hood and Its Installation

Before you begin removing your range hood, you’ll want to carefully assess its current installation. Understanding the installation types is essential because different range hood models are mounted in various ways—some are wall-mounted, while others are under-cabinet or island models. You’ll need to identify which type you have to anticipate how it’s secured and what tools might be necessary later. Check if your range hood is hardwired or plugged into an outlet, as electrical connections vary. Also, look for screws, brackets, or clips holding it in place. By knowing your specific range hood model and installation type, you gain control over the removal process, making it smoother and less stressful. This initial assessment sets you on the path to freedom from your current setup.
Preparing the Work Area and Gathering Tools
Once you know what type of range hood you’re dealing with, it’s important to clear and organize your workspace to guarantee safety and efficiency. Start by removing any items around the range hood that might get in your way or cause accidents. A clean, clutter-free work area lets you move freely and focus on the task without distractions. Next, gather all the necessary tools in one spot—this is where good tool organization comes in handy. Having screwdrivers, pliers, a drill, and safety gear within easy reach saves time and frustration. Keep everything neatly arranged on a nearby table or cart so you can grab what you need quickly. Preparing your work area thoughtfully gives you the freedom to work confidently and finish the removal smoothly.
Disconnecting Power and Ensuring Safety

Although it might seem straightforward, disconnecting the power to your range hood is an important step you can’t skip. Before you begin, make certain to switch off the circuit breaker that controls the power sources linked to the hood. This simple safety precaution prevents any accidental shocks while you’re working. If your range hood is plugged into an outlet, unplug it directly. For hardwired units, double-check that the power is completely off using a voltage tester. Taking these safety precautions guarantees you stay in control and avoid any electrical hazards. By disconnecting power properly, you protect yourself and maintain the freedom to work confidently on your project without unexpected interruptions or risks. Safety comes first, so don’t rush this important step.
Removing Ductwork and Vent Covers
After you’ve safely disconnected the power, the next step is to remove the ductwork and vent covers attached to your range hood. This part gives you the freedom to fully detach the system without damaging your home’s ventilation. Start by loosening any vent clamps securing the ductwork. If the duct tape sealing connections is stubborn, gently peel or cut it away for a clean break. Remember, taking your time here prevents damage and keeps things reusable. Here’s how to proceed:
Safely disconnect power before loosening vent clamps and removing ductwork to avoid damage and preserve ventilation.
- Use a screwdriver or pliers to loosen vent clamps.
- Carefully detach the ductwork from the hood’s vent outlet.
- Peel off or cut duct tape sealing the ducts.
- Remove vent covers from the exterior while avoiding damage.
These steps free you from old attachments, preparing you for the next phase.
Detaching the Range Hood From the Mounting Surface

Loosen the screws or bolts securing the range hood to the wall or cabinet to begin detaching it from the mounting surface. Start with the detaching screws at the top or sides, depending on your model. Keep a firm grip on the hood as you remove these fasteners to prevent it from suddenly dropping. Once the screws are out, carefully slide or lift the range hood to release it from any mounting brackets. Removing brackets may require slight wiggling or gentle prying—just be cautious not to damage the wall or cabinet. With the detaching screws undone and brackets removed, the range hood should come free easily, giving you the freedom to move on to your next project step.
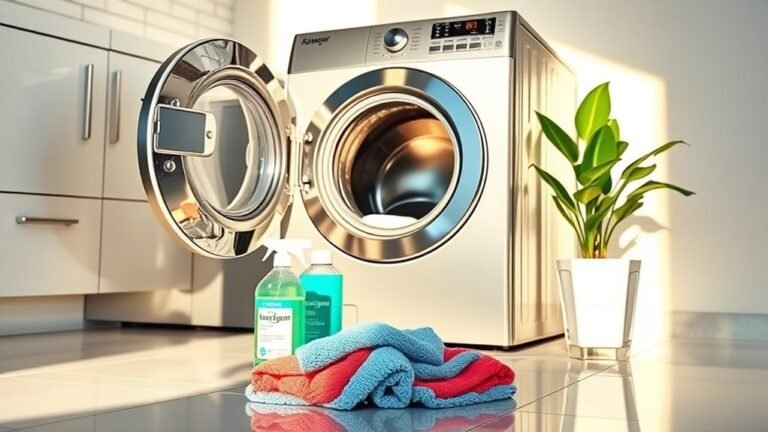
Cleaning Up and Disposing of the Range Hood
Once the range hood is removed, you’ll want to clean it thoroughly to prevent grease buildup and odors. Make sure to follow safe disposal guidelines, whether you’re recycling parts or donating the unit if it’s still in good condition. Proper cleanup and disposal help keep your space safe and eco-friendly.
Proper Cleaning Techniques
Start by carefully wiping down all accessible surfaces of the range hood with a mild detergent and warm water to remove grease and grime. Using the right cleaning products guarantees you maintain freedom from stubborn residue and keep your space fresh. Here are some maintenance tips to make the process smooth:
- Use non-abrasive sponges to avoid scratching surfaces
- Soak removable filters in hot, soapy water before scrubbing
- Clean regularly to prevent buildup that complicates removal
- Dry all parts thoroughly to prevent rust or damage
Safe Disposal Methods
When disposing of your range hood, you’ll want to follow a few key steps to guarantee safety and environmental responsibility. First, make sure you properly disconnect any electrical components to avoid hazards. Be mindful that some parts, like filters or wiring, may contain hazardous materials, so handle them carefully. For eco friendly disposal, check your local regulations on electronic waste or bulky item pickup—many communities have specific drop-off sites or scheduled collection days. Avoid simply tossing your range hood in the trash, as improper disposal can harm the environment. Clean up any debris thoroughly before transport to keep your space safe and tidy. Taking these steps helps you stay free from risks while respecting the planet.
Recycling and Donation Options
Although removing your range hood responsibly is important, you might also want to contemplate recycling or donating it to extend its life and reduce waste. Exploring recycling options and donation centers not only frees you from clutter but also benefits others and the environment. Consider these steps:
- Check local recycling options for metal and electronic parts.
- Contact donation centers to see if your hood meets their acceptance criteria.
- Explore community groups or online marketplaces for free giveaways.
- Disassemble non-recyclable parts to minimize landfill waste.
Frequently Asked Questions
Can I Install a New Range Hood Myself Afterward?
Absolutely, you can handle a DIY installation of your new range hood! With some basic tools and a bit of patience, you’ll enjoy the freedom of upgrading your kitchen yourself. Just remember to follow the manufacturer’s instructions carefully and guarantee proper electrical connections for safety. Regular range hood maintenance afterward will keep it running smoothly. Taking control of the process not only saves money but also gives you a satisfying sense of accomplishment.
What Are the Best Replacement Options for Outdoor Range Hoods?
Imagine your outdoor kitchen as a stage where every element plays its part flawlessly. When choosing outdoor range hoods, you’ll want durable outdoor materials like stainless steel or copper, which resist weather and rust. Look for ventilation systems designed for open-air use, ensuring smoke and odors vanish like whispers on the wind. Freedom in your cooking space means choosing options that blend strength and style effortlessly, giving you control without constraints.
How Do I Prevent Rust on Outdoor Range Hoods?
To prevent rust on your outdoor range hood, you’ll want to focus on preventative maintenance and choosing weatherproof materials. Regularly clean and dry the hood to avoid moisture buildup. Applying a rust-resistant coating helps, too. If you’re picking a new hood, go for stainless steel or powder-coated options designed for outdoor use. Taking these steps means you’ll enjoy your cooking freedom without worrying about rust ruining your setup.
Are There Specific Permits Needed for Removing Range Hoods?
You might picture just unplugging and pulling off your range hood, but hold on—there’s more to it. You’ll want to check local building codes since some areas require permits for electrical or structural changes to guarantee safety measures are met. Don’t let red tape limit your freedom; getting the right permits keeps you compliant and safe. It’s a small step that prevents big headaches later, letting you enjoy your project worry-free.
Can Range Hood Removal Damage My Porch Structure?
You might worry if taking down the range hood could hurt your porch support or mess with its structural integrity. If the hood’s attached to a critical support beam or wall, removal could weaken things. But if it’s just mounted on siding or a non-load-bearing spot, you’re probably in the clear. Just make sure you check carefully so your porch stays strong and safe while you enjoy your freedom to change things up!