Mistakes to Avoid When Cleaning Your Walls
When cleaning your walls, don’t use harsh or wrong cleaning solutions—they can damage paint or wallpaper. Avoid scrubbing too hard or over-wetting, as that harms finishes and may cause peeling or mold. Always dust first and test a small hidden spot to prevent stains. Skip abrasive tools, protect floors and furniture, and guarantee good ventilation to avoid health risks. Keep these tips in mind, and you’ll be ready to tackle your walls safely and effectively—you’ll find plenty more helpful advice ahead.
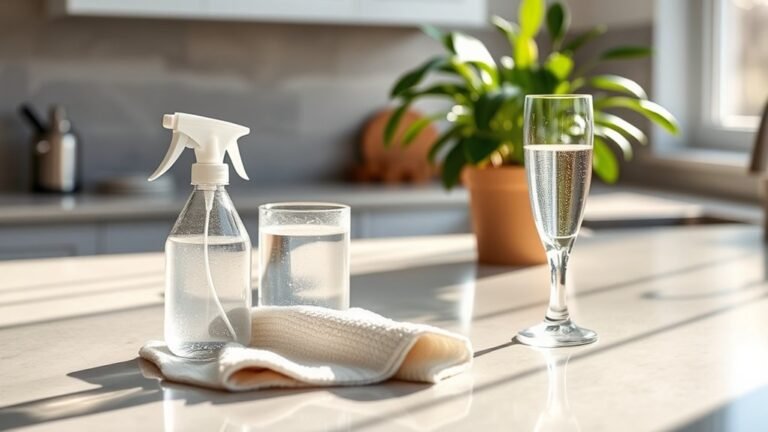
Using the Wrong Cleaning Solution

One common mistake you might make is using the wrong cleaning solution on your walls. When you choose a cleaner without considering solution compatibility, you risk triggering unwanted chemical reactions that can damage your paint or wallpaper. It’s easy to grab a harsh cleaner thinking it’ll give you freedom from dirt, but that freedom can backfire if the solution reacts negatively with your wall’s finish. To avoid this, always check the cleaner’s ingredients and test a small, hidden spot first. This simple step guarantees you don’t trap yourself in a cycle of damage and costly repairs. Remember, the right cleaning solution respects your walls and gives you the freedom to refresh your space safely and effectively.
Scrubbing Too Hard
While it might seem like scrubbing harder will get your walls cleaner, it often causes more harm than good. When you push too aggressively, you risk damaging paint, wallpaper, or delicate finishes. Instead, focus on gentle wall cleaning techniques that respect your wall surface considerations. Use soft cloths or sponges and mild cleaning solutions appropriate for your wall type. Scrubbing too hard can strip paint or create uneven textures that limit your freedom to refresh or change your décor later. Remember, your goal is to clean without compromising the integrity of your walls. By adjusting your approach and applying just enough pressure, you maintain the beauty of your space while effectively removing dirt and stains. Choose care over force to protect your walls and preserve your freedom to decorate.
Ignoring Test Spots

Why skip test spots when cleaning your walls? Skipping test patching can lead to damage, wasting your time and effort. Every wall material reacts differently to cleaning solutions and techniques, so you need to guarantee your chosen method won’t cause discoloration or harm. Taking a few minutes to test patch a small, hidden area lets you see how the wall material responds. This simple step protects your freedom to clean confidently without unexpected setbacks. Ignoring test spots means risking peeling paint, stains, or permanent marks. Don’t gamble with your walls—embrace test patching as a smart, quick way to maintain their integrity. It’s the key to cleaning freedom, guaranteeing your walls look fresh and flawless without surprises.
Over-Wetting the Walls
Skipping test spots might save time upfront, but if you’re not careful, over-wetting the walls during cleaning can cause even bigger problems. Excessive wall moisture can lead to paint peeling, stains, or even mold growth, restricting your freedom to enjoy a fresh, clean space. To avoid this, be mindful of your cleaning techniques—use a damp cloth or sponge rather than soaking the surface. Wring out excess water before you start wiping, and work in small sections to control moisture levels. Choosing the right cleaning solutions and tools also helps minimize water use while effectively removing dirt. Remember, keeping wall moisture in check means preserving your walls’ integrity and your freedom to maintain a healthy, beautiful home without costly repairs.
Neglecting to Dust First

Before you start scrubbing, make sure to dust your walls thoroughly. Skipping this step can leave dirt and grime trapped beneath your cleaning solution, making the job harder. Grab a microfiber cloth or a soft brush to remove dust effectively without damaging the surface.
Importance of Dust Removal
Although it might seem quicker to jump straight into scrubbing, dusting your walls first is vital to avoid spreading dirt around. When you skip this step, dust accumulation effects become more stubborn and harder to remove later. By starting with effective dusting techniques, like using a microfiber cloth or a vacuum with a soft brush attachment, you can easily lift away loose particles. This not only prevents smudges but also keeps your walls looking fresh longer. Taking the time to remove dust first gives you freedom from repeated cleaning and helps maintain a healthier living space. So, don’t rush—embrace dust removal as the vital first step to a cleaner, more vibrant home.
Effects of Skipping Dusting
If you don’t dust your walls before cleaning, you’ll likely spread dirt and grime instead of removing it. Skipping this essential step means dust accumulation effects become more pronounced, making your walls look dull and dirty faster. Beyond aesthetics, there are serious health implications—dust can carry allergens and irritants that affect your breathing and overall well-being.
When you neglect dusting first, you risk:
- Redistributing dust particles across surfaces
- Creating stubborn smudges and streaks
- Increasing indoor allergen levels
- Compromising the effectiveness of your cleaning
- Allowing buildup that damages paint and finishes
Tools for Dusting Walls
Failing to dust your walls properly often comes down to not having the right tools at hand. You want to free yourself from stubborn dust and cobwebs without damaging your walls. Choosing the right duster types and wall brushes makes all the difference. Extendable dusters reach high spots, while soft wall brushes gently sweep delicate surfaces. Here’s a quick guide to help you pick:
| Tool Type | Best Use |
|---|---|
| Feather Duster | Light dust on smooth walls |
| Microfiber Duster | Traps fine dust efficiently |
| Extendable Duster | Hard-to-reach high areas |
| Wall Brush | Textured surfaces, corners |
| Electrostatic Duster | Attracts dust with static charge |
Equip yourself with these tools and dust your walls confidently, preserving their look and your freedom.
Using Abrasive Tools
When cleaning walls, you might be tempted to grab a harsh scrubber to tackle tough stains. However, abrasive tools can easily scratch and damage the surface. It’s important to choose gentle cleaning methods to protect your walls.
Scratching Wall Surfaces
Although it might seem like a quick fix, using abrasive tools on your walls can easily cause scratches that are tough to repair. To maintain wall surface protection and guarantee scratch prevention, you need to be careful with your cleaning methods. Abrasive tools may seem efficient, but they risk damaging the surface, limiting your freedom to refresh your space without costly fixes.
Keep these tips in mind to protect your walls:
- Avoid steel wool or harsh scrapers.
- Use soft cloths or sponges instead.
- Test cleaning methods on inconspicuous spots.
- Choose gentle, non-abrasive cleaners.
- Apply minimal pressure during cleaning.
Using Harsh Scrubbers
Since harsh scrubbers can quickly wear down your wall’s finish, you’ll want to steer clear of abrasive tools during cleaning. Those rough sponges or steel wool pads might seem effective, but they can damage your wall finishes, leaving scratches or dull spots. Instead, opt for soft cloths or gentle sponges that respect the surface. Using harsh chemicals alongside abrasive scrubbers only worsens the issue, stripping paint or protective coatings faster than you’d expect. Remember, your walls deserve care that preserves their look and longevity. Choosing the right tools lets you maintain freedom in your cleaning routine without sacrificing quality. Keep things simple, avoid harsh scrubbers, and your walls will stay fresh and beautiful longer with less effort.
Forgetting to Protect Flooring and Furniture
Before you start scrubbing your walls, make sure you’ve covered your floors and moved or shielded any nearby furniture. Skipping floor protection and furniture covers can lead to unwanted stains, water damage, or scratches, limiting your freedom to clean freely and confidently. Take simple steps to keep your space safe and your cleaning stress-free:
- Lay down drop cloths or old sheets for floor protection
- Use plastic or fabric furniture covers to shield sofas and tables
- Move fragile items out of the cleaning area
- Secure rugs and mats to avoid slips
- Keep cleaning supplies organized and away from furniture
Cleaning Without Proper Ventilation
When you clean your walls without proper ventilation, you risk breathing in fumes from cleaning products that can cause headaches, dizziness, or irritation. Ventilation importance cannot be overstated—it’s vital not only for your health but also for maintaining good air quality in your home. You want to feel free and comfortable while cleaning, not trapped by harsh odors or toxic vapors. Open windows and doors, or use fans to circulate fresh air, ensuring that harmful chemicals don’t build up. By prioritizing ventilation, you protect yourself and keep your living space safe and breathable. Remember, taking a few extra minutes to improve air quality can make your cleaning routine both effective and healthy. Don’t overlook this important step.
Frequently Asked Questions
How Often Should I Clean My Walls to Maintain Them?
You should clean your walls monthly to quarterly, depending on your environment, lifestyle, and wall type. Regular wall cleaning frequency keeps dirt, dust, and stains at bay, ensuring your space feels fresh and inviting. For wall maintenance tips, focus on gentle cleaning solutions, spot-checking high-traffic areas, and addressing marks promptly. By sticking to a routine, you’ll maintain your walls’ appearance and enjoy the freedom of a vibrant, well-kept home.
Can I Use Vinegar to Clean All Types of Paint Finishes?
You can use vinegar to clean many paint finishes, but its effectiveness depends on paint compatibility. Vinegar works well with flat or matte paints but might dull glossy or semi-gloss finishes. If you want to keep your walls looking fresh without damage, test a small spot first. This way, you maintain freedom in your cleaning routine while ensuring your paint stays vibrant and unharmed.
What Is the Best Technique for Cleaning Textured Walls?
Did you know textured walls can trap up to 60% more dust than flat ones? When cleaning these, you’ll want to use the sponge technique—gently dabbing with a soft sponge rather than scrubbing harshly. Mix mild cleaning solutions with warm water to avoid damaging the texture. This approach lets you maintain your walls’ unique look without feeling restricted by complicated methods, giving you the freedom to keep your space fresh and vibrant.
Should I Remove Wall Decorations Before Cleaning?
You should definitely handle wall decoration removal before starting your cleaning preparation. Taking down pictures, shelves, or any decor frees up space and prevents damage to both your decorations and walls. It also lets you clean thoroughly without missing spots behind them. Once everything’s off, you’ll enjoy more freedom to move around and get your walls spotless without worrying about knocking anything down or missing grime hiding behind decorations.
How Do I Handle Mold or Mildew on Walls Safely?
When you’re tackling mold removal, start by wearing gloves and a mask to protect yourself. Use a mixture of water and vinegar or a mild bleach solution, but never mix chemicals. Gently scrub the affected area and let it dry completely to keep mold at bay. For mildew prevention, make certain your space has good ventilation and reduce humidity with a dehumidifier or by opening windows. This way, you keep your walls fresh and free from mold without hassle.