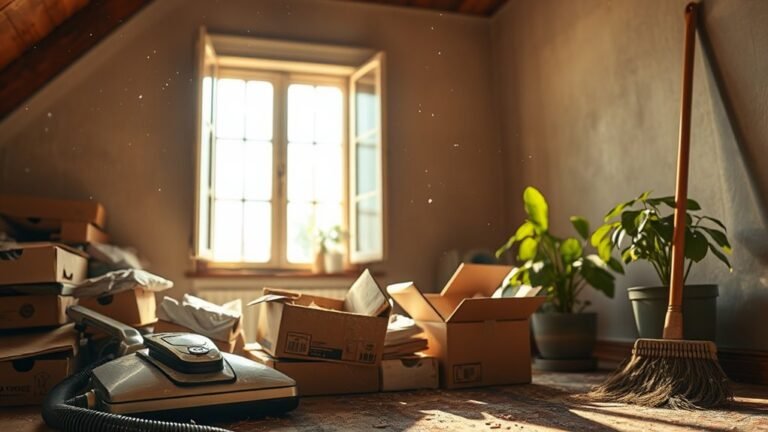
The Ultimate Move-Out Cleaning Checklist for Renters
To ace your move-out cleaning, start by scouring the kitchen—clean appliances, cabinets, and fridge inside and out. Deep clean the bathroom, focusing on grout and fixtures. Dust and wipe all surfaces, including vents and light fixtures, then vacuum and mop floors thoroughly. Don’t forget windows and blinds, plus trash removal. Check for minor repairs, like nail holes or scuffs, and finish with a careful walkthrough. Keep going to discover tips that can help secure your full deposit.
Cleaning the Kitchen Thoroughly
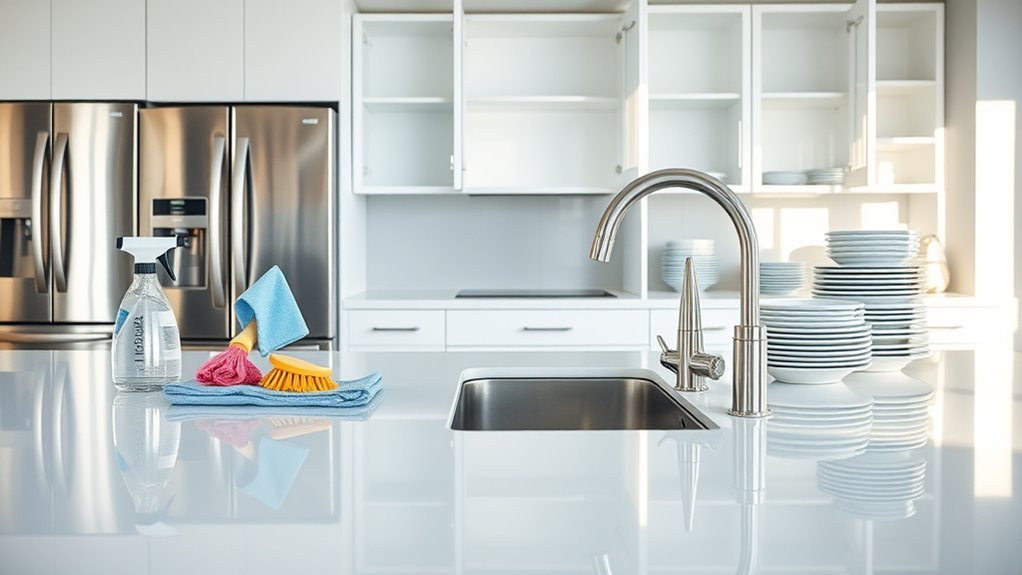
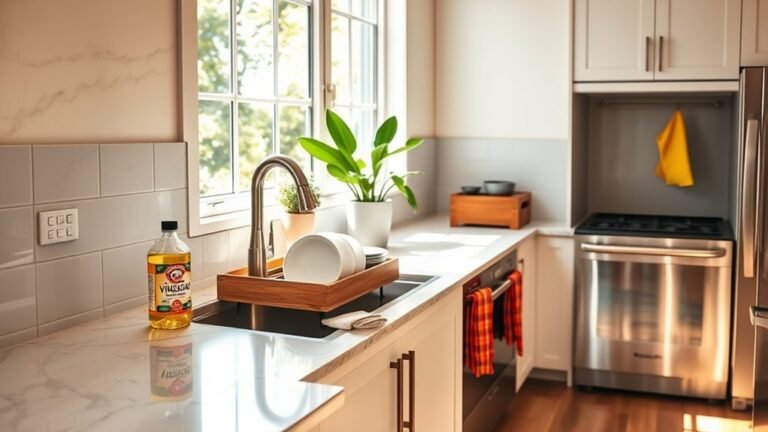
Before you move out, cleaning the kitchen thoroughly is essential to leave a good impression and avoid deductions from your deposit. Start by clearing and organizing your cabinets using smart kitchen organization tips—group similar items and wipe down shelves. Don’t forget to clean inside the refrigerator and freezer, discarding expired food. Pay close attention to appliance maintenance advice: unplug and wipe down your stove, oven, microwave, and dishwasher. Remove grease and food residues to prevent lingering odors or stains. Clean the sink and faucet, and polish any stainless steel surfaces. By tackling these tasks efficiently, you’ll free yourself from last-minute stress and guarantee the kitchen looks spotless for the next tenant. This approach gives you the freedom to move on without worries about your deposit.
Deep Cleaning the Bathroom
A spotless bathroom can make a big difference when moving out, so you’ll want to focus on deep cleaning every surface. Master toilet scrubbing techniques to remove stains and odors effectively, and don’t forget shower grout cleaning to banish mildew and brighten tiles. A thorough clean here frees you from worries about lost deposits.
| Task | Tool Needed | Tip |
|---|---|---|
| Toilet scrubbing | Toilet brush | Use a pumice stone for stains |
| Shower grout cleaning | Grout brush | Apply baking soda paste |
| Sink and fixtures | Microfiber cloth | Use vinegar for shine |
Approach this task with confidence—you’re clearing the path to your next adventure.
Dusting and Wiping All Surfaces
Once the bathroom shines, move on to dusting and wiping all surfaces throughout your space. Start with surface preparation techniques—clear clutter and gently loosen dust with a microfiber cloth or duster. This sets you up for effective dusting methods that grab dirt rather than just pushing it around. Work from top to bottom, tackling shelves, countertops, window sills, and baseboards. Don’t forget light fixtures, vents, and door frames—these often get overlooked. Use a damp cloth with mild cleaner for sticky spots or fingerprints, but keep surfaces just damp enough to avoid streaks or damage. By mastering these steps, you’ll breeze through this task, freeing yourself from lingering grime and ensuring your rental looks spotless and ready for inspection.
Vacuuming and Mopping Floors
When it comes to cleaning your floors before moving out, choosing the right vacuum and mop can make all the difference. You’ll want to use effective vacuuming techniques to get rid of dirt and dust, especially in corners and under furniture. Then, follow up with proper mopping methods to leave your floors spotless and ready for inspection.
Choosing the Right Tools
Choosing the right tools for vacuuming and mopping can make all the difference in how efficiently you clean your floors during move-out. To keep your space spotless without wasting time, focus on smart tool selection. Here’s what you need to contemplate:
- Vacuum type: Pick a lightweight model with strong suction that’s easy to maneuver.
- Mop style: Choose a microfiber mop for better dirt pickup and faster drying.
- Eco friendly products: Use green cleaning solutions that protect your health and the environment.
- Accessories: Don’t forget attachments like crevice tools and scrub brushes for tight spots.
Vacuuming Techniques Tips
Having the right vacuum and mop is just the start; knowing how to use them effectively will save you time and effort. Mastering vacuuming techniques not only guarantees thorough cleaning but also extends carpet maintenance, keeping your space fresh and inviting. Here’s a quick guide to boost your efficiency:
| Action | Tip |
|---|---|
| Vacuum direction | Use slow, overlapping strokes |
| Attachments | Use crevice tool for edges |
| Frequency | Vacuum high-traffic areas twice |
| Carpet maintenance | Remove furniture before vacuuming |
Effective Mopping Methods
Although vacuuming lays the foundation for clean floors, effective mopping is essential to remove lingering dirt and grime. To master mopping techniques and maintain proper floor care, follow these steps:
- Choose the right mop and cleaning solution for your floor type to avoid damage.
- Start mopping from the farthest corner, moving backward toward the exit to prevent stepping on wet floors.
- Use a figure-eight motion to cover more surface area and lift dirt efficiently.
- Rinse and wring your mop frequently to avoid spreading dirt around.
Cleaning Windows and Window Treatments
You’ll want to make sure your windows are spotless by using the right glass cleaning techniques to avoid streaks. Don’t forget to dust blinds and curtains thoroughly, as they can collect a lot of dirt. For stubborn grime on window frames or glass, a bit of elbow grease with the right cleaner will do the trick.
Glass Cleaning Techniques
When tackling glass cleaning, focusing on both the windows and their treatments guarantees a spotless finish. You want to use streak free solutions that let natural light shine through without annoying smudges. Opt for eco friendly cleaners to keep your space fresh and chemical-free. Here’s how to get it done right:
- Spray your chosen eco friendly cleaner evenly on the glass surface.
- Use a microfiber cloth or a squeegee to wipe in vertical then horizontal strokes.
- Don’t forget to clean window edges and frames to avoid dirt buildup.
- For window treatments like glass doors, gently wipe with a damp cloth and mild cleaner.
Stick to these tips, and your windows will look crystal clear, giving you a fresh start in your next chapter.
Dusting Blinds and Curtains
Since dust and allergens tend to accumulate quickly on blinds and curtains, regular dusting is essential to keep them looking fresh and clean. You’ll want to start by closing the blinds and using a microfiber cloth or a duster designed specifically for dust removal to gently wipe each slat. For curtains, shake them outside to loosen dust before vacuuming with an upholstery attachment. If you need deeper cleaning, opt for gentle cleaning products that won’t damage the fabric or material. Avoid harsh chemicals that might leave residue or cause discoloration. Taking these simple steps not only refreshes your window treatments but also helps maintain a healthy, allergen-free living space. It’s a small effort that frees you from lingering dust and keeps your rental in top shape.
Removing Stubborn Window Grime
Although regular cleaning can keep windows looking clear, stubborn grime often builds up over time and needs extra attention. When tackling window cleaning for grime removal, you want to free yourself from frustration and get the job done efficiently. Here’s how:
- Mix equal parts white vinegar and water in a spray bottle to break down dirt effectively.
- Spray generously on the glass and let it sit for a few minutes to loosen grime.
- Use a microfiber cloth or a soft sponge to gently scrub away buildup without scratching.
- Finish with a squeegee or a clean, dry cloth for a streak-free shine.
Following these steps guarantees your windows regain their sparkle, giving you the freedom to enjoy clear views and a cleaner space.
Emptying and Cleaning Closets and Cabinets
Because closets and cabinets often hide forgotten dust and debris, you’ll want to empty them completely before cleaning. Take this chance to reevaluate your closet organization—free yourself from clutter and arrange items in a way that feels liberating. Wipe down all surfaces with a gentle cleaner, paying special attention to corners where grime tends to gather. For cabinet maintenance, inspect hinges and handles; tightening or adjusting them now can prevent future headaches. Don’t forget to clean inside drawers and shelves thoroughly, ensuring no crumbs or dust remain. By tackling closets and cabinets with intention, you’re not just cleaning—you’re creating a fresh, open space that supports your freedom and ease in your new chapter. Keep it simple, clear, and efficient to make your move-out process smooth and stress-free.
Removing Trash and Debris

Before you wrap up your move-out cleaning, you’ll want to tackle removing all trash and debris. Handling this step efficiently gives you the freedom to leave the space spotless and hassle-free. Here are some debris removal tips to streamline the process:
- Sort your waste by recyclables, donations, and trash to apply the best trash disposal methods.
- Use sturdy garbage bags and boxes to prevent spills and make carrying easier.
- Check local regulations for bulky item pickup or designated disposal sites.
- Schedule a final sweep to catch hidden debris in corners and under furniture.
Checking and Cleaning Appliances
Once you’ve cleared out all the trash and debris, it’s time to turn your attention to the appliances. Start by unplugging each one and giving them a thorough wipe-down using simple appliance cleaning hacks like a baking soda paste for stubborn grime. Check inside the fridge and oven for spills or food residues—you don’t want any surprises for the next tenant. Use appliance maintenance tips such as cleaning refrigerator coils or defrosting the freezer to keep things in top shape. Don’t forget small appliances like microwaves and dishwashers; a quick run with a vinegar solution can work wonders. Taking these steps not only guarantees you leave the place spotless but also frees you from future hassles, letting you move on with ease and confidence.
Repairing Minor Damages and Touch-Ups
Before you hand over the keys, it’s smart to spot any minor damages like nail holes or scuffed walls. You can often fix these yourself with simple DIY techniques that save money and time. Let’s look at easy, cost-effective touch-up tips to leave the place looking great.
Identifying Common Damage Types
When you’re moving out, spotting common types of minor damage early can save you from losing your security deposit. Understanding what counts as normal wear and tear versus avoidable damage helps you manage repair costs effectively. Here are four common damage types you should check for:
- Wall scuffs and nail holes – Small marks from furniture or picture hangers are typical but should be noted.
- Carpet stains and burns – These often require professional cleaning or replacement.
- Broken fixtures – Light switches, cabinet handles, or door knobs that don’t work need attention.
- Window and door damage – Cracks or chips in glass and scratches on frames can be costly to fix.
Identifying these early gives you the freedom to decide what needs fixing before your final inspection.
DIY Repair Techniques
Tackling minor repairs yourself can save you both time and money during move-out. With some basic tools and a bit of patience, you can handle diy wall repairs and fixing scratches effortlessly, keeping your deposit intact and your freedom intact.
| Damage Type | DIY Solution |
|---|---|
| Small nail holes | Fill with spackle, sand smooth |
| Scratches on walls | Use touch-up paint or markers |
| Scuff marks | Gentle scrubbing with baking soda |
Start by cleaning the area, then apply spackle or paint as needed. For fixing scratches, matching paint or a wax crayon can work wonders. These simple fixes let you leave your space looking fresh and damage-free without relying on professionals.
Cost-Effective Touch-Up Tips
Handling minor repairs yourself is a great start, but knowing some cost-effective touch-up tips can make a big difference in how your place looks at move-out. Using simple cleaning hacks and budget supplies will help you save money and time. Here’s how to get it done efficiently:
- Use white toothpaste to fill small nail holes—wipe off the excess for a smooth finish.
- Touch up scuffed baseboards with a matching crayon or marker designed for wood.
- Remove scuff marks from walls with a magic eraser or mild baking soda paste.
- Clean and polish faucets and fixtures with vinegar and a microfiber cloth to restore shine.
These budget-friendly fixes give you freedom from costly repairs while keeping your space spotless.
Final Walkthrough and Inspection Preparation
Before the final walkthrough, you’ll want to guarantee every corner of your rental is spotless and damage-free. This step is essential for a smooth final inspection, ensuring you meet all tenant responsibilities without surprises. Walk through your space with a checklist, double-checking cleaned areas, repaired damages, and removed personal items. Pay special attention to appliances, fixtures, and walls for any marks or issues. Document the condition with photos as proof, giving you peace of mind. If anything’s amiss, fix it promptly—this proactive approach keeps your deposit intact and frees you from post-move hassles. Preparing thoroughly means you can confidently hand over the keys and embrace your next chapter with the freedom you deserve.
Frequently Asked Questions
How Far in Advance Should I Schedule My Move-Out Cleaning?
You should schedule your move-out cleaning about one to two weeks before your final move-out date. This timing fits well within your move out timeline and gives you enough room for any last-minute touch-ups. Planning ahead means you won’t feel rushed, letting you enjoy your freedom instead of stressing over cleaning. Starting your cleaning preparation early guarantees a smooth, hassle-free shift to your next adventure.
Can I Use Professional Cleaning Services to Meet Landlord Requirements?
Funny enough, hiring professional cleaning services is exactly what many renters do to meet landlord requirements without breaking a sweat. You don’t have to stress over scrubbing every corner yourself—you can trust experts to handle it all, freeing you up for your next adventure. Plus, professional cleaning often guarantees the place looks spotless, boosting your chances of getting your full deposit back. So go ahead, enjoy that freedom while they do the dirty work!
What Cleaning Supplies Are Best for Eco-Friendly Move-Out Cleaning?
If you’re aiming for eco-friendly move-out cleaning, you’ll want to choose eco friendly products made from natural alternatives like vinegar, baking soda, and lemon juice. These not only cut through grime but also keep the air fresh without harsh chemicals. You can find biodegradable soaps and recycled packaging options too, giving you freedom from toxic cleaners while still meeting your cleaning goals. It’s a great way to protect the planet and your space.
How Do I Handle Cleaning if My Lease Ends During Winter?
When your lease ends during winter, winter cleaning can feel tougher, but you’ve got this. Focus on clearing snow or ice from entryways to keep things safe and tidy. Use quick-drying, eco-friendly products to avoid dampness. Plan your lease changes by scheduling cleaning when temperatures are warmer or using portable heaters to speed drying. Staying organized helps you move out smoothly and enjoy your freedom without stress or last-minute scrambles.
Are There Specific Cleaning Tasks Landlords Often Overlook?
You might focus on obvious cleaning priorities like floors and counters, yet landlords often overlook hidden areas like inside cabinets, behind appliances, or air vents. While you’re keen to break free from your lease, these overlooked areas can cost you your deposit. Don’t let hidden grime hold you back—tackling these spots guarantees a smooth exit and sets you free without extra hassle or unexpected charges.