Pre-Holiday Cleaning Checklist for Windowsills
Before the holidays, start by checking your windowsills for cracks, peeling, or moisture damage. Gather gentle cleaners, soft cloths, and gloves to protect both your hands and surfaces. Carefully remove decorations, storing fragile items safely. Dust and vacuum the sill, tracks, and frames to clear debris and improve air quality. Dry thoroughly, inspect for repair needs, and apply sealant if necessary. Replace decorations thoughtfully for a festive touch. Keep going to uncover detailed cleaning tips and decoration ideas.
Assessing the Current Condition of Your Windowsills

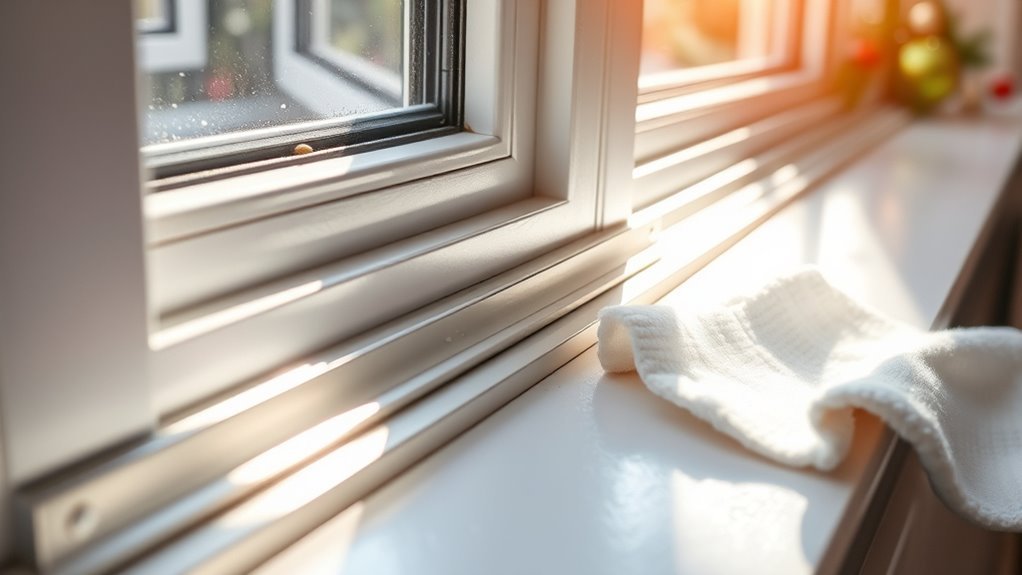
How do you know if your windowsills need attention before the holidays? Start by evaluating wear—look for cracks, peeling paint, or water stains that signal damage. Run your hand along the surface to feel for roughness or softness indicating rot. Next, assess functionality by checking if the windowsill still supports decorations or plants without wobbling or sagging. Inspect seals around the sill for gaps that could let in drafts, impacting your home’s comfort and energy efficiency. Don’t overlook dirt buildup in corners or grooves, which can hide damage and reduce appearance. By thoroughly evaluating wear and assessing functionality now, you guarantee your windowsills are ready for holiday décor without surprises, freeing you to enjoy the season with confidence and ease.
Gathering Essential Cleaning Supplies
Once you’ve identified the condition of your windowsills, the next step is to gather the cleaning supplies that will make the job efficient and effective. Opt for eco friendly supplies to protect both your home and the environment. Choose cleaning tools suitable for the material and level of dirt. Having the right items on hand frees you to work swiftly and confidently.
| Supply Type | Purpose | Recommended Options |
|---|---|---|
| Cleaning Solutions | Remove dirt & stains | Vinegar, mild detergent |
| Tools | Scrubbing & dusting | Soft cloth, brush, sponge |
| Protective Gear | Skin and surface protection | Gloves, microfiber towels |
Removing Decorative Items Safely

Before you start cleaning, carefully remove all decorative items to prevent damage or loss. Begin by evaluating each piece’s fragility and weight to apply the right decor removal techniques. Use both hands to lift heavier or delicate items steadily, avoiding sudden movements. For items with intricate parts, like figurines or vases, gently loosen any attachments or stands before lifting. Place each item on a soft surface or padded tray to avoid scratches. Label fragile items if needed for easy identification later. Once removed, focus on safe storage: choose a clutter-free area with stable temperature and minimal humidity. Use bubble wrap or cloth to wrap breakables, stacking boxes securely. Following these steps guarantees your decor stays intact and ready to brighten your windowsill after cleaning.
Dusting and Vacuuming the Windowsill Area
With your decorative items safely stored, you can focus on dusting and vacuuming the windowsill area to remove accumulated dirt and debris. Start by using a microfiber cloth or a soft brush to gently dislodge dust accumulation from all surfaces, including corners where it tends to gather. Next, apply a vacuum technique using a brush attachment to capture loosened dust without scratching the surface. Move the vacuum slowly and methodically to guarantee no debris is missed. Pay close attention to crevices and edges, where dust often hides. This step not only clears visible dirt but also improves air quality. By combining dusting and vacuuming, you maintain a clean windowsill that’s ready for the next step in your pre-holiday cleaning routine, freeing you to enjoy a fresh, welcoming space.
Cleaning Window Tracks and Frames

Start by removing loose dust and debris from window tracks with a small brush or vacuum attachment. Then, use a deep cleaning solution like a vinegar-water mix to scrub the frames and tracks thoroughly. Finally, dry the area completely and apply a mold-preventing spray to keep your windows fresh and clean.
Dust Removal Techniques
Although window tracks and frames often go unnoticed, they’re prime spots for dust buildup that can affect your home’s air quality and appearance. Start by choosing effective dusting tools like a soft-bristle brush or a microfiber cloth. These tools reach tight corners without causing damage. Use a vacuum with a crevice attachment to remove loose dust first. Then, apply dusting techniques such as gently brushing along tracks and wiping frames in a consistent motion to avoid redistributing dust. For stubborn particles, a slightly damp cloth can help lift them without soaking the area. Regularly cleaning these areas prevents buildup, making your windows look fresh and keeping your indoor air cleaner. Stick to these steps to maintain dust-free window tracks and frames effortlessly.
Deep Cleaning Solutions
Before you tackle deep cleaning your window tracks and frames, gather the right supplies: a small brush, cotton swabs, mild detergent, and a spray bottle with a vinegar-water solution. Using eco friendly cleaners or homemade solutions helps keep your home fresh without harsh chemicals. Start by spraying the tracks, letting the vinegar solution loosen dirt. Scrub with the brush, then use cotton swabs for tight corners. Wipe down frames with a damp cloth and mild detergent to remove grime.
| Step | Purpose |
|---|---|
| Spray solution | Loosen dirt and debris |
| Brush tracks | Remove buildup |
| Cotton swabs | Clean corners and crevices |
| Damp cloth wipe | Clean frames thoroughly |
| Dry completely | Prevent moisture damage |
This method keeps your windows clean and your space toxin-free.
Preventing Mold Growth
While cleaning window tracks and frames, you’ll want to focus on preventing mold growth by keeping these areas dry and well-ventilated. Start by removing debris and wiping down surfaces with a mixture of water and vinegar or a mild detergent. After cleaning, thoroughly dry every corner to eliminate moisture that can encourage mold. For effective mold prevention, maintain proper humidity control in your home by using dehumidifiers or opening windows to boost air circulation. Check window seals regularly to prevent water intrusion. If you spot any early signs of mold, treat them immediately with a fungicidal cleaner to stop it from spreading. By staying proactive and managing moisture levels, you guarantee your window tracks and frames stay clean and mold-free, preserving a fresh and healthy environment.
Washing the Windowsills With Appropriate Cleaners
Three key steps will help you wash your windowsills effectively using the right cleaners. First, choose eco friendly cleaners to avoid harsh chemicals that can damage your windowsills and compromise window protection. These cleaners are gentle yet effective at breaking down dirt and grime. Second, apply the cleaner evenly with a soft cloth or sponge to prevent scratches. Focus on corners and edges where dust accumulates. Third, rinse with clean water to remove any residue, which helps maintain the surface’s integrity and avoids streaks or buildup. By following these steps, you’ll keep your windowsills clean and protected without harming your home or the environment. This approach lets you enjoy your space freely, knowing your windowsills look great and last longer.
Drying and Polishing for a Streak-Free Finish
A spotless finish depends on properly drying and polishing your windowsills after cleaning. Start by using a clean, lint-free microfiber cloth to gently absorb any moisture, preventing water spots. For streak free techniques, always dry in one direction, avoiding circular motions that can leave marks. Once dry, grab your polishing tools—another soft cloth or a dedicated polishing pad works well. Apply light pressure while polishing to enhance shine without damaging surfaces. Focus on edges and corners where streaks tend to hide. If you’re working with wood or painted windowsills, make certain your polishing tools are appropriate to avoid scratches. Following these steps guarantees your windowsills gleam, giving you the freedom to enjoy a flawless, refreshed space just in time for the holidays.
Checking for Damage or Repairs Needed
Before moving on, take a thorough look at your windowsills to identify any cracks, chips, or loose paint that might need attention. Conduct a damage assessment by carefully inspecting every corner and surface for signs of decay or structural weakness. Pinpoint areas where moisture damage or rot could be compromising the wood or material integrity. Once you’ve identified these issues, consider your repair options: minor cracks can be filled with wood filler or caulk, while chipped paint may require sanding and repainting. For more significant damage, you might need to replace sections or consult a professional. Addressing these repairs now guarantees your windowsills stay sturdy and visually appealing, giving you the freedom to enjoy a flawless pre-holiday clean without surprises later.
Applying Protective Treatments if Necessary
Once you’ve repaired any damage, you’ll want to apply protective treatments to your windowsills to prevent future wear and moisture issues. Start by selecting high-quality protective sealants suited for your windowsill material—wood, metal, or vinyl. Clean the surface thoroughly and verify it’s dry before application. Use a brush or cloth to evenly apply the sealant, covering all exposed areas, especially corners and edges where moisture tends to gather. Allow it to cure fully according to the product instructions. Don’t forget to inspect existing window treatments, like blinds or curtains, verifying they don’t trap moisture or obstruct airflow around your windowsills. Properly maintained window treatments promote ventilation, which helps keep your windowsills dry and protected. This simple step will extend your windowsills’ life and keep them looking great for holidays and beyond.
Replacing Decorations With Holiday Themes
Start by carefully removing any outdated decorations, making sure to handle fragile items gently to avoid damage. Next, choose seasonal decor that complements your home’s style and fits your holiday theme. Finally, arrange the new decorations strategically to create a festive atmosphere without overcrowding your space.
Seasonal Decor Ideas
Although switching up your decor can feel overwhelming, replacing your current decorations with holiday-themed items is a straightforward way to instantly set a festive mood. Focus on seasonal themes and festive colors to bring energy and warmth to your windowsills. Choose items that reflect the holiday spirit without overcrowding the space.
| Seasonal Theme | Festive Colors |
|---|---|
| Winter Wonderland | Icy blues, whites |
| Traditional Holiday | Red, green, gold |
| Cozy Autumn | Orange, brown, yellow |
Use this table to guide your selections. For example, add small pinecones and twinkle lights for a Winter Wonderland or red berries and candles for Traditional Holiday. Keep decor minimal to maintain freedom in your space and ease in cleaning.
Safe Decoration Removal
After you’ve enjoyed your seasonal decor, it’s important to remove decorations carefully to avoid damage and maintain safety. Follow these steps to guarantee safe decoration removal and efficient decoration organization:
- Unplug and Disassemble: Disconnect lights and fragile items first to prevent accidents. Handle ornaments gently.
- Sort by Type and Condition: Group decorations by holiday and assess their condition for reuse or disposal.
- Use Proper Containers: Store items in sturdy boxes or bins with padding to guarantee safe storage and prevent breakage.
- Label Clearly: Mark each container with its contents and holiday for quick access next season.
Frequently Asked Questions
How Often Should Windowsills Be Cleaned Outside of Holiday Preparations?
You should clean your windowsills regularly as part of your seasonal cleaning and maintenance routine. Ideally, give them a thorough wipe-down every few months to prevent dirt buildup and avoid damage. If you live in a dusty or rainy area, check and clean them more often. Staying consistent keeps your windowsills looking fresh and extends their life, giving you more freedom to enjoy your space without constant repairs or deep cleans.
Can Indoor Plants on Windowsills Affect Cleaning Methods?
You might think plant placement and cleaning frequency are worlds apart, but they actually go hand in hand. When you have indoor plants on windowsills, you’ll need to adjust your cleaning methods to avoid disturbing them. Wiping gently around pots and using a soft cloth helps prevent damage. Plus, plants can increase dust buildup, so you might want to clean more often to keep both your windowsills and greenery happy.
Are There Eco-Friendly Cleaning Products Suitable for Windowsills?
You can definitely choose eco friendly sprays and natural cleaners for your windowsills to keep things green and safe. Look for products made from plant-based ingredients or make your own with vinegar, baking soda, and lemon juice. These natural cleaners work well without harsh chemicals, letting you clean thoroughly while protecting your indoor air quality. Just spray, wipe with a microfiber cloth, and enjoy a fresh, eco-conscious space that supports your freedom to live sustainably.
How to Prevent Mold Growth on Windowsills During Winter?
To prevent mold growth on windowsills during winter, focus on mold prevention and winter care. Keep windowsills dry by wiping away condensation daily. Improve airflow by opening curtains and occasionally cracking windows to reduce humidity. Use a dehumidifier in damp rooms to control moisture levels. Seal any gaps or leaks around windows to prevent cold air and moisture intrusion. Regularly clean with an eco-friendly mold prevention spray to keep your space fresh and mold-free.
What Are the Best Materials for Durable and Easy-To-Clean Windowsills?
When choosing durable, easy-to-clean windowsills, you’ll want to take into account wood materials and vinyl options. Wood gives a classic look but needs sealing to resist moisture and stains. Vinyl, on the other hand, is highly durable, moisture-resistant, and effortless to wipe clean. If you want freedom from constant upkeep, vinyl options are ideal. For a balance of style and practicality, sealed hardwood with a protective coating works well.


