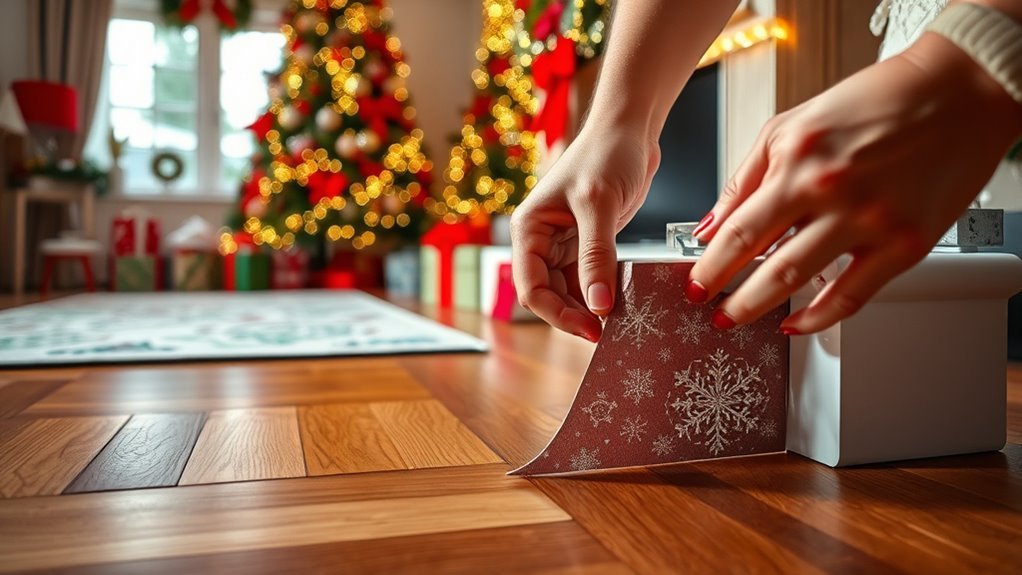
Removing Baseboards From Holiday Decor Effectively
To remove baseboards from your holiday decor effectively, start by clearing the area and protecting your floors. Use a utility knife to score any caulk sealing the baseboard, then carefully insert a putty knife or pry bar with a protective wood shim behind the trim. Apply steady, even pressure along the board’s length to avoid damage. Handle and store the baseboards gently to prevent warping. Following these steps guarantees a clean removal, and exploring further tips can help you avoid common mistakes.
Tools Needed for Safe Baseboard Removal

To safely remove baseboards without damaging your walls or the trim itself, you’ll need a few essential tools. Start with a utility knife to score the caulk or paint sealing the baseboard to the wall. This prevents peeling or tearing when you lift the trim. Next, use a pry bar with a flat, wide end to gently loosen the baseboard. Slide a thin piece of wood or a putty knife behind the pry bar to protect your wall from dents or scratches. Work slowly along the length, prying a little at a time to avoid cracking the wood. Having these tools on hand gives you control and freedom to remove baseboards efficiently while preserving both your walls and trim for future use. Additionally, wearing protective gloves during this process helps keep your hands safe from splinters and sharp edges.
Preparing Your Space Before Removing Baseboards
Once you have your tools ready for removing baseboards, it’s important to prepare the area around you. Start by creating a pre removal checklist to guarantee nothing is overlooked. Remove furniture and decorations near the baseboards to give yourself enough room to work comfortably. Cover the floor with a drop cloth or old sheets to protect it from dust and potential damage. Organize your tools within easy reach to maintain efficiency. Clear pathways to avoid tripping hazards and keep your workspace tidy. Proper space organization not only safeguards your belongings but also speeds up the process. Taking these preparatory steps helps you work confidently and freely, minimizing interruptions and guaranteeing a smooth baseboard removal experience. Additionally, wearing sturdy shoes and gloves enhances your safety while working in the garage or workspace.
Step-by-Step Guide to Removing Baseboards Without Damage
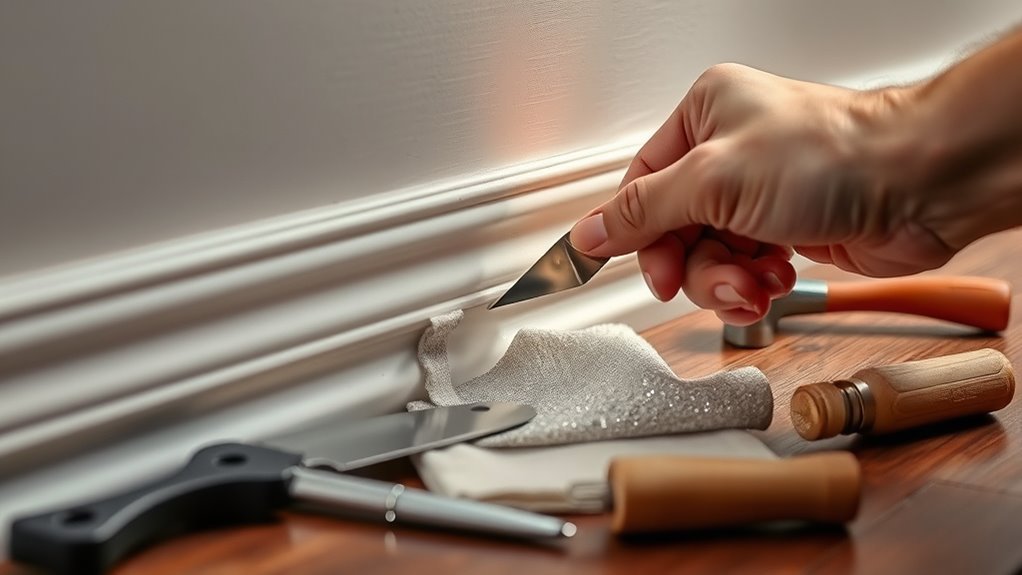
Removing baseboards carefully involves a few key steps to prevent damage to both the trim and your walls. First, identify the baseboard styles and their installation techniques to understand how they’re attached. Start by scoring the caulk line with a utility knife to loosen the seal between the baseboard and wall. Next, gently insert a putty knife or pry bar behind the baseboard, protecting the wall with a thin piece of wood or cardboard. Apply steady pressure, working along the length to gradually loosen the board. Avoid forcing it to prevent splitting or cracking. Once free, carefully pull the baseboard away, checking for any remaining nails or adhesive. Taking these steps guarantees your baseboards stay intact and ready for reuse or storage.
Tips for Handling and Storing Removed Baseboards
Although carefully removing baseboards is essential, how you handle and store them afterward is just as important to maintain their condition. Proper handling baseboards guarantees they stay intact and ready for reuse, while effective storing baseboards protects them from damage.
- Handle with care: Always lift baseboards gently, avoiding bends or cracks. Support the length evenly to prevent warping.
- Clean before storing: Wipe down any dust or debris to avoid deterioration or stains during storage.
- Store flat and elevated: Lay baseboards flat on a dry surface, elevated slightly off the ground to prevent moisture damage and warping.
Common Mistakes to Avoid When Removing Baseboards

Taking care when handling and storing your baseboards helps preserve them, but it’s equally important to avoid common mistakes during removal that can cause damage or make the process harder. First, don’t rush; improper removal techniques like prying too quickly can crack or splinter baseboard materials, especially delicate wood or MDF. Use a putty knife to gently loosen the caulk or paint seal before inserting a pry bar to reduce damage. Also, avoid pulling straight out—apply even pressure along the length to prevent warping. Another mistake is neglecting to protect your walls; place a thin board behind your pry tool to shield drywall. Finally, don’t ignore nails—remove them carefully with pliers to keep baseboards intact for reuse. Following these tips guarantees a smooth, damage-free removal.
Frequently Asked Questions
Can Baseboards Be Removed Without Damaging the Holiday Decorations?
You can definitely remove baseboards without damaging your holiday decorations by handling everything with care. Consider using baseboard alternatives like removable adhesive strips or magnetic mounts to avoid permanent fixtures. When removing traditional baseboards, gently pry them off using the right tools and protect your decor by covering nearby areas. Prioritizing holiday decoration care guarantees your setup stays intact, giving you the freedom to refresh your space without worry.
How Long Does It Typically Take to Remove Baseboards Safely?
When removing baseboards, you’ll typically spend about 30 minutes to an hour per room, depending on size and condition. To speed things up, use baseboard removal techniques like scoring the caulk line first and gently prying with a putty knife before using a pry bar. This prevents damage and saves time. Working methodically and having tools ready will give you the freedom to finish efficiently without stressing over mistakes.
Are There Eco-Friendly Methods for Disposing of Old Baseboards?
Imagine old baseboards piling up, waiting for their fate. You don’t have to toss them in the trash. Instead, explore recycling options like wood recycling centers or donating to Habitat for Humanity. If the baseboards are made from sustainable materials, consider sanding and repurposing them into shelves or decor. Taking these eco-friendly steps not only frees you from waste guilt but also supports a greener planet—you’ll feel the freedom in making responsible choices.
What Should I Do if the Baseboards Are Painted Over Holiday Wallpaper?
If the baseboards are painted over holiday wallpaper, start by carefully scoring the paint along the baseboard edge to avoid damaging the wallpaper during holiday wallpaper removal. Use a gentle adhesive remover if needed. Once the wallpaper’s off, sand the baseboards lightly before repainting. For baseboard painting tips, choose a high-quality primer and paint for a smooth finish, and use painter’s tape to protect walls. This way, you keep your space clean and fresh without hassle.
Can Removing Baseboards Affect My Home’s Heating or Cooling Efficiency?
Ever wondered if removing baseboards could mess with your heating efficiency or cooling impact? It can, especially if the baseboards seal gaps that prevent drafts. When you take them off, you might expose spaces where air can escape, reducing your home’s energy efficiency. To keep your comfort and save energy, seal any gaps with caulk or weatherstripping before reinstalling or replacing baseboards. This way, you maintain your home’s freedom from energy loss.


