Removing Keyboard From Grease Effectively
To remove keyboard grease effectively, start by wiping the surface with a microfiber cloth dampened with isopropyl alcohol or a gentle degreaser. Use soft brushes or cotton swabs to reach between keys and lift oily grime. For stubborn grease, carefully remove keycaps and soak them in warm, soapy water before scrubbing. Always let everything dry thoroughly. Keeping your keyboard clean is key to smoother typing and longer device life. You’ll find even more handy tips if you keep exploring.
Understanding the Causes of Keyboard Grease

Although you might not notice it right away, keyboard grease builds up from the natural oils on your fingers and skin. Every time you type, these oils transfer onto the keys, accumulating over time. Your keyboard usage plays a major role in how quickly this grease develops. The more you type, the more contact your fingers have with the keys, increasing grease buildup. Other common grease sources include sweat, food residues, and environmental dust that sticks to the oily surface. Understanding these grease sources helps you take control of your keyboard’s cleanliness without feeling trapped by constant maintenance. By recognizing how your daily habits contribute to keyboard grease, you can better manage its presence and enjoy the freedom of a clean, efficient workspace.
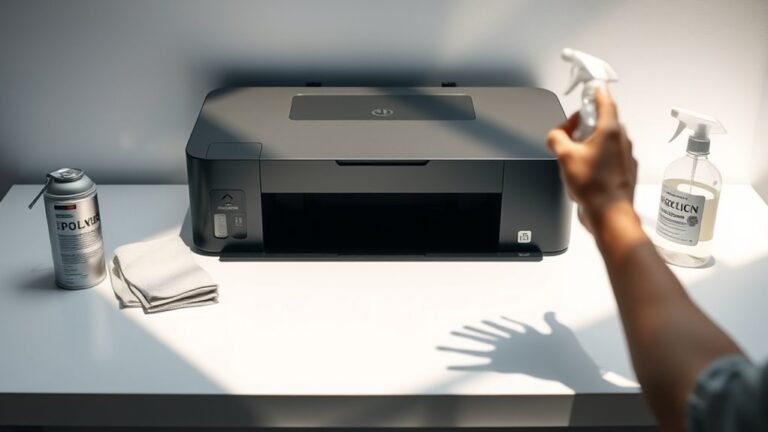
Essential Tools and Materials for Cleaning
To clean your keyboard effectively, you’ll need the right supplies like microfiber cloths, gentle cleaning agents, and soft brushes. Don’t forget to wear protective gloves to keep your hands safe from chemicals and grime. Choosing surface-safe cleaners is key to avoid damaging your keyboard while removing grease.
Recommended Cleaning Supplies
You’ll need a handful of essential supplies to effectively remove grease from your keyboard. Start with effective degreasers designed for electronics—they break down oily residues without damaging delicate components. Cleaning wipes are a must-have; choose those that are lint-free and slightly dampened with a mild cleaning solution to avoid excess moisture. Microfiber cloths are perfect for wiping away loosened grease without scratching surfaces. A soft-bristled brush helps reach between keys, dislodging stubborn grime. Isopropyl alcohol (70% or higher) is another reliable cleaning agent that evaporates quickly, leaving no residue. Finally, cotton swabs assist in targeting tight spaces where grease tends to accumulate. Having these supplies on hand empowers you to reclaim your keyboard’s cleanliness swiftly and safely, giving you the freedom to work without sticky distractions.
Protective Gear Importance
Having the right cleaning supplies is only part of the process; protecting yourself during keyboard cleaning is just as important. When you immerse yourself in removing grease, you’ll want to wear protective gloves to shield your skin from harsh chemicals and grime. These gloves let you work freely without worrying about irritation or sticky residue. Don’t forget safety goggles, either—they protect your eyes from splashes, especially if you’re using sprays or liquid cleaners. Wearing proper gear isn’t about restricting you; it’s about giving you the freedom to clean confidently and safely. By gearing up with gloves and goggles, you guarantee the process stays trouble-free, letting you focus on restoring your keyboard’s shine without risking your health or comfort. Safety and freedom go hand in hand here.
Surface-Safe Cleaning Agents
Although it might be tempting to grab any cleaner at hand, choosing surface-safe cleaning agents is essential for protecting your keyboard’s delicate components. You want to avoid harsh chemicals that could damage plastic or electronic parts. Instead, opt for surface safe solvents specifically designed for electronics—they effectively break down grease without causing harm. Eco friendly cleaners are another excellent choice, letting you maintain your keyboard without compromising your values or the environment. These gentle solutions provide powerful cleaning while minimizing toxic residues and odors. By selecting the right cleaning agent, you preserve your keyboard’s longevity and functionality, all while enjoying a safer, greener approach. So, before you start, make sure your cleaning tools respect both your device and your freedom to choose wisely.
Step-by-Step Guide to Cleaning Keyboard Surface
First, you’ll want to gather all your cleaning materials to make the process smooth. Next, carefully apply the cleaning solution to tackle the grease without damaging your keyboard. Finally, remove any leftover residue to leave your keyboard spotless and ready to use.
Gather Cleaning Materials
To effectively remove grease from your keyboard, you’ll need just a few essential cleaning materials. Before you start, focus on gathering supplies with a clear cleaning checklist to stay organized and efficient. This simple prep step gives you the freedom to clean without interruptions. Here’s a quick guide to what you’ll need:
| Item | Purpose | Tips |
|---|---|---|
| Microfiber cloth | Wipes surface gently | Avoid abrasive fabrics |
| Isopropyl alcohol | Dissolves grease | Use 70% or higher |
| Cotton swabs | Cleans tight spaces | Slightly dampen before use |
| Compressed air | Removes dust & debris | Hold upright while spraying |
Gathering these items guarantees your cleaning process is smooth and effective, freeing you from greasy buildup.
Apply Cleaning Solution
With your cleaning materials ready, you can start applying the solution to tackle the grease on your keyboard. Begin by lightly dampening a microfiber cloth with your chosen grease solution—avoid soaking it to prevent liquid damage. Use gentle, circular motions to work the cleaner into greasy spots, focusing on areas between keys where grime often hides. This step is essential in effective cleaning techniques, helping to break down stubborn oils without harming your keyboard. If needed, use a cotton swab dipped in the solution for tight spaces. Remember, patience is key here; don’t rush the process or apply excessive liquid. By carefully applying your grease solutions, you’re one step closer to restoring your keyboard’s fresh, clean feel and reclaiming your workspace freedom.
Remove Residual Grease
Three simple steps can help you effectively remove any leftover grease from your keyboard surface. Understanding the grease composition—often a mix of oils and dirt—guides your cleaning approach. After applying your cleaning solution, tackle residual grease by gently wiping with a microfiber cloth. Remember, regular cleaning frequency prevents buildup and keeps your keyboard fresh.
To remove residual grease:
- Use a soft microfiber cloth to avoid scratches
- Lightly dampen the cloth with water or isopropyl alcohol
- Wipe in circular motions focusing on stubborn spots
- Let the surface air dry completely before use
Deep Cleaning Techniques for Stubborn Grease
Although regular cleaning can handle most keyboard grime, stubborn grease often requires more intensive methods. To tackle it, start by unplugging your keyboard and removing the keycaps carefully. Use a soft brush or compressed air to loosen debris. Next, apply isopropyl alcohol on a microfiber cloth or cotton swab to gently scrub greasy spots—this dissolves oils without harming components. For deeper grease buildup, soaking keycaps in warm, soapy water for 15–20 minutes works wonders. Remember to dry everything completely before reassembling. These cleaning tips not only restore your keyboard’s look but also contribute to grease prevention by removing residue that attracts more dirt. Taking the time for deep cleaning frees you from sticky keys and keeps your keyboard performing smoothly and hygienically.
Preventive Measures to Avoid Future Grease Buildup

Since grease buildup can quickly return if left unchecked, taking preventive steps is key to keeping your keyboard clean. By adopting simple preventive habits and committing to regular maintenance, you’ll enjoy a smoother, grease-free typing experience. Here’s how you can stay ahead of the grime:
Prevent grease buildup with simple habits and regular maintenance for a cleaner, smoother keyboard experience.
- Wash your hands before using your keyboard to minimize oil transfer.
- Avoid eating or drinking near your keyboard to prevent accidental spills and crumbs.
- Use a keyboard cover to shield keys from grease and dust.
- Schedule quick weekly wipes with a microfiber cloth and gentle cleaner to maintain cleanliness.
Following these steps helps you keep your keyboard grease-free, preserving both its appearance and functionality without restricting your freedom to enjoy your devices.
Maintaining Keyboard Hygiene for Longevity
If you want your keyboard to last, maintaining proper hygiene is essential. Regular cleaning is one of the top keyboard maintenance tips you should adopt. Wipe down your keys with a microfiber cloth dampened with a mild cleaner to prevent grease buildup. Avoid eating or drinking near your keyboard to reduce grime and spills. Hygiene best practices also include washing your hands before use, which cuts down on oil transfer. Consider using a keyboard cover to shield against dust and dirt. Don’t forget to clean beneath the keys occasionally; a gentle brush or compressed air can help with that. By following these straightforward keyboard maintenance tips and hygiene best practices, you’ll enjoy a cleaner, more responsive keyboard that serves you well for years, giving you the freedom to work or play without interruptions.
Frequently Asked Questions
Can Greasy Keyboards Cause Health Problems?
Yes, greasy keyboards can pose health risks if you don’t maintain good hygiene practices. When grease mixes with dirt and bacteria, it creates a breeding ground for germs that can lead to skin irritations or infections. If you want to enjoy your freedom without worrying about health issues, it’s smart to clean your keyboard regularly and wash your hands often. Keeping your workspace clean supports your well-being and peace of mind.
Is It Safe to Use Alcohol-Based Cleaners on All Keyboards?
You might think alcohol-based cleaners are safe for all keyboards, but that’s not always true. Some keyboards, especially those with delicate coatings or backlighting, can be damaged by alcohol. Instead, you can explore alcohol alternatives like gentle microfiber cloths dampened with water or specialized electronic cleaning sprays. Using different cleaning techniques helps you maintain your keyboard’s look and function without risking damage—giving you the freedom to clean confidently and safely.
How Often Should I Clean My Keyboard to Prevent Grease Buildup?
To keep your keyboard in tip-top shape, think of regular keyboard maintenance as a gentle ritual that preserves its charm. You don’t need to overdo it, but a cleaning frequency of once a week can fend off the sneaky buildup of grease and grime. This schedule lets you enjoy a smooth experience without feeling tied down, giving your fingers the freedom to glide effortlessly across clean, responsive keys every day.
Are There Keyboard Covers That Resist Grease and Dirt?
Yes, you’ll find keyboard covers made from materials like silicone or TPU that resist grease and dirt quite well. These materials create a protective barrier, making it easier to keep your keyboard clean without harsh cleaning solutions. You can just wipe them down quickly, giving you more freedom to use your keyboard worry-free. Choosing the right cover means less hassle and more time enjoying your device without grime buildup.
Can Greasy Keyboards Affect Typing Performance or Key Responsiveness?
Yes, greasy keyboards can definitely impact your typing speed and key sensitivity. When grease builds up, keys might stick or feel less responsive, slowing you down and making typing less smooth. You’ll notice reduced key sensitivity, which means you have to press harder or multiple times, breaking your flow. Keeping your keyboard clean helps maintain that freedom to type quickly and effortlessly, without annoying interruptions from sticky or sluggish keys.