Removing Pet Mess From Microwave Effectively
You can effectively clean pet mess from your microwave by first unplugging it for safety. Use a vinegar and water mix to steam and soften grime, then wipe with a soft cloth. Lemon juice hot steam helps neutralize odors, while a baking soda paste tackles stubborn stains. Don’t forget to soak the turntable separately. Keep pets away from the kitchen to prevent repeat messes. For deeper cleaning tips and odor control, there’s more you can explore.
Understanding Common Pet Messes in Microwaves

Although it might seem unusual, pet messes can end up in your microwave more often than you’d expect. You might think your furry friend couldn’t possibly reach in there, but common pet messes like food crumbs, saliva, or even accidental drips from their water bowl can find their way inside. These small incidents can create microwave hazards, such as unpleasant odors, bacterial growth, or even sparks if metal bits cling to the walls. Understanding these messy possibilities helps you take control and maintain your freedom from worry. Recognizing how easily these messes occur allows you to act quickly, keeping your microwave clean and safe without hassle. It’s about staying ahead—so you can enjoy your kitchen with confidence and ease.
Safety Precautions Before Cleaning
Before you start cleaning, make certain you unplug the microwave to avoid any electrical hazards. You’ll also want to use non-toxic cleaners to keep both you and your pets safe. Taking these steps helps guarantee a safe and effective cleaning process.
Unplug Microwave First
One of the most important steps you should take before cleaning your microwave is to unplug it. Doing this guarantees safety first, preventing any accidental shocks or electrical issues while you focus on removing pet mess. When you unplug your microwave, you’re taking control of your environment, giving yourself the freedom to clean thoroughly without worry. This step also supports pet hygiene, as you can safely handle any residue without risking contamination or injury. Remember, safety isn’t just about protecting yourself; it’s about creating a clean, secure space for both you and your furry friends. So before grabbing any cloth or sponge, always unplug your microwave first—it’s a simple action that makes all the difference in effective, safe cleaning.
Use Non-Toxic Cleaners
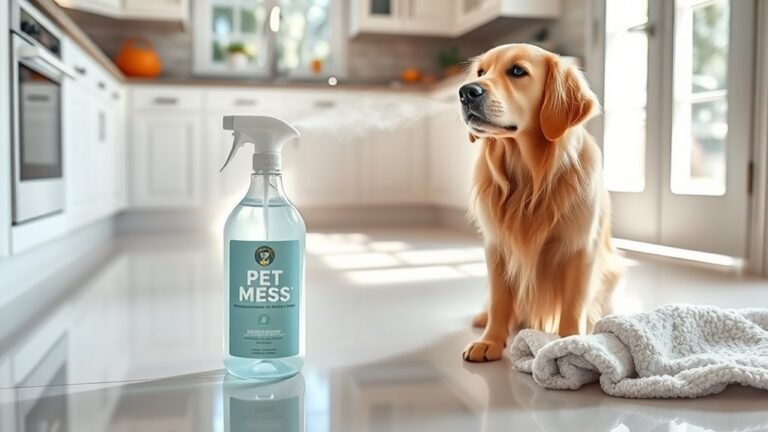
When dealing with pet mess in your microwave, choosing non-toxic cleaners is essential to keep both you and your pets safe. Harsh chemicals can linger, causing unwanted exposure or harm, especially if your furry friends sniff around. Opt for cleaning solutions made with non toxic ingredients—these protect your home environment without compromising effectiveness. Eco friendly alternatives like vinegar, baking soda, or gentle plant-based sprays work wonders for breaking down stains and odors. You don’t have to sacrifice cleanliness for safety; these options let you maintain freedom from harsh chemicals while ensuring your microwave is spotless. Before you start scrubbing, always check labels and avoid anything with strong fumes or synthetic additives. This way, your cleaning routine stays safe, simple, and aligned with a healthier lifestyle for everyone.
Essential Cleaning Supplies for Pet Mess

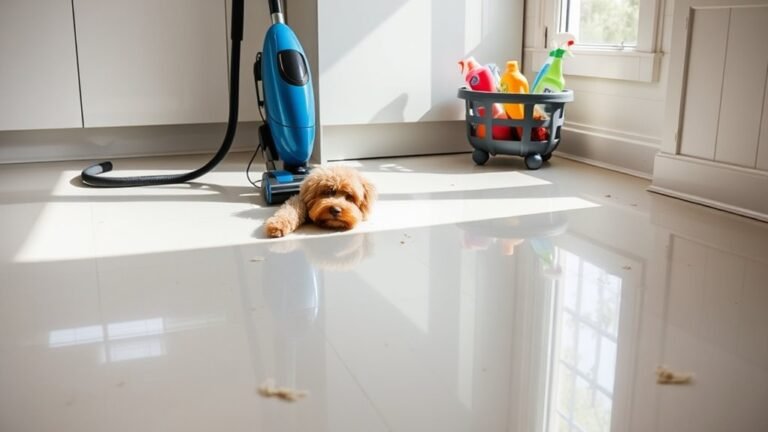
To tackle pet mess in your microwave effectively, you’ll need the right cleaning tools and pet-safe solutions. Make sure you have gloves and other protective gear to keep yourself safe. Let’s go over the essentials you should have on hand before you start cleaning.
Must-Have Cleaning Tools
Having the right cleaning tools can make tackling pet messes in your microwave much quicker and more effective. To free yourself from stubborn stains and odors, you’ll want a few must-have tools. Start with a sturdy sponge or microfiber cloth for scrubbing without scratching surfaces. A soft-bristle brush helps reach crevices where messes hide. Don’t forget disposable gloves to keep your hands clean and safe. A spray bottle lets you apply cleaning solutions evenly, boosting efficiency. Paper towels or lint-free cloths are perfect for drying and wiping away residue. With these effective supplies on hand, you’ll handle any pet mess confidently and swiftly, reclaiming your microwave’s cleanliness and your freedom from lingering grime.
Pet-Safe Cleaning Solutions
Along with the right tools, you’ll need cleaning solutions that are safe for both your microwave and your pets. Choosing products with pet safe ingredients or natural alternatives guarantees you won’t compromise your furry friends’ health while keeping your microwave spotless. Here’s a quick guide to effective, pet-friendly options:
| Cleaning Solution | Key Benefit |
|---|---|
| White Vinegar | Natural deodorizer |
| Baking Soda | Gentle abrasive |
| Lemon Juice | Antibacterial |
| Castile Soap | Plant-based cleaner |
| Water (steam method) | Chemical-free rinse |
These natural alternatives let you clean freely without worrying about toxic residues. Stick to these for a safe, fresh microwave that respects your pet’s well-being and your desire for a clean, chemical-free home.
Protective Gear Essentials
Even though natural cleaning solutions are safe, you’ll want to protect yourself while tackling pet messes in your microwave. Wearing protective gloves shields your hands from lingering bacteria and any cleaning agents you use. They also help you avoid direct contact with stubborn residues that could irritate your skin. Don’t forget safety goggles—these keep your eyes safe from unexpected splashes or fumes, especially when scrubbing or spraying. Having these essentials means you’re free to clean confidently without worrying about irritation or injury. By gearing up properly, you maintain your independence and peace of mind during the process. So, before you start, grab your protective gloves and safety goggles to make your microwave cleanup both safe and effective.
Using Vinegar and Water for Steam Cleaning

Since pet messes can leave stubborn odors and stains in your microwave, using a simple mixture of vinegar and water for steam cleaning is an effective way to tackle the problem. Just mix equal parts water and vinegar in a microwave-safe bowl, then heat it until it steams. The steam softens dried messes, loosening grime without harsh scrubbing. After steaming, carefully remove the bowl and wipe your microwave’s interior with a clean cloth or sponge. This vinegar solution not only breaks down residue but also neutralizes odors, giving you a fresher microwave without chemicals. It’s a quick, natural method that lets you reclaim your space easily and safely. You’ll appreciate how freeing it is to clean up without hassle or harsh products.
Lemon Method for Odor Removal
A lemon is a simple, natural way to remove odors from your microwave. All you need is some lemon juice and water. Squeeze the juice of one lemon into a microwave-safe bowl, add about a cup of water, and place it inside. Heat the mixture for three to five minutes until it steams up the interior. The lemon juice acts as a powerful odor neutralizer, breaking down lingering smells left by pet messes. After steaming, let it sit for a few minutes before carefully removing the bowl. Wipe down the interior with a clean cloth or sponge, and you’ll notice the fresh, clean scent replacing any stubborn odors. This method is quick, chemical-free, and keeps your microwave smelling fresh without hassle.
Baking Soda Paste for Stubborn Stains
If your microwave has stubborn pet mess stains, you’ll want to make a baking soda paste by mixing baking soda with water. Apply the paste directly onto the stains and let it sit for a few minutes. Then, scrub gently to lift away the grime without damaging the surface.
Mixing Baking Soda Paste
When stubborn stains refuse to budge, mixing a baking soda paste can be your best bet for tackling the mess in your microwave. Baking soda benefits include its gentle abrasive quality and natural deodorizing power, making it perfect for cleaning without harsh chemicals. To create the paste, simply combine baking soda with a small amount of water until you reach a spreadable consistency—not too runny, not too thick. This balance guarantees easy paste application on the stained areas. You’ll appreciate how this simple mixture empowers you to take control of tough spots, freeing your microwave from pet mess remnants. Embrace this straightforward method to restore cleanliness while enjoying the freedom of using safe, effective ingredients you likely already have on hand.
Applying and Scrubbing Method
Though stubborn stains can be frustrating, you’ll find that applying the baking soda paste directly to the affected areas makes a big difference. Start by spreading a thick layer over the mess, ensuring full coverage with careful applying techniques. Let it sit for 10-15 minutes to loosen the grime. When it’s time to scrub, use a soft cloth or sponge and gentle scrubbing tips to avoid scratching your microwave’s surface. Focus on circular motions to break down the residue without damaging the finish. After scrubbing, wipe away the paste with a damp cloth and rinse well. This method gives you the freedom to tackle tough pet messes effectively, freeing your microwave from stains without harsh chemicals or excessive effort.
How to Clean Microwave Turntable and Walls
Cleaning the microwave turntable and walls is essential to remove pet mess effectively and prevent lingering odors. Start with turntable maintenance by removing it carefully and soaking it in warm, soapy water. This loosens stuck-on debris without harsh scrubbing. While the turntable soaks, focus on wall scrubbing inside the microwave. Use a gentle sponge or cloth dipped in a vinegar-water solution to wipe down all surfaces, targeting spots where pet mess might hide. Avoid abrasive tools that could damage the interior. After scrubbing, rinse with a damp cloth to remove residue. Once the turntable is clean and dry, place it back inside. Regular turntable maintenance and wall scrubbing keep your microwave fresh and ready for use, freeing you from stubborn pet mess worries.
Tips for Preventing Future Pet Messes
Since pet messes can quickly become a hassle, taking proactive steps to prevent them is key. Start with preventive pet proofing by keeping the microwave door closed when not in use and restricting your pet’s access to the kitchen. Use barriers or gates if needed. Incorporate simple training techniques to teach your pet boundaries around kitchen appliances. Reward calm behavior and redirect curiosity away from the microwave. Consistency in training helps your pet understand limits, reducing accidents. Regularly clean up any minor spills immediately to discourage repeat messes. By combining preventive pet proofing with effective training techniques, you’ll enjoy more freedom without worrying about unexpected messes in your microwave. This approach saves time and keeps your kitchen fresh, letting you focus on what matters most.
Dealing With Lingering Pet Odors
Even with the best preventive measures, pet odors can linger in your microwave, making it unpleasant to use. To tackle those stubborn lingering scents, start by wiping down the interior with a mixture of equal parts water and white vinegar. This natural solution helps with odor neutralization without harsh chemicals. Then, place a bowl of water with lemon slices inside and run the microwave on high for a few minutes. The steam loosens trapped smells, while lemon adds a fresh scent. Afterward, leave the microwave door open to air out completely. Regularly repeating this process keeps your microwave smelling clean and free, so you can enjoy your freedom from pet-related odors every time you heat your food.
When to Consider Professional Microwave Cleaning
If your microwave has stubborn stains or persistent odors that home remedies can’t eliminate, it might be time to call in a professional. Knowing when to hire expert help can save you time and prevent further issues. You should consider professional microwave cleaning if you notice signs of damage like corrosion, cracks, or malfunctioning components. These issues not only affect performance but can also pose safety risks. Additionally, if odors linger despite deep cleaning or pet mess has seeped into hard-to-reach areas, a professional service can thoroughly sanitize and restore your microwave. Don’t hesitate to seek help when your efforts fall short—getting expert assistance guarantees your appliance stays safe and odor-free, giving you the freedom to enjoy a clean kitchen without stress.
Frequently Asked Questions
Can Pet Mess Damage the Microwave’S Electronics?
You might not realize it, but pet mess can actually harm your microwave’s electronics if left unchecked. Moisture and bacteria from the mess can seep into vents or control panels, risking damage and compromising microwave safety. To keep your freedom intact and avoid costly repairs, it’s smart to clean up spills quickly and regularly. That way, your microwave stays in top shape without limiting your lifestyle or convenience.
Are Pet-Safe Cleaning Products Available for Microwave Use?
Yes, you’ll find plenty of pet safe solutions designed specifically for cleaning your microwave without harmful chemicals. These cleaning alternatives often use natural ingredients like vinegar, baking soda, or lemon juice, so you can keep your space fresh and safe for your furry friends. Choosing these options lets you maintain freedom from harsh toxins while ensuring your microwave stays spotless and your pets stay healthy.
How Often Should Microwaves Be Cleaned if Pets Are Around?
Imagine your microwave as a tiny fortress, guarding your meals from unwanted pet germs. When pets roam freely, you’d want a higher cleaning frequency—ideally once a week—to maintain pet hygiene and keep your space fresh. This routine not only protects your food but also gives you the freedom to enjoy your kitchen without worry. Staying consistent with cleaning lets you embrace a carefree, healthy lifestyle alongside your furry friends.
Can Pet Hair Cause Microwave Malfunctions?
Yes, pet hair can cause microwave malfunctions if it builds up inside the appliance. When you don’t keep up with regular microwave maintenance, pet hair might clog vents or interfere with electrical components, leading to overheating or failure. To enjoy your freedom without worrying about breakdowns, make sure you clean your microwave often, especially if you have pets roaming around. Staying on top of this keeps your microwave running smoothly and hassle-free.
Is It Safe to Microwave Pet Food Immediately After Cleaning?
You can safely microwave pet food right after cleaning, as long as you confirm the microwave is totally dry and free from any soap residue. Microwave safety is key here—make certain no moisture or cleaning agents remain, since they can affect both the appliance and your pet’s food quality. Once everything’s clean and dry, go ahead and heat up your pet’s meal with confidence, giving them a fresh, safe dish every time.