Removing Tile From Bedroom Effectively
To remove tile from your bedroom effectively, start by inspecting the tiles for damage and plan your work. Gather tools like a pry bar, hammer, chisel, gloves, goggles, and dust masks to stay safe. Clear the room, protect nearby walls, and cover furniture before carefully breaking tiles with controlled hammer taps. Remove adhesive with appropriate scrapers or solvents, dispose of debris responsibly, and check your subfloor for repairs. For a smooth project and next steps, keep exploring expert tips and techniques.
Assessing the Condition of Existing Tile

Before you begin removing tile from your bedroom, you’ll want to carefully assess the condition of the existing tile. This tile condition assessment is essential to determine whether removal is necessary or if repairs might suffice. Start by using simple tile inspection methods like tapping tiles to listen for hollow sounds, which indicate loose adhesion. Check for visible cracks, chips, or discoloration that could signal underlying damage. Also, examine grout lines for wear or mold, as these might affect removal ease. By thoroughly evaluating the tile’s state, you’ll gain the freedom to plan your project efficiently and avoid unexpected setbacks. This upfront assessment empowers you to decide whether you’re dealing with a straightforward removal or a more complex renovation.
Gathering Essential Tools and Safety Gear
Once you’ve evaluated the tile’s condition, you’ll need to gather the right tools and safety gear to guarantee a smooth and safe removal process. Essential gear includes a sturdy pry bar, a hammer, a chisel, and a heavy-duty scraper to tackle stubborn tiles. Don’t forget knee pads to protect your joints and gloves to shield your hands from sharp edges. Safety procedures are vital—wear safety goggles to guard your eyes from flying debris and a dust mask to avoid inhaling harmful dust particles. Having a durable garbage bin or heavy-duty bags nearby will help you manage the waste efficiently. By preparing these tools and following basic safety procedures, you’re setting yourself up for freedom from old tile without risking injuries or unnecessary delays.
Preparing the Bedroom for Tile Removal

Before you start removing the tile, make sure to clear the room completely to give yourself plenty of space. You’ll also want to protect adjacent areas from dust and debris by covering them properly. Finally, double-check that you have all the necessary tools within reach to keep the process smooth.
Clear the Room
To get started with removing tile from your bedroom, you’ll need to clear the room completely. This step is essential for effective tile removal techniques and guarantees you have full access to the floor without any obstacles. Here’s how to liberate your space:
- Remove all furniture, including beds, dressers, and nightstands, to avoid damage and give yourself room to work.
- Take down any rugs or carpets so they don’t interfere with the tile removal or get damaged.
- Clear out smaller items like lamps, decor, and electronics to protect them from dust and debris.
Protect Adjacent Areas
After clearing the room, the next step is to protect the areas adjacent to your workspace. Adjacent protection is essential to keep your walls, furniture, and flooring safe from dust, debris, and accidental damage during tile removal. You’ll want to use sturdy plastic sheeting or drop cloths to create effective area shielding around doorways, baseboards, and any fixtures nearby. Secure these coverings with painter’s tape to prevent them from shifting. This simple step saves you from extra cleanup and repairs later, letting you focus on the task without worries. Taking time to shield your surroundings guarantees your freedom to work efficiently while preserving the rest of your bedroom’s condition. Protecting adjacent areas upfront keeps the project smooth and damage-free.
Gather Necessary Tools
Since tile removal can get messy and physically demanding, you’ll want to gather all the necessary tools beforehand to make the process smoother. Different tile types and adhesive options call for specific equipment, so being prepared lets you work freely and efficiently. Here’s what you’ll need:
- Pry Bar and Hammer – Essential for loosening tiles and breaking through tough adhesives.
- Floor Scraper or Chisel – Helps remove residual adhesive and smaller tile pieces.
- Safety Gear – Gloves, goggles, and a dust mask protect you from sharp edges and dust.
Having these tools ready guarantees you won’t be interrupted searching for supplies, allowing you to focus on reclaiming your bedroom space with ease. No matter the tile or adhesive, the right tools make your freedom from old flooring effortless.
Techniques for Breaking and Removing Tiles

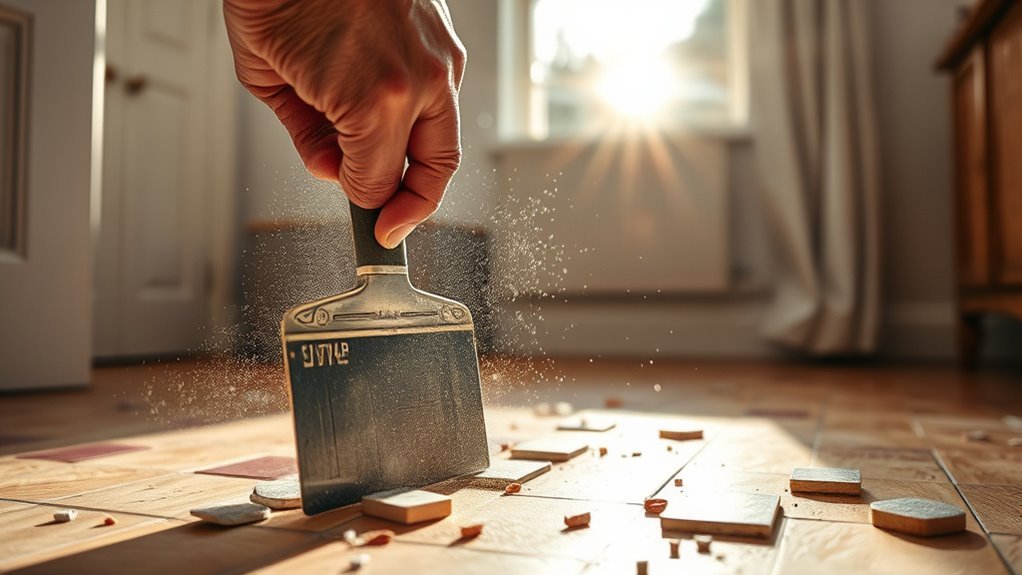
Start by scoring the tile with a utility knife or a grout removal tool to weaken its surface. For tile removal safety, always wear gloves and eye protection to avoid injury from sharp shards. Use a hammer and chisel for effective chiseling—place the chisel at the scored line and tap gently to break the tile without damaging the subfloor. Patience and control give you freedom to work cleanly.
| Tool | Purpose | Tip |
|---|---|---|
| Utility Knife | Score tile surface | Apply steady pressure |
| Grout Removal Tool | Weaken grout lines | Follow grout edges precisely |
| Hammer | Tap chisel | Use controlled, gentle taps |
This method guarantees tiles break where you want, making removal smoother and safer.
Handling Adhesive and Mortar Removal
Once you’ve removed the tiles, you’ll need to tackle the adhesive and mortar left behind. Different types of residue may require specific tools or safe chemical solvents to clean effectively. Knowing what to use will make the cleanup quicker and prevent damage to your floor.
Types of Adhesive Residue
Adhesive residue left behind after removing tile can vary widely in texture and hardness, which affects how you’ll approach its removal. Knowing the adhesive types helps you choose the best method to regain your freedom from stubborn messes. Here are common residues you might face:
- Thinset Mortar: A hard, cement-based adhesive that’s tough to scrape off, often requiring some effort and patience.
- Mastic: A sticky, tar-like glue that can be softer but leaves a gummy residue needing solvent or heat.
- Epoxy Adhesive: Extremely durable and chemical-resistant, demanding specialized removers or mechanical methods.
Understanding these adhesive types sets you on the right path for effective residue removal, freeing your space and your time with less frustration.
Tools for Mortar Removal
Although removing mortar can be tough, having the right tools makes the job much easier and faster. You’ll want to start with mortar chisels—they’re designed to chip away stubborn mortar without damaging your subfloor. Their sharp edges help you regain control quickly, giving you freedom to work at your own pace. For larger areas or thicker mortar, electric scrapers are a game-changer. They power through adhesive with less effort, speeding up the process and reducing strain. Both tools empower you to tackle mortar removal efficiently, so you’re not stuck wasting time or energy. Choosing the right combination of mortar chisels and electric scrapers lets you reclaim your space faster and enjoy the freedom that comes with a clean slate.
Safe Chemical Solvents
While mortar chisels and electric scrapers help physically remove mortar and adhesive, some stubborn spots might need a bit more help. When you turn to chemical solvents, it’s essential to prioritize chemical safety. Not all solvent types are created equal, so choosing the right one is key to maintaining your freedom from harmful fumes and damage.
Here’s how to handle solvents safely:
- Select solvent types designed specifically for tile adhesive and mortar removal to avoid surface damage.
- Always work in a well-ventilated area to minimize inhalation risks.
- Wear gloves and protective eyewear to shield your skin and eyes.
Managing Dust and Debris During the Process
Since tile removal can stir up a lot of dust and debris, you’ll want to prepare your space carefully to keep the mess contained. Start by sealing off the bedroom with plastic sheeting and use painter’s tape to secure it. This simple step helps with dust control by preventing particles from spreading to other areas. Wear a dust mask and goggles to protect yourself as you work. For debris management, keep a heavy-duty trash bag or bucket nearby to collect broken tiles immediately, minimizing clutter. Regularly sweep or vacuum the work area with a vacuum equipped with a HEPA filter to capture fine dust. Taking these precautions lets you maintain a cleaner, safer space while enjoying the freedom to focus on the job without unnecessary cleanup hassles.
Protecting Walls and Fixtures From Damage
Before you start removing tile, it’s important to protect your walls and fixtures to avoid accidental damage. You want to maintain your freedom to move and work without worrying about costly repairs. Focus on wall protection and fixture safeguarding by following these steps:
- Cover adjacent walls with painter’s plastic or thick cardboard to shield them from flying debris.
- Use painter’s tape to secure the coverings and prevent dust from sneaking in behind them.
- Temporarily remove or shield fixtures like light switches, outlet covers, and baseboards to keep them intact.
Disposing of Old Tiles and Waste Responsibly
When you’re ready to dispose of old tiles, it’s important to follow local waste regulations to avoid fines and environmental harm. You can often find eco-friendly disposal options like recycling centers that accept construction debris. Taking these steps helps keep your project green and compliant.
Eco-Friendly Disposal Methods
Disposing of old tiles in an eco-friendly way helps reduce landfill waste and environmental impact. You don’t have to feel tied down by traditional disposal methods. Instead, consider these options to keep your freedom intact while being responsible:
- Explore recycling options—many facilities accept ceramic and porcelain tiles, turning them into road base or new products.
- Donate usable tiles to community centers or art projects; it’s a great way to give your tiles a second life.
- While composting tiles isn’t feasible, you can crush some natural stone tiles to mix with soil, improving drainage and aeration in your garden.
Local Waste Regulations
Understanding local waste regulations is essential to handle old tiles and debris properly. Before you start, check if your area requires waste permits for tile disposal. These permits guarantee that you’re following the rules without unnecessary hassle. Don’t just toss your tiles in the trash; many communities offer local recycling options specifically for construction materials. Taking advantage of these programs helps keep your freedom intact by avoiding fines or complications. You’ll want to separate tiles from other waste and transport them to the designated recycling centers. Staying informed about your local waste regulations lets you dispose of old tiles responsibly, keeping your project smooth and eco-friendly. By doing this, you respect the community’s standards while maintaining control over your renovation process.
Inspecting Subfloor After Tile Removal
How do you know if your subfloor survived the tile removal process? A thorough subfloor inspection is essential to guarantee your floor is ready for what’s next. Start with a damage assessment focusing on these three key points:
- Look for cracks and holes – Small cracks may be repairable, but big holes need immediate attention.
- Check for moisture – Moisture can warp or weaken the subfloor, so use a moisture meter or look for discoloration.
- Test stability – Walk around and press on the subfloor; any soft spots indicate underlying issues.
Preparing the Floor for New Flooring Installation
Before you install new flooring, you’ll need to make certain the subfloor is clean, level, and fully dry to provide a solid foundation. This step guarantees your new flooring options perform well and last longer. Depending on the material, different installation techniques require specific subfloor conditions—some need moisture barriers, others demand perfect flatness. Here’s a quick guide to help you prep:
| Task | Purpose |
|---|---|
| Clean debris | Prevents uneven surfaces |
| Check level | Avoids gaps and damage |
| Dry thoroughly | Prevents mold and warping |
| Repair cracks | Guarantees stability |
| Install underlayment | Enhances comfort and soundproofing |
Prepping right grants you freedom to explore diverse flooring options without worries. Your new floor’s success depends on this vital step.
Frequently Asked Questions
Can I Remove Tile Myself Without Professional Help?
Funny enough, you don’t need to be a pro to tackle tile removal yourself. With some DIY tips, you can save money and gain freedom over your space. Just remember to prioritize tile safety—wear gloves, goggles, and a mask to protect yourself from sharp edges and dust. Taking your time and using the right tools will make the job manageable. So yes, you can definitely do it yourself!
How Long Does Tile Removal Usually Take in a Bedroom?
Your tile removal timeline can vary quite a bit, usually taking anywhere from a few hours to a couple of days. Factors influencing duration include the size of your bedroom, the type of tile, and the adhesive used. If you’re going for freedom from professional constraints, you’ll want to prepare for some physical work and possibly unexpected challenges. Knowing these factors helps you plan and enjoy the process on your own terms.
What Are the Common Mistakes to Avoid During Tile Removal?
When tackling tile removal, watch out for common pitfalls like skipping proper preparation steps or rushing the process. You don’t want to damage your subfloor or walls, so take your time setting up protective gear and clearing the area. Avoid using the wrong tools, which can make the job harder and risk injury. Staying patient and prepared gives you the freedom to handle the project smoothly and confidently, without unnecessary setbacks.
Will Tile Removal Increase My Home’S Resale Value?
You might wonder if tile removal will boost your home’s resale value. It really depends on current flooring trends and what buyers in your area prefer. If the tile looks outdated or damaged, replacing it with something fresh can definitely help. But if the tile’s stylish and in good shape, removing it might not add value. Trust your instincts and go with what feels right for your freedom to personalize.
Are There Eco-Friendly Alternatives to Traditional Tile Disposal?
You’ll be glad to know there are recycling options that let you ditch traditional tile disposal while embracing sustainable practices. Instead of sending tiles to landfill, you can find local facilities that crush and repurpose tile fragments for construction or landscaping. By choosing these eco-friendly routes, you’re not just freeing your space—you’re also freeing yourself from guilt, knowing you’re contributing to a greener planet in a simple, impactful way.
