Spring Cleaning Guide for Germs
When you tackle spring cleaning for germs, focus on everyday hotspots like light switches, doorknobs, and remote controls that collect more bacteria than you might expect. Use microfiber cloths and disinfectant sprays to wipe these surfaces daily, letting them air dry for the best results. Don’t forget to clean kitchen counters properly, scrub bathroom grout, and wash bedding regularly. With the right supplies and a solid routine, you’ll create a healthier home—and there’s plenty more to help you keep germs at bay.
Understanding Common Germ Hotspots in Your Home

Although your home may look clean, germs can lurk in unexpected places. You might assume the obvious spots like the kitchen sink or bathroom handle are the main germ hotspots, but common areas such as light switches, remote controls, and door knobs often harbor more bacteria than you think. These frequently touched surfaces easily become breeding grounds for germs, especially when you’re sharing your space with others. Understanding where these hotspots are is the first step to reclaiming your home’s freedom from unseen threats. By focusing your attention on these everyday touchpoints, you gain control over your environment and reduce the risk of illness. Remember, it’s not just about tidiness—it’s about creating a safe, healthy space where you can truly feel free.
Essential Cleaning Supplies for Effective Germ Removal
When you’re tackling germ hotspots, having the right cleaning supplies makes all the difference. You’ll want reliable cleaning tools that can reach every nook and cranny—think microfiber cloths and scrub brushes that don’t just push dirt around but actually lift it away. Disinfecting sprays are your secret weapon; pick ones that kill a broad spectrum of germs without harsh chemicals that restrict your freedom to breathe easy. Make sure your supplies are versatile so you can move quickly between different surfaces without wasting time or effort. By arming yourself with efficient cleaning tools and effective disinfecting sprays, you can confidently reclaim your space from germs and enjoy the freedom of a truly clean home.
Best Practices for Disinfecting Kitchen Surfaces

Having the right cleaning supplies sets you up for success, especially in busy areas like the kitchen. To keep germs at bay, focus on these best practices for disinfecting kitchen surfaces:
- Cutting board hygiene: Use separate boards for raw meat and veggies, and disinfect them after each use with a bleach solution or vinegar to prevent cross-contamination.
- Know your countertop materials: Different surfaces need different care. Granite and quartz require gentle cleaners, while laminate can handle more robust disinfectants. Avoid harsh chemicals that damage finishes.
- Regular wipe-downs: Don’t wait until mess piles up. Wipe surfaces daily with a disinfectant spray, paying extra attention to high-touch spots like faucet handles.
Master these steps and enjoy a kitchen that’s not only clean but free from harmful germs.
How to Sanitize Bathroom Areas Thoroughly
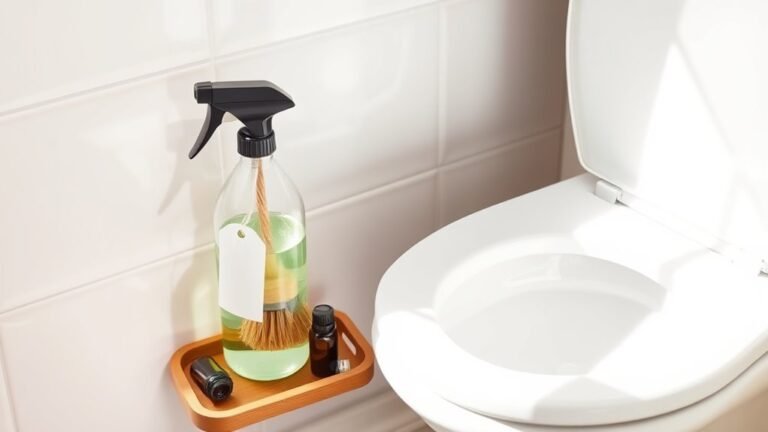
Since bathrooms are high-traffic areas prone to germs and moisture, you’ll want to sanitize them thoroughly to keep your space healthy and fresh. Start with toilet sanitation: use a strong disinfectant and let it sit for several minutes before scrubbing all surfaces, including under the rim. Flush and rinse well. Next, focus on shower disinfecting—spray a bathroom cleaner with antimicrobial properties on walls and floors, paying special attention to grout and corners where mold can hide. Let it work, then scrub and rinse. Don’t forget to open windows or use a fan to speed drying, preventing moisture buildup. By tackling toilet sanitation and shower disinfecting with precision, you’ll reclaim your bathroom as a clean, germ-free zone that supports your freedom to relax and refresh.
Strategies to Clean and Disinfect High-Touch Items

After giving your bathroom a deep clean, it’s important to turn your attention to the high-touch items throughout your home. These surfaces are hotspots for germs, so effective germ prevention is key to keeping your space healthy and free. Here’s how to tackle them:
- Identify high touch surfaces like doorknobs, light switches, remotes, and faucet handles. These get touched multiple times daily.
- Use disinfectant wipes or sprays approved to kill germs. Wipe thoroughly, letting surfaces air dry to maximize effectiveness.
- Clean these items regularly—daily if possible. Consistency is your best defense against germ buildup.
Proper Techniques for Laundering Bedding and Linens
Though laundering bedding and linens might seem straightforward, using the right techniques guarantees they stay fresh, clean, and last longer. You’ll want to weigh fabric types and laundry temperatures carefully to protect fibers and kill germs effectively. For instance, cotton can usually handle hotter water, while delicate fabrics need cooler cycles. Sorting your laundry by fabric and color prevents damage and fading.
| Fabric Type | Recommended Laundry Temperature | Detergent Type | Drying Method | Special Care Tips |
|---|---|---|---|---|
| Cotton | Hot (130°F/54°C) | Regular | Tumble dry | Wash whites separately |
| Linen | Warm (104°F/40°C) | Mild | Air dry | Avoid bleach |
| Silk | Cold (86°F/30°C) | Gentle | Air dry | Hand wash recommended |
| Polyester | Warm (104°F/40°C) | Regular | Tumble dry | Low heat drying |
| Wool | Cold (86°F/30°C) | Wool-specific | Lay flat | Avoid agitation |
Tips for Maintaining a Germ-Free Living Room
Keeping your bedding fresh is just one part of a clean home; maintaining a germ-free living room helps create a healthier environment for you and your guests. To keep your space fresh and free from germs, focus on these essentials:
- Choose the right furniture materials – Opt for non-porous materials like leather or treated wood that resist bacteria buildup and are easier to clean.
- Regularly clean high-touch surfaces – Don’t forget remote controls, door handles, and tabletops, which can harbor germs.
- Invest in air purification – Use air purifiers with HEPA filters to reduce airborne germs and allergens, boosting your living room’s overall freshness.
With these tips, you’ll enjoy a living room that feels open, clean, and truly free from unwanted germs.
Incorporating Natural Cleaners to Combat Germs
When you want to reduce chemicals in your home, natural cleaners offer a powerful way to combat germs without harsh ingredients. You can rely on simple natural ingredients like vinegar, baking soda, and lemon juice to clean surfaces effectively. These eco friendly options not only kill germs but also minimize your environmental impact, giving you the freedom to maintain a healthy space without toxic residues. Plus, making your own natural cleaner is easy and affordable, letting you control exactly what goes into your home. By choosing these alternatives, you’re embracing a lifestyle that values both cleanliness and sustainability. So go ahead—swap out those chemical-laden products for natural solutions that keep your home fresh and germ-free with peace of mind.
Creating a Regular Cleaning Schedule to Prevent Germ Build-Up
To keep germs from piling up, you’ll want to set up daily cleaning habits that tackle high-touch areas. Then, plan a weekly deep cleaning session to refresh your whole space thoroughly. Sticking to this schedule makes maintaining a healthy home much easier.
Daily Cleaning Habits
Although it might seem time-consuming, establishing daily cleaning habits can save you from bigger messes and germ build-up later on. To keep your space fresh without feeling trapped by chores, try integrating simple daily routines that fit your lifestyle. Use cleaning checklists to stay on track and avoid forgetting critical tasks. Here’s a quick daily routine to follow:
- Wipe down high-touch surfaces like doorknobs, light switches, and countertops.
- Tidy up clutter to prevent dust and germs from accumulating.
- Wash dishes or load the dishwasher to keep the kitchen germ-free.
Weekly Deep Cleaning
Since daily habits keep things manageable, weekly deep cleaning tackles areas that often get overlooked but can harbor germs. By setting up weekly checklists, you create a freeing routine that prevents buildup without overwhelming your schedule. These cleaning routines help you reclaim your space and peace of mind.
| Area to Deep Clean | Task Example |
|---|---|
| Kitchen | Clean fridge shelves |
| Bathroom | Scrub grout lines |
| Living Room | Dust baseboards |
| Bedroom | Wash bedding thoroughly |
Stick to this plan weekly, and you’ll minimize germs while maintaining freedom from constant chores. Your home stays fresh, and your time remains yours.
Frequently Asked Questions
How Often Should I Replace My Cleaning Sponges to Avoid Germ Buildup?
You should replace your cleaning sponges every one to two weeks to keep germ prevention on point. Sponges have a short lifespan because they trap bacteria and germs quickly. If you want to stay free from unwanted germs, don’t push your sponge’s limits. Tossing it regularly guarantees your cleaning stays fresh and effective, giving you the freedom to enjoy a healthier, cleaner space without worrying about hidden buildup.
Can Using a Humidifier Affect Germ Growth in My Home?
Using a humidifier can definitely affect germ growth in your home. When humidity levels get too high, it creates the perfect environment for germ proliferation, including mold and dust mites. You’ll want to keep your humidity between 30-50% to avoid this. If you’re free to control it, use a hygrometer to monitor levels and adjust your humidifier accordingly, keeping germs in check while enjoying comfortable air.
Are UV Light Sanitizers Effective for Everyday Household Cleaning?
UV light sanitizers can be effective for everyday household cleaning, but their UV effectiveness depends on proper use. They work best on smooth surfaces and require direct exposure to the light to kill germs. However, UV sanitization methods shouldn’t replace regular cleaning since dirt can block the light. If you want freedom from harsh chemicals and extra germ control, UV sanitizers can be a great addition, just don’t rely on them alone.
What Is the Safest Way to Dispose of Used Disinfectant Wipes?
When it comes to disinfectant disposal, you’ll want to toss used wipes in the trash—not the recycling bin—since wipe recycling isn’t typically available and can mess up the system. Don’t flush them either; they can clog pipes and harm the environment. To keep things safe and free-flowing, bag your used disinfectant wipes securely before disposing of them in regular trash. This way, you’re protecting your home and nature without any hassle.
How Do Pets Influence Germ Presence and Cleaning Routines in the Home?
Did you know pets can carry up to 300 different types of bacteria? When you have furry friends, pet hygiene becomes essential because they create unique germ hotspots like bedding and food bowls. You’ll want to clean these areas regularly to keep your home fresh and safe. Embracing simple routines lets you enjoy your freedom while managing germs effectively, so your space stays comfy without feeling like a chore.