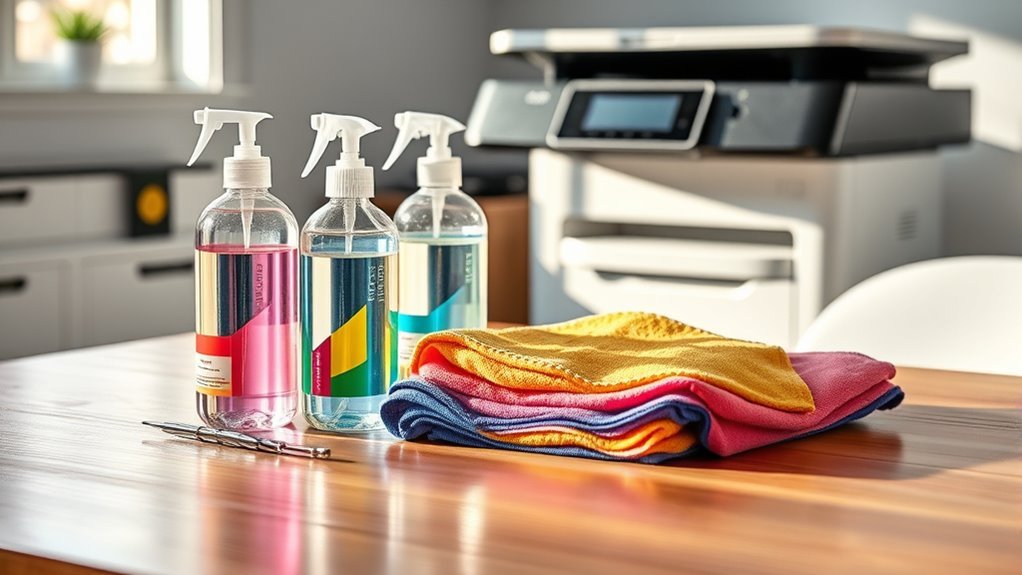
Spring Cleaning Guide for Printer
For a thorough spring cleaning, first gather lint-free cloths, cotton swabs, and gentle cleaning solutions. Power off and unplug your printer to stay safe. Remove ink or toner cartridges carefully, wiping them with a damp cloth. Clear any paper jams by gently pulling stuck paper in its natural direction. Clean rollers regularly to avoid feeding issues. Wipe the exterior and control panel with a soft cloth. Run built-in cleaning software and check for worn parts. Keep this routine consistent to guarantee great print quality. More detailed tips can help you maintain your printer like a pro.
Gather Necessary Cleaning Supplies

Before you begin cleaning your printer, you’ll need to gather a few essential supplies. Having the right tools makes the process smooth and efficient. Start with a reliable printer cleaning kit, which typically includes specialized wipes, cleaning solution, and swabs designed to safely remove dust and ink residue. These kits are your best bet for effective maintenance without risking damage. Besides the kit, gather essential tools like lint-free cloths, cotton swabs, and a small brush for hard-to-reach areas. Avoid using harsh chemicals or rough materials that could harm delicate components. By preparing these supplies upfront, you guarantee a thorough cleaning session that helps your printer perform freely and reliably for longer. Being equipped empowers you to maintain your printer without hassle.
Power Down and Unplug Your Printer
To start cleaning your printer safely, you need to power it down completely and unplug it from the electrical outlet. This step is essential for printer safety, preventing any accidental electrical shocks or damage while you work. Always verify the device is fully off before disconnecting the power cord. Taking these electrical precautions gives you the freedom to clean without worry. Avoid rushing this step; even if your printer was idle, residual power can pose risks. After unplugging, wait a few minutes to let internal components cool down. With the printer powered down and unplugged, you’re ready to proceed confidently with your spring cleaning, knowing you’ve minimized any hazards and protected both yourself and your equipment effectively.
Remove and Clean Ink or Toner Cartridges

Now that your printer is powered down, it’s time to carefully remove the ink or toner cartridges following the manufacturer’s instructions. You’ll want to clean them gently using appropriate methods to avoid damage. After cleaning, make sure the cartridges are completely dry before reinstalling them to guarantee peak performance.
Cartridge Removal Steps
Although it might seem straightforward, removing your printer’s ink or toner cartridges requires careful handling to avoid damage. First, power off your printer and unplug it to guarantee safety. Open the cartridge access door gently, and locate the cartridges—note that cartridge types vary by model. To avoid leaks or damage, hold each cartridge firmly and pull it straight out without twisting. Pay attention to the cartridge lifespan; removing cartridges prematurely can waste ink or toner. Place the cartridges on a clean, protected surface to prevent spills. Avoid touching the electrical contacts or nozzles, as this can affect print quality. Following these steps lets you safely remove cartridges, setting you up to clean or replace them without risking harm to your printer or cartridges.
Cleaning Techniques Overview
Before you start cleaning, make certain you’ve safely removed the cartridges as described earlier. Proper cleaning methods are crucial to keep your printer running smoothly and extend cartridge life. Here are some maintenance tips to help you clean your ink or toner cartridges effectively:
- Use a lint-free cloth dampened with distilled water or isopropyl alcohol.
- Gently wipe the cartridge nozzles and contacts to remove dried ink or toner residue.
- Avoid touching the cartridge nozzles directly with your fingers.
- Do not soak cartridges in water or cleaning solutions.
- Handle cartridges carefully to prevent damage during cleaning.
Following these cleaning methods guarantees peak print quality and prevents clogs or smudges. Keep these maintenance tips in mind for a hassle-free spring cleaning experience.
Drying and Reinstallation
Once you’ve carefully cleaned your ink or toner cartridges, you’ll want to make sure they’re completely dry to avoid any damage or smudging when reinstalled. Use gentle drying techniques like air drying on a lint-free cloth or paper towel. Avoid using heat sources, which can warp or damage the cartridges. Once dry, handle cartridges by their edges to prevent fingerprints or contamination. When reinstalling, align cartridges properly according to your printer’s instructions—this prevents jams and guarantees smooth operation. Press firmly but gently until you hear a click, confirming the cartridge is securely seated. Following these drying techniques and reinstallation tips helps maintain print quality and extends your printer’s lifespan. Taking these steps grants you freedom from print errors and lets you enjoy crisp, clear documents.
Clear Paper Jams and Debris

To keep your printer running smoothly, start by locating any paper jams inside the device. Carefully remove any stuck paper without tearing it to prevent further issues. Finally, clean the paper pathways to clear out dust and debris that might cause future jams. It is also important to power off and unplug the printer before cleaning to ensure safety and prevent damage.
Identifying Jam Locations
Where exactly is that paper jam hiding in your printer? Identifying jam locations is key to efficient jam prevention and quick troubleshooting tips. Start by checking these common trouble spots:
- Paper tray: Look for misaligned or overloaded paper.
- Output area: Inspect for stuck or crumpled sheets.
- Inside the printer cover: Remove debris or torn paper fragments.
- Rollers: Check for worn or dirty rollers causing feed issues.
- Rear access panel: Some jams hide deep inside here.
Removing Stuck Paper
Dealing with stuck paper can be tricky, but following a few careful steps will help you clear jams without damaging your printer. First, power off your device to avoid any mechanical issues. Open all accessible areas where paper jams might occur, gently removing the stuck paper by pulling it slowly in the paper’s natural direction. Avoid tearing to prevent leftover scraps. Check the paper types you’re using—thicker or damaged sheets may cause frequent jams. Adjust your printer settings to match the paper type, guaranteeing smooth feeding. After removal, inspect for any debris or small bits that could cause future jams. Close all covers securely before powering on. Taking these steps guarantees your printer remains free from jams and functions smoothly, giving you more freedom to print without interruptions.
Cleaning Paper Pathways
Once you’ve cleared any stuck paper, it’s important to clean the paper pathways thoroughly to prevent future jams and debris buildup. Regular attention to paper path obstructions keeps your printer running smoothly and extends its life. Stick to a cleaning frequency that fits your usage—more often if you print frequently.
Here’s how to keep the paper pathways clear:
- Power off and unplug your printer for safety.
- Use a soft, lint-free cloth to wipe away dust and debris.
- Check rollers and guides for stuck bits of paper or dust.
- Remove any visible obstructions carefully without forcing parts.
- Consider using compressed air to blow out hard-to-reach debris.
Clean the Printer Rollers
Although cleaning the printer rollers might seem minor, it’s essential for maintaining smooth paper feeding and preventing jams. You’ll want to focus on different roller types—feed, separation, and pickup rollers—each requiring attention. Cleaning frequency depends on your printer usage, but a general rule is to clean rollers every 3-6 months.
Here’s a quick guide:
| Roller Type | Purpose | Cleaning Frequency |
|---|---|---|
| Feed Roller | Moves paper forward | Every 3 months |
| Separation Roller | Prevents multiple sheets | Every 6 months |
| Pickup Roller | Picks up paper from tray | Every 3 months |
Use a lint-free cloth slightly dampened with water or isopropyl alcohol. Gently wipe rollers to remove dust and debris, ensuring freedom from jams and smooth printing.
Wipe Down the Exterior and Control Panel
To keep your printer looking fresh, you’ll want to use safe cleaning materials like a soft, lint-free cloth lightly dampened with water or a mild cleaner. Start by gently wiping the exterior surfaces to remove dust and smudges. Then, carefully clean the control panel to avoid damaging any buttons or touchscreens.
Safe Cleaning Materials
When cleaning your printer’s exterior and control panel, choosing the right materials is essential to avoid damage. You want effective, safe options that protect your device and align with your values. Consider eco friendly options or simple homemade solutions to keep things green and budget-friendly. Avoid harsh chemicals that can harm surfaces or leave residues.
Here are safe materials to use:
- Microfiber cloths for gentle wiping
- Distilled water mixed with a small amount of mild dish soap
- Isopropyl alcohol diluted to 70% for stubborn spots
- Eco friendly cleaning sprays designed for electronics
- Cotton swabs for tight spaces and control panel buttons
These choices help you clean thoroughly while preserving your printer’s finish and functionality.
Step-by-Step Wiping
Start by gathering three key items: a microfiber cloth, your chosen cleaning solution, and cotton swabs. First, lightly dampen the microfiber cloth with the cleaning solution—never soak it. Use gentle wiping techniques to clean the printer’s exterior, moving in smooth, circular motions to avoid streaks. Pay special attention to corners and vents where dust collects. For the control panel, use a dry cotton swab to carefully remove dirt between buttons and crevices, preventing moisture damage. Maintain a regular cleaning frequency—wiping down your printer once a month keeps dust and grime at bay, ensuring smooth operation. By following these precise steps, you’ll preserve your printer’s appearance and functionality, giving yourself the freedom to print without interruptions or maintenance hassles.
Use Printer Cleaning Software
Although physical cleaning is essential, using printer cleaning software can greatly enhance your printer’s performance. These tools help you maintain your device without hassle, giving you more freedom from frequent jams or poor print quality. Here are some printer maintenance tips and software recommendations to keep your printer running smoothly:
Using printer cleaning software complements physical cleaning for smoother operation and fewer jams or print issues.
- Run the built-in print head cleaning utility regularly
- Use manufacturer-recommended software for best results
- Schedule automatic maintenance checks to prevent issues
- Use diagnostic tools to identify and fix errors quickly
- Update printer drivers and software to guarantee compatibility
Check and Replace Printer Components if Needed
Maintaining your printer’s software is just one part of keeping it in top shape; you also need to regularly inspect its physical components. Start by checking replaceable components like ink or toner cartridges, paper trays, and print heads. Look for signs of wear, damage, or clogs that could affect print quality. If you spot any issues, don’t hesitate to replace these parts promptly to avoid bigger problems later. Printer maintenance isn’t just about cleaning; it’s about ensuring every component functions smoothly. Keeping an eye on these parts extends your printer’s life and keeps your prints sharp and reliable. By staying proactive with inspections and replacements, you’re giving yourself the freedom to print confidently whenever you need. Additionally, cleaning the rollers can eliminate smudging issues and improve overall print quality.
Perform a Test Print to Ensure Quality
One of the most effective ways to confirm your printer is working properly is to perform a test print. This simple step gives you immediate feedback on print quality and helps with quality assurance after cleaning or replacing components. Here’s how to get the most out of your test print:
- Check for streaks, smudges, or faded areas
- Guarantee colors are vibrant and accurate
- Verify text sharpness and alignment
- Confirm there are no paper jams or feed issues
- Repeat test prints if adjustments are made
Maintain Regular Cleaning Schedule
Since regular cleaning keeps your printer running smoothly, you should set a consistent schedule for it. Establishing a cleaning frequency based on your printer’s usage helps prevent issues before they arise. For light use, monthly cleanings work well; for heavy use, consider weekly checks. Follow maintenance tips like wiping rollers, cleaning the print head, and removing dust from internal parts. Mark your calendar or set reminders to stay on track—this simple habit saves you time and frustration. Regular upkeep not only extends your printer’s lifespan but also guarantees quality prints every time. By sticking to your cleaning frequency and applying these maintenance tips, you’re giving yourself the freedom to print confidently without unexpected interruptions or costly repairs.
Frequently Asked Questions
How Often Should I Deep Clean My Printer Internally?
Did you know that 30% of printer issues stem from poor printer maintenance? To keep your device running smoothly, you should deep clean it internally every 3 to 6 months, depending on usage. Setting a cleaning schedule helps prevent clogs and extends your printer’s lifespan. If you print frequently or notice quality drops, don’t wait—deep clean more often. Staying consistent gives you freedom from frustrating jams and errors.
Can Using the Wrong Cleaning Solution Damage My Printer?
Yes, using the wrong cleaning solutions can cause printer damage. Harsh chemicals or abrasive liquids might corrode internal parts, clog nozzles, or ruin delicate sensors. To avoid this, always choose cleaning solutions specifically designed for printers or recommended by the manufacturer. This way, you keep your printer running smoothly without risking costly repairs. You’ve got the freedom to maintain your device safely—just pick the right products for the job.
What Are the Signs That My Printer Needs Professional Servicing?
If your printer performance issues persist despite basic troubleshooting, it’s a sign you might need professional servicing. Watch out for common error messages that don’t clear or frequent paper jams and unusual noises. If print quality suddenly drops or your device won’t connect properly, don’t keep struggling. Getting expert help can save you time and avoid further damage, giving you the freedom to print smoothly again without hassle.
How Do Environmental Factors Affect Printer Maintenance?
Fluctuating factors like humidity levels and temperature fluctuations markedly sway your printer’s performance. When humidity is high, moisture can cause ink clumping or paper jams, while low humidity might dry out ink cartridges. Temperature swings can lead to condensation inside the printer, risking damage. To maintain freedom from frequent breakdowns, keep your printer in a stable, moderate environment, ensuring consistent care and smooth, reliable printing every time you need it.
Are There Eco-Friendly Ways to Dispose of Used Cartridges?
You can definitely dispose of used cartridges in eco-friendly ways. Many manufacturers and office supply stores offer recycling programs that let you return empty cartridges for proper processing. Instead of tossing them, consider cartridge refills, which extend the life of your ink and reduce waste. By choosing these options, you not only protect the environment but also enjoy the freedom of reducing your carbon footprint without hassle.


