Step-By-Step Guide to Cleaning Coffee Machine
To clean your coffee machine, first gather supplies like a soft cloth, mild detergent, and descaling solution. Unplug and cool the machine, then remove and rinse detachable parts. Next, descale to remove mineral buildup by following instructions carefully. Clean filters by soaking them in vinegar-water, and wipe down the exterior and drip tray with a damp cloth. After drying, reassemble your machine and test it. There’s more to keep your coffee tasting great and your machine running smoothly.
Gathering the Necessary Cleaning Supplies

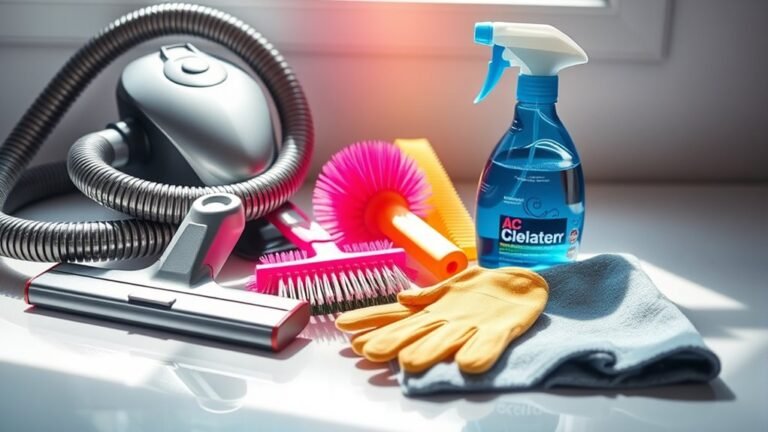
Before you begin cleaning your coffee machine, you’ll want to gather all the necessary supplies to make the process smooth and efficient. Having the right cleaning supplies and essential tools on hand means you won’t be interrupted or forced to improvise. Grab a soft cloth or sponge, a small brush to reach tight spots, and a container to catch any water or cleaner runoff. You’ll also need a mild detergent or a specialized coffee machine cleaner that’s safe for your model. Don’t forget white vinegar or descaling solution to tackle mineral buildup. By assembling these cleaning supplies beforehand, you’re setting yourself up for a quick, thorough job that keeps your coffee machine running freely and your mornings hassle-free. Freedom starts with preparation.
Preparing the Coffee Machine for Cleaning
Before you start cleaning, make sure to unplug the coffee machine and let it cool down completely. Then, remove all detachable parts like the filter basket and carafe. This will make the cleaning process safer and more effective.
Unplug and Cool Down
Although it might be tempting to start cleaning right away, you should always unplug your coffee machine and let it cool down completely first. This simple safety precaution protects you from electrical hazards and burns, giving you peace of mind as you take control of your machine maintenance. By unplugging, you cut power completely, preventing any unexpected starts. Waiting for the machine to cool also guarantees you won’t damage sensitive parts or risk scalding yourself. Taking this step lets you clean confidently and freely, without rushing or worrying. So, pause, unplug, and allow your coffee machine to cool—it’s an essential part of taking care of your device and enjoying the independence that comes with maintaining it yourself.
Remove Coffee Components
Start by removing all detachable parts of your coffee machine, such as the water reservoir, drip tray, and filter basket. This step frees you from any leftover coffee grounds or water that can cause buildup or unpleasant odors. If you have a coffee grinder attached, detach it carefully to clean its burrs and remove stale grounds. For espresso machine owners, take out the portafilter and any removable shower screens to guarantee every component is spotless. Doing this not only maintains your machine’s performance but also gives you control over every part, so you’re not tied down by hidden grime. Once these components are removed, rinse them under warm water, and let them dry completely before reassembling. This simple step is key to keeping your coffee experience fresh and unrestricted.
Descaling the Coffee Machine

You’ll want to descale your coffee machine regularly to prevent mineral buildup that can affect taste and performance. The process usually involves running a descaling solution through the machine to break down deposits. Following the right steps guarantees your coffee stays fresh and your machine lasts longer.
Importance of Descaling
Because minerals from water build up inside your coffee machine over time, descaling is crucial to keep it running smoothly. Ignoring this step can lead to clogs, poor taste, and even damage your machine. To enjoy freedom from breakdowns and stale coffee, you need to pay attention to descaling frequency and choose the right descaling solutions.
Regular descaling guarantees:
- Ideal brewing temperature and pressure
- Extended lifespan of your coffee machine
- Consistently fresh and flavorful coffee
- Prevention of costly repairs or replacements
Descaling Process Steps
Keeping up with descaling means knowing exactly how to carry out the process correctly. First, grab your preferred descaling solution—whether commercial or a natural mix—following the instructions carefully. Empty the water reservoir and pour in the descaling solution. Run a brewing cycle without coffee grounds to circulate the solution through the machine. Once done, let it sit for 15-30 minutes to break down mineral buildup. Then, rinse thoroughly by running multiple cycles with fresh water to clear out any residue. Remember, regular descaling is one of the best maintenance tips to keep your coffee tasting fresh and your machine running smoothly. Staying on top of this routine not only extends your machine’s life but also frees you from unexpected breakdowns and costly repairs.
Cleaning Removable Parts and Filters
Removable parts and filters play an essential role in your coffee machine’s performance and taste quality. Keeping these components clean lets you enjoy fresh, flavorful coffee without hassle. Here’s how to handle removable parts and filter maintenance:
Clean removable parts and filters regularly to ensure your coffee machine’s best performance and freshest taste.
- Detach all removable parts like the water reservoir, filter basket, and drip tray carefully.
- Rinse each part under warm water to remove coffee residue and oils.
- Soak filters in a vinegar-water solution for 15 minutes to dissolve buildup, then rinse well.
- Use a soft brush to gently scrub hard-to-reach areas, ensuring no grime remains.
Regular attention to these parts keeps your machine running smoothly and your coffee tasting great. It’s a small effort that grants you the freedom of consistently perfect brews.
Wiping Down the Exterior and Drip Tray

A clean exterior and drip tray not only make your coffee machine look great but also prevent sticky buildup and stains. To maintain your machine’s freedom from grime, gently wipe the exterior materials—like stainless steel, plastic, or glass—with a soft, damp cloth. Avoid harsh chemicals that can damage surfaces. For drip tray care, remove it carefully and rinse with warm, soapy water, ensuring all coffee residue and spills are washed away. Dry it thoroughly before placing it back to avoid mold or mildew. Regular attention to these parts keeps your coffee station inviting and your machine running smoothly, freeing you from sticky messes and preserving its sleek look. Remember, simple care routines empower you to enjoy great coffee every day.
Reassembling and Testing the Coffee Machine
Once you’ve cleaned and dried all the parts, it’s time to reassemble your coffee machine carefully. Start by reassembling components in the reverse order of disassembly, guaranteeing each piece fits securely without forcing. Take your time to avoid damaging any delicate parts. After reassembly, testing functionality is vital to confirm everything is working smoothly. Here’s how to proceed:
- Plug in the machine and fill the water reservoir.
- Run a brewing cycle without coffee grounds to flush out any residue.
- Check for leaks or unusual sounds during operation.
- Taste the first brew to verify flavor quality and consistent performance.
Frequently Asked Questions
How Often Should I Clean My Coffee Machine for Optimal Performance?
You should stick to a regular cleaning frequency to keep your coffee machine running smoothly and guarantee peak maintenance. Generally, it’s best to clean it every one to two weeks, depending on how often you use it. If you want your coffee to taste fresh and avoid buildup, don’t skip this routine. Keeping up with cleaning lets you enjoy your freedom to savor great coffee without hassle or machine issues.
Can I Use Vinegar Instead of Commercial Descaling Solutions?
You want cleaning that’s effective, affordable, and natural—you want freedom. Using vinegar as a descaling alternative offers vinegar benefits like removing mineral buildup and being eco-friendly. However, vinegar’s strong smell and acidity might affect your machine’s parts over time. If you choose vinegar, dilute it properly and rinse thoroughly. Ultimately, you can use vinegar, but weigh the pros and cons to keep your coffee machine running smoothly without restrictions.
What Are the Signs That My Coffee Machine Needs Descaling?
You’ll notice scaling indicators like slower brewing, unusual noises, or bitter-tasting coffee—that’s your machine begging for attention. If you want to keep your freedom from constant repairs, don’t ignore these signs. Maintenance frequency depends on your water hardness and usage, but if you spot scaling indicators, it’s time to descale. Staying on top of it means your coffee stays great, and your machine stays reliable without locking you down to frequent fixes.
Is It Safe to Clean the Coffee Machine With Bleach?
Imagine using bleach to clean your coffee machine like trying to fix a delicate watch with a hammer—it’s too harsh. Bleach can damage your machine’s parts and leave harmful residues. Instead, opt for bleach alternatives like vinegar or citric acid, which are safer and eco-friendly. Remember, regular cleaning frequency—about once a month—keeps your machine running smoothly without risking damage. This way, you enjoy freedom from worries and great-tasting coffee.
How Do I Prevent Mold Buildup Inside the Coffee Machine?
To prevent mold buildup inside your coffee machine, focus on mold prevention by regularly cleaning and drying all removable parts after use. Don’t leave water sitting inside the machine, as moisture encourages mold growth. Also, practice proper coffee storage—keep beans in airtight containers away from heat and humidity. These simple habits will give you the freedom to enjoy fresh, mold-free coffee every day without worrying about hidden buildup.


