Top 10 Tips for Cleaning Tile
To keep your tile clean and lasting, start by choosing a pH-neutral or tile-specific cleaner, avoiding harsh chemicals. Sweep and vacuum to remove loose dirt before washing. Use a soft-bristled brush to gently clean grout lines. Homemade vinegar and water solutions work well on tiles. Rinse thoroughly to prevent residue, then dry promptly to avoid spots. Don’t forget to seal grout regularly. Stick to a routine for lasting shine and durability—there’s plenty more to explore for expert care.
Choose the Right Cleaning Solution
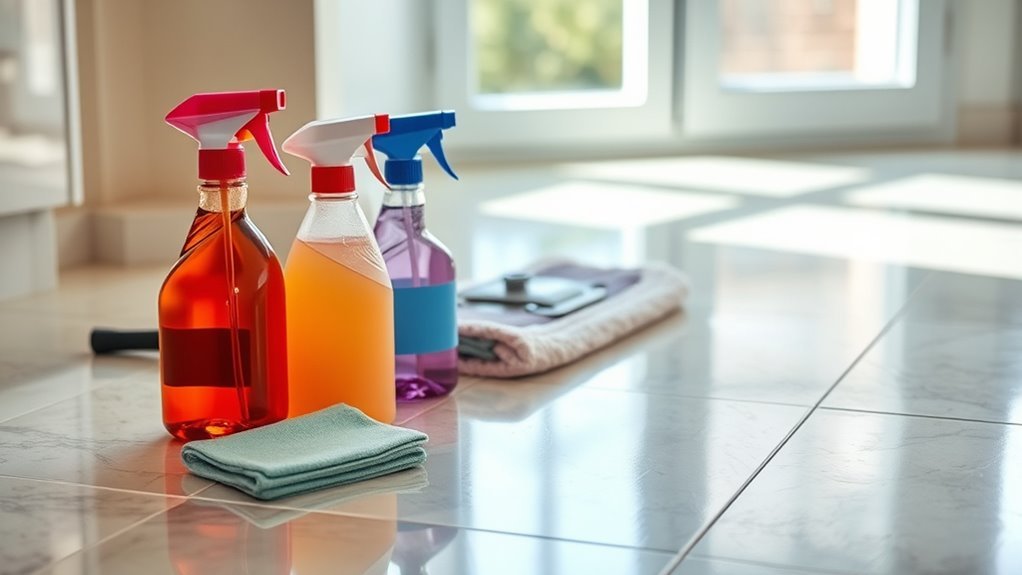
Before you begin cleaning your tile, it’s important to choose the right cleaning solution to avoid damage and guarantee effectiveness. Start by identifying your tile type, as surface compatibility is essential; some tiles react poorly to acidic or abrasive cleaners. Opt for eco friendly options when possible—they’re gentler on your tile and the environment, allowing you to clean without compromising your values. Check ingredient labels to verify the solution suits your tile’s material, such as ceramic, porcelain, or natural stone. Avoid harsh chemicals that could erode grout or dull finishes. By selecting a compatible, eco friendly cleaner, you maintain your tile’s integrity while enjoying a safe, effective cleaning process. This careful choice gives you freedom to maintain your space responsibly and confidently. Additionally, understanding the differences between cementitious and epoxy grout can help you select cleaning products that protect both tile and grout effectively.
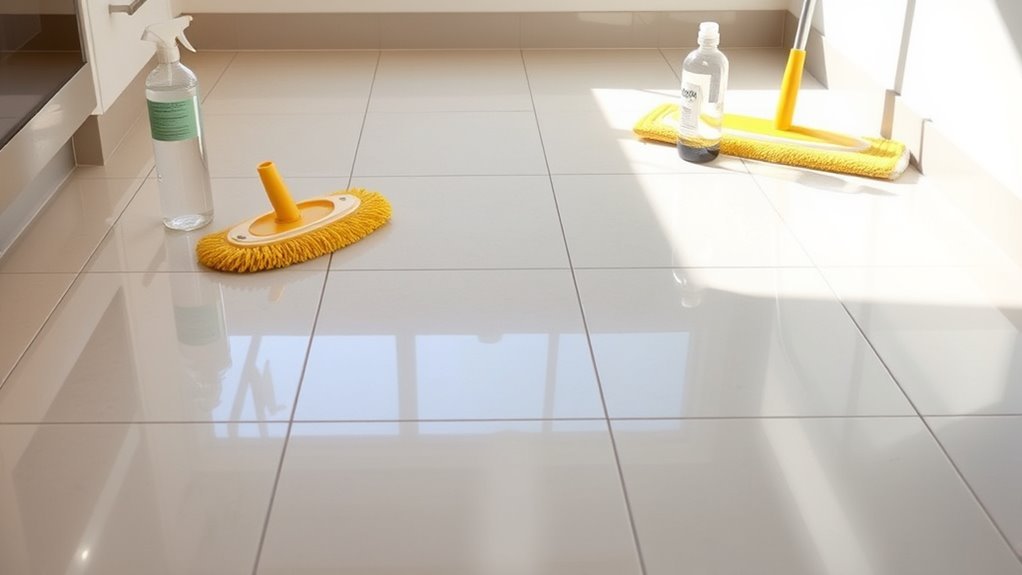
Sweep and Vacuum Before Washing
Two essential steps you should take before washing your tile are sweeping and vacuuming. These actions remove loose dirt and debris that can scratch your tiles during cleaning, ensuring effective tile maintenance. Begin with a broom or dust mop, sweeping in one direction to gather particles efficiently. Follow up by vacuuming, focusing on corners and grout lines where dust accumulates. Use a vacuum with a hard floor setting to avoid damage. Selecting the right cleaning tools is vital; avoid brushes with stiff bristles that might harm your tile’s surface. By thoroughly removing surface debris first, you create a clean base for washing, preventing dirt from spreading. This methodical approach not only protects your tiles but also prolongs their lifespan, giving you freedom from frequent deep cleaning. Additionally, paying attention to the condition of your grout during cleaning can help prevent discoloration and maintain overall tile appearance.
Use a Soft-Bristled Brush for Grout
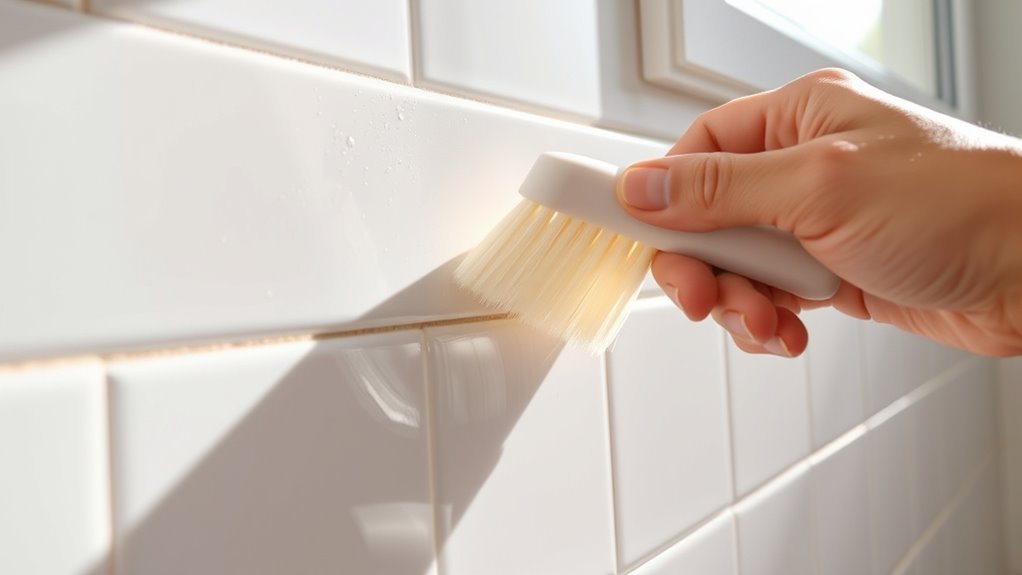
One of the most effective tools for maintaining clean grout lines is a soft-bristled brush. When tackling grout cleaning, using the right brush techniques guarantees you remove dirt without damaging your tile. Here’s how to maximize your results:
- Gently scrub grout lines with short, controlled strokes to lift grime without eroding the grout.
- Focus on one small section at a time, allowing for targeted cleaning and better control.
- Rinse the brush frequently to avoid redistributing dirt and to maintain effective cleaning power.
Using a soft-bristled brush is especially important because grout is porous and absorbs dirt, making gentle scrubbing essential to avoid damage.
Avoid Harsh Chemicals on Tile Surfaces
You should choose gentle cleaners to protect your tile surfaces from damage caused by harsh chemicals. Using natural alternatives like vinegar or baking soda can effectively clean without compromising the tile’s finish. This approach helps maintain the tile’s appearance and extends its lifespan. Additionally, selecting cleaning products with fewer toxic ingredients supports environmental well-being while keeping your home safe.
Choose Gentle Cleaners
Although it might be tempting to use strong chemicals for quick results, choosing gentle cleaners is vital to preserve the integrity of your tile surfaces. Harsh chemicals can erode tiles and grout over time, so opting for gentle solutions with natural ingredients is a smarter choice. Here’s how to select the best cleaners:
- Look for products labeled “pH-neutral” or specifically designed for tile to avoid damage.
- Consider homemade cleaners using vinegar, baking soda, or mild soap—these natural ingredients effectively clean without harsh effects.
- Always test a small, inconspicuous area first to verify the cleaner won’t discolor or damage your tile.
Prevent Surface Damage
Since harsh chemicals can quickly degrade tile surfaces and grout, it’s important to steer clear of them to maintain your flooring’s appearance and durability. To guarantee effective surface protection, avoid cleaners containing bleach, ammonia, or strong acids that can erode the tile finish or discolor grout. Instead, opt for mild detergents or pH-neutral products specifically designed for tile care. When applying any cleaner, always test a small, inconspicuous area first to check for adverse reactions. Consistent damage prevention also involves rinsing thoroughly to remove residue that might cause buildup or wear over time. By carefully selecting your cleaning agents and applying them methodically, you’ll extend the life of your tiles and preserve their original look without compromising your freedom to maintain a beautiful, safe home environment.
Use Natural Alternatives
Steering clear of harsh chemicals is key to protecting your tile surfaces, but that doesn’t mean you have to sacrifice cleaning power. Embracing natural cleaning and eco friendly solutions allows you to maintain your tiles effectively while preserving their integrity. Here are three reliable natural alternatives to evaluate:
- Vinegar and Water: Mix equal parts for a mild, effective cleaner that cuts through grime without damaging your tile.
- Baking Soda Paste: Combine with water to form a gentle abrasive that lifts stains and cleans grout.
- Castile Soap: Diluted with water, it provides a biodegradable, safe option for regular cleaning.
Using these natural methods keeps your tiles looking fresh, supports a healthier environment, and grants you freedom from harsh chemical residues.
Make a Homemade Vinegar and Water Cleaner
When you want an effective and natural way to clean your tiles, making a homemade vinegar and water solution is a smart choice. Vinegar benefits include its ability to break down grime, disinfect surfaces, and remove mineral deposits without harsh chemicals. To prepare your homemade cleaner, mix equal parts white vinegar and warm water in a spray bottle. Shake well before each use to combine the solution thoroughly. Spray the mixture directly onto your tile surfaces and let it sit for 5-10 minutes to loosen dirt. Then, scrub gently with a soft brush or cloth, paying attention to grout lines. Finally, rinse with clean water and dry with a microfiber cloth to prevent streaks. This method offers a simple, eco-friendly way to maintain sparkling tiles. Remember to always spot-test cleaners on a hidden area first to ensure your tiles are not damaged by the vinegar solution.
Apply Baking Soda for Stubborn Stains
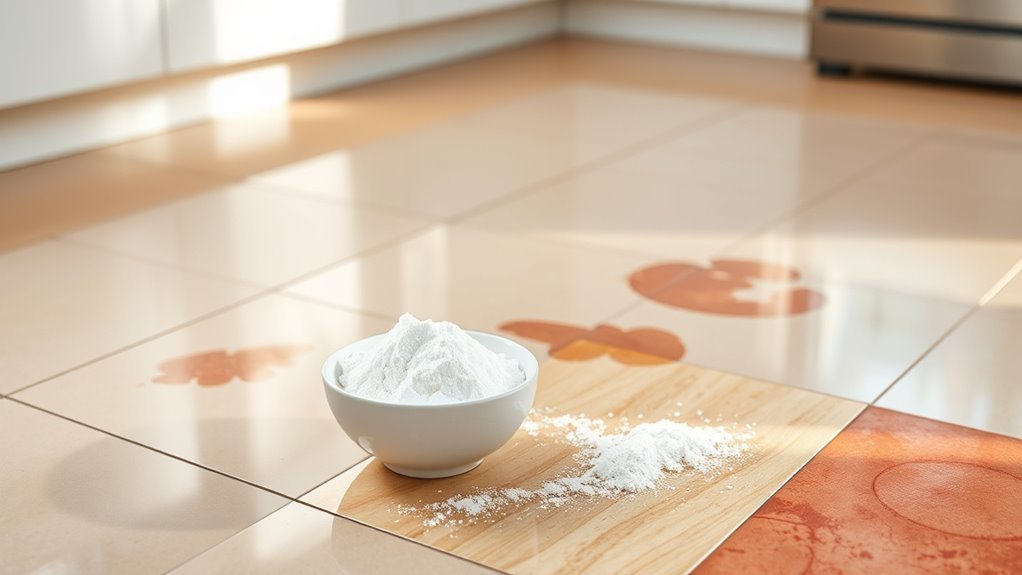
You can tackle stubborn tile stains by making a simple baking soda paste with water. Apply the paste directly to the stain and let it sit for 10-15 minutes before scrubbing gently. This method effectively lifts grime without damaging your tiles. It’s important to consider the type of tile and use pH-neutral cleaners when necessary to protect delicate surfaces.
Baking Soda Paste Preparation
One simple way to tackle stubborn tile stains is by preparing a baking soda paste. Baking soda benefits include its gentle abrasiveness and natural deodorizing power, making it ideal for tile cleaning. To get the paste consistency just right, follow these steps:
- Mix 3 parts baking soda with 1 part water in a small bowl.
- Stir thoroughly until you achieve a thick, spreadable paste—not too runny or dry.
- Adjust by adding small amounts of water or baking soda to perfect the texture.
This method guarantees the paste adheres well to tile surfaces, maximizing contact with stains. By mastering your baking soda paste preparation, you maintain control over cleaning strength and avoid damage, giving you the freedom to clean effectively and safely.
Application Techniques for Tiles
Apply the baking soda paste directly onto stubborn tile stains using a soft cloth or sponge to guarantee even coverage. For effective tile application, spread the paste gently in circular motions, making certain it penetrates the grout lines as well. Let the paste sit for 10-15 minutes to allow its natural abrasive properties to loosen dirt without damaging the tile surface. When ready, scrub lightly with a soft brush to avoid scratching. Rinse thoroughly with warm water to remove all residue. This methodical approach to cleaning techniques guarantees you target tough stains while preserving your tiles’ finish. Repeat the process if necessary, but avoid harsh scrubbing that could harm delicate tile surfaces. With consistent application, you’ll maintain pristine tiles and enjoy the freedom of a fresh, clean space.
Stain Removal Effectiveness
The effectiveness of baking soda in removing stubborn tile stains largely depends on proper application and dwell time. Different stain types respond uniquely to various removal methods, so understanding this helps you achieve better results. Here’s how to maximize baking soda’s stain removal effectiveness:
- Identify the stain type: oil-based stains require longer dwell time, while water-based stains respond faster.
- Create a paste by mixing baking soda with water; apply it generously on the stain to guarantee full coverage.
- Let the paste sit for 10-15 minutes before scrubbing gently with a soft brush, then rinse with warm water.
Rinse Thoroughly to Prevent Residue
Although cleaning solutions break down dirt effectively, failing to rinse your tiles thoroughly can leave behind a sticky residue that attracts more grime. To prevent residue buildup, adopt proper rinse techniques. Start by using clean, warm water to wash away any leftover cleaning agents. Use a mop or sponge to guarantee you cover all areas evenly. For grout lines, a small brush dipped in water helps flush out trapped residues. Change rinse water frequently to avoid redepositing dirt. Rinsing multiple times may be necessary, especially after using stronger cleaners. By rinsing thoroughly, you maintain your tile’s original shine and avoid the need for frequent deep cleans. This simple step grants you freedom from stubborn residue and keeps your tiles fresh longer. Always test cleaning products on a small, hidden area first to prevent damage and ensure the appropriate cleaning method.
Dry Tiles to Avoid Water Spots
You’ll want to dry your tiles promptly after rinsing to prevent water spots from forming. Use a microfiber cloth or a squeegee for the most effective drying. Timing is key—don’t let water sit on the surface, as it can leave behind mineral deposits that dull the finish. Using microfiber cloths helps remove residue without scratching the tile surface.
Importance of Drying
Because water spots can mar the appearance of your tiles, drying them thoroughly after cleaning is critical. Proper drying prevents mineral deposits and streaks, maintaining the tile’s natural shine. To achieve this, you need to use effective drying techniques and suitable drying materials.
Here’s what you should focus on:
- Use absorbent drying materials like microfiber cloths or squeegees to quickly remove excess water.
- Apply systematic drying techniques—work in sections, moving from one area to the next without leaving moisture behind.
- Guarantee adequate ventilation to speed up the drying process and reduce humidity, which can cause water spots to form.
Best Drying Tools
Proper drying techniques are only as effective as the tools you use to remove moisture from your tiles. To prevent water spots and streaks, you should rely on microfiber cloths and squeegee tools. Microfiber cloths excel at absorbing water quickly without leaving lint, while squeegee tools efficiently push water off flat surfaces, speeding up drying. Choosing the right tool depends on your tile type and surface area.
| Tool | Best Use |
|---|---|
| Microfiber Cloths | Small areas, grout lines |
| Squeegee Tools | Large flat tile surfaces |
| Dry Mop | Quick drying of floors |
| Chamois Cloth | Polishing and streak-free finish |
Use these tools methodically to maintain tile beauty and freedom from water damage.
Timing for Drying
When finishing up tile cleaning, it’s essential to dry the surface promptly to prevent water spots from forming. Ideal drying depends on both timing and the drying techniques you use. Here’s how to make sure your tiles stay spotless:
- Start Immediately: Begin drying as soon as you finish rinsing to stop mineral deposits from settling.
- Use Effective Drying Techniques: Employ microfiber cloths or squeegees for quick, streak-free drying.
- Allow for Adequate Airflow: After manual drying, let air circulate to remove residual moisture.
Seal Grout Regularly to Protect Against Dirt
Sealing grout at least once a year is essential to keep your tile looking clean and prevent dirt from settling into the porous surface. When you apply grout sealing, you create a protective barrier that resists moisture, stains, and grime buildup. This step saves you time and effort by reducing frequent deep cleaning. Before sealing, verify the grout is thoroughly cleaned and completely dry to maximize adhesion. Use a high-quality grout sealer and apply it evenly with a small brush or applicator. Allow it to penetrate for the recommended time, then wipe off excess. Regular grout sealing enhances dirt protection and prolongs the life and appearance of your tile surfaces, giving you freedom from constant maintenance and preserving your space’s fresh, clean look.
Clean Tiles Frequently to Maintain Shine
Regularly cleaning your tiles is key to preserving their shine and preventing dirt buildup that dulls their appearance. To maintain that fresh look, establish a regular cleaning schedule as part of your tile maintenance tips. Here’s how to keep your tiles gleaming:
Consistent cleaning protects tile shine and prevents dullness from dirt buildup.
- Sweep or vacuum daily to remove loose dirt and grit that can scratch surfaces.
- Mop with a mild, pH-neutral cleaner at least once a week to eliminate grime without damaging the finish.
- Wipe spills immediately to prevent stains and buildup that are harder to remove later.
- Use microfiber cloths for streak-free drying to enhance the overall cleanliness and shine of your tiles.
Frequently Asked Questions
Can Steam Cleaners Be Used on All Types of Tile?
You might think steam cleaners can damage delicate tiles, but that’s not always the case. Different steam cleaner types offer varied heat levels and pressure, so it’s essential to match the cleaner with your tile material compatibility. Porcelain and ceramic usually handle steam well, while natural stone like marble or limestone can be sensitive. Always check manufacturer guidelines to avoid damage, ensuring your tiles stay pristine without compromising your cleaning freedom.
How Do I Remove Mold From Tile Grout?
To tackle mold removal from tile grout, start by mixing equal parts of water and white vinegar in a spray bottle. Spray the solution generously on the grout, letting it sit for about 10 minutes to break down mold. Then, scrub the grout using a stiff brush or old toothbrush for effective grout cleaning. Rinse thoroughly with water and dry the area completely to prevent mold from returning. Regular maintenance helps keep grout mold-free.
What Is the Best Way to Prevent Slippery Tile Floors?
Imagine walking across polished tile that doesn’t make you hesitate with every step. To prevent slippery floors, you can apply non-slip treatments, which create microscopic grips on your tiles, enhancing traction without altering appearance. Strategically placing area rugs also adds safety by providing secure footing in high-traffic zones. These simple, effective methods let you move freely and confidently, turning slick surfaces into safe, slip-resistant spaces.
Can Tile Floors Be Polished for Extra Shine?
Yes, you can polish tile floors for extra shine by using specific tile polishing techniques designed for your tile type. Start with a thorough cleaning to remove dirt, then apply a polishing compound or use a polishing machine carefully. Remember to follow tile maintenance tips like sealing grout and avoiding harsh chemicals to keep that shine longer. Polishing not only enhances appearance but also protects your floor, giving you more freedom to enjoy a beautiful space.
How Often Should Tile Grout Be Replaced?
Grout’s grace greatly governs grout longevity. You should consider grout maintenance regularly to keep it looking fresh and functional. Usually, grout needs replacing every 10 to 15 years, but if you spot cracks, stains, or crumbling, it’s time to act sooner. Staying steadfast with sealing and cleaning extends grout’s life, granting you the freedom to enjoy your tiles without worry. Regular upkeep is key to preserving grout’s durable charm.


