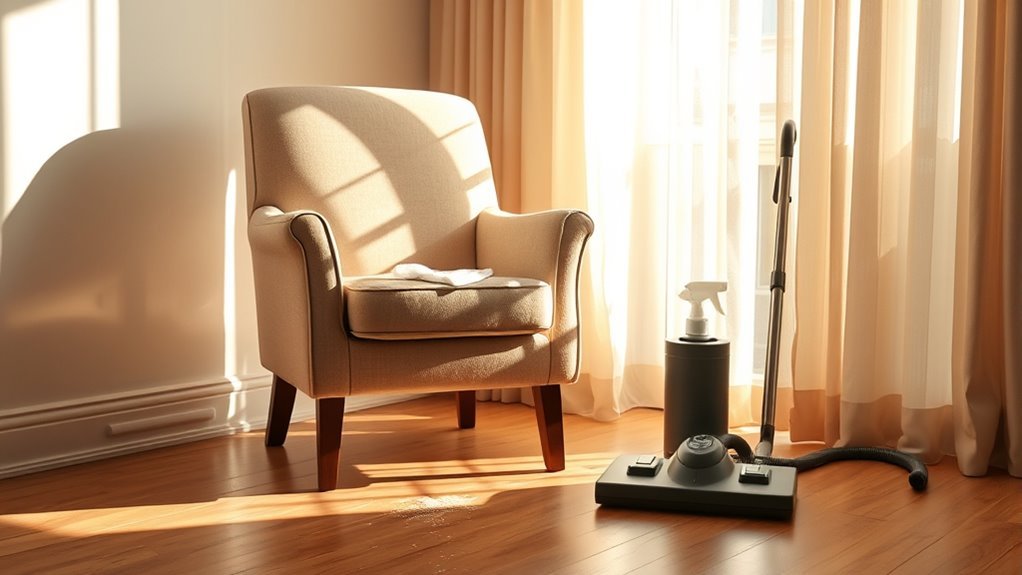
Weekly Cleaning Routine for Chair
Start your weekly chair cleaning by identifying its material to choose the right method. Dust off loose dirt, then vacuum upholstery with appropriate attachments, focusing on seams. Quickly spot-clean any spills using a mild detergent and test first on hidden areas. Wipe down wooden or metal parts with a damp cloth. If it’s leather, apply conditioner every few months to prevent cracking. Set a consistent cleaning day and reminders to maintain this routine. To get the most out of your efforts, understanding detailed care steps can be essential.
Assessing the Material of Your Chair

Before you begin cleaning, it’s essential to identify the material of your chair, as different fabrics and finishes require specific care methods. Start by examining the fabric types—common ones include cotton, linen, leather, velvet, and synthetic blends. Each demands a unique approach; for example, leather needs gentle conditioning, while synthetics can often tolerate stronger cleaners. Next, consider the chair styles, as some designs have delicate trims or intricate weaves that call for cautious handling. Look for care tags or manufacturer instructions to guide you. Understanding your chair’s fabric and style empowers you to select the right cleaning products and techniques, preventing damage and preserving its look. This knowledge frees you to maintain your chair effectively every week without guesswork or risk. Using upholstery cleaning tools appropriate to the fabric type ensures a thorough yet gentle clean that extends your chair’s life.
Removing Loose Dirt and Debris
A thorough weekly cleaning starts with removing loose dirt and debris from your chair. Begin by using proper dusting techniques, like a microfiber cloth or soft brush, to gently lift dirt without damaging the material. Focus on crevices and seams where debris tends to accumulate. After dusting, collect the dirt and dispose of it responsibly to maintain a clean environment. Remember that using microfiber cloths, which trap dust effectively, will enhance your cleaning results.
| Step | Action |
|---|---|
| 1. Dusting | Use microfiber cloth or brush |
| 2. Target Areas | Crevices, seams, under arms |
| 3. Collect Debris | Shake out or vacuum dirt |
| 4. Debris Disposal | Dispose in trash or compost |
This routine guarantees your chair stays fresh, letting you enjoy freedom from dirt buildup.
Spot Cleaning Stains and Spills

When stains or spills happen, you’ll want to act quickly to prevent permanent damage. Identifying stain types is key—oil-based, water-based, or protein stains all need different approaches. Grab the right cleaning tools before you start: a clean cloth, mild detergent, water, and a soft brush.
- Blot spills immediately with a dry cloth to absorb excess liquid.
- Use a damp cloth with mild detergent for water-based stains; dab gently.
- For oil-based stains, sprinkle baking soda to absorb oil, then brush off.
- Protein stains like food require cold water treatment before detergent application.
Avoid scrubbing harshly to protect fabric fibers. Acting fast and using proper tools guarantees your chair stays fresh and stain-free. Always test cleaning solutions on hidden spots first to ensure fabric safety.
Vacuuming Upholstered Chairs
Keeping stains under control is just one part of maintaining your chair’s appearance. To keep upholstered chairs fresh, vacuum them weekly. Start by checking fabric types—delicate fabrics like velvet need a gentle brush attachment, while sturdier materials like microfiber can handle stronger suction. Use cleaning tools designed for upholstery, such as a crevice tool for seams and edges, and a soft brush for surface dust. Move the vacuum slowly to lift dirt and debris trapped in fibers without damaging the fabric. Don’t forget to vacuum underneath cushions and along folds where dust accumulates. Regular vacuuming reduces allergens and prolongs your chair’s life, giving you the freedom to relax without worrying about buildup or wear. Make vacuuming a quick, routine step in your chair care. Always use a brush attachment to protect the fabric while effectively removing dust and debris.
Wiping Down Wooden and Metal Parts

When wiping down wooden and metal parts, choose cleaning solutions that are gentle and designed for those materials to avoid damage. Start by removing dust with a soft cloth or brush before applying any cleaner. Always wipe in the direction of the grain for wood and use a non-abrasive cloth on metal to prevent scratches. Using microfiber cloths is recommended as they trap dust and dirt without spreading particles, ensuring gentle care.
Choosing Safe Cleaning Solutions
Although many cleaning products promise quick results, you’ll want to choose solutions that won’t damage your chair’s wooden and metal parts. Opting for eco friendly options or homemade cleaners protects your furniture and the environment. Here’s what you should consider:
- Use mild soap diluted in water for gentle cleaning.
- Avoid harsh chemicals that can strip finishes or corrode metal.
- Try a vinegar and water mix as a natural disinfectant, but test on a small area first.
- Select oils like lemon or mineral oil sparingly to nourish wood without buildup.
Techniques for Dust Removal
Since dust can quickly accumulate on your chair’s wooden and metal surfaces, you’ll want to remove it regularly using the right techniques. Start by selecting effective cleaning tools like a microfiber cloth, which traps dust without scratching. For wooden parts, gently wipe along the grain to lift particles without damaging the finish. When tackling metal components, use a slightly damp cloth to catch dust, then immediately dry to prevent moisture buildup. Avoid abrasive tools that could harm surfaces. Incorporate soft-bristled brushes to reach crevices where dust hides. Practicing these dusting techniques weekly keeps your chair looking fresh and extends its lifespan. By mastering these simple steps, you’ll maintain cleanliness effortlessly and enjoy the freedom of a well-kept space.
Preventing Surface Damage
To protect your chair’s wooden and metal surfaces, prioritize gentle wiping techniques that prevent scratches and moisture damage. When cleaning, avoid harsh chemicals that can strip finishes. Instead, use a soft microfiber cloth slightly dampened with water or a mild cleaner designed specifically for wood and metal. Focus on preventing scratches by following these steps:
- Use gentle, circular motions to clean without abrasion.
- Wipe spills immediately to avoid water damage or rust.
- Apply a protective wax or polish occasionally to maintain finishes.
- Avoid excessive moisture; thoroughly dry surfaces after wiping.
Conditioning Leather Chairs
You’ll want to pick a leather conditioner that matches your chair’s finish to avoid damage. Apply it evenly using a soft cloth, working in small sections to guarantee full absorption. Aim to condition your leather chair every three to six months to keep it supple and prevent cracking. Consider using a natural leather conditioner for gentle care and to maintain the leather’s suppleness.
Choosing the Right Conditioner
Anyone caring for leather chairs knows that choosing the right conditioner is essential to maintain their appearance and durability. Start by identifying your leather type—full-grain, top-grain, or corrected-grain—as each demands specific care. Next, select conditioner brands known for quality and compatibility with your leather type. Avoid products with harsh chemicals or silicone, which can damage the finish. Consider conditioners with natural oils for flexible, breathable leather. Keep these tips in mind:
- Match conditioner to leather type to avoid damage
- Research trusted conditioner brands with positive reviews
- Choose formulas without petroleum or alcohol
- Opt for conditioners that restore moisture without leaving residue
Application Techniques for Leather
Selecting the right conditioner sets the stage, but how you apply it determines the results. Start by gathering your cleaning tools: a soft cloth or sponge works best to avoid scratching the leather. Apply a small amount of conditioner to the cloth, not directly on the chair, to control coverage and prevent oversaturation. Work in gentle, circular motions, ensuring even distribution across the surface. Focus on dry or cracked areas first, allowing the conditioner to absorb fully. Avoid excess product buildup, which can attract dirt and compromise leather protection. After application, let the chair rest for 15-20 minutes, then buff lightly with a dry cloth to restore natural shine. This precise method maximizes leather protection and extends your chair’s lifespan while keeping maintenance simple.
Frequency of Conditioning Sessions
Although the ideal conditioning frequency depends on your chair’s usage and environment, a general guideline is to condition leather chairs every 3 to 6 months. This schedule keeps the leather supple, prevents cracking, and extends your chair’s life. Adjust conditioning frequency based on:
- Exposure to sunlight or heat sources, which dry out leather faster
- Frequency of use; daily use demands more frequent conditioning
- Humidity levels; dry climates require more regular care
- Signs of dryness or stiffness in the leather
Setting a Weekly Cleaning Schedule
Because regular maintenance keeps your chair in top condition, setting a weekly cleaning schedule is essential. Start by creating a cleaning checklist tailored to your chair’s material and daily use. Include tasks like dusting, spot cleaning, and conditioning. Next, pick a consistent day and time each week that fits your lifestyle—this guarantees the routine becomes effortless, not a chore. Use scheduling tips such as setting reminders on your phone or calendar to stay on track. Prioritize quick, manageable steps so cleaning feels freeing, not restrictive. By sticking to this plan, you’ll preserve your chair’s look and comfort without stress. Your commitment to this simple schedule assures your chair remains inviting and durable for years to come. Remember to vacuum upholstered chairs regularly using the appropriate vacuum attachment to effectively remove dust and crumbs.
Frequently Asked Questions
How Often Should Chair Cushions Be Replaced?
You should replace chair cushions every 2 to 3 years, depending on cushion durability and how often you use the chair. Regular chair maintenance helps you spot wear and sagging early. If cushions lose support or comfort, it’s time to swap them out. Staying on top of this keeps your seating comfy and your freedom to relax uninterrupted. Don’t wait until cushions are completely worn—proactive replacement preserves comfort and longevity.
Can I Use Essential Oils to Freshen My Chair?
You can definitely use essential oils to boost your chair freshness. Just mix a few drops with water in a spray bottle and lightly mist the fabric—avoid soaking it. Lavender, eucalyptus, or lemon oils work well to keep things smelling great without harsh chemicals. Be sure to test a small hidden area first to prevent stains. This way, you enjoy a fresh, inviting chair while staying free from synthetic fragrances.
What Are the Best Storage Tips for Chairs During Winter?
Think of your chair as a loyal ship braving winter’s storm. For proper chair storage, shelter it indoors or use a waterproof cover to shield from snow and moisture. Apply a protective finish to prevent cracking. Elevate legs on blocks to avoid dampness. Winter maintenance means ensuring it’s dry and clean before storage, preserving freedom from damage. This way, your chair will sail smoothly into spring, ready for new adventures.
Are Chair Covers Effective for Prolonging Chair Life?
Yes, chair covers are effective for prolonging chair life by offering excellent fabric protection and simplifying chair maintenance. You’ll prevent stains, dust buildup, and sun damage, keeping your chairs looking fresh longer. Choose breathable, durable materials for covers to avoid moisture buildup. Regularly clean both the covers and chairs underneath. This simple step lets you enjoy your furniture freely, without worrying about wear and tear.
How Do I Safely Remove Pet Hair From Chairs?
To safely remove pet hair from chairs, start by using removal techniques like a lint roller or sticky tape to lift hair without damaging fabric. You can also use a damp rubber glove, running it over the surface to gather hair easily. For stubborn hair, a vacuum with a brush attachment works well. These methods let you quickly clear pet hair while keeping your chair’s material intact and looking fresh.