Budget-Friendly DIY Cleaning Products for Windowsills
You can easily clean your windowsills on a budget using simple DIY products like a vinegar and water mix or a baking soda paste for tough stains. Lemon juice works great as a natural disinfectant and freshener. For wooden windowsills, try olive oil mixed with lemon to polish and protect the surface. These homemade cleaners are safe, eco-friendly, and cheap. If you want to explore more easy recipes and tips for safe use and storage, keep going for helpful ideas.
Essential Ingredients for Homemade Windowsill Cleaners

When it comes to making your own windowsill cleaner, you’ll want ingredients that are both effective and safe. Choosing natural ingredients lets you avoid harsh chemicals, giving you freedom from toxins while keeping your space sparkling. Simple staples like baking soda, castile soap, and essential oils are excellent eco friendly options that work well together to cut through dirt and grime. These ingredients are gentle enough for frequent use, yet strong enough to leave your windowsills fresh and clean. By opting for homemade solutions, you reduce waste and control what you bring into your home, aligning perfectly with a lifestyle that values independence and sustainability. Embracing natural, eco friendly choices means you get a cleaner home and a cleaner conscience.
How to Make a Vinegar and Water Cleaning Solution
Natural ingredients like vinegar offer a powerful way to clean your windowsills without harsh chemicals. You’ll love the vinegar benefits: it’s natural, affordable, and effective against grime. To make your own cleaning solution, follow these simple steps:
Harness the natural power of vinegar to clean windowsills effectively, affordably, and without harsh chemicals.
- Mix white vinegar and water using the right cleaning ratios—typically, a 1:1 ratio works well for everyday dirt.
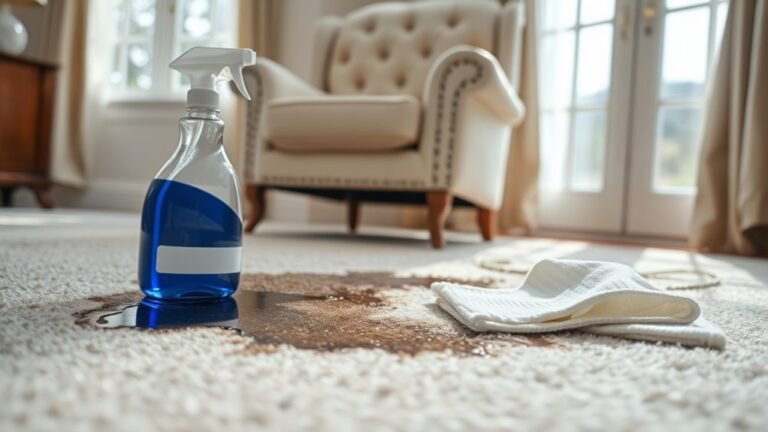
- Pour the mixture into a spray bottle for easy application.
- Spray your windowsills, let it sit for a few minutes, then wipe clean with a cloth.
This solution gives you freedom from pricey, chemical-laden cleaners while keeping your windowsills spotless. Plus, it’s quick to make and safe for your home and the environment.
Using Baking Soda Paste for Tough Stains

Tough stains on your windowsills don’t stand a chance against baking soda paste. This simple mixture, combining baking soda with a bit of water, harnesses powerful stain removal techniques that are both effective and budget-friendly. You’ll love how baking soda benefits extend beyond just cleaning—it’s non-toxic and safe to use around your home. To tackle stubborn grime, apply the paste directly onto the stain and let it sit for 10-15 minutes. Then, scrub gently with a soft brush or cloth. This method breaks down dirt without harsh chemicals, giving you freedom from expensive cleaners while protecting your surfaces. Baking soda paste is a straightforward, eco-friendly solution that makes maintaining spotless windowsills easy and satisfying. Give it a try—you’ll see results quickly and effortlessly.
Lemon Juice as a Natural Disinfectant and Deodorizer
Besides tackling stains, you can also use lemon juice to keep your windowsills fresh and germ-free. The lemon juice benefits go beyond its bright scent—it acts as a natural disinfectant, killing germs without harsh chemicals. Here’s how you can enjoy its power:
- Mix equal parts lemon juice and water in a spray bottle for a quick disinfecting mist.
- Apply directly to the windowsill, let it sit for a few minutes, then wipe clean.
- Use lemon juice to neutralize odors, leaving your space smelling crisp and inviting.
Crafting a Mild Dish Soap Cleaner for Daily Use

One simple way to keep your windowsills clean every day is by using a mild dish soap cleaner. Dish soap benefits include its gentle yet effective ability to cut through dirt and grime without harsh chemicals, making it perfect for regular use. To make your own, mix a few drops of mild dish soap with warm water in a spray bottle. This solution fits right into your cleaning routine, allowing you to quickly wipe down windowsills and keep them fresh. It’s affordable, easy to make, and lets you control what goes into your cleaner, giving you freedom from store-bought products loaded with unnecessary additives. Stick to this simple DIY cleaner, and you’ll enjoy sparkling windowsills with minimal effort.
Combining Olive Oil and Lemon for Polishing Wood Windowsills
You can give your wood windowsills a natural shine by mixing olive oil and lemon juice. Olive oil nourishes the wood, while lemon’s acidity helps lift grime and freshen the surface. Here’s how to combine and apply them for the best results.
Benefits of Olive Oil
When you combine olive oil with lemon juice, you get a natural polish that not only cleans but also nourishes wood windowsills. Olive oil offers several benefits that make it perfect for your DIY cleaning routine:
- Moisturizes Wood: Olive oil seeps into the wood, preventing drying and cracking, which keeps your windowsills looking fresh and vibrant.
- Adds Shine: It naturally enhances the wood’s luster without harsh chemicals, giving your windowsills a smooth, polished finish.
- Health Benefits: Beyond cleaning, olive oil’s antioxidant properties mean it’s safe to use around your home, reducing exposure to toxic substances.
Lemon’s Natural Cleaning Power
Lemon’s natural acidity makes it a powerful cleaner that cuts through grime and leaves surfaces sparkling. When you combine olive oil with lemon, you reveal lemon’s versatility—its natural oils and acidity work together to polish wood windowsills beautifully. The lemon benefits go beyond just cleaning; it brightens and refreshes the wood while the olive oil nourishes and protects it from drying out. This combo gives you a budget-friendly, all-natural way to care for your windowsills without harsh chemicals. You get the freedom to maintain your home using simple ingredients that are safe and effective. Plus, the fresh citrus scent adds a clean, uplifting vibe to your space. It’s a smart, eco-friendly solution that fits perfectly into your DIY routine.
Mixing and Application Tips
Although combining olive oil and lemon is straightforward, getting the right balance is key to achieving a smooth polish without leaving residue. To help you enjoy the freedom of DIY cleaning, here are some mixing ratios and application techniques to follow:
- Mix 3 parts olive oil with 1 part lemon juice to keep the polish nourishing and fresh without being too acidic.
- Dip a soft cloth into the mixture, wring out excess, and gently rub the windowsill in circular motions to evenly distribute the polish.
- Let it sit for 5 minutes, then buff with a clean, dry cloth to bring out the shine and remove any residue.
Using Rubbing Alcohol for Quick Drying and Streak-Free Shine
Since rubbing alcohol evaporates quickly, it’s perfect for cleaning windowsills without leaving streaks behind. You’ll love the rubbing alcohol benefits—it not only dries fast but also cuts through grime and kills germs effortlessly. To get that streak free technique down, just dampen a microfiber cloth with rubbing alcohol and gently wipe your windowsills. The quick evaporation means no smudges, letting you enjoy a crystal-clear shine in no time. Plus, using rubbing alcohol keeps things simple and budget-friendly, freeing you from pricey cleaners. It’s a smart, effective way to maintain your windowsills with minimal fuss, giving you more time to enjoy your clean space exactly how you want it.
Tips for Applying DIY Cleaners Safely and Effectively
When using DIY cleaners on your windowsills, it’s important to apply them safely and effectively to get the best results without causing damage. Follow these safety precautions and effective techniques to keep your cleaning hassle-free:
- Test First: Always spot-test your cleaner on a small, hidden area to avoid discoloration or damage.
- Use Gloves: Protect your skin by wearing gloves, especially if your DIY mix contains vinegar or rubbing alcohol.
- Apply with Care: Use a soft cloth or sponge, applying gentle pressure to avoid scratching. Avoid over-saturating to prevent moisture damage.
Storage and Shelf Life of Homemade Cleaning Products
If you want your homemade cleaning products to remain effective, proper storage is key. Use airtight storage containers to keep out air and moisture, which can degrade your mixtures quickly. Glass jars or BPA-free plastic bottles work great because they don’t react with the ingredients and are easy to clean. Label each container with the date you made the product to track its shelf life. Most DIY cleaners last between one to three months, depending on the ingredients, so don’t hold on to them too long. Keep your products in a cool, dark place to slow down any chemical changes and preserve their potency. By managing storage containers and understanding shelf life, you’ll enjoy your homemade cleaners at their best, giving you freedom from harsh chemicals without wasting your effort.
Frequently Asked Questions
Can These DIY Cleaners Harm Window Glass or Frames?
You probably wonder if homemade cleaners could cause glass damage or hurt your window frames. If you’re careful with ingredients—avoiding harsh acids or abrasives—you won’t risk harming the glass or frame protection. Using gentle, natural components like vinegar diluted with water keeps things safe while letting you clean freely. Just always test a small spot first to guarantee your DIY solution won’t cause any unwanted damage.
Are These Homemade Products Safe for Pets?
You’ll want to think about pet safety when using any homemade cleaner. Some ingredients, like vinegar or essential oils, can irritate your furry friends or even be toxic if ingested. It’s best to avoid harsh chemicals and pick pet-friendly options—like diluted baking soda or mild soap. Always keep your pets away while cleaning, and store products out of reach. With the right ingredient considerations, you can keep your home clean and your pets safe.
How Often Should Windowsills Be Cleaned Using These Methods?
You might wonder if cleaning windowsills once a month is enough or if more frequent attention is needed. Truth is, your cleaning frequency depends on your environment—dusty or pet-friendly homes might need weekly care. Seasonal maintenance is key; a thorough scrub each spring and fall keeps grime at bay and lets you enjoy that fresh, open-air vibe. So, trust your instincts and clean when it feels right for your space!
Can These Mixtures Be Used on Outdoor Windowsills?
You can definitely use those mixtures on outdoor surfaces like windowsills, but keep in mind outdoor grime can be tougher. Since outdoor windowsills face more dirt and weather, adjusting your cleaning frequency is key—maybe once every couple of weeks or after heavy rain. Just make sure the ingredients won’t damage your paint or wood. This way, you’ll maintain a fresh look and enjoy the freedom of easy, effective upkeep without breaking the bank.
What Are Eco-Friendly Alternatives to These Ingredients?
If you want eco friendly ingredients for cleaning, you can turn to natural cleaners like white vinegar, baking soda, and lemon juice. These ingredients are gentle on the environment and work wonders on grime without harsh chemicals. You’re free to mix and match them to suit your needs, keeping your space fresh while staying kind to the planet. Plus, they’re affordable and easy to find, giving you freedom in both choice and budget.


