Deep Cleaning Checklist for Microwave
To deep clean your microwave, start by gathering supplies like a microfiber cloth, mild soap, and vinegar. Remove and wash the turntable with warm soapy water. Wipe interior walls gently with a solution to tackle stains, then deodorize by steaming vinegar or lemon juice inside. Clean door seals and exterior surfaces carefully, avoiding excess moisture. Don’t forget to vacuum and wipe vents for proper airflow. Finally, inspect, dry thoroughly, and run a quick test to guarantee everything works perfectly. Discover detailed steps for a thorough cleanup ahead.
Gather Cleaning Supplies

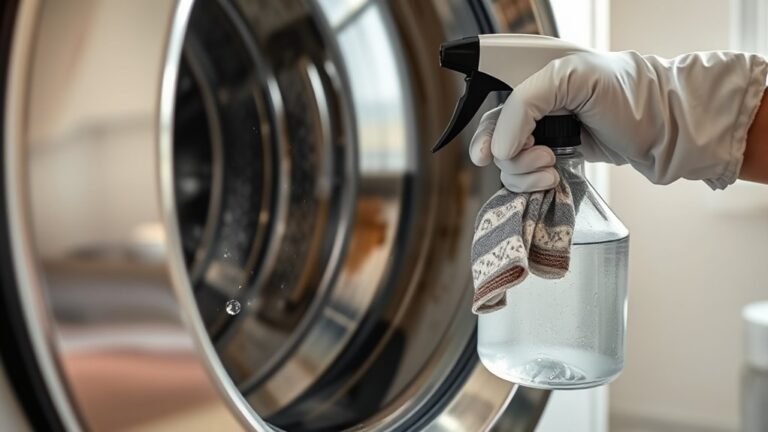
Before you begin cleaning your microwave, gather all the necessary supplies to guarantee an efficient process. Start with essential cleaning tools: a microfiber cloth, a soft sponge, a small brush for crevices, and a spray bottle. For cleaning solutions, choose eco friendly options like white vinegar, baking soda, or lemon juice, which effectively remove grime without harsh chemicals. Avoid abrasive scrubbers that can damage surfaces. Also, have a bowl suitable for microwave use to prepare cleaning mixtures. Ensuring you have everything on hand prevents interruptions and allows you to clean thoroughly in one session. With the right tools and eco friendly products, you maintain your microwave’s performance and contribute to a healthier environment, giving you the freedom to clean responsibly and efficiently.
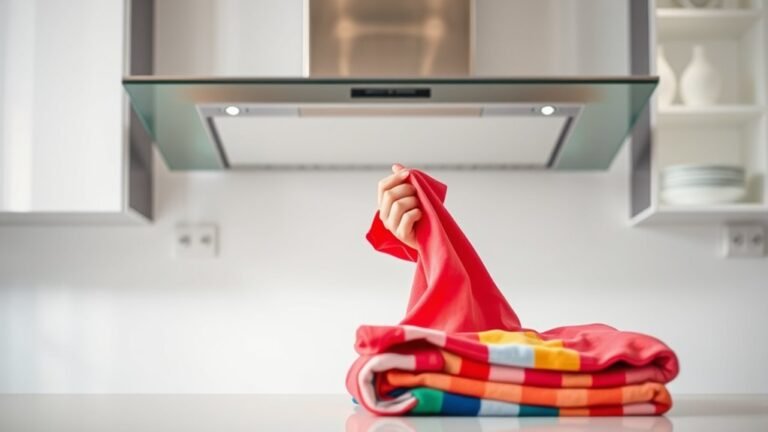
Remove and Clean the Turntable
Once you have your cleaning supplies ready, focus on the microwave’s turntable, which often collects food splatters and spills. Start with turntable removal by carefully lifting the glass plate and the roller ring beneath it. This makes turntable cleaning easier and more effective. Use warm, soapy water or a mild detergent to scrub off stuck-on residue. Rinse and dry thoroughly before placing it back.
| Step | Action | Tip |
|---|---|---|
| 1 | Remove turntable | Lift gently to avoid breakage |
| 2 | Remove roller ring | Check for stuck debris |
| 3 | Wash with soap and water | Use a soft sponge |
| 4 | Rinse thoroughly | Prevent soap residue |
| 5 | Dry completely | Avoid moisture buildup |
This guarantees your turntable stays spotless and functional.
Wipe Down the Interior Walls

Start by choosing a cleaning solution that’s safe for microwave interiors, such as a mixture of water and mild dish soap or vinegar. Gently scrub any stubborn stains with a soft cloth or sponge to avoid damaging the surfaces. Once clean, make sure you dry the walls completely to prevent moisture buildup inside the microwave.
Use Safe Cleaning Solutions
Two key factors guarantee effective and safe cleaning when wiping down your microwave’s interior walls: choosing non-abrasive solutions and avoiding harsh chemicals. You want to protect the microwave’s surfaces while removing food residue efficiently. Opt for natural cleaners like a mixture of white vinegar and water or mild dish soap diluted in warm water. These eco friendly options break down grime without damaging the interior or emitting toxic fumes. Avoid bleach, ammonia, or abrasive powders, as they can compromise the microwave’s materials and your health. Apply your chosen solution with a soft cloth or sponge, gently wiping to lift dirt. This method preserves your microwave’s finish and supports a healthier environment, giving you the freedom to clean confidently and responsibly.
Scrub Stubborn Stains
After applying a safe cleaning solution, you’ll need to address any stubborn stains that remain on your microwave’s interior walls. Start by letting the solution sit for a few minutes to loosen grime. Then, use a soft sponge or microfiber cloth to scrub gently, focusing on those tough spots. Avoid abrasive materials that could damage the surface. For effective stain removal, employ circular motions and apply a bit more pressure as needed. If stains persist, try a paste made from baking soda and water—apply it directly, let it sit, then scrub again. These cleaning techniques free you from lingering residue without harsh chemicals. Taking this precise, methodical approach guarantees your microwave’s interior is spotless and ready for safe use every time.
Dry Thoroughly After Cleaning
Once you’ve scrubbed away all stains and rinsed the interior, you’ll need to dry the microwave thoroughly to prevent moisture buildup. Start by using a clean, dry microfiber cloth to wipe down every surface inside, including the ceiling, floor, and walls. Employ gentle drying techniques—press the cloth firmly against damp spots and move in circular motions to absorb moisture effectively. For tight corners, a dry cotton swab can help. Ensuring complete moisture control is essential because residual dampness can lead to unpleasant odors or mold growth. After wiping, leave the microwave door open for a few minutes to air out any remaining humidity. By following these precise drying steps, you maintain a fresh, hygienic microwave interior ready for your next use, giving you freedom from worry about hidden dampness.
Clean the Door and Seals

You’ll want to start by carefully removing any grease and grime from the microwave door using a mild cleaner and a soft cloth. Pay special attention to the seals, as maintaining their integrity is essential for your microwave’s efficiency and safety. Gently clean around the seals without applying excessive force to avoid damaging them.
Removing Grease and Grime
Although the microwave’s interior gets most of the attention, the door and seals often accumulate stubborn grease and grime that can affect both cleanliness and performance. For effective grease removal, start by mixing equal parts warm water and white vinegar or a gentle dish soap solution. Dip a microfiber cloth into the solution, wring it out, and thoroughly wipe the door’s glass and frame, focusing on visible grime buildup. Use a soft toothbrush or cotton swab dipped in the solution to carefully clean tight crevices and edges around the seals. Avoid soaking the seals to prevent damage. Once cleaned, wipe the area with a damp cloth to remove any residue, then dry completely with a clean towel. Regularly tackling grease and grime buildup prevents odors and keeps your microwave looking fresh and functioning well.
Maintaining Seal Integrity
Because the door seals play a crucial role in keeping your microwave airtight and efficient, maintaining their integrity is important. Start by carefully wiping the door and seals with a soft cloth dampened with mild soap and warm water. Avoid harsh chemicals that can damage the seals. After cleaning, perform regular integrity checks by inspecting for cracks, tears, or deformation. If you notice any damage, replace the seals immediately to prevent leaks and maintain peak performance. Seal maintenance should become part of your routine deep cleaning to guarantee your microwave operates safely and efficiently. Remember, a well-maintained seal preserves the appliance’s freedom to function properly without energy loss or safety hazards, giving you peace of mind every time you use it.
Deodorize the Microwave
One effective method to deodorize your microwave involves using natural ingredients that neutralize odors without harsh chemicals. Start by filling a microwave-safe bowl with water and adding a few tablespoons of white vinegar or lemon juice—both proven natural deodorizers. Place the bowl inside and run the microwave on high for five minutes, allowing steam to loosen grime and absorb microwave odors. Afterward, leave the door closed for a few minutes to let the steam work deeper. Carefully remove the bowl, then wipe the interior with a clean cloth or sponge, focusing on corners where odors linger. Repeat if stubborn smells persist. This simple, chemical-free approach guarantees your microwave stays fresh and odor-free, giving you freedom from unpleasant smells every time you heat your food.
Clean the Exterior Surfaces
The exterior surfaces of your microwave can accumulate dust, grease, and fingerprints that not only look unsightly but can also affect its performance. To clean these surfaces effectively, first identify the exterior materials—usually plastic, stainless steel, or glass. For plastic, use a soft cloth dampened with mild soap and water. Avoid abrasive cleaners that can scratch or dull the finish. Stainless steel requires a microfiber cloth and a gentle cleaner designed for metal to prevent streaks and maintain shine. Glass panels can be wiped with a vinegar-water solution to remove smudges. Always turn off and unplug the microwave before cleaning. Use gentle, circular motions and avoid excess moisture near buttons or seams. These cleaning techniques guarantee your microwave’s exterior stays pristine without risking damage or impairing functionality.
Check and Clean the Ventilation Areas
Although often overlooked, the ventilation areas of your microwave play an essential role in preventing overheating and maintaining efficient operation. Start by unplugging the microwave to guarantee safety. Locate the vents, typically found on the sides or back. Use a soft brush or vacuum with a brush attachment to remove dust and debris gently. For stubborn grime, dampen a cloth with mild soap and water, then wipe the vents carefully without letting moisture enter the appliance. Regular ventilation maintenance improves airflow efficiency, which helps your microwave cool properly and extends its lifespan. By keeping these areas clean, you avoid performance issues and potential damage caused by blocked air passages. Make this step a routine part of your deep cleaning to enjoy hassle-free microwave use.
Perform a Final Inspection and Test Run
Before you finish, take a moment to perform a final inspection and test run to confirm every part of your microwave is clean and functioning properly. This step guarantees peak test performance and confirms your deep cleaning was effective.
Here’s what to check during the final inspection and test run:
- Verify the interior is dry and free of cleaning residue.
- Inspect the door seal for any damage or debris.
- Make sure the turntable spins smoothly without obstruction.
- Close the door firmly and listen for a proper seal.
- Run the microwave on high for 30 seconds to test heating and noise levels.
If all checks pass, your microwave is ready to use. If you notice issues, repeat cleaning or inspect components for repair. This final inspection is key to lasting freedom from grime and safe operation.
Frequently Asked Questions
Can I Use Bleach to Clean My Microwave?
Imagine a bright, spotless microwave humming quietly in your kitchen, free from harsh chemicals. You shouldn’t use bleach to clean your microwave—it’s too strong and can damage surfaces, compromising microwave safety. Instead, opt for bleach alternatives like vinegar or baking soda, which effectively cut grime without toxic fumes. These natural options keep your microwave clean and your space fresh, giving you freedom to enjoy a safe, chemical-free kitchen environment.
How Often Should I Deep Clean My Microwave?
You should stick to a cleaning frequency of once a month for deep cleaning your microwave to keep it fresh and odor-free. Regular maintenance tips include wiping spills immediately and using a microwave-safe bowl with water and lemon juice to steam clean weekly. This approach prevents buildup and prolongs your microwave’s life, giving you more freedom from stubborn stains and unwanted smells without too much hassle.
Is It Safe to Microwave Lemon for Cleaning?
Yes, it’s safe to microwave lemon for cleaning. You just need to cut a lemon in half, squeeze the juice into a microwave-safe bowl with water, and microwave it for 3-5 minutes. The steam softens grime, while lemon benefits like natural antibacterial properties and a fresh scent help with microwave cleaning. Just be careful removing the hot bowl, and wipe down the interior afterward for a sparkling, chemical-free clean.
Can Metal Objects Be Cleaned Inside the Microwave?
Did you know that nearly 30% of microwave fires result from metal objects inside? When it comes to metal safety, you shouldn’t clean metal objects inside the microwave because microwave materials can’t handle metal’s reflective properties. Metal sparks, causing damage or fires. Instead, clean metal items by hand using warm soapy water. Avoid risking your microwave’s integrity—stick to non-metallic containers and tools to keep your freedom and safety intact.
How Do I Fix a Microwave That Won’T Start After Cleaning?
If your microwave won’t start after cleaning, start with basic microwave troubleshooting. Verify the door is properly closed—sometimes moisture or residue prevents the latch from engaging. Check the power cord and outlet for issues. Avoid excessive water inside the control panel during cleaning; moisture can cause malfunctions. Let the microwave dry completely before testing again. Following these cleaning tips and troubleshooting steps can help you regain full control and freedom with your appliance.