Deep Cleaning Guide for Keyboard Flooring
To deep clean your keyboard flooring effectively, start by disconnecting your keyboard and removing keycaps to access the base. Use compressed air to blow out loose debris, then gently scrub embedded dirt with a soft brush and isopropyl alcohol applied via microfiber cloth or cotton swab. Dry thoroughly with compressed air to avoid moisture damage, then apply a compatible protective finish. Regular dusting and quarterly protective coatings will extend longevity. For an all-encompassing approach, understanding material-specific methods is essential.
Understanding the Materials Used in Keyboard Flooring
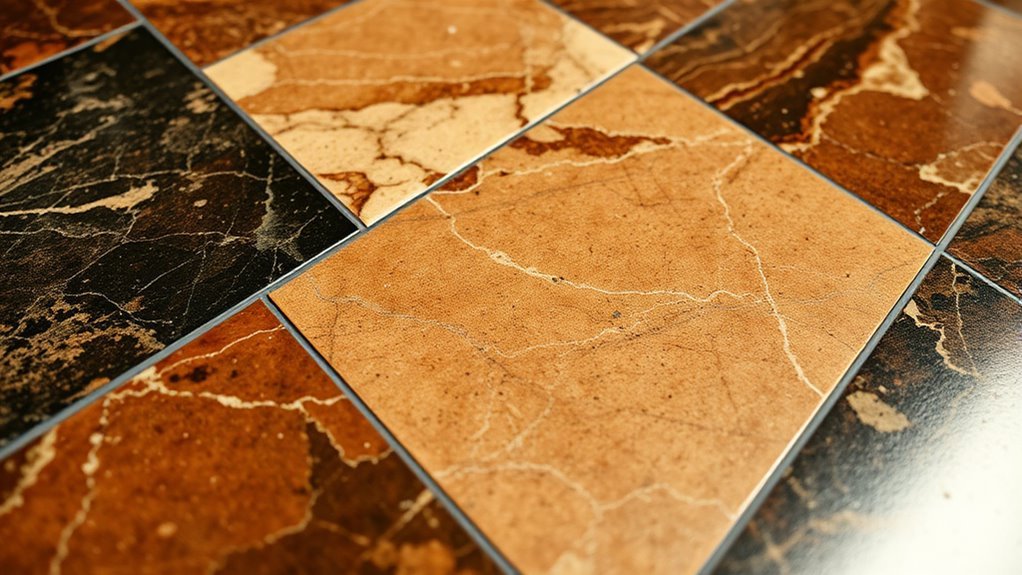
Although keyboards are primarily electronic devices, the materials used in their construction—particularly the keys and underlying mechanisms—play a critical role in their durability and cleaning requirements. When evaluating keyboard material types, you’ll find plastics like ABS and PBT dominate keycaps due to their resilience and tactile response. Meanwhile, the base or “flooring” supporting the keys often involves metal or reinforced plastic, which influences flooring durability factors such as resistance to wear and structural integrity under constant use. Understanding these materials is essential for effective maintenance since each responds differently to cleaning agents and mechanical stress. By recognizing the specific flooring durability factors tied to these material types, you can tailor your cleaning approach, preserving your keyboard’s longevity while maintaining the freedom to use it confidently in diverse environments.
Essential Tools and Cleaning Supplies
A set of precise tools and appropriate cleaning supplies is essential for performing an effective deep cleaning on your keyboard. You’ll need microfiber cloths to avoid scratching, compressed air cans for debris removal, and soft-bristle brushes to reach tight spaces. Select cleaning solutions formulated specifically for electronic components to prevent damage and residue buildup. Isopropyl alcohol at 70% concentration works well for disinfecting without harming circuits. Establishing strict maintenance schedules guarantees your keyboard remains free from dust and grime accumulation, preserving functionality and longevity. Avoid household cleaners with harsh chemicals, as they can degrade key materials. By equipping yourself with these targeted tools and solutions, you gain the freedom to maintain your keyboard’s performance precisely and efficiently, ensuring it operates flawlessly over time.
Preparing the Area for Deep Cleaning

Before you start deep cleaning your keyboard, make sure to clear the surrounding space by removing any furniture or items that could obstruct your work. This prevents accidental damage and provides ample room for maneuvering cleaning tools. Additionally, protect adjacent surfaces with a waterproof mat or cloth to catch debris and cleaning fluids.
Clear the Surrounding Space
Three key steps help you clear the surrounding space effectively: removing nearby clutter, guaranteeing adequate lighting, and securing a clean, flat surface. This preparation directly influences your cleaning frequency and dust prevention success. Start by organizing the area to minimize obstacles, which allows unfettered access and reduces recontamination risks.
To optimize space clearance, follow this checklist:
- Remove loose items that can trap dust
- Use adjustable lighting to highlight debris
- Lay down a microfiber cloth or mat to catch particles
- Guarantee floor leveling to prevent dust accumulation in crevices
- Keep cleaning tools within reach but off the floor
Remove Furniture and Items
Once you’ve cleared the surrounding space, focus on removing any furniture and items that could obstruct thorough cleaning. Evaluate your current furniture arrangement and plan a temporary setup that maximizes accessibility to the keyboard flooring. Carefully lift and move chairs, desks, and peripheral objects to a designated area, ensuring you maintain proper item organization to avoid misplacement. Use protective padding under heavy furniture to prevent damage during repositioning. This methodical removal guarantees you can reach every corner of the keyboard flooring without hindrance. Prioritize systematic item organization by grouping smaller objects in labeled containers or trays. By strategically managing furniture arrangement and item placement, you’ll create an open, obstruction-free environment, enabling a precise and effective deep clean while maintaining workflow freedom and minimizing disruption.
Protect Adjacent Surfaces
To set up an effective deep cleaning session, you’ll want to cover and shield all adjacent surfaces from potential damage caused by cleaning agents, dust, or debris. Prioritize floor protection and surface safeguarding by creating physical barriers that prevent contamination and moisture exposure. Here’s how you can achieve this efficiently:
- Use heavy-duty plastic sheeting or drop cloths for floor protection around the cleaning zone.
- Apply painter’s tape to secure coverings and protect baseboards or moldings.
- Cover electrical outlets and switches with waterproof tape to avoid liquid damage.
- Wrap nearby furniture legs and walls with protective film to prevent scratches or stains.
- Make certain ventilation covers are sealed to block dust infiltration during cleaning.
Removing Surface Dust and Loose Debris
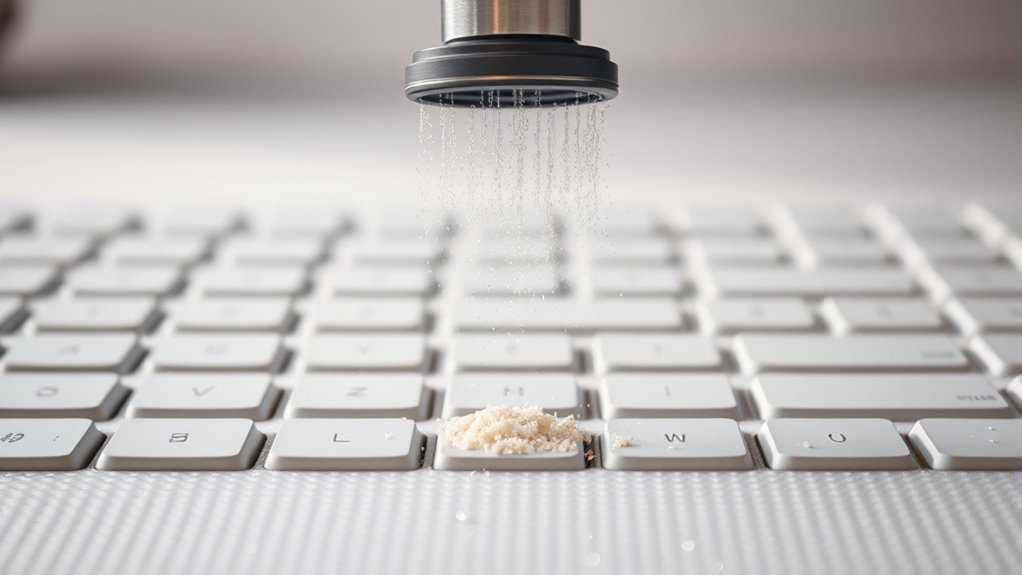
To effectively remove surface dust and loose debris from your keyboard, you’ll need specialized tools like compressed air cans, anti-static brushes, and microfiber cloths. Employ precise dusting techniques by directing airflow into crevices and gently sweeping particles away without dislodging keycaps. For ideal maintenance, perform this surface cleaning at least once a week to prevent buildup and guarantee consistent performance.
Tools for Dust Removal
Three essential tools can make dust removal from your keyboard both efficient and thorough. To maintain peak performance and freedom from contaminants, you’ll want to equip yourself with the right gear. Start with dust brushes designed with anti-static bristles that reach between keys without causing damage. Vacuum attachments tailored for electronics provide precise suction to extract loose debris without dislodging keycaps. Additionally, consider these indispensable tools:
- Compressed air cans to blow out stubborn dust
- Microfiber cloths for wiping surfaces delicately
- Soft rubber dust removers that pick up particles effectively
Each tool plays a specific role, ensuring you remove surface dust and loose debris without compromising your keyboard’s integrity. Using them correctly preserves function and enhances your cleaning efficiency.
Effective Dusting Techniques
Five key steps will help you efficiently remove surface dust and loose debris from your keyboard without risking damage. First, power off your device to avoid accidental inputs. Second, use compressed air to dislodge particles trapped between keys. Third, employ dusting methods involving microfiber cloths, which attract and trap dust without scratching surfaces. Fourth, gently wipe each key with a slightly dampened microfiber cloth, avoiding excess moisture. Fifth, focus on the keyboard’s edges and crevices, where dust tends to accumulate. These dusting methods guarantee thorough cleaning without compromising keyboard integrity. By mastering these precise techniques, you maintain your device’s functionality and extend its lifespan, all while keeping your workspace liberatingly clean and free from stubborn debris.
Frequency of Surface Cleaning
Regularly cleaning your keyboard’s surface is essential to prevent buildup of dust and debris that can impair key responsiveness and harbor bacteria. Establish a routine that includes weekly cleaning to maintain peak function and hygiene, complemented by seasonal deep cleaning for thorough maintenance. Focus on these key points:
- Remove loose debris with compressed air or a soft brush.
- Wipe the surface gently with isopropyl alcohol wipes to disinfect.
- Avoid moisture accumulation to protect internal electronics.
- Inspect for sticky keys and clean promptly to avoid mechanical issues.
- Schedule seasonal deep cleaning to dismantle and clean beneath keycaps.
Techniques for Cleaning Embedded Dirt and Grime
Although surface cleaning removes visible debris, embedded dirt and grime require more specialized techniques to confirm thorough removal. Begin deep cleaning by carefully removing keycaps with a key puller to access trapped particles underneath. Use compressed air to dislodge loose dirt before applying isopropyl alcohol (70% or higher) with a lint-free cloth or cotton swab to dissolve grime. For persistent buildup, employ a soft-bristled brush to agitate dirt without damaging components. Avoid excessive moisture to prevent electrical damage. Reassemble only after components are fully dry. Consistent application of these methods confirms effective grime removal, restoring keyboard functionality and hygiene. By mastering these precise techniques, you gain freedom from buildup that surface cleaning can’t address, maintaining an ideal typing environment.
Addressing Stubborn Stains and Discoloration
When stubborn stains and discoloration persist despite thorough cleaning, targeted solutions become necessary to restore your keyboard’s appearance. Understanding discoloration causes such as UV exposure, chemical reactions, or material degradation is key for effective stain removal. You’ll want to:
- Identify the stain type to select appropriate solvents or cleaning agents
- Test cleaning solutions on a small, inconspicuous area first
- Use isopropyl alcohol or specialized keyboard cleaners for ink or grease stains
- Apply gentle scrubbing with a soft-bristle brush to avoid surface damage
- Consider using baking soda paste for organic or food-based discoloration
Drying and Protecting Keyboard Flooring Post-Cleaning
Since moisture can compromise your keyboard’s internal components, ensuring thorough drying after cleaning is critical to maintain functionality and prevent damage. Begin by using controlled drying techniques such as compressed air to expel residual moisture from crevices and between keys. Avoid heat sources that may warp plastic or damage circuitry. Next, apply a suitable protective finish designed for keyboard flooring materials—this creates a barrier against future contaminants and moisture ingress. Opt for finishes that are non-conductive and compatible with your keyboard’s surface to prevent interference with key responsiveness. Allow the protective finish to cure fully in a dust-free environment to maximize adhesion and durability. By integrating precise drying methods with protective finishes, you’ll safeguard your keyboard flooring’s performance and extend its operational lifespan effectively.
Preventative Maintenance Tips for Longevity
To guarantee your keyboard remains functional and responsive over time, you’ll need to implement a consistent preventative maintenance routine. Establishing a strict maintenance schedule guarantees you address wear and environmental factors before they cause damage. Preventive cleaning minimizes debris buildup, preserving key sensitivity and floor integrity.
Consistent preventative maintenance keeps your keyboard functional and responsive by addressing wear and environmental factors early.
Here’s what you should include in your maintenance routine:
- Perform weekly surface dusting using compressed air or a soft brush.
- Schedule monthly deep cleaning sessions with appropriate solvents.
- Inspect keyboard flooring for signs of wear or moisture damage bi-monthly.
- Apply protective coatings to flooring surfaces quarterly to prevent degradation.
- Keep liquids and food away from your workspace to reduce contamination risk.
Following this regimen lets you enjoy your keyboard’s freedom without sacrificing durability or performance.
Safety Precautions During the Cleaning Process
Maintaining a regular cleaning schedule is only effective if you follow proper safety measures during the process. Before starting, verify you disconnect the keyboard from any power source to prevent electrical hazards. When handling cleaning chemicals, always consult the manufacturer’s guidelines for appropriate use and dilution. Use personal protective equipment such as nitrile gloves and safety goggles to shield your skin and eyes from irritants. Work in a well-ventilated area to avoid inhaling fumes. Avoid spraying liquids directly onto the keyboard; instead, apply solutions to a microfiber cloth for controlled cleaning. Dispose of any chemical waste responsibly, adhering to local regulations. By integrating these safety precautions, you protect yourself and maintain the integrity of your keyboard, enabling a thorough, risk-free cleaning process that preserves your freedom to work safely.
Frequently Asked Questions
Can Keyboard Flooring Be Cleaned With Steam Cleaners?
You might wonder about steam cleaner effectiveness on keyboard flooring. While steam cleaners offer powerful sanitation, you need to evaluate keyboard flooring durability first. Excessive moisture and heat from steam can damage delicate components or degrade materials over time. If your keyboard flooring is designed to withstand high humidity and heat, steam cleaning can be effective. Otherwise, it’s safer to use gentler cleaning methods to preserve its integrity without risking damage.
How Often Should Deep Cleaning Be Scheduled for Keyboard Flooring?
Consistent cleaning combats contaminants and conserves your keyboard flooring’s condition. For ideal cleaning frequency, schedule deep cleaning every six to twelve months, depending on foot traffic and environmental factors. Maintenance tips include regular vacuuming and immediate spot cleaning to prevent grime buildup. By following this precise schedule, you guarantee longevity and preserve freedom from frequent repairs, allowing your space to remain functional and fresh without unnecessary restrictions or downtime.
Are There Eco-Friendly Cleaning Products Suitable for Keyboard Flooring?
You’ll find several eco friendly solutions suitable for keyboard flooring, especially those emphasizing natural alternatives like vinegar, baking soda, and plant-based detergents. These products effectively break down dirt and grime without harsh chemicals, preserving both the flooring material and indoor air quality. When selecting, make certain the solution is pH-balanced and non-corrosive to prevent damage. Using these natural alternatives lets you maintain your space responsibly while enjoying freedom from synthetic toxins.
Can Keyboard Flooring Withstand Bleach-Based Cleaners?
You shouldn’t use bleach-based cleaners on keyboard flooring because bleach impact can severely compromise flooring durability. Bleach’s strong chemical properties may cause discoloration, surface degradation, or weaken the material structure over time. To preserve your flooring’s integrity and maintain its aesthetic, opt for milder, pH-neutral cleaners designed specifically for resilient surfaces. This approach guarantees you keep your flooring durable without risking damage from harsh chemicals.
Is Professional Cleaning Recommended for Keyboard Flooring Maintenance?
Imagine your keyboard flooring like a vintage car—regular upkeep keeps it running smoothly, but sometimes you need expert mechanics. Professional services guarantee deep cleaning beyond your routine, addressing hidden grime and preserving material integrity. Depending on cleaning frequency and environmental factors, scheduling these services prevents deterioration. So, while you can handle basic care, relying on pros at intervals assures longevity and maintains the pristine condition you value for your space.