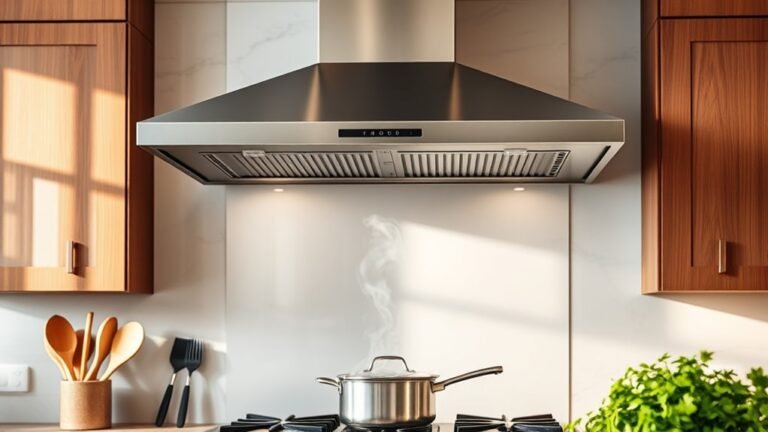
Pre-Holiday Cleaning Checklist for Range Hood
Before the holidays, inspect your range hood for visible grease buildup, especially on filters and fan blades. Gather your cleaning supplies like degreaser, soft cloths, and gloves. Remove the filters and soak them in hot, soapy water before scrubbing and rinsing. Wipe down the exterior and scrub the filter grates thoroughly. Don’t forget to clean the vent duct, check and replace light bulbs, then reassemble everything tightly. Finally, test the fan and lights to verify smooth operation. Up next, guarantee peak performance for your holiday cooking.
Inspect the Range Hood for Visible Grease Buildup
Before you plunge into scrubbing, take a close look at your range hood to spot any visible grease buildup. Start by examining the filters, fan blades, and the surface beneath the hood. Grease tends to accumulate in layers, so inspect all crevices carefully. Noticing the extent of buildup helps you plan effective grease removal and avoid unnecessary effort. For efficient maintenance, focus on areas where grease is thickest first. Use this inspection as a routine maintenance tip to prevent future grease buildup, saving you time and preserving your kitchen’s air quality. Keeping your range hood clean not only improves its performance but also maintains a fresh cooking environment, giving you the freedom to enjoy your kitchen without worry.
Gather Necessary Cleaning Supplies
Once you’ve assessed the grease buildup on your range hood, the next step is to gather all the cleaning supplies you’ll need to tackle the job efficiently. Start with basic essentials: a degreaser or mild detergent, a soft sponge or cloth, and a scrub brush for stubborn buildup. If you prefer eco friendly options, consider using baking soda, white vinegar, and lemon juice—these natural cleaners effectively cut grease without harsh chemicals. Don’t forget gloves to protect your hands and a bucket or basin for soaking parts if needed. Having all cleaning supplies ready before you start saves time and keeps the process smooth, giving you the freedom to focus on restoring your range hood’s shine without any interruptions.
Remove and Soak the Filters

Start by carefully removing the filters from your range hood, paying attention to how they fit so you can easily reinstall them later. Place the filters on a flat surface and prepare a soaking solution—mix hot water with a few drops of degreasing dish soap or vinegar for effective filter cleaning. Submerge the filters completely in the solution and let them soak for at least 15 to 30 minutes. This process loosens grease and grime, making it easier to clean thoroughly. After soaking, use a soft brush to gently scrub away any remaining residue. Rinse the filters with warm water and let them air dry completely before reinstalling. Taking these steps guarantees your filters are free of buildup, improving your range hood’s performance and giving you the freedom to cook without worry.
Clean the Range Hood Exterior
After your filters have soaked and dried, it’s time to focus on the range hood’s exterior. Start by wiping it down with a soft cloth dampened with warm, soapy water. This removes grease and dust that accumulate during cooking. For stainless steel surfaces, use a cleaner specifically designed for them to avoid streaks and maintain shine. Don’t forget buttons, knobs, and vents—they often collect grime that impacts range hood maintenance. Avoid abrasive pads that can scratch the surface. Once cleaned, dry the exterior thoroughly to prevent water spots. Regularly cleaning the range hood exterior not only enhances kitchen cleanliness but also extends the appliance’s lifespan. By keeping this area spotless, you’re ensuring your kitchen stays fresh and your range hood performs at its best throughout the holidays.
Scrub the Filter Grates Thoroughly

Give your filter grates a thorough scrubbing to remove the stubborn grease and residue that can build up over time. Start by soaking the grates in hot, soapy water for at least 15 minutes to loosen debris. Use a non-abrasive brush or sponge to scrub each grate carefully, focusing on corners and mesh where grease hides. Applying a degreaser can enhance your cleaning techniques, ensuring all oily buildup is broken down effectively. After scrubbing, rinse the grates with clean water and let them air dry completely to prevent moisture-related issues. Regular filter maintenance like this not only improves your range hood’s efficiency but also extends its lifespan. Taking these practical steps gives you freedom from frequent deep cleans and keeps your kitchen fresh during the holidays.
Wipe Down the Fan Blades and Motor Housing
Wipe down the fan blades and motor housing carefully to remove accumulated dust and grease that can hinder your range hood’s performance. Proper fan maintenance and motor cleaning are essential steps to keep your range hood running smoothly and efficiently.
Regularly cleaning fan blades and motor housing removes dust and grease, ensuring your range hood operates efficiently.
Here’s how to tackle this task effectively:
- Use a soft cloth dampened with warm, soapy water to gently clean the fan blades.
- Avoid harsh chemicals that can damage the motor housing or blades.
- Make sure the range hood is unplugged before starting motor cleaning to guarantee safety.
- Dry all components thoroughly to prevent rust or electrical issues.
Clean the Vent Duct and Exhaust Area
While cleaning the fan blades is essential, you shouldn’t overlook the vent duct and exhaust area, as buildup here can restrict airflow and reduce your range hood’s efficiency. Start by disconnecting power to guarantee safety. Remove any accessible duct covers, then use a flexible brush or vacuum designed for duct maintenance to clear out accumulated grease and debris. Pay close attention to bends and joints, where buildup tends to gather. Next, inspect the exhaust area outside your home, removing any blockages like leaves or bird nests that could impede airflow. Regularly maintaining these parts not only improves exhaust efficiency but also extends your range hood’s lifespan. Taking these steps before the holidays guarantees your kitchen stays fresh and smoke-free, letting you enjoy cooking without unwanted odors or lingering grease.
Check and Replace Light Bulbs if Needed
A well-lit kitchen is essential for safe and efficient cooking, especially during the busy holiday season. Checking and replacing your range hood’s light bulbs guarantees you have the right brightness levels to clearly see what you’re preparing. Start by identifying the bulb types compatible with your hood—LED, halogen, or incandescent—to match your preferences and energy use. Consider these steps:
- Turn off power before removing bulbs to avoid shocks.
- Inspect bulbs for dimness, flickering, or burnout.
- Choose bulbs with appropriate brightness levels for ideal visibility.
- Replace bulbs carefully, confirming correct wattage and fitting.
Reassemble the Range Hood Components
When reassembling your range hood components, make certain each part is properly aligned to guarantee smooth operation. Double-check that all screws, clips, or fasteners are securely tightened to prevent any loose pieces. Taking these steps carefully will help maintain your range hood’s efficiency and safety during the holidays.
Align Parts Correctly
Three key steps will help you align the range hood parts correctly as you reassemble them: identifying each component’s position, matching connection points precisely, and ensuring all screws and clips fit securely. Achieving proper parts alignment avoids damage and guarantees peak performance. Focus on correct positioning to make sure every piece fits as intended.
- Lay out all components in the order they’ll be reassembled
- Refer to your manual or previous notes for each part’s location
- Align edges carefully before securing parts together
- Check that all holes and clips line up perfectly
Secure Fastening Methods
Although proper alignment sets the foundation, you’ll need to focus on secure fastening methods to verify the range hood components stay firmly in place. Start by identifying the correct fastening techniques for each part—screws, clips, or brackets—to verify a secure installation. Use a screwdriver or drill with the appropriate bit to tighten screws without stripping them. For clip mechanisms, apply steady pressure until you hear a click, confirming they’re locked. Double-check all fasteners to avoid loose parts that could rattle or detach during operation. Finally, test the stability by gently shaking the reassembled components. By following these precise fastening techniques, you’ll enjoy a reliable, sturdy range hood setup that won’t require constant adjustments, giving you freedom from maintenance hassles during the busy holiday season.
Test the Range Hood for Proper Operation
Start by turning on your range hood to check if the fan and lights are working properly. Ensuring your range hood functionality is ideal means your kitchen stays smoke-free and comfortable. Pay close attention to the airflow efficiency — if the fan sounds weak or the suction feels off, it’s time for maintenance.
Begin by testing your range hood’s fan and lights to ensure optimal kitchen ventilation and comfort.
Here’s what to check:
- Confirm the fan operates smoothly without unusual noises
- Verify that all light bulbs illuminate correctly
- Test different fan speed settings for consistent airflow
- Feel for strong suction near the hood’s intake area
Frequently Asked Questions
How Often Should I Clean My Range Hood Filters During the Year?
Imagine your range hood filters like your car’s air filter—it needs regular care to keep things running smoothly. For range hood maintenance, you should clean the filters every 1 to 3 months, depending on how often you cook. Grease and debris build up quickly, reducing efficiency. If filters look damaged or too clogged, don’t hesitate to replace them. Keeping up with this gives you freedom from kitchen odors and keeps your cooking space fresh and safe.
Can I Use Natural Cleaning Products for My Range Hood?
You absolutely can use natural cleaning products for your range hood. Eco friendly solutions like vinegar, baking soda, and lemon juice work wonders at cutting grease without harsh chemicals. For DIY cleaners, mix baking soda with water to form a paste, then scrub filters gently. These options keep your kitchen fresh and safe while giving you freedom from toxic ingredients. Just remember to rinse thoroughly and dry parts before reinstalling.
What Should I Do if My Range Hood Makes Unusual Noises?
As they say, “An ounce of prevention is worth a pound of cure.” If your range hood makes unusual noises, start with thorough range hood maintenance. Check for loose screws, clogged filters, or debris in the fan blades. Clean or replace filters regularly to avoid noise issues. If the noise persists, consider lubricating the motor or contacting a professional. These unusual noise solutions will keep your kitchen peaceful and your freedom intact.
Is It Safe to Clean the Range Hood Motor Myself?
You can clean parts of your range hood motor yourself, but range hood safety is key. Before starting, always unplug the unit to avoid electric shock. Use a soft brush or cloth to gently remove dust and grease buildup, but avoid getting moisture into the motor. For deeper motor maintenance or if you’re unsure, it’s best to call a professional. This way, you maintain safety while keeping your motor running smoothly and freely.
How Do I Prevent Grease Buildup on My Range Hood?
To prevent grease buildup, you should focus on regular grease prevention and hood maintenance. Clean the filters weekly with hot, soapy water or in the dishwasher if they’re dishwasher-safe. Wipe down the exterior and interior surfaces after cooking to avoid residue buildup. Run the range hood during and after cooking to keep air flowing and trap grease particles. Staying consistent with these steps guarantees your hood works efficiently and stays grease-free longer.