Spring Cleaning Guide for Oven
For your spring oven cleaning, start by removing racks and gathering gloves, a sturdy scraper, and supplies like baking soda and vinegar. Make a natural paste to tackle grime, then apply and let it sit to loosen baked-on messes. Don’t forget to soak racks separately. Wipe everything down thoroughly, focusing on stubborn spots. Keeping spills wiped up between deep cleans saves time. If you want to know how to handle tough stains and keep your oven spotless longer, keep exploring further steps.
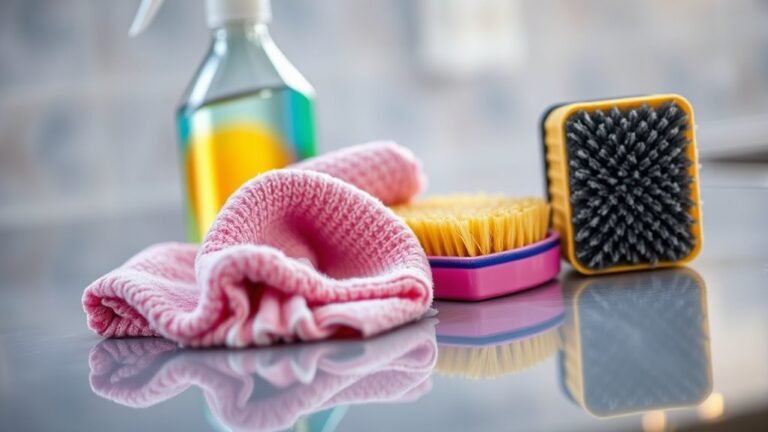
Tools and Materials Needed for Oven Cleaning

To get your oven sparkling clean, you’ll need just a few essential tools and materials. First, gather your oven cleaning tools: a sturdy scraper or spatula, a soft-bristle brush, and microfiber cloths. These will help you tackle grime without damaging the oven’s surfaces. Next, select effective cleaning materials such as baking soda, white vinegar, and a non-toxic commercial oven cleaner if you prefer convenience. Gloves are a must to protect your hands, and having a spray bottle will aid in applying solutions evenly. With these oven cleaning tools and cleaning materials at your disposal, you’re empowered to reclaim your kitchen space without relying on harsh chemicals or expensive services. Freedom in cleaning starts with the right gear, making the process straightforward and satisfying.
Preparing Your Oven for Cleaning
Before you start cleaning, be sure to remove the oven racks to give yourself full access to the interior. Next, gather all the cleaning supplies you’ll need, like gloves, scrubbers, and your chosen cleaner. Having everything ready will make the process smoother and quicker.
Remove Oven Racks
One essential step in preparing your oven for cleaning is removing the oven racks. This rack removal frees up space and lets you clean both the racks and oven interior thoroughly. Take your time to slide each rack out carefully to avoid scratching or bending them. Once out, you can soak the racks in warm, soapy water to make rack cleaning easier and more effective.
| Step | Tip |
|---|---|
| Slide Out | Use both hands for control |
| Soak | Warm water with dish soap |
| Scrub & Rinse | Use a non-abrasive scrubber |
Removing racks not only simplifies cleaning but also gives you the freedom to restore your oven to its best condition.
Gather Cleaning Supplies
Gathering the right cleaning supplies is essential for an efficient oven scrub-down. You want to equip yourself with essentials like a sturdy sponge, a soft-bristle brush, a spray bottle, and microfiber cloths. Don’t forget gloves to protect your hands and a plastic scraper for stubborn grime. If you’re aiming for freedom from harsh chemicals, consider eco friendly options such as baking soda, white vinegar, and lemon juice. These natural ingredients not only tackle grease effectively but also keep your home healthier and the environment cleaner. By choosing the right cleaning supplies, you’re setting yourself up for a smooth, effective cleaning session that respects both your space and the planet. With everything gathered, you’ll be ready to tackle your oven with confidence.
How to Make a Natural Oven Cleaning Paste

You’ll need just a few simple ingredients like baking soda, water, and maybe some vinegar to create an effective natural oven cleaning paste. Mixing these properly is key to getting the right consistency for easy application. Let’s walk through the steps to prepare your paste so it works wonders on your oven grime.
Ingredients Needed
Before you start scrubbing, it’s important to have the right ingredients on hand to make a natural oven cleaning paste. This simple mix harnesses the power of baking soda and white vinegar to cut through grime without harsh chemicals. Gather these essentials to enjoy a fresh, clean oven and the freedom of a toxin-free home.
| Ingredient | Purpose |
|---|---|
| Baking soda | Base for scrubbing |
| White vinegar | Activates fizzing action |
| Water | Adjusts paste consistency |
| Lemon juice | Adds natural freshness |
With these ingredients, you’re all set to create a paste that’s tough on grease yet gentle on your oven. You’ll be amazed at how easily the grime loosens up, giving you more time to enjoy life.
Preparation Steps
Start by mixing half a cup of baking soda with a few tablespoons of water until you get a spreadable paste. This simple, natural mixture is your key to freeing your oven from grime without harsh chemicals. Adjust the water slowly—too much and it won’t stick; too little and it’ll be hard to spread. Once your paste is ready, remember to plan your cleaning schedule wisely to maintain that fresh feeling without rushing. Before applying, take safety precautions: wear gloves and guarantee good ventilation. This way, you protect yourself while reclaiming your oven’s shine naturally. With just a bit of effort and this homemade paste, you’re in control, breaking free from toxic cleaners and embracing a cleaner, healthier kitchen environment.
Step-by-Step Oven Cleaning Process
Cleaning your oven can be a straightforward task when broken down into clear steps. To regain your kitchen’s freedom from grime, start by choosing the right oven cleaning techniques and safe cleaning products. Here’s how you do it:
- Apply a non-toxic cleaner generously inside the oven, avoiding heating elements.
- Let the product sit for 20-30 minutes to loosen baked-on grease and debris.
- Wipe everything down thoroughly with a damp cloth, repeating as needed for stubborn spots.
This approach frees you from harsh chemicals and endless scrubbing. By following these steps, you’ll enjoy a spotless oven without sacrificing your health or time. Remember, the key to success lies in patience and selecting safe products that respect both you and your appliance.
Cleaning Oven Racks and Accessories

Although the oven’s main chamber gets most of the attention, you shouldn’t overlook the racks and accessories that support your cooking. Start by removing the racks and soaking them in warm, soapy water—rack soaking loosens grime effortlessly. While they soak, tackle accessory cleaning by wiping down trays, thermometers, and other removable parts with a damp cloth and mild cleaner. For stubborn spots on racks, a gentle scrub with a non-abrasive pad will do the trick once they’ve softened. Rinse everything thoroughly and let them air dry before sliding racks and accessories back into place. Keeping these components clean not only extends their life but also guarantees your cooking freedom stays fresh and hassle-free every time you open your oven door.
Dealing With Tough Stains and Burnt-On Residue
Tackling tough stains and burnt-on residue can feel like a hassle, but with the right approach, you’ll get your oven spotless in no time. Don’t let stubborn grime hold you back from enjoying a clean cooking space. Start by loosening burnt residue with a simple, natural paste of baking soda and water. Let it sit for 15-20 minutes to break down tough stains. Then:
Ease oven cleaning with a baking soda paste and gentle scrubbing for a spotless, grime-free kitchen.
- Scrub gently with a non-abrasive sponge to avoid scratching.
- Use a plastic scraper to lift stubborn burnt residue without damaging surfaces.
- Rinse thoroughly with warm water and wipe dry for a streak-free finish.
Tips to Maintain a Clean Oven Between Deep Cleans
Even if you don’t deep clean your oven regularly, you can keep it looking fresh with some simple habits. Start by wiping spills immediately after the oven cools—that prevents grime buildup and makes cleaning easier. Use a damp cloth or sponge for quick daily cleaning habits. Avoid harsh chemicals; a mixture of baking soda and water works wonders for light messes. Regularly check and clean the oven racks—they can be soaked and scrubbed separately. Also, consider placing a reusable liner at the bottom to catch drips and crumbs. These oven maintenance tips save you time and effort, giving you freedom from scrubbing marathons. By staying consistent with these small steps, you’ll maintain a clean oven that’s always ready for your next cooking adventure.
Frequently Asked Questions
How Often Should I Deep Clean My Oven Annually?
You should aim for an annual deep cleaning to keep your oven running smoothly and smelling fresh. It’s a key part of oven maintenance tips that help prevent buildup and improve efficiency. If you love the freedom of a clean, hassle-free kitchen, sticking to this schedule makes sense. Of course, if you cook a lot, you might want to deep clean twice a year. Either way, regular care keeps your oven in top shape!
Can I Use Commercial Oven Cleaners Safely With Pets Around?
Better safe than sorry, especially when it comes to pet safety. While commercial oven cleaners can be effective, they often contain harsh chemicals that might harm your furry friends if inhaled or ingested. You’re better off choosing cleaner alternatives like baking soda and vinegar, which are gentler and pet-friendly. Remember, your freedom to clean safely means protecting your pets from unnecessary risks—so opt for natural solutions whenever possible.
What Are the Signs My Oven Needs Professional Servicing?
You’ll know your oven needs professional servicing when you notice oven performance indicators like uneven heating or longer cooking times. If your oven struggles to maintain temperature or you spot unusual smells, especially burning or gas odors, that’s a clear sign something’s off. Don’t ignore these warnings—you deserve the freedom to cook without hassle or safety worries. Getting a pro to check it out guarantees your oven stays reliable and safe.
Is It Better to Clean the Oven When It’S Hot or Cold?
You might wonder if hot cleaning or cold cleaning works better for your oven. Hot cleaning loosens grime quickly but can be risky if you’re not careful; the oven’s heat can burn you. Cold cleaning gives you more control and safety, letting you tackle tough spots with cleaning agents at your own pace. If you want freedom and safety, cold cleaning’s usually the smarter choice, but a mix can work too.
How Does Oven Cleanliness Impact Cooking Efficiency?
When your oven’s clean, you’ll notice better cooking performance because heat distributes evenly without grime blocking it. A dirty oven forces your appliance to work harder, reducing energy efficiency and wasting power. Keeping it spotless means you’ll save energy, cook food more consistently, and enjoy your freedom from unnecessary costs or uneven meals. So, maintaining oven cleanliness isn’t just about looks—it’s about making your cooking smoother and more efficient.