Step-By-Step Guide to Cleaning Remote
To clean your remote, first gather supplies like a microfiber cloth, isopropyl alcohol, and cotton swabs. Power off and remove the batteries for safety. Wipe the surface gently with a damp cloth, then clean between buttons using cotton swabs dipped in alcohol. Disinfect carefully without soaking the remote, then let it dry fully before reassembling if taken apart. Regular maintenance keeps it working well. Keep following to uncover more tips and detailed steps for ideal care.
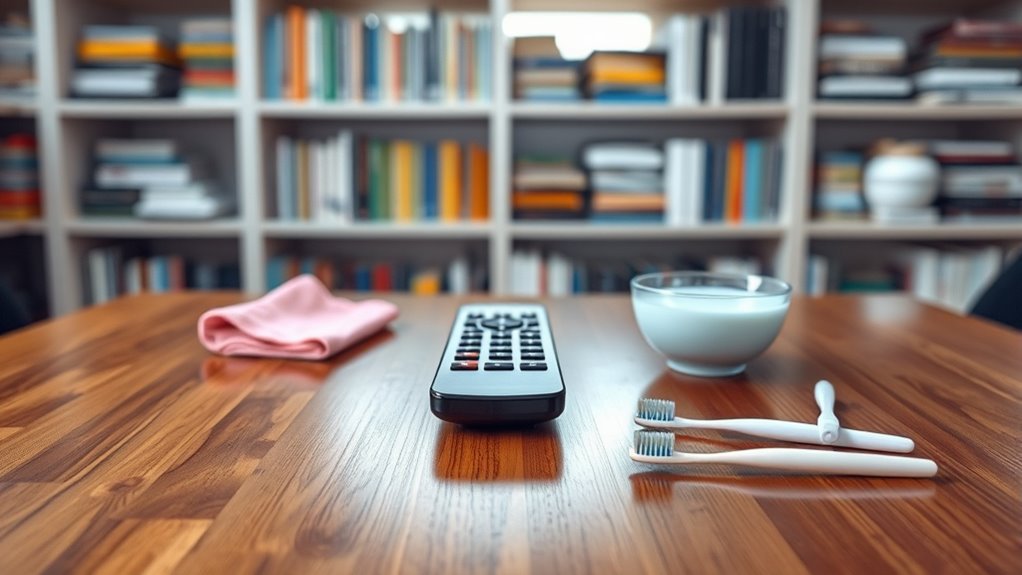
Gather Necessary Cleaning Supplies

Before you begin cleaning your remote, you’ll need a few essential supplies. Having the right cleaning supplies and essential tools at your fingertips gives you the freedom to tackle the task efficiently and confidently. Start with a microfiber cloth—it’s perfect for wiping away dirt without scratching. Next, grab some isopropyl alcohol or a gentle cleaning solution to disinfect without damaging your remote. Cotton swabs are essential tools for reaching tight spaces between buttons where grime hides. You might also want a small brush or compressed air to blow out dust and debris. By gathering these cleaning supplies now, you set yourself up for a smooth, effective cleaning process that frees your remote from dirt and germs, letting you enjoy your devices without restriction.
Power Off and Remove Batteries
Start by powering off your remote to guarantee safety during cleaning. This simple step guarantees you won’t accidentally trigger any commands or waste energy, reflecting smart power management. Next, remove the batteries carefully to protect both yourself and your device. Handling batteries with care is vital for battery safety — it prevents leaks or corrosion that could damage your remote. Once out, store the batteries in a dry, cool place or dispose of them properly if they’re old. By disconnecting power sources, you free yourself from the risk of electrical mishaps, giving you full control over the cleaning process. Taking these steps empowers you to maintain your remote efficiently and safely, so you can enjoy its freedom of use without worry.
Wipe Down the Remote Surface

Although the batteries are removed, you’ll still want to handle the remote gently while wiping down its surface. Start by dampening a soft cloth with a mixture of mild soap and water or use a screen-safe cleaning wipe. Avoid harsh chemicals that could damage the remote surface or strip away any labels. Using gentle cleaning techniques, wipe the entire surface in smooth, circular motions to lift dirt and oils without pushing debris into crevices. Make sure the cloth is only slightly damp to prevent moisture from seeping inside. This simple step refreshes your remote, keeping it clean and functional without restricting your freedom to enjoy your devices. Remember, a careful approach preserves both the remote’s condition and your peace of mind.
Clean Between the Buttons
Since dirt and grime often build up between the buttons, cleaning these tight spaces is crucial to keep your remote responsive. You don’t want stuck or unresponsive buttons limiting your freedom to control your devices. For effective button cleaning, grab a soft-bristled brush or a cotton swab slightly dampened with rubbing alcohol. Gently scrub between each button to loosen and lift away debris without damaging the remote. Avoid spraying liquids directly onto the device to prevent moisture damage. Regular remote maintenance like this guarantees every button press is smooth and reliable, helping you stay in control without hassle. Taking these small steps lets you enjoy your entertainment freedom fully, free from the frustration of a dirty, unresponsive remote.
Disinfect the Remote Safely

When disinfecting your remote, make sure you pick safe cleaners that won’t harm the device. Avoid using too much liquid to prevent damage inside the buttons. Gently wipe the surface thoroughly to kill germs without soaking the remote.
Choose Safe Disinfectants
Before you start disinfecting your remote, make certain you pick a cleaner that’s effective but won’t damage its surface or electronics. When choosing disinfectant options, look for those made with safe materials like isopropyl alcohol (at least 70%) or disinfectant wipes specifically designed for electronics. Avoid harsh chemicals such as bleach or ammonia, which can erode plastic or seep into delicate components. Using safe materials guarantees you protect your remote’s finish while still eliminating germs. You want a disinfectant that kills bacteria and viruses without compromising your device’s functionality. Stay clear of anything too abrasive or overly wet—stick to gentle but powerful solutions. This way, you maintain both your health and your freedom to use your remote without worry.
Avoid Liquid Damage
A key step to disinfecting your remote safely is avoiding liquid damage. You want to steer clear of excess moisture sources that can seep inside and ruin the internal components. Instead of pouring or spraying liquid types directly onto the remote, apply disinfectant to a soft cloth first. This method gives you control over how much moisture you’re using, preventing drips and puddles. Be cautious with water-based solutions and alcohol-based cleaners alike—too much liquid can cause short circuits or sticky buttons. Protect your freedom from unnecessary repairs by limiting exposure to moisture. Remember, your goal is to clean effectively without compromising your remote’s function. This careful approach keeps your device working smoothly while still killing germs.
Wipe Thoroughly and Gently
Keeping moisture in check sets the stage for wiping your remote thoroughly and gently. You want to use gentle techniques to avoid damaging surface materials while disinfecting. Grab a microfiber cloth dampened with a bit of isopropyl alcohol or an appropriate cleaning solution. Avoid soaking it to prevent moisture seeping inside. Wipe all surfaces carefully, paying attention to buttons and crevices.
| Step | Action | Tip |
|---|---|---|
| 1 | Use microfiber cloth | Soft, non-abrasive material |
| 2 | Slightly dampen cloth | Prevent excess moisture |
| 3 | Wipe all surfaces gently | Avoid pressing too hard |
| 4 | Clean crevices carefully | Use cotton swabs if needed |
| 5 | Dry immediately | Confirm no lingering dampness |
This approach frees you to enjoy a clean remote without risking damage.
Dry and Reassemble the Remote
Once you’ve cleaned your remote, make sure you let it air dry completely to prevent any moisture damage. Avoid using heat sources that could warp the plastic or harm the electronics. When everything is dry, carefully follow the proper steps to reassemble your remote so it works like new.
Air Dry Techniques
Moisture left inside your remote can cause damage if not fully dried before reassembly. To confirm your remote stays safe, focus on effective air drying methods. Start by placing the remote’s components on a clean, dry surface with good airflow. Use drying materials like microfiber cloths or paper towels to gently pat off excess moisture without pushing it deeper inside. Avoid direct sunlight or heat sources, which can warp plastic parts. Instead, let the parts air dry naturally for several hours, or even overnight, to assure all moisture evaporates. This approach gives you the freedom to clean thoroughly without risking internal damage. Once you’re confident everything is dry, you can reassemble your remote, confident it’s ready for use.
Avoiding Moisture Damage
Before you reassemble your remote, make sure every part is completely dry to prevent any damage. Moisture prevention is key to maintaining your remote’s functionality and ensuring long-lasting remote protection. Any leftover dampness can cause corrosion or electrical issues, limiting your freedom to use it whenever you want. You can speed up drying by gently patting components with a lint-free cloth and letting them air dry in a warm, dry spot. Avoid using heat sources like hair dryers, as they might warp delicate parts. Taking these steps means you’re actively protecting your remote from hidden moisture risks. Once dry, you’ll confidently move forward knowing your remote is safe and ready to be reassembled, preserving your control over your devices.
Proper Reassembly Steps
After verifying all parts are completely dry, you can start putting your remote back together. Using smart reassembly techniques will guarantee your remote works flawlessly and feels just right in your hand again. Here’s how to regain your freedom from a malfunctioning remote:
- Button Alignment: Carefully align each button in its slot. Misalignment can cause stuck or unresponsive buttons, so take your time here.
- Circuit Placement: Position the circuit board exactly as it was, avoiding any pinches or bends. This protects the electronics and maintains functionality.
- Housing Snap: Gently press the remote’s front and back housings together until you hear a secure click, confirming everything fits perfectly.
Following these steps assures your remote is ready to serve you freely once more.
Tips for Regular Remote Maintenance
Though it might seem like a small device, your remote needs regular care to keep it working smoothly. With regular usage, dirt and oils can build up, affecting button response and overall function. To guarantee remote longevity, wipe it down weekly with a slightly damp microfiber cloth—avoid harsh chemicals that could damage its surface. Remove batteries if you won’t use the remote for an extended time to prevent corrosion. Keep it in a clean, dry spot to avoid dust accumulation and accidental spills. Regularly check for stuck buttons or unusual behavior, and clean as needed. By following these simple steps, you maintain control freedom, ensuring your remote stays responsive whenever you want to enjoy your devices without interruption.
Frequently Asked Questions
Can I Use Water Directly on the Remote?
You shouldn’t use water directly on your remote because it can cause water damage, especially if the remote’s materials aren’t water-resistant. Instead, try using a slightly damp cloth to avoid soaking it. This way, you keep your remote safe and working while still cleaning it effectively. You want to maintain your freedom to control devices without risking a broken remote, so being cautious with moisture is key.
How Often Should I Clean My Remote Control?
Think of your remote as a tiny kingdom—neglected, it gathers dust and germs like unwanted invaders. For your freedom from sticky buttons and grimy surfaces, maintain a regular cleaning frequency of once a week or every two weeks. This keeps remote hygiene in check, letting you enjoy seamless control without worry. Don’t let dirt rule; a little care goes a long way in preserving your device’s lifespan and your peace of mind.
What if My Remote Stops Working After Cleaning?
If your remote stops working after cleaning, don’t worry—there are troubleshooting tips you can try. First, check if the batteries are properly seated or need replacing. Confirm no moisture is trapped inside, and let it dry completely. If it still doesn’t work, consider replacement options like buying a universal remote or using your smartphone as a remote control. You’ve got the freedom to choose what works best for you!
Are There Remotes That Are Waterproof?
You’d think waterproof remotes are as rare as unicorns, but they really do exist! If you crave freedom from worrying about spills or rain, these waterproof remotes offer incredible remote durability. They’re designed to withstand water exposure, letting you enjoy your devices without fear. Just remember, not all remotes are waterproof, so look for those specifically labeled accordingly to guarantee you get the protection you need for carefree use.
Can I Use a Dishwasher to Clean My Remote?
You shouldn’t use a dishwasher to clean your remote because dishwasher safety for electronics is generally poor. Most remotes are made of materials like plastic and contain sensitive components that can be damaged by water and heat. Instead, try wiping it down with a damp cloth and mild cleaner. This way, you maintain your freedom to use the remote without risking costly damage or loss of functionality.


