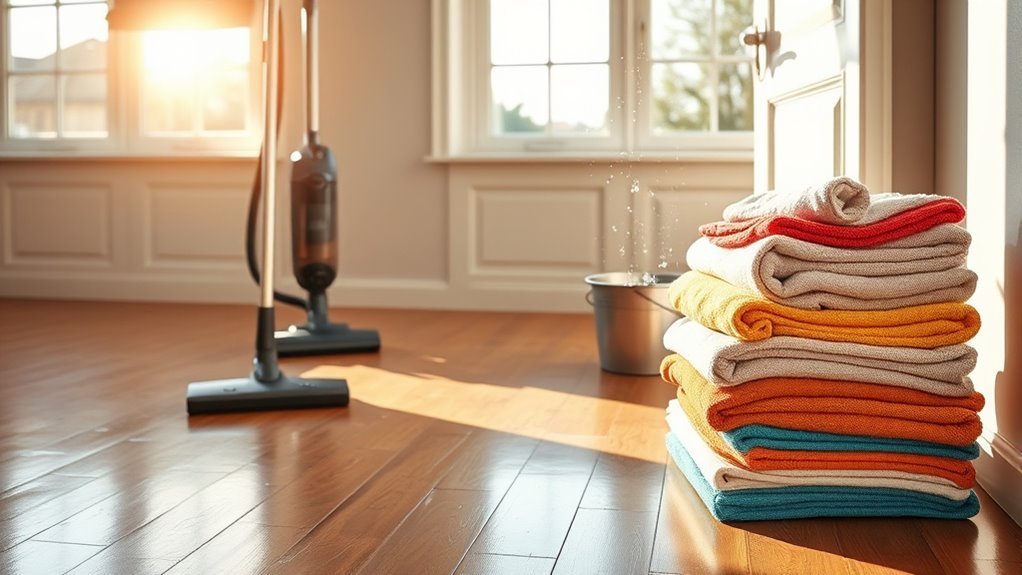
How to Clean Your Home After Wood
After woodworking, start by picking up large chips while wearing gloves, then sweep gently to avoid scattering debris. Use a vacuum with a HEPA filter to capture fine sawdust, moving slowly for thorough cleaning. Damp microfiber cloths work best for dusting surfaces without scratching. Clear the area beforehand and ventilate well to maintain air quality. Finally, dispose of wood waste safely, separating treated materials. Keep these steps in mind if you want to master a complete cleanup process.
Assessing the Type of Wood Debris
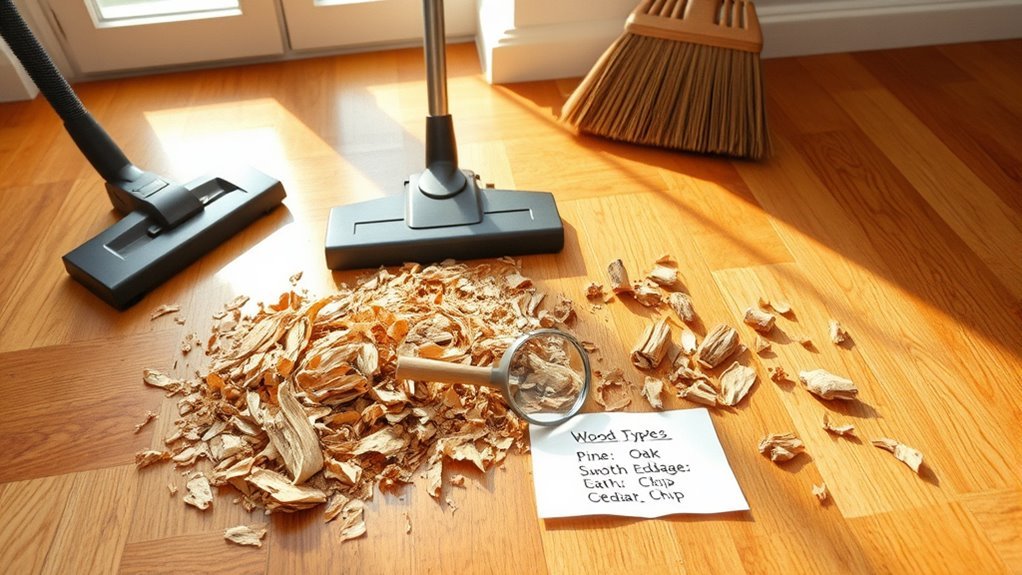
Before you begin cleaning, it’s crucial to identify the type of wood debris you’re dealing with, as different materials require distinct handling techniques. Start by observing the wood types present: are you dealing with sawdust from softwoods like pine, or chips from hardwoods like oak? Each produces dust and fragments of varying density and size, affecting cleanup methods. Next, perform debris identification by evaluating moisture levels and any finishes such as varnish or paint on the wood remnants. This influences whether you need dry sweeping or a damp approach. Recognizing these characteristics helps you choose precise removal techniques, ensuring efficiency and protecting your freedom to maintain a clean environment without unnecessary restrictions or damage. Accurate debris identification is the foundation for a successful, tailored cleaning process after working with wood.
Gathering Essential Cleaning Tools
Before you start cleaning, make sure you have all the essential supplies like a broom, vacuum, dustpan, and a damp cloth ready. Don’t forget protective gear such as gloves and a mask to keep yourself safe from dust and splinters. Organize these tools in a convenient spot so you can access everything efficiently during the cleanup.
Must-Have Cleaning Supplies
Although cleaning up after woodwork can feel overwhelming, having the right supplies on hand will make the process much more efficient. Start by gathering your must-have tools: a sturdy broom, a high-quality vacuum with a HEPA filter, microfiber cloths, and a dustpan. These essentials will help you tackle sawdust and wood chips quickly. Next, select appropriate cleaning solutions—mild detergent for general surfaces and a specialized wood cleaner to preserve finishes without damage. Avoid harsh chemicals that could harm your wooden surfaces. Keep a bucket for water and solution mixing, along with disposable gloves to maintain hygiene. By methodically assembling these must-have tools and cleaning solutions, you’ll streamline your cleanup, giving you the freedom to enjoy a spotless space without unnecessary hassle.
Protective Gear Importance
Gathering the right cleaning supplies sets the stage, but protecting yourself during the cleanup is just as important. Before you plunge into removing sawdust, wood chips, or stains, put on your protective gloves to shield your hands from splinters, harsh chemicals, and irritants. These gloves should fit snugly, allowing dexterity without sacrificing safety. Equally essential are safety goggles; wood particles or cleaning sprays can easily irritate or damage your eyes. Choose goggles with a secure seal to prevent debris from sneaking in. By prioritizing this gear, you maintain your freedom to move confidently and efficiently through the task without injury or discomfort. Remember, a careful approach with protective gloves and safety goggles guarantees your cleaning process is both safe and effective.
Organizing Cleaning Materials
To tackle cleaning after working with wood efficiently, you’ll want to assemble a well-organized set of essential tools. Start by gathering all necessary cleaning supplies: microfiber cloths, a vacuum with a HEPA filter, dustpans, brushes, and appropriate wood-safe cleaners. Use organizing tips like grouping items by function—dusting, wiping, vacuuming—to streamline the process. Store these supplies in a portable caddy or container, so you can move freely from room to room without interruption. Label compartments or sections to quickly locate what you need. Keep gloves and masks close to maintain safety during cleanup. This methodical approach to organizing cleaning materials not only saves time but also grants you the freedom to clean thoroughly and effectively, avoiding unnecessary backtracking or forgotten tools.
Preparing the Area for Cleaning
Before you begin cleaning up wood debris, it is vital to clear the area thoroughly to prevent spreading dust and particles. Start by applying wood preparation techniques: remove any loose objects or furniture, and cover nearby surfaces with protective sheets. Conduct an area safety assessment to identify potential hazards such as sharp splinters, nails, or unstable flooring. Confirm proper ventilation by opening windows or using fans to disperse airborne dust. Wearing protective gear like gloves and a mask is essential to maintain your freedom to work safely without interruptions. Finally, designate a clear pathway for debris removal to streamline your process. By preparing the area methodically, you’ll maintain control and efficiency as you move forward with cleaning, minimizing mess and risk.
Removing Large Wood Chips and Splinters
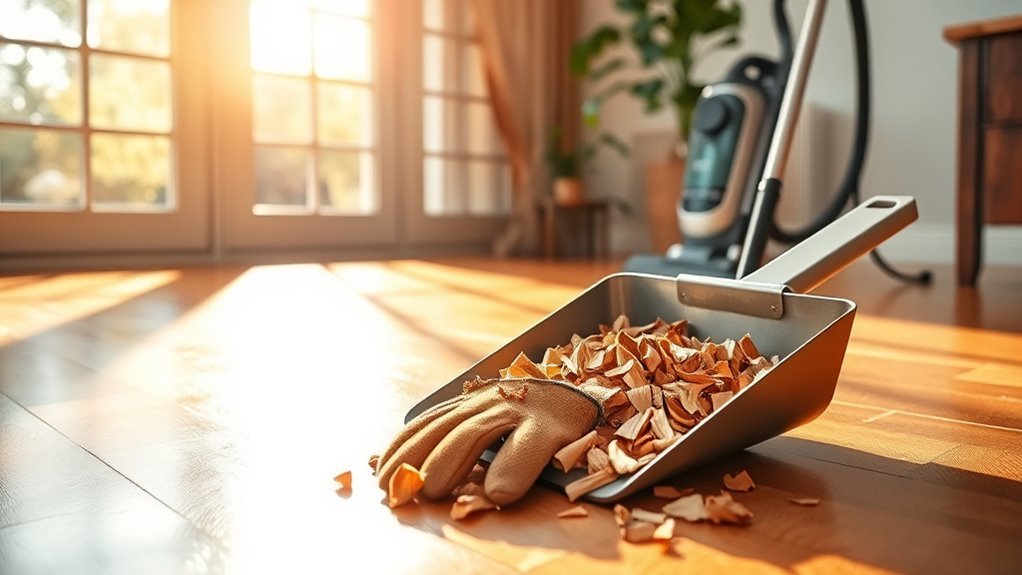
Once the area is secured and you’ve donned protective gear, focus on clearing out the larger wood chips and splinters. These pieces of wood debris can pose hazards and hinder a thorough cleanup. Use these cleanup techniques to methodically remove them:
After securing the area and wearing protective gear, prioritize removing large wood chips and splinters to ensure safety.
- Carefully pick up large chips by hand, wearing gloves to avoid injury.
- Use a stiff broom to gently sweep splinters into manageable piles.
- Employ a dustpan to collect and dispose of wood debris efficiently.
- Inspect corners and crevices with a flashlight to guarantee no fragments remain.
- Avoid aggressive sweeping that scatters debris further.
Vacuuming Sawdust Effectively
Although vacuuming sawdust might seem straightforward, it requires careful technique to guarantee all fine particles are removed without clogging your vacuum. First, use a vacuum with a HEPA filter and a brush attachment for effective sawdust vacuuming techniques. Move slowly and in overlapping strokes to capture hidden dust. Frequent vacuum cleaner maintenance, like checking filters and emptying dust bins, prevents buildup that reduces suction.
| Step | Detail |
|---|---|
| Select Equipment | HEPA filter, brush attachment |
| Vacuum Method | Slow, overlapping strokes |
| Monitor Suction | Stop if reduced, clean filters |
| Empty Collection Bin | After each session |
| Clean Filters | Weekly during heavy sawdust cleanup |
These steps assure efficient sawdust removal while protecting your vacuum’s functionality.
Using Damp Cloths for Fine Dust Removal
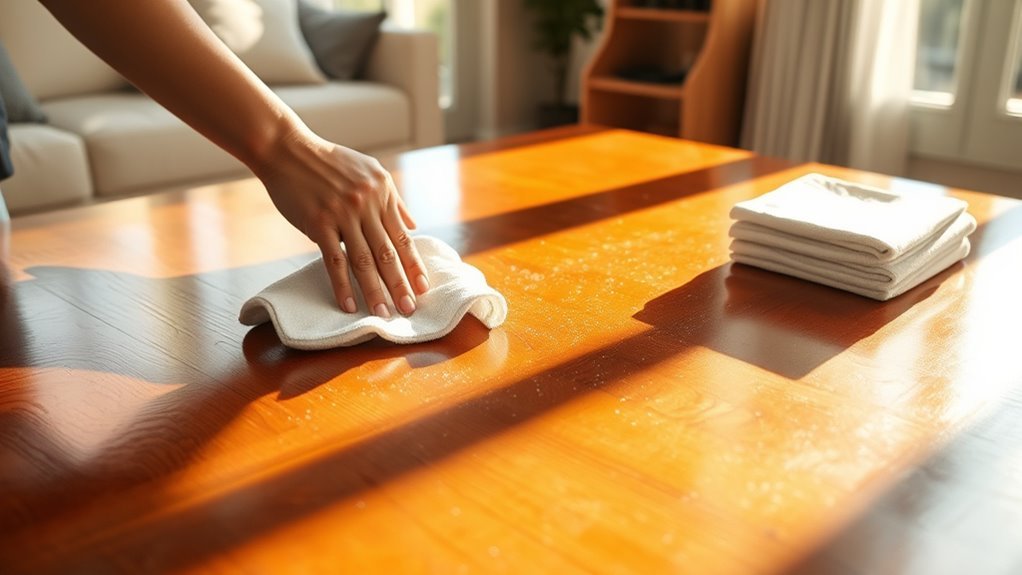
You’ll want to select a microfiber cloth for its ability to trap fine dust without spreading it around. Lightly dampen the cloth—too much water can cause dust to smear or damage surfaces. Wipe methodically in one direction to lift and remove dust effectively without dispersing it into the air.
Choosing the Right Cloth
Since fine dust can easily escape or scatter if not handled properly, selecting the right cloth is essential for effective removal. You want a cloth that traps dust rather than pushes it around. Microfiber cloths are your best bet because their dense fibers capture particles efficiently. Cotton rags also work well, especially when slightly dampened, as they hold onto dust without scratching surfaces. When choosing your cloth, consider these factors:
- Fiber density to trap fine dust
- Softness to prevent surface damage
- Absorbency for effective dust capture
- Size for maneuverability in tight spaces
- Durability to withstand repeated use
Proper Dampening Techniques
When dealing with fine dust after woodworking, dampening your cloth properly is essential to prevent particles from becoming airborne again. You need to master dampening methods that guarantee moisture control without over-wetting, which can cause streaking or damage surfaces. Start by wringing out excess water until the cloth feels just damp to the touch. Here’s a quick guide:
| Cloth Type | Moisture Level | Best Use |
|---|---|---|
| Microfiber | Slightly damp | Captures fine dust well |
| Cotton | Moderately damp | Suitable for general dust |
| Terrycloth | Lightly damp | For rough surfaces |
Always test your cloth’s dampness on a hidden area first. Proper moisture control maximizes dust capture and keeps your workspace clean without spreading dust or causing damage.
Effective Dust Removal Tips
Effective dust removal hinges on using damp cloths correctly to trap fine particles without spreading them. To master dusting techniques and optimize your cleanup strategies, focus on these key points:
- Lightly dampen a microfiber cloth; avoid soaking to prevent residue.
- Wipe surfaces in one direction to gather dust efficiently.
- Rinse and re-dampen the cloth regularly to maintain effectiveness.
- Use separate cloths for different areas to avoid cross-contamination.
- Prioritize high-traffic and flat surfaces where dust accumulates most.
Cleaning Upholstery and Fabric Surfaces
Although cleaning upholstery and fabric surfaces after woodworking might seem challenging, it’s crucial to act promptly to prevent stains and dust from setting in. Start by vacuuming your upholstery thoroughly using a brush attachment to lift sawdust and fine particles without embedding them deeper. For fabric care, check the manufacturer’s label for cleaning codes—water-based or solvent-based cleaners work differently. Spot clean stains with a mild detergent solution or fabric-safe cleaner, gently blotting rather than rubbing to avoid damage. Allow surfaces to air dry fully, guaranteeing no moisture remains trapped. For stubborn dust, consider using a lint roller or a specialized upholstery cleaning brush. Following these precise steps guarantees your furniture stays fresh and maintains its freedom from wood dust and residue, preserving both appearance and comfort.
Disposing of Wood Waste Safely
Three main steps will help you dispose of wood waste safely and responsibly after your woodworking projects. First, sort your scraps to separate treated from untreated wood. Next, explore local wood recycling programs that accept clean wood to reduce landfill burden. Finally, choose proper disposal methods for non-recyclable pieces.
Consider these guidelines:
- Avoid burning wood waste indoors or near flammable materials.
- Contact waste management for bulk pickup or drop-off options.
- Use protective gloves when handling sharp or splintered wood.
- Check for hazardous coatings before recycling or disposal.
- Repurpose small scraps for crafts or kindling when possible.
Maintaining Air Quality During Cleanup
To keep your indoor air clean while cleaning up wood debris, start by maximizing ventilation—open windows and use fans to direct dust outside. Next, control dust at the source by using damp cloths or vacuum cleaners with HEPA filters to minimize airborne particles. Finally, consider running an air purifier equipped with a HEPA filter to capture fine dust and improve overall air quality during the cleanup process.
Ventilation Techniques
How can you guarantee the air in your home stays fresh and safe during the cleanup process? Effective ventilation is key. You’ll want to maximize air circulation to remove dust and odors generated by wood residue. Start by installing or turning on ventilation fans in affected rooms to push stale air outside. Open windows and doors strategically to create a cross breeze that accelerates air exchange. Consider these ventilation techniques:
- Use high-capacity ventilation fans near the cleanup area
- Open multiple windows for cross-ventilation
- Keep interior doors open to promote airflow
- Use portable fans to direct air toward exits
- Avoid recirculating air with closed HVAC systems
Dust Control Methods
Where should you start when trying to keep dust from spreading during your wood cleanup? Begin by establishing clear dust containment methods. Use plastic sheeting or temporary barriers to isolate the work area, preventing particles from migrating to other rooms. Next, implement particle control strategies like dampening surfaces with a fine mist before sweeping or wiping; this reduces airborne dust. Always opt for a vacuum equipped with a HEPA filter instead of dry sweeping, as it captures finer particles effectively without dispersing them. Seal vents and close doors tightly, minimizing airflow that could carry dust elsewhere. By methodically combining these dust containment methods and particle control strategies, you’ll maintain better air quality, ensuring your home stays cleaner and you retain the freedom to breathe easy during and after cleanup.
Air Purifier Benefits
Although dust containment methods considerably reduce airborne particles, using an air purifier during wood cleanup offers an essential layer of protection by continuously filtering the air in your space. To maintain ideal air quality, you’ll want to select an air purifier with specific features designed for this purpose. Effective air purifier features include:
- High-efficiency particulate air (HEPA) filters to capture fine wood dust
- Activated carbon layers to reduce odors and volatile organic compounds
- Adjustable fan speeds to match cleanup intensity
- Real-time air quality sensors for automatic operation
- Quiet operation to allow freedom to focus without distraction
Preventative Measures for Future Woodworking Cleanup
Since woodworking inevitably creates dust and debris, taking preventative measures can save you significant time and effort during cleanup. Start by refining your woodworking techniques to minimize dust production—use sharp tools and slow, controlled cuts. Employ dust prevention strategies such as attaching a shop vacuum or dust extractor directly to your tools. Set up designated work zones with plastic barriers or drop cloths to contain debris. Regularly clean your workspace throughout your project rather than waiting until the end. Wearing protective gear like dust masks and goggles also keeps you safe while maintaining airflow with fans directed outward helps push dust away. By integrating these precise steps into your routine, you’ll preserve your freedom from exhaustive cleaning sessions and keep your home environment healthier after every woodworking project.
Frequently Asked Questions
Can Wood Dust Cause Allergies or Respiratory Problems?
Yes, wood dust can cause wood allergies and respiratory issues, especially if you’re sensitive or exposed frequently. When you inhale wood dust particles, they can irritate your lungs and trigger allergic reactions like sneezing, coughing, or even asthma attacks. To protect yourself, you’ll want to minimize dust exposure by wearing masks and ensuring proper ventilation. Taking these steps helps you avoid discomfort and maintain your freedom to enjoy your space safely.
What Types of Wood Finishes Require Special Cleaning Methods?
When cleaning wood with oil finishes, you’ll want to avoid harsh chemicals; use mild soap and water, then reapply oil occasionally to keep it nourished. Lacquer finishes need extra care since they’re sensitive to solvents and abrasives—just use a soft, damp cloth and avoid excessive moisture. You’ll find that treating these finishes gently preserves their beauty and lets your wood surfaces age gracefully without damage or dullness.
How to Clean Wood Stains or Resin From Skin?
Imagine your skin as a smooth canvas, accidentally marked by stubborn wood stains or sticky resin. For effective stain removal, start by gently rubbing your hands with a little vegetable oil or rubbing alcohol to break down the resin. Then, wash thoroughly with warm water and mild soap, ensuring proper skin care to avoid dryness. Finally, apply a moisturizer to keep your skin soft and free, ready for whatever creative freedom comes next.
Are There Eco-Friendly Cleaning Products for Wood Dust Cleanup?
You’ll find several eco friendly alternatives perfect for wood dust cleanup. Natural cleaning products like vinegar and water solutions or baking soda sprinkled on surfaces work effectively without harsh chemicals. Use a microfiber cloth or a damp mop to trap dust instead of spreading it. These natural cleaning methods not only keep your space fresh but also support your desire for freedom from toxins and harmful residues.
How Often Should I Deep Clean After Woodworking Projects?
Imagine your space as a canvas, where every woodworking project leaves its mark. For ideal deep cleaning frequency, aim to perform a thorough woodworking project cleanup after each major task to prevent dust buildup. If you’re working regularly, schedule a deep clean weekly to maintain air quality and protect surfaces. This methodical approach guarantees your home breathes freely, letting you enjoy the creative freedom without the weight of lingering dust and debris.


