Deep Cleaning Checklist for Washer
To deep clean your washer, start by unplugging it and gathering supplies like a soft brush, microfiber cloths, and vinegar. Remove and soak the detergent drawer, clean the washer filter, and wipe down door seals and drum carefully. Run a hot cycle with vinegar, followed by another with baking soda to break down residue and neutralize odors. Don’t forget to clean the exterior and check the drain hose for blockages. Keep going to uncover a complete, detailed maintenance routine.
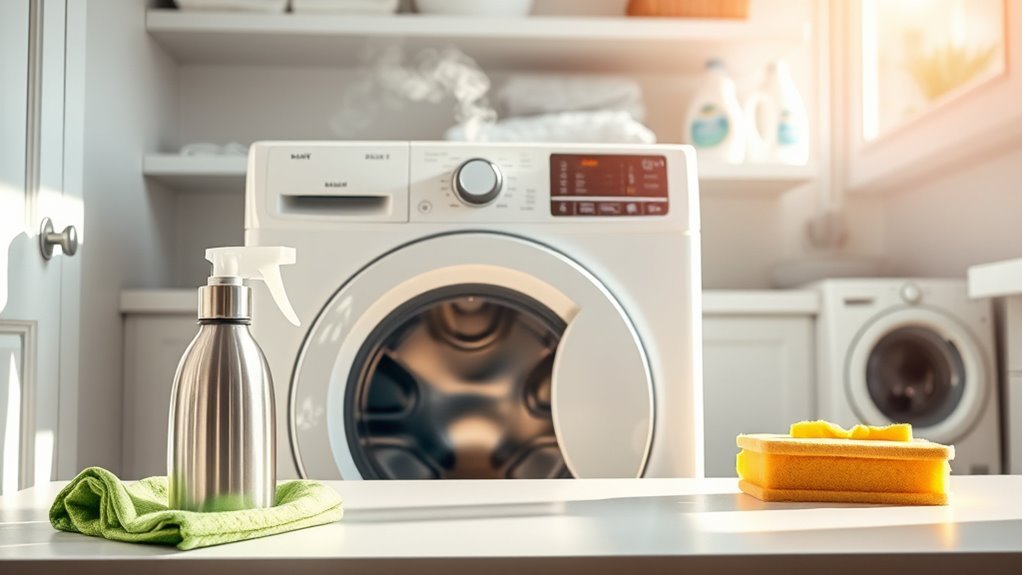
Gather Necessary Cleaning Supplies
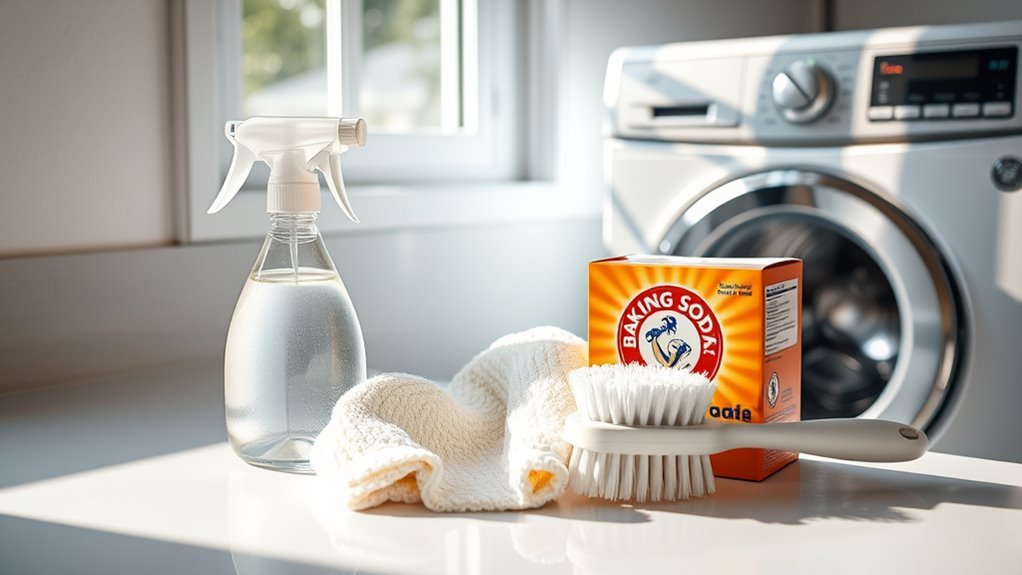
Before you begin the deep cleaning process, you’ll need to gather specific supplies to guarantee thorough and effective results. Start by assembling essential cleaning tools: a soft-bristle brush, microfiber cloths, a spray bottle with a vinegar-water solution, and a non-abrasive sponge. Include a measuring cup for precise detergent or cleaner application. Supply organization is critical—arrange these tools systematically on a tray or caddy to access them efficiently during cleaning. This setup minimizes interruptions, allowing you to maintain workflow freedom. Additionally, have a bucket for rinsing and a disposable glove set to protect your hands from harsh chemicals. Proper preparation guarantees that every component of the washer, from drum to seals, receives meticulous attention, maximizing your deep cleaning effectiveness with minimal hassle and maximum control. Identifying your washer as either a top-loading or front-loading washer will help determine the appropriate cleaning method and supplies needed.
Unplug the Washer and Prepare the Area
Two critical steps you must take before cleaning your washer are unplugging it and preparing the surrounding area. Start by firmly grasping the plug and disconnecting it from the electrical outlet to eliminate any risk of electrical shock. This safety precaution guarantees you can work freely without hazard. Next, organize your workspace by clearing the floor around the washer, removing any laundry baskets, rugs, or clutter that might obstruct movement or cause accidents. Lay down towels or a waterproof mat to catch spills. Arrange your cleaning supplies within easy reach but out of the way, maintaining a tidy and efficient environment. By rigorously following these steps, you create a safe, accessible workspace that supports effective deep cleaning without interruptions or risk.
Clean the Detergent Dispenser Drawer
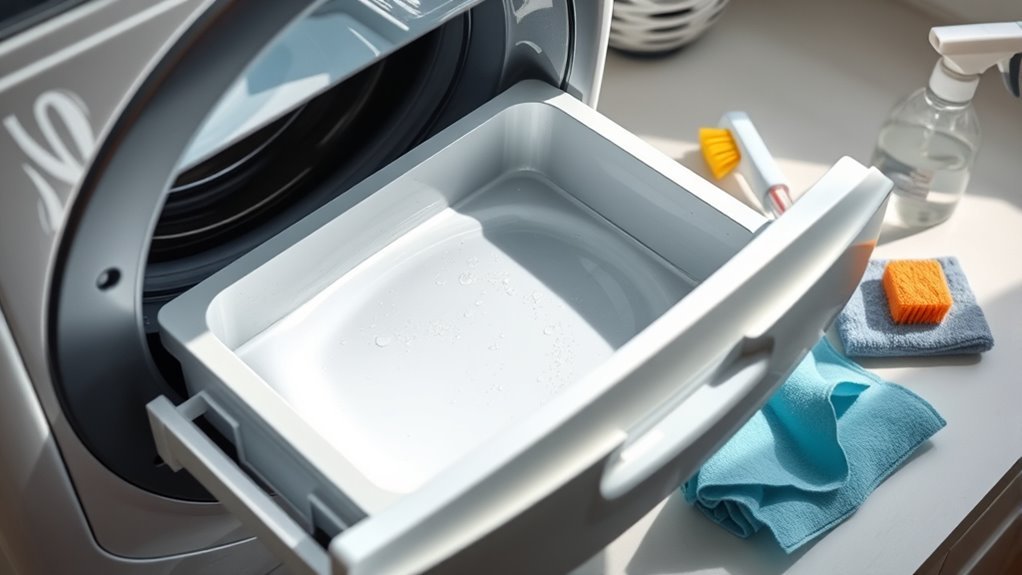
Start by carefully removing the detergent dispenser drawer from your washer to avoid damaging any components. Soak the drawer in warm water mixed with a mild detergent to loosen residue buildup. After soaking, use a soft brush to scrub all compartments thoroughly, then dry it completely before reinserting. Regular cleaning of removable parts like the detergent dispenser helps prevent grime buildup and ensures optimal washing performance.
Remove and Soak
Carefully remove the detergent dispenser drawer from your washer to access accumulated residues. Once detached, prepare an appropriate soaking solution—typically a mixture of warm water and a mild detergent or vinegar—to effectively break down soap scum, mildew, and mineral deposits. Submerge the drawer fully, ensuring all compartments are immersed to maximize contact with the cleaning agents. Maintain a soaking duration of at least 30 minutes; this timeframe allows the solution to loosen stubborn buildup without damaging plastic components. For heavily soiled drawers, extending the soaking duration up to one hour can enhance results. After soaking, you’ll be ready for the next step to restore your dispenser’s ideal function. This process frees you from recurring residue issues, supporting your freedom from frequent maintenance hassles.
Scrub and Dry
Scrub the detergent dispenser drawer thoroughly using a soft brush or an old toothbrush to remove any remaining soap scum, mildew, and mineral deposits loosened during soaking. Focus on corners and crevices where buildup tends to accumulate. Employ gentle scrub techniques to avoid damaging the drawer’s plastic components. After scrubbing, rinse the drawer with warm water to eliminate loosened debris. For drying methods, pat the drawer dry with a lint-free cloth to prevent moisture retention, which can promote mold growth. Then, allow the drawer to air dry completely in a well-ventilated area before reinserting it into the washer. This guarantees no residual moisture remains, maintaining ideal hygiene and preventing future buildup. Following these precise steps grants you control over your washer’s cleanliness and longevity.
Remove and Clean the Washer Filter
Locate the washer filter, typically positioned near the bottom front panel of your machine, and prepare to remove it by turning off the power and water supply to prevent leaks. Proper filter maintenance is essential for preserving washer efficiency and preventing malfunctions.
- Open the filter access panel and place a shallow container underneath to catch residual water.
- Unscrew the filter cap carefully, then remove and inspect it for lint, hair, or debris.
- Rinse the filter under running water, using a soft brush if necessary, then reinstall it securely.
Regularly performing these steps guarantees unrestricted water flow, reduces strain on your washer’s pump, and extends its lifespan, giving you the freedom to wash without interruption.
Wipe Down the Door Seal and Drum

Wipe down the door seal and drum thoroughly to remove detergent residue, mold, and mildew that can compromise your washer’s performance and hygiene. For effective door seal maintenance, use a microfiber cloth dampened with a mild detergent solution, carefully cleaning all folds and crevices to prevent microbial buildup. Pay special attention to the rubber gasket, as trapped moisture fosters mold growth. When addressing drum cleaning techniques, manually wipe the interior drum surface with a non-abrasive cloth, ensuring you reach all areas to eliminate grime and deposits. Avoid harsh chemicals that could degrade drum materials. Regular, precise wiping reduces odor and maintains peak washer function, granting you the freedom to trust your appliance’s cleanliness and efficiency without constant worry or additional repairs. Establish a regular cleaning schedule to prevent buildup and maintain freshness and hygiene in your washer.
Run a Hot Water Cleaning Cycle With Vinegar
A hot water cleaning cycle paired with white vinegar is an effective way to break down detergent buildup, eliminate bacteria, and neutralize odors inside your washer. The vinegar benefits stem from its natural acidity, which dissolves mineral deposits and grime without harsh chemicals. To execute this step precisely:
- Pour two cups of white vinegar directly into the detergent dispenser.
- Set your washer to the hottest water setting available—this hot cycle guarantees maximum cleaning efficiency.
- Start the cycle and allow it to run completely without adding laundry.
This process penetrates hidden residues, sanitizes internal components, and restores your machine’s freshness. By using vinegar and the hot cycle, you’re leveraging a natural, eco-friendly solution that keeps your washer operating effectively while granting you the freedom from foul smells and buildup. Regular cleaning also prevents buildup that can affect performance and longevity.
Run a Second Cycle With Baking Soda
After completing the vinegar cycle, you’ll run a second wash using baking soda to neutralize odors and further break down residue. Add about half a cup of baking soda directly into the drum or detergent dispenser for ideal dispersion. To maximize effectiveness, select the hottest water setting compatible with your washer and avoid adding clothes during this cleaning cycle.
Benefits of Baking Soda
Although vinegar is effective for cleaning, running a second cycle with baking soda enhances your washer’s freshness by neutralizing odors and breaking down residue that detergents or fabric softeners might leave behind. Understanding baking soda benefits allows you to optimize laundry freshness while maintaining appliance efficiency. Specifically, baking soda:
- Adjusts pH levels inside the drum, creating an environment hostile to mold and mildew growth.
- Acts as a mild abrasive, dislodging mineral deposits and detergent buildup without damaging components.
- Neutralizes acidic and alkaline odors, leaving your washer and laundry smelling clean without harsh chemicals.
Incorporating this step grants you control over washer hygiene, ensuring your freedom from unpleasant smells and residue. This precision in maintenance maximizes performance and prolongs the lifespan of your machine.
How to Add Baking Soda
To maximize the deodorizing and residue-breaking effects of baking soda, you’ll need to run a separate wash cycle specifically with it. Start by setting your washer to the hottest water temperature, as heat enhances baking soda’s effectiveness in dissolving grime and neutralizing odors. Add approximately 1/2 cup of baking soda directly into the drum or detergent dispenser. Avoid mixing it with other cleaning agents to prevent chemical reactions that could reduce its efficacy. Once the cycle begins, the baking soda will work to balance pH levels inside the washer, loosening mineral deposits and soap scum. This step is essential for thorough washer maintenance, ensuring your machine stays fresh and performs at its best. Running this second cycle regularly supports long-term cleanliness and freedom from lingering smells.
Tips for Effective Cycle
When you run a second cycle with baking soda, make sure your washer is empty to allow the cleaner to reach all surfaces effectively. This step is essential for effective cleaning and ideal cycle maintenance. Follow these precise actions:
- Add 1/2 cup of baking soda directly to the drum, ensuring even distribution to target odors and residues.
- Select the hottest water setting available on your machine to maximize the dissolving and scrubbing power of baking soda.
- Run a full wash cycle without any detergent or clothes, allowing the baking soda solution to break down buildup and sanitize the interior.
Clean the Exterior Surfaces
Start by gathering a microfiber cloth, a mild detergent, and a soft-bristle brush to clean the exterior surfaces of your washer. Different exterior materials—such as stainless steel, plastic, or painted metal—require specific cleaning techniques to avoid damage. Dampen the microfiber cloth with a diluted detergent solution, ensuring it’s not overly wet to prevent moisture seeping into control panels or vents. Gently wipe all accessible surfaces, paying attention to seams and corners where dirt accumulates. For stubborn grime or textured areas, use the soft-bristle brush with light pressure, avoiding abrasive scrubbing that can scratch finishes. Finally, dry the surfaces thoroughly with a clean, dry microfiber cloth. Regularly applying these precise techniques preserves your washer’s exterior integrity and enhances its longevity, giving you the freedom to focus on what matters most. Using microfiber cloths helps prevent streaks and protects delicate surfaces during cleaning.
Check and Clean the Washer Drain Hose
You should start by inspecting the washer drain hose for any blockages or kinks that could impede water flow. Next, carefully detach the hose from the washer and the drain pipe to avoid damage or leaks. Finally, rinse the hose thoroughly with water to remove any debris or buildup inside.
Inspect Hose for Blockages
One critical step in maintaining your washer’s efficiency is inspecting the drain hose for blockages. Proper hose maintenance directly impacts blockage prevention, ensuring your washer drains smoothly and avoids backups. To perform a precise inspection:
- Visually examine the hose for kinks, cracks, or debris buildup along its length.
- Use a flashlight to look inside the hose opening, checking for obstructions that might restrict water flow.
- Gently flex the hose to dislodge minor blockages without detaching it.
Detach and Rinse Hose
After thoroughly inspecting the hose for blockages, the next step involves detaching it carefully to perform a more thorough cleaning. Begin by unplugging your washer and locating the drain hose connection at the back. Use pliers to loosen any clamps securing the hose, then gently pull it free to avoid damage. Once detached, flush the hose with a strong stream of water to dislodge debris or buildup that can impair drainage. Inspect the hose’s interior and exterior for cracks or wear; this is critical hose maintenance that prevents leaks or failures. If you notice significant deterioration, prioritize hose replacement to maintain system integrity and avoid water damage. Reattach the hose securely, ensuring clamps are tight to restore peak function and preserve your freedom from frequent repairs.
Leave the Door Open to Air Dry
Although the cleaning cycle removes most residue, leaving the washer door open afterward is crucial for preventing moisture buildup and mold growth. This practice maximizes airflow benefits, allowing trapped moisture to evaporate efficiently and reducing the risk of mildew formation. To optimize moisture prevention, follow these steps:
Leaving the washer door open post-cleaning prevents moisture buildup and mold by enhancing airflow and evaporation.
- Open the door fully immediately after each wash cycle to enhance ventilation.
- Keep the door open for a minimum of 2 hours or until the drum is completely dry.
- Confirm the laundry area is well-ventilated to support continuous air circulation.
Regularly maintaining proper airflow helps prevent the accumulation of mold spores and bacteria, which can pose health risks if left unchecked.
Frequently Asked Questions
How Often Should I Deep Clean My Washer?
You don’t want your washer turning into a science experiment gone wrong, right? Following frequency guidelines, you should deep clean your washer at least once a month. This keeps mold, detergent buildup, and odors at bay. Maintenance tips include running a hot water cycle with vinegar or a specialized cleaner. Sticking to this schedule not only prolongs your washer’s life but also guarantees your clothes come out fresh and spotless every time.
Can I Use Bleach Instead of Vinegar for Cleaning?
You can use bleach instead of vinegar for cleaning, but you need to prioritize bleach safety. Bleach is a strong disinfectant, effective at killing mold and bacteria, but it requires careful handling—always dilute it properly and guarantee good ventilation. Vinegar alternatives like bleach are harsher and can damage rubber seals if overused. So, use bleach sparingly and follow your washer’s manual to avoid corrosion or voiding warranties.
What Are Signs My Washer Needs Deep Cleaning?
You’ll know your washer needs deep cleaning if you notice unpleasant odors lingering after cycles or see visible mold buildup inside the drum or rubber seals. Excessive moisture trapped in gaskets often leads to mildew, which causes that musty smell. Also, if your clothes come out less fresh or you spot residue on laundry, it’s a clear sign. Addressing these issues promptly keeps your washer running efficiently and your freedom to enjoy fresh clothes intact.
Is It Safe to Use Commercial Washer Cleaners?
Yes, it’s generally safe to use commercial cleaners designed specifically for washers. These cleaning solutions are formulated to break down residue, mold, and grime without damaging your machine’s components. However, you should always follow the manufacturer’s instructions carefully to avoid overuse or incorrect application, which could harm seals or internal parts. Using the right commercial cleaners gives you freedom from buildup, ensuring your washer runs efficiently and lasts longer.
Can Deep Cleaning Improve Washer Efficiency?
Did you know that a dirty washer can use up to 25% more energy? Deep cleaning your washer greatly improves its efficiency by removing residue, mold, and buildup that strain the motor and heating elements. Following maintenance tips like regularly cleaning filters and seals guarantees ideal water flow and temperature regulation. This not only cuts energy usage but also extends your machine’s lifespan, giving you the freedom to enjoy hassle-free laundry with lower utility bills.