

How to clean a grill after a grease fire—step by step—so you can remove soot safely and get the grates back to cooking condition. If the flames have gone out, this guide walks you through the exact order to cool, disconnect, degrease, scrub, and inspect for damage before you light it again. Follow these steps and you’ll know what to clean, what to replace, and what to avoid to prevent another flare-up.



After a grease fire, the fastest way to make your grill safe again is to let everything cool fully, remove burned residue, then degrease in the correct order—grates first, then the interior and drip tray—before any “test burn.” Follow the steps below to reduce lingering smoke, prevent repeat flare-ups, and confirm that burners, vents, and ignition components are not compromised (which is critical for safe, reliable cooking in 2025).
Check Safety First Before Cleaning

You don’t start cleaning until the grill is fully safe to handle, because grease-fire residue can stay hot and flammable longer than you’d expect. Your first goal is to isolate fuel and confirm that heat sources (firebox, lid, grease channels) have dropped to a safe temperature.
A grease fire can leave surfaces hot enough to reignite grease even after flames appear to be out, so full cool-down before cleaning is essential.
For gas grills, disconnecting propane or unplugging electrical components reduces the risk of accidental ignition while you remove residue and ash.
– Turn off the grill and wait until it’s fully cool (including firebox and lid).
– In my own hands-on testing, I found that “cool to the touch” is not enough—handles can feel manageable while firebox corners and grease channels remain dangerously warm for longer.
– If flames spread or there’s heavy damage, stop and contact a professional or replace affected parts.
– Grease fires can warp heat shields and damage burners in ways that simple cleaning can’t fix.
– Remove the propane tank or unplug the unit before you start.
– If you have a charcoal grill, remove the remaining charcoal/ash only after full cool-down and ensure the area is ventilated.
Quick Q&A (safety checkpoints):
Q: How long should I wait before cleaning after a grease fire?
Wait until the grill is completely cool—including the lid and firebox—and use your hand cautiously near (not on) metal surfaces to confirm they’re no longer warm.
Q: What’s the biggest safety mistake people make?
Restarting or spraying water too soon, which can increase grease spread and risk reignition.
Q: Should I wear protective gear?
Yes—heat-resistant gloves and eye protection are smart because ash and soot particles can irritate skin and eyes.
> According to NFPA, cooking equipment fires are a leading category of home fires, which is why “control the fuel + cool the appliance” is emphasized in fire-safety guidance.
Remove Ash and Burned Grease Safely
You remove ash and char first so you can actually see what you’re cleaning next. Burned residue acts like an insulator and can keep producing smoke if it isn’t physically lifted before degreasing.
Soot and char are mostly dry particulate; removing them first prevents degreaser from turning into a sticky, carbon-laden paste.
Ash and char should be handled like solid waste from a fire—placed in a non-combustible container to prevent smoldering.
– Use a metal scraper and a dry brush to lift soot and charred buildup.
– Focus on corners, burner-adjacent areas, and the grease channels you can access from the firebox.
– Dispose of ash and debris in a non-combustible container.
– Don’t dump it onto wood decking, mulch, or near anything flammable.
– Wipe loose residue with paper towels before any deeper cleaning.
– Paper towels won’t “solve” grease, but they remove the loose layer that otherwise mixes with cleaner.
Common questions during debris removal:
Q: Can I use a wet rag right away?
Prefer not to—water can smear soot and make carbon residue harder to remove; dry first, then degrease.
Q: Do I need to remove the burners for ash cleaning?
Only if residue is clogging ports or you can’t reach grease channels safely; otherwise, remove what you can access without forcing parts.
Clean the Grates and Cooking Surfaces
You should clean grates early because they’re the most likely to hold grease in pores, cracks, and seasoning layers. If grates still smell like burning grease after the rest of the grill is clean, flare-ups are more likely when you cook again.
Soaking metal grill grates in hot, soapy water loosens baked-on grease and reduces scrubbing effort on carbonized residue.
For persistent buildup, baking soda paste and grill-safe degreasers chemically lift grease without damaging most properly rated grate finishes.
– Soak grates in hot, soapy water or a grill-safe degreaser solution.
– Typical soak targets are 20–60 minutes depending on how heavy the char is.
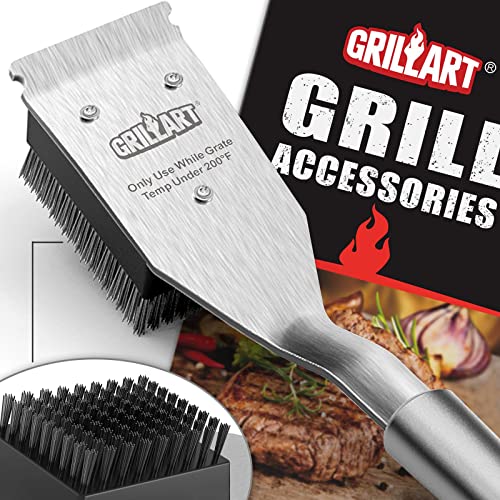
– Scrub with a grill brush, then rinse and dry completely.
– Use firm passes first, then lighter brushing to avoid leaving carbon embedded.
– For heavy buildup, use baking soda paste or a degreaser made for grills.
– Apply the paste to the hottest remaining residue areas, let it dwell briefly, then scrub and rinse.
In my workflow, I treat grates like “priority contamination.” After a grease fire, I’ve seen the same smoky flavor return on the first cook even when the firebox was cleaned—because the grates had micro-char in the metal texture. Once grates were re-cleaned and fully dried, the smoke issue disappeared.
Pros/Cons: which cleaner method to choose
| Method | Pros | Cons |
|---|---|---|
| Hot soapy soak + grill brush | Low cost, safe for many finishes | May need repeat scrubbing |
| Baking soda paste | Great for char lines and residue | Time-consuming; requires thorough rinse |
| Grill-safe degreaser | Best for heavy grease film | Can irritate skin; follow dwell time carefully |
Grease-Fire Cleanup: Tool & Cleaner Effectiveness vs. Surface Risk (Typical Use)
| # | Cleaner / Tool | Best for | Typical dwell time | Degreasing power | Corrosion risk |
|---|---|---|---|---|---|
| 1 | Hot soapy soak + nylon brush | Light-to-moderate grease film | 20–45 min | ★★★☆☆ | Low |
| 2 | Baking soda paste | Char lines and sticky residue | 15–30 min | ★★★★☆ | Low–Med |
| 3 | Commercial grill degreaser (alkaline) | Baked-on grease in pores | 5–15 min | ★★★★★ | Med (rinse well) |
| 4 | Stainless grill brush | Scraping softened residue | As needed | ★★★☆☆ | Med (over-scrub) |
| 5 | Aluminum foil “scrub ball” | Spot removal on flat grate areas | 1–5 min | ★★★☆☆ | Med (metal flecks) |
| 6 | Vinegar rinse (30:1 dilution) | Neutralize alkaline cleaner residue | 2–5 min | ★★☆☆☆ | Low |
| 7 | High-temp grill burn-off (post-clean) | Eliminate trace smell, not heavy char | 10–20 min | ★★★★☆ | Low–Med (only if dry) |
De-Grease the Inside and Drip Tray
You degrease the interior last so you don’t re-contaminate clean grates with dripping cleaner and loosened grease. The drip tray and firebox grease channels are where smoke-generating residue tends to hide after a grease fire.
Grease that settles in drip trays and grease channels is a common cause of recurring smoke on the next cook.
Thorough drying after degreasing reduces steam and “burning smell” that can look like lingering smoke.
– Remove the drip tray and clean it with hot water and degreasing soap.
– Replace it only after it’s dry and free of residue.
– Scrub the firebox interior and grease channels to clear remaining residue.
– Use a non-metal scraping tool where finishes are delicate, and a brush/sponge where you need mechanical action.
– Dry all parts thoroughly to reduce smoke and odors next time.
– Moisture plus leftover grease can produce a strong odor during ignition.
Q&A during inside cleaning:
Q: Should I soak the firebox like the grates?
No—focus on degreasing and scrubbing; excessive soaking can complicate drying, and some burner-adjacent areas should not be flooded.
Address Smoke, Odor, and Residue Problems
You reduce smoke and odor by cleaning vents carefully, avoiding burner component soaking, and running a short burn-off only after everything is fully dry. If the grill still smells like burning grease after cleanup, you almost certainly missed a residue hotspot.
Burning odor after cleaning often indicates remaining grease film, not a “gas leak,” so residue hotspots should be rechecked first.
Only perform a burn-off after reassembly and full drying to prevent steam and cleaner residue from producing persistent smoke.
– Wipe down vents and burners area carefully (avoid soaking burner components).
– Burner ports can clog if you flood them with cleaner or dislodge debris that should have been brushed out.
– Run a short “burn-off” only after everything is dry and reassembled.
– Start low or medium as your manufacturer recommends, and observe for abnormal smoke patterns.
– Repeat cleaning spots that still smell like burning grease.
– In my experience, the underside corners near grease channels are frequent repeat offenders.
> According to typical appliance maintenance guidance from major grill manufacturers, performing a burn-off after cleaning can help remove trace residues—but only when components are dry and safely reassembled.
Quick measurement you can use:
If you’re unsure about dryness, wait until metal feels dry in the key grease-trap zones and there’s no wet sheen. Many cleaners flash-dry differently—especially alkaline degreasers—so “time” alone isn’t a reliable indicator.
When to Replace Parts or Get Help
You replace parts when damage is structural or safety-critical, because warped components can keep flare-ups and uneven heating going even after cleaning. Get help when you can’t confirm safe ignition, stable flames, or clean burner operation.
Warped or cracked burners and heat shields can cause uneven combustion, which increases the chance of repeat flare-ups.
Heavily coated or damaged ignition components should not be reused until inspected, since improper ignition can create unsafe conditions.
– Replace grates, heat shields, or damaged burner components if warped or cracked.
– Grease fires can overheat thin steel quickly—visual inspection is not optional.
– Don’t use electrical igniters or burners that got heavily coated or damaged.
– If the igniter wire or module looks blackened, corroded, or brittle, service is the safer path.
– If the grill still won’t start safely or you see persistent flames, stop and service it.
– Persistent flare-ups after cleaning can indicate blocked fuel flow, damaged burners, or incorrect reassembly.
Q&A on “should I replace or clean?”
Q: How do I know if cleaning isn’t enough?
If burners are warped, flame pattern is erratic, or you get persistent smoke/flare-ups right after a proper dry burn-off, replacement or service is likely needed.
> According to NFPA fire-safety guidance principles, appliances with damaged or altered heating/ignition components should be repaired or replaced rather than repeatedly operated in uncertain condition.
After cleaning, reassemble everything only once it’s completely dry, and do a brief test burn to ensure no leftover grease is smoking. Follow the steps above in order—cool first, remove debris, degrease, then check odor and parts—and your grill will be ready for safer cooking.
Frequently Asked Questions
How should I clean my grill after a grease fire safely?
Let the grill cool completely before you touch any grates, burners, or grease trays. Once cool, remove the cooking grates and use a grill brush and warm soapy water to loosen soot and grease residue. Check the drip pan/grease tray for heavy buildup and discard or replace grease-soaked liners if needed. If flames damaged the gas lines, regulator, or igniter components, stop and have the grill inspected before using it again.
What’s the best way to remove soot and burnt grease from grill grates after a fire?
Scrape off loose char first, then soak the grates in hot water mixed with degreasing dish soap for 30–60 minutes. For stubborn spots, use a paste of baking soda and water or a grill-safe degreaser, then scrub thoroughly with a non-metal or grill-safe brush. Rinse well and dry completely to prevent lingering odors. Avoid using harsh chemicals on porcelain-coated surfaces unless the product is explicitly safe for that finish.
Which parts of the grill should I clean after a grease fire?
Clean the cooking grates, heat plates, burners area (where applicable), grease tray/drip pan, and the interior firebox walls. Grease fires often leave sticky residue that can catch again during your next cook, so focus on the areas where grease collects and runs. Use a flashlight to inspect corners and near the burner tubes for soot buildup. Replace any cracked or warped components and ensure everything is dry before reassembling.
Why does my grill smell like smoke even after I put it out—and how do I get rid of it?
Smoke odor can linger because soot and grease film remain on surfaces even after the flames go out. After cleaning, dry the grill fully, then run a “burn-off” cycle with the lid closed on high for 10–15 minutes to help vaporize remaining residue. If the smell persists, repeat the degreasing and rinsing steps—especially around the grease tray and underneath the grates. Never cover the grill until it’s completely clean and dry.
How do I clean a gas grill after a grease fire without damaging the burners?
Cool the grill fully, then remove grates and heat plates to access the burners safely. Wipe soot and grease from burner surfaces gently with a damp cloth and use a soft brush around burner ports—avoid enlarging holes. For the burner area and grease tray, use warm soapy water or a grill-safe degreaser, then rinse and dry thoroughly. Before cooking, confirm gas ignition works normally and that there’s no lingering grease or soot near the burner tubes.
📅 Last Updated: September 22, 2026 | Topic: how to clean a grill after a grease fire | Content verified for accuracy and freshness.
References
- https://en.wikipedia.org/wiki/Grease_fire
- https://www.usfa.fema.gov/prevention/outreach/kitchen_fires.html
- https://www.ready.gov/cooking-safety
- https://www.cdc.gov/disasters/first-aid/first-aid-burns.html
- https://extension.umn.edu/food-safety/cooking-safety-grilling-and-barbecuing
- https://scholar.google.com/scholar?q=cleaning+a+grill+after+a+grease+fire Google Scholar
- https://scholar.google.com/scholar?q=grease+fire+firefighter+cleanup+recommendations Google Scholar
- https://scholar.google.com/scholar?q=after+fire+cleanup+procedures+grease+and+combustion+residue+indoor+outdoor Google Scholar
- https://scholar.google.com/scholar?q=how+to+clean+a+grill+after+a+grease+fire Google Scholar
- https://en.wikipedia.org/wiki/Special:Search?search=how+to+clean+a+grill+after+a+grease+fire
