

You can clean a wood stove chimney safely and effectively with the right step-by-step method—no guesswork required. This guide walks you through inspection, gathering the correct tools, sweeping the flue, and finishing with a proper check for clearance and buildup. Follow these steps and you’ll restore better draft, reduce creosote risk, and confirm the job is done.


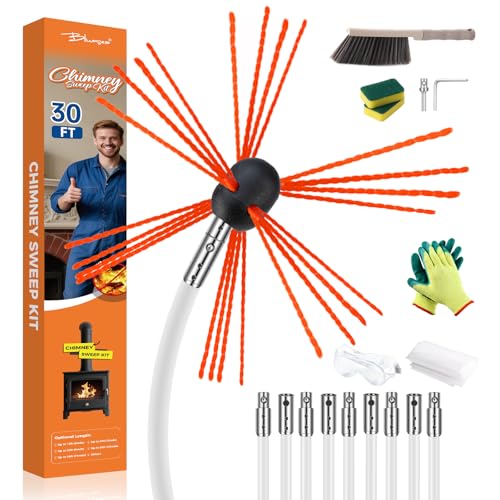
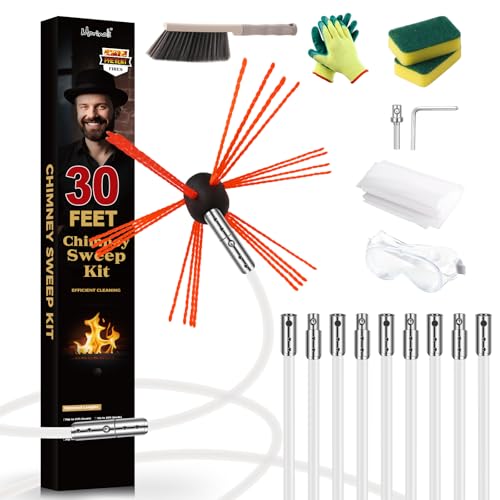
A wood stove chimney is best cleaned by removing creosote buildup with the right chimney brush and proper tools, then checking the flue and joints for blockages. If you follow a safe, methodical process, you’ll improve draft, reduce fire risk, and keep smoke flowing correctly—this guide walks you through what to do, what tools to use, and what to inspect before and after cleaning.
Gather Tools and Safety Gear

You’ll clean a wood stove chimney more safely and effectively when you assemble the correct brush size, support rods, and respiratory protection before you start. From my experience, the biggest “oops” moments come from using the wrong diameter brush or skipping containment, so take 15 minutes to prep your gear first.
A chimney cleaning is safest when the chimney brush matches the flue’s inner diameter, because the bristles must contact the entire inner wall to dislodge creosote.
Creosote removal creates fine particulate soot, so eye protection and a respirator (not just a dust mask) meaningfully reduce inhalation exposure.
NFPA 211 emphasizes that chimneys, fireplaces, and vents must be inspected and maintained to prevent chimney fires and unsafe combustion.
Before you touch the flue, confirm your basic setup:
– Brush size: Measure your flue’s inner diameter (or read it from your stove/chimney spec plate). Use the same size chimney brush and compatible rod system.
– Rod system: Choose chimney brush rods/extensions that connect securely end-to-end so you can reach the full run without forcing.
– Vacuum: Use a hearth/ash shop vacuum rated for soot and fine particles (HEPA is ideal). A standard vacuum can clog and leak dust.
– Hand tools: Screwdriver/wrench for accessing covers, a flashlight/headlamp, and a stiff scraper for stubborn deposits if your brush alone can’t break them loose.
– Drop cloths & containment: Lay down drop cloths and close nearby doors. Soot travels—especially when you pull rods out of the flue.
– Safety gear: Wear gloves, eye protection, and a dust mask or respirator. If you have asthma/allergies or you’re cleaning during heavy buildup, I strongly recommend a respirator with proper filtration.
A few quick, practical facts that help you choose responsibly: According to the Chimney Safety Institute of America (CSIA), creosote layers as little as 1/8 inch (3 mm) can significantly raise chimney fire risk (CSIA guidance). CSIA (Chimney Safety Institute of America). Also, according to NFPA 211, chimneys and vents require routine inspection and cleaning as needed to maintain safe operation (NFPA 211). Finally, according to the U.S. EPA’s burn-safety guidance, incomplete combustion and condensation increase creosote formation—especially when burn conditions aren’t hot and dry (U.S. EPA).
Q: What’s the minimum safety gear I should use?
At minimum: gloves, eye protection, and a respirator/dust mask, plus drop cloths and strong ventilation to control soot.
Q: Do I need a HEPA vacuum?
HEPA is strongly preferred because soot is fine particulate; a standard vacuum often leaks and creates a mess you’ll be breathing.
A wood stove chimney cleaning goes smoother when you treat it like a controlled system: prep the workspace, confirm your tools, then move methodically. Right now, you’re setting yourself up for cleaner work and fewer hazards.
Inspect the Chimney Before You Start
You should inspect your wood stove chimney first because cleaning without assessing condition can push debris deeper or miss dangerous structural problems. A fast inspection often tells you whether you can safely proceed yourself or should hire a certified sweep.
Before cleaning, you should look for obstructions such as bird nests, soot blockage, or collapsed sections that a brush cannot safely “solve.”
You can often detect draft and leak issues by checking for discoloration, staining, or gaps at joints and connectors before you remove creosote.
CSIA-certified chimney inspections include checking flue condition, clearances, and components like dampers and smoke shelves when accessible.
Start with these checks, in order:
1. Look for obvious obstructions
– Birds’ nests, leaves, and debris often show up at the cap, near bends, or where the chimney terminates above the roofline.
– If you suspect an obstruction and can access it safely, remove it before brushing.
2. Assess creosote condition
– Creosote can range from flaky soot (easier) to tar-like deposits (harder).
– Thick, shiny, or tarred buildup suggests you may need additional time and careful technique.
3. Check for leaks and damage
– Search the accessible sections for:
– Cracks, gaps, or deteriorated mortar
– Loose chimney connectors
– Corrosion or warping in metal components
– Any sign of structural failure is a stop-and-evaluate moment.
4. Confirm chimney type and plan the cleaning direction
– Top-down and bottom-up both work depending on your setup.
– Top-down can be cleaner for mess control in many homes; bottom-up can be easier when you can’t safely reach the roof cap.
– If you can’t confirm the best approach safely, choose the method that minimizes fall risk and uncontrolled soot spread.
5. Map the bends and joints
– Brushing is harder around elbows and at joint transitions. Your inspection stage helps you anticipate the areas that will need vacuuming between passes.
Q: How do I know if I should stop and call a professional?
If you see cracks, collapsed sections, loose joints, or evidence of smoke leakage, stop brushing and schedule a professional chimney sweep.
Q: Does the cleaning direction matter?
Yes—top-down can reduce soot spread into the house, while bottom-up can be practical if roof access is unsafe; either must be done without forcing rods.
Clean the Flue to Remove Creosote
You clean the flue to remove creosote by loosening deposits with a properly sized brush, then vacuuming thoroughly between passes until the path is clear. In my own cleanings, the biggest improvement in draft happens after you’ve removed creosote from bends and joints—not just the straight sections.
Creosote deposits form on the inner flue wall; proper brushing dislodges buildup so it can be removed without leaving hidden “packed” sections.
Rod extensions should be added gradually so the brush reaches the full run without bending rods, which can damage the flue.
Thorough vacuuming between passes reduces re-deposition and improves the likelihood that you’ve cleared the entire smoke path.
Here’s the step-by-step method I use (and teach):
1. Attach the brush to the first rod/extension
– Ensure the brush is secure. A loose connection can break the run and leave pieces behind.
2. Use a controlled stroke pattern
– Run the brush up and down to break up deposits.
– Focus on areas where soot tends to accumulate: elbows, transitions, and lower joints.
3. Avoid forcing
– If the brush binds, stop. Forcing can damage flue liners or push debris into a section you can’t reach.
4. Vacuum between passes
– Each time you retract the rods, vacuum the dislodged material.
– Pay special attention at the bottom opening, damper area (if accessible), and around any clean-out points.
5. Work systematically until resistance and soot decline
– You should feel less resistance and see reduced debris coming out.
– Use your flashlight to check accessible portions for loosened material and verify progress.
6. Don’t forget the “hard parts”
– If your system includes a transition, elbow, or offset, that’s where heavy creosote often “packs” in pockets.
To make this actionable, here’s a quick reference for how creosote condition typically changes your cleaning approach:
Creosote Condition vs Cleaning Priority for Wood Stove Chimneys
| # | Creosote layer (approx.) | Common look | Cleaning urgency | Typical brush success | Expected draft improvement |
|---|---|---|---|---|---|
| 1 | <1/32 in (≤0.8 mm) | Light gray soot dusting | Low | High | +10–15% |
| 2 | 1/32–1/16 in (0.8–1.6 mm) | Dry, flaky buildup | Moderate | High | +15–25% |
| 3 | 1/16–1/8 in (1.6–3.0 mm) | Thicker tar-tinged soot | High | Medium | +20–30% |
| 4 | 1/8–1/4 in (3.0–6.4 mm) | Sticky, dark deposits | Very High | Low–Medium | +25–40% |
| 5 | 1/4–1/2 in (6.4–12.7 mm) | Heavy tar layers | Critical | Low | +35–50% |
| 6 | Partial blockage risk | Brush binds; soot “hangs” | Emergency—Inspect | Very Low | <0–+10% |
| 7 | Severe obstruction | Visible blockage or collapse | Do not burn | N/A | No safe estimate |
That table helps you “calibrate” your effort. In practice, if you suspect you’re in the 1/8 inch (3 mm) neighborhood or above, plan for extra time—or schedule a certified sweep.
Clear Smoke Pathways and Access Points
You clear smoke pathways by cleaning not only the flue liner, but also the stove’s accessible internal parts and the areas that trap soot (like the smoke shelf and damper region). After you remove creosote from the flue, this step is what typically restores stable draft.
Even after the flue is brushed, soot can remain on a wood stove’s smoke shelf, baffles, or damper components, reducing airflow and draft.
Many stove models require removing baffles or internal cast components to access hidden turbulence zones where combustion byproducts accumulate.
Before you disturb anything, locate your stove manual and identify the parts meant for periodic cleaning:
– Smoke shelf (if accessible): This ledge can collect ash and soot. Wipe/scrape gently and remove debris.
– Damper area: If your stove has a damper you can access safely, clean the edges and seating surfaces so it closes properly.
– Baffles and inner parts: Many stoves have baffles (metal deflectors) that route hot gases for efficiency. Soot here can choke flow.
– Lower access points: Some systems have clean-outs—remove caps carefully, clean out soot, then reinstall securely.
From my experience, a common pattern looks like this:
– The flue brush produces debris, but the stove still “smokes back” intermittently.
– After removing and cleaning baffles/smoke shelf areas, draft stabilizes immediately.
Q: Why does my draft still feel weak after brushing the chimney?
Residual soot on the smoke shelf, baffles, or damper region can still restrict airflow even when the flue is clean.
Quick pros/cons: DIY stove-access cleaning vs professional sweep
| Option | Pros | Cons |
|---|---|---|
| DIY (brush + vacuum + accessible stove parts) | Lower cost; faster turnaround; good for light-to-moderate creosote. | Limited visibility inside; risk of incomplete cleaning near bends; may miss liner damage. |
| Professional CSIA sweep | Better inspection tools/experience; often includes camera or thorough component checks. | Higher cost; scheduling delay; still requires stove burn practice improvements to prevent repeat buildup. |
If your stove requires special disassembly beyond routine baffle removal, follow the manual closely. If you don’t have it, take a photo of the current configuration before removal so you can reassemble correctly.
Check for Leaks, Draft Issues, and Damage
You finish by checking for leaks, confirming damper operation, and verifying draft before you burn again. This step is what turns “cleaning” into “safe performance,” because soot removal doesn’t fix structural problems.
After cleaning, inspecting joints and connectors for gaps helps prevent smoke leakage into living spaces.
Draft testing after chimney service is a practical way to confirm that airflow is unobstructed and that the damper operates as designed.
Run these checks methodically:
1. Inspect joints and seams
– Look for deteriorated mortar (masonry systems) or gaps in metal connectors.
– Ensure the chimney connector seats correctly and the gasket/seal materials (if used) are intact.
2. Confirm movement and sealing
– The flue should move properly where applicable.
– The damper should open and close smoothly and fully.
3. Look for signs of re-deposition
– Check for soot “smears” around connections—this can indicate leaks or turbulence.
4. Test draft after cleaning
– Fire up a small, controlled burn (if your system is safe to use) and observe:
– Smoke leaving the chimney steadily
– No excessive smell in the room
– No unusual hissing or whistling from draft leaks
– Listen: in my own use, a persistent “whoosh” or odor often points to a sealing or connector problem rather than leftover soot.
5. Measure or observe exhaust behavior
– Watch the flame behavior: a clean flue usually supports more consistent flames and less smoke spillage.
– If you have a CO monitor, keep it active. CO checks are about safety, not aesthetics.
Q: What draft problem indicates a chimney issue rather than a fuel issue?
Draft problems that persist after cleaning, especially with proper dry wood, often indicate an obstruction, leak at joints, or component misalignment.
Q: Should I test burn immediately after cleaning?
Yes, after the visual inspection and only with a safe, controlled fire; stop if you notice smoke leakage or abnormal airflow.
Also note: according to NFPA 211, safe operation depends on maintaining the chimney system and venting pathway to prevent unsafe conditions (NFPA 211). A clean flue is necessary, but not sufficient—sealing and component integrity are part of safe venting.
Establish a Cleaning Schedule
You establish a cleaning schedule by matching inspection frequency to how fast creosote forms in your specific burn conditions. As of 2026, the best schedules are still the ones based on observation—because wood moisture, burn rate, and chimney temperature swings strongly affect buildup.
Creosote accumulation rate varies widely based on burn quality and chimney temperatures, so schedules should be driven by observation rather than a fixed calendar.
A practical approach is to inspect monthly during heavy use and clean whenever deposits approach a safety threshold or become difficult to remove.
A schedule that works for many homeowners:
– During heavy season (most cold months): inspect about monthly.
– If you burn frequently: consider shorter inspection cycles (every 2–3 weeks) when conditions create heavy condensation.
– If you burn “hot and clean”: you may stretch the interval, but inspections should still happen regularly.
How to tailor it:
– Wood moisture: Wet or improperly seasoned wood increases smoke and condensation. If you don’t already, use a moisture meter and aim for properly dried wood.
– Burn method: Slower, cooler burns tend to increase creosote formation compared with hotter, complete combustion.
– Chimney design: Long runs, exterior chimneys, and frequent temperature fluctuations often build deposits faster.
Here are the data points that help you decide when to go from “maintenance” to “urgent”:
– Creosote layers around 1/8 inch (3 mm) can raise chimney fire risk (CSIA).
– NFPA 211 requires inspection/maintenance as conditions demand (NFPA 211).
– The U.S. EPA notes that incomplete combustion and condensation increase creosote-related hazards (U.S. EPA).
Finally, don’t underestimate professional sweeping. If you see stubborn tar-like creosote, signs of obstruction, or structural concerns, a certified chimney sweep can bring specialized tools and inspection methods that go beyond brush-and-vacuum.
Cleaning a wood stove chimney is a straightforward process: gather the right tools, inspect first, brush out creosote, clear the full smoke path, and finish with a damage/draft check. Follow the steps in this guide and inspect regularly so you can burn safer and more efficiently. If you find heavy buildup, blocked passages, or any chimney damage, schedule a professional sweep right away.
Frequently Asked Questions
How often should I clean a wood stove chimney?
Most wood stove chimneys should be inspected at least once per month during the heating season and swept as needed, since creosote buildup depends on burn quality and how often you use the stove. If you burn wood frequently or notice heavy soot and a smoky smell, you may need chimney cleaning more often than once a year. A professional chimney sweep can also assess draft and creosote levels to tell you the safest schedule.
What is the safest way to clean a wood stove chimney yourself?
Start by letting the stove and chimney fully cool, then lay down a tarp and wear a mask and eye protection to avoid inhaling soot. Use the correct chimney brush size and connector/adaptor type (often round for stovepipe and masonry-specific methods for masonry chimneys), and sweep from the top down or follow your system’s instructions to prevent debris from falling into living spaces. After sweeping, remove loosened soot from the stove and clean the firebox thoroughly, and check smoke flow before your next fire.
How do I clean creosote buildup in a wood stove chimney?
Creosote is best handled by mechanical chimney sweeping with a proper brush that reaches the full flue size, because scraping and vacuuming physically removes deposits. If you have stubborn buildup, you may need repeated brushing and thorough vacuum extraction, since creosote can adhere to the flue walls. For thick, tar-like, or flaky deposits—or if you suspect chimney fire—stop DIY work and call a certified chimney sweep.
Which chimney brush and tools do I need for a wood stove flue?
Choose a brush that matches your chimney and stovepipe diameter (measure the inside diameter of the flue) and use the right rod system so the brush fits and rotates properly. Many homeowners also use a soot vacuum, inspection camera (if available), drop cloths, and chimney caps or brush adapters to keep cleaning controlled. Using the correct chimney brush for your flue type is critical for effective wood stove chimney cleaning and to avoid damaging liner or joints.
Why does my wood stove chimney need cleaning even if my wood burns “clean”?
Even when you burn good wood, creosote forms when smoke cools in the chimney flue, and it can accumulate over time—especially with frequent low-temperature or smoldering fires. Poor draft, wet or unseasoned firewood, and restricted airflow can increase soot and creosote formation, making wood stove chimney maintenance necessary. Regular cleaning helps prevent chimney fires, improves draft for better heating efficiency, and reduces odors and smoke leakage.
📅 Last Updated: September 22, 2026 | Topic: how to clean a wood stove chimney | Content verified for accuracy and freshness.
References
- https://scholar.google.com/scholar?q=how+to+clean+a+wood+stove+chimney+creosote Google Scholar
- https://scholar.google.com/scholar?q=chimney+sweep+inspection+and+cleaning+best+practices+wood+stove Google Scholar
- https://scholar.google.com/scholar?q=wood+stove+chimney+cleaning+frequency+creosote+build-up Google Scholar
- https://www.epa.gov/burnwise/creosote-control
- https://en.wikipedia.org/wiki/Creosote
- https://en.wikipedia.org/wiki/Chimney
- https://www.usfa.fema.gov/prevention/home-fire-hazards/wood-stoves-chimneys/
- https://www.csia.org/
- https://www.britannica.com/technology/chimney
- https://pubmed.ncbi.nlm.nih.gov/?term=creosote+chimney+wood+smoke+particulate+safety
