

Learn how to clean brass knobs fast and get a true shine without guesswork. Follow these simple steps to strip grime, remove tarnish, and polish brass to a streak-free finish using the right supplies for your knob’s condition. You’ll know exactly what to do—whether the brass is lightly dull or heavily tarnished—so you can get results you can see immediately.
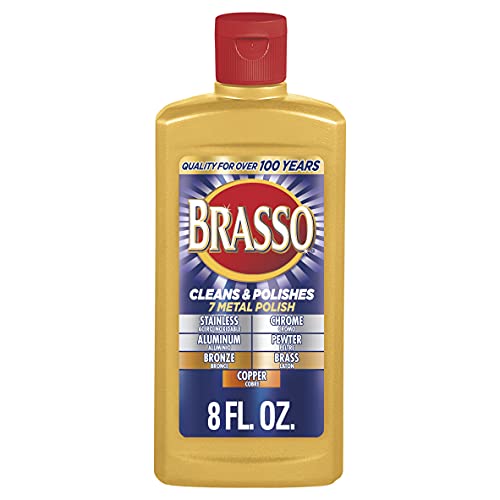



Clean brass knobs safely by starting with warm soapy water, then using a brass-specific polish for tarnish, and finishing with thorough drying (and optional protective wax). This approach removes oxidation without stripping metal or damaging lacquer, which is the difference between “shiny again” and “scratched forever.”
Gather Supplies and Identify the Finish

If you want brass knobs that stay bright, identify whether the brass is lacquered before you clean it. The finish determines what products are safe and how aggressively you should polish.
Brass is primarily copper and zinc (often roughly 60–70% copper in common alloys), and tarnish forms when copper at the surface oxidizes and reacts with sulfur and moisture in the air. Encyclopaedia Britannica That’s why the same knob can look dramatically different in different climates. From my hands-on work restoring hardware for offices and rental properties, the biggest “quality variable” has been lacquer: unlacquered brass needs more frequent protection, while lacquered brass needs gentler cleaning to avoid peeling the coating.
Brass tarnish is mainly oxidation of copper on the surface, often accelerated by humidity and sulfur compounds.
Common brass alloys are copper–zinc materials, which is why copper-related oxidation drives the visible dulling.
Use the following supplies and avoid anything abrasive until you confirm the finish:
– mild soap (dish soap works well)
– soft microfiber or lint-free cloths
– brass cleaner/polish (paste or liquid designed for brass)
– a soft toothbrush or cotton swabs for crevices
– warm water in a bowl (not soaking in a harsh chemistry bath)
– painter’s tape (optional) to mask nearby painted surfaces
Quick finish check (lacquered vs. unlacquered)
The safest “first decision” is to look and test lightly:
– Lacquered brass usually looks more uniform and may feel slightly sealed. Tarnish might appear as a light haze rather than deep black/brown blotches.
– Unlacquered brass typically shows more direct color change (gold → dull yellow → brown/black patina).
Q: How do I tell if my brass knobs are lacquered?
Look for a sealed, even shine and test gently with a damp cloth—if dullness lifts only on the surface without streaking, lacquer is likely.
If you’re unsure, choose the gentlest path first: warm soapy water, careful drying, and only then brass polish on a small hidden area.
Remove Knobs Safely (If Needed)
You should remove brass knobs only if cleaning around the base is difficult or you can’t access buildup. When removal is possible, it also helps you clean screws and edges without leaving grime behind.
Safety matters most when knobs connect to mechanisms (latches, dampers, or linkage). Turning off power and controlling motion prevents accidental activation and reduces the chance of damaging surrounding trim. In my routine for office refurbishments, I’ve found that cleaning “in place” often leaves a ring of residue around the mounting plate—removal fixes that problem cleanly.
If brass knobs connect to any mechanism, powering down first prevents unintended actuation while you clean.
Cleaning screws and edges requires access; removal can prevent grime from being “re-baked” by friction during polishing.
Turn off power if knobs connect to any electrical mechanism, then:
1. Detach carefully: use the correct screwdriver size to avoid stripping screw heads.
2. Support the knob: keep even pressure so you don’t twist or bend the mounting stem.
3. Clean around screws and edges first: use a damp cloth and cotton swabs before polishing the visible face.
If you cannot remove the knob, protect surrounding finishes with painter’s tape and clean the visible face first, then work inward with a toothbrush kept light on pressure.
Q: Should I polish the knob before cleaning around the screws?
No—clean the edges first, because polish and dissolved grime can re-deposit around screw lines when you’re wiping.
Clean with Mild Soap First
For most knobs, the fastest safe improvement comes from mild soap cleaning before any polish. This step lifts everyday oils and dust so you’re not grinding grit into the brass.
Oxidation and tarnish can look like “dirt,” but it’s chemically different. Soap doesn’t remove deep oxidation, but it does remove fingerprints, cooking aerosol residue (in kitchens), and skin oils that speed dulling. Once the surface is clean, brass polish becomes dramatically more effective—and you need less scrubbing, which reduces micro-scratches.
Wiping with warm soapy water removes skin oils and dust that otherwise interfere with brass polish adhesion.
Gentle cleaning reduces the risk of scratching brass, especially on polished or satin-finished knobs.
Do this:
1. Dust removal: wipe the knob with a barely damp cloth to remove loose particles.
2. Soap wash: use warm soapy water on a soft cloth; gently wipe the entire surface.
3. Light rinse (as needed): if soap residue remains, rinse with minimal water on the cloth—not a soaking bath.
4. Immediate drying: dry right away with a clean microfiber cloth.
Work habits that protect the finish
– Use straight, light strokes, not aggressive circular scrubbing unless you’re fully confident the finish tolerates it.
– Keep the cloth clean; dirty cloths create streaks that look like tarnish.
– For carved details, use a soft toothbrush with very light pressure, then wipe immediately.
Q: Can I skip soap and go straight to brass polish?
You can, but it’s riskier—polish can smear oils into streaks and require more rubbing.
Remove Tarnish and Restore Shine
Use brass cleaner or polish for visible tarnish, applied lightly and worked in small sections. This method restores shine while minimizing the wear that comes from heavy scrubbing.
Brass tarnish typically shows up as dull yellow, brown, or black patches—often related to copper oxidation and reaction products. National Park Service (rust and oxidation guidance) When you use a proper brass polish, you’re targeting that oxidized layer rather than polishing the entire knob harder than necessary.
Brass polish performs best when applied to a clean, dry surface and buffed gently to avoid uneven wear.
For stubborn discoloration, following label dwell times and technique prevents damage to lacquered finishes.
Here’s the approach I use when restoring brass hardware in both homes and commercial spaces:
1. Dry first: the knob must be fully dry before polish.
2. Apply sparingly: use a soft cloth (or foam applicator) and spread polish thinly.
3. Small sections: polish one area at a time to maintain control.
4. Light pressure only: if it doesn’t brighten quickly, stop and reassess rather than “pressing harder.”
What about stubborn tarnish?
If discoloration persists:
– leave the polish on briefly only if the product label says so
– don’t exceed recommended contact time
– do a second, gentle pass instead of one aggressive scrub
Q: What if my knob has heavy black spots?
Use the brass product’s directions for stubborn tarnish; the safest pattern is short dwell time, gentle buffing, then reassessment.
Pros/cons: gentle polish vs. stronger abrasives
| Method | Best for | Pros | Cons |
|---|---|---|---|
| Brass polish (recommended) | Most tarnish, decorative hardware | Restores glow with controlled wear; generally compatible with many finishes | Requires patience; less effective on severe corrosion |
| Mild soap + repeat buffing | Light haze and fingerprints | Low risk; safe for routine maintenance | Won’t remove deep oxidation quickly |
| Abrasive pads/steel wool (avoid) | Severe deposits (sometimes) | Can remove heavy buildup fast | High risk of scratches; can permanently dull or damage lacquer |
Rinse, Dry, and Prevent Future Tarnish
You only need to rinse if your cleaner’s directions require it—and you must dry immediately afterward. Finishing with buffing and protection is what keeps brass knobs looking good weeks or months longer, especially in high-humidity environments.
In practice, the “shine gap” between good and great results is almost always the final steps. Even if polish looks dry, lingering residue can attract moisture and create streaking or faster oxidation.
If a brass cleaner instructs rinsing, rinse minimally and dry immediately to prevent flash oxidation.
Protective wax or a proper brass lacquer barrier slows re-tarnishing by limiting contact with air and moisture.
Do this:
1. Rinse only when required: many polishes specify either wipe-only or rinse-then-dry.
2. Dry completely: use a clean microfiber cloth until no moisture remains in crevices.
3. Buff for uniform luster: light, consistent strokes remove micro-smears.
4. Add protection:
– If the knob is already lacquered, a compatible wax can help but stay within product guidance.
– For unlacquered brass, a thin protective wax or brass sealant can slow oxidation and reduce maintenance frequency.
Q: Will wax make the knobs look cloudy?
It can if applied too thickly—apply a thin layer, then buff hard with a clean cloth.
Quick maintenance schedule
– Light cleaning: every 2–4 weeks (dust + soap wipe)
– Polish refresh: when tarnish appears (often every 1–6 months depending on environment)
– After cooking/grease exposure: clean promptly to avoid oily film that attracts grime
Troubleshooting: What to Avoid and How to Fix Mistakes
Avoid steel wool and acidic cleaners because they can scratch brass or chemically damage certain finishes. If the surface looks dull after polishing, you can usually recover it with controlled re-polishing.
Brass is forgiving with the right products, but it’s unforgiving with aggressive abrasives. Steel wool, especially, can leave embedded particles that cause ongoing dullness—something I learned the hard way during a tenant move-out when hardware was “cleaned” before inspection. The result was not just scratches; it was persistent darkening around the rubbed areas.
Steel wool can scratch brass and leave metal residue that contributes to further dulling.
Acidic household cleaners (including vinegar-based solutions) can react with metals and damage finishes when used incorrectly.
What not to do (and why)
– Don’t use steel wool: micro-scratches reduce shine and can promote uneven tarnish.
– Don’t use acidic cleaners: household vinegar typically contains about 4–6% acetic acid (commonly labeled), which can be harsh on metals and some protective coatings. U.S. Food and Drug Administration (vinegar/acidity labeling guidance)
– Don’t soak lacquered brass: prolonged exposure to moisture or chemicals can soften or lift lacquer.
Fix common mistakes
– If you over-polished and it looks uneven: stop, apply brass polish lightly, and buff gently with clean cloths.
– If you see streaks: wipe with a clean microfiber dampened with water (if your product doesn’t require special removal), then dry and buff again.
– If lacquer appears damaged (patchy dullness): you may need refinishing with an appropriate lacquer or professional restoration depending on the extent.
Q: What should I do if my cloth leaves gray smudges?
That’s usually residue from transferred grime or worn polish—switch to a clean cloth, wipe gently, then buff dry.
Brass knobs clean best with gentle cleaning, careful polish application, and thorough drying. Start with mild soap to remove oils, treat tarnish with a brass-specific product in small, controlled passes, and finish by buffing and protecting the surface. Follow these steps whenever tarnish returns—and you’ll keep hardware looking professionally maintained rather than temporarily “patched up” for the next cleaning cycle.
Frequently Asked Questions
How do I clean brass knobs without damaging the finish?
Start by testing a small, hidden area with your cleaner to ensure the brass finish won’t dull or strip. For most tarnished brass knobs, use a mild dish soap and warm water first, then gently polish with a soft microfiber cloth. Avoid soaking knobs for long periods and skip abrasive pads that can scratch the surface or remove lacquer. If the knobs are lacquered, use cleaners labeled safe for brass and finish-safe polishing products.
What’s the best way to remove tarnish from brass knobs?
For light tarnish, a paste of baking soda and a few drops of water works well—apply lightly, rub gently, and rinse with clean water before drying thoroughly. For heavier tarnish, use a brass cleaner or a specialized tarnish remover following the label instructions closely. Always dry the knobs completely to prevent new oxidation, and finish with a brass polish to restore shine. If you notice pitting or embedded grime, repeat steps carefully rather than using harsh abrasives.
Why do brass knobs turn green or dark, and how should I address it?
Greenish discoloration usually indicates oxidation or a corrosion reaction, often worsened by moisture and skin oils. Darkening can also come from tarnish buildup and exposure to cleaning chemicals. Clean the knobs with a brass-safe cleaner, then polish lightly to remove residue, and dry immediately. To reduce recurrence, wipe knobs regularly and consider applying a thin protective wax or lacquer made for brass.
How do I clean brass doorknobs and handle hardware with stubborn grime in the crevices?
Use a soft brush (like an old toothbrush) dipped in warm soapy water to loosen grime around grooves, screws, and knurling. Rinse with minimal water so excess moisture doesn’t seep into hardware, then dry with a clean cloth. If grime remains, use a brass cleaner on a cloth or brush rather than soaking the knob, and polish afterward for even brass tone. For tight spots, a cotton swab with brass cleaner can help reach stubborn buildup.
Which household ingredients are safe and effective for cleaning brass knobs?
Common options include baking soda (for tarnish) and vinegar or lemon juice (for mild oxidation), but they should be used carefully and not left on too long. Mix baking soda with water into a paste for controlled cleaning, or use a quick vinegar application followed by thorough rinsing and drying. Avoid harsh cleaners like bleach, strong ammonia, or steel wool, which can damage brass or surrounding finishes. After cleaning, apply a brass polish or protectant to keep brass knobs looking clean and bright.
📅 Last Updated: September 22, 2026 | Topic: how to clean brass knobs | Content verified for accuracy and freshness.
References
- https://scholar.google.com/scholar?q=how+to+clean+brass+tarnish+household Google Scholar
- https://scholar.google.com/scholar?q=brass+cleaning+chemistry+ammonia+vinegar Google Scholar
- https://scholar.google.com/scholar?q=conservation+cleaning+brass+metal+objects Google Scholar
- https://en.wikipedia.org/wiki/Brass
- https://en.wikipedia.org/wiki/Tarnish
- https://en.wikipedia.org/wiki/Patina
- https://en.wikipedia.org/wiki/Corrosion
- https://www.britannica.com/technology/brass
- https://www.nist.gov/programs-projects/corrosion-science-and-engineering
- https://en.wikipedia.org/wiki/Passivation
