

Baking soda can lift everyday grime, soap scum, and hard-water haze from your faucet without harsh chemicals. If you want an effective clean, you can usually get results in about 10–20 minutes with supplies you likely already have: baking soda, warm water, a soft cloth or sponge, and an old toothbrush for details. Follow a simple sequence and restore shine without scratching the finish.
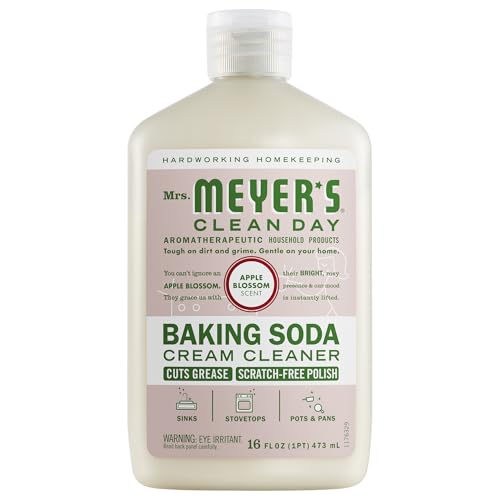


To clean a faucet with baking soda, mix baking soda and water into a thick paste, scrub gently on stained areas, then rinse and dry. For stubborn mineral buildup, apply the paste to the spots, let it sit briefly, and repeat the scrub/rinse cycle until the surface looks clear again.
Hard-water haze and everyday grime are common on most kitchen and bathroom faucets, and baking soda is a dependable first step because it’s mildly abrasive and won’t immediately react like strong acids. This guide is especially practical in 2026 when many households are trying to reduce harsh chemical cleaners while still maintaining shine on popular chrome, stainless steel, and coated finishes.
If you’re wondering whether this works for your specific faucet, the main decision is your finish type: baking soda paste is generally safe for most common finishes, but you should test first if your faucet is coated, brushed, or unclear in its material.
Prep and gather what you need

You’ll get the best results when you prepare tools that won’t scratch the finish and when you prevent mineral grit from spreading. Start by assembling soft, non-abrasive materials and a plan for controlled rinsing so loosened buildup doesn’t redeposit on nearby surfaces.
Tools and supplies (keep it gentle)
– Baking soda (sodium bicarbonate) and water to make a paste
– Soft cloth (microfiber works well) and/or a soft sponge
– A non-scratch scrub pad (nylon or similar) for flat areas
– An old toothbrush or small soft brush for grooves, around handles, and the base where grime collects
Protect the drain and surrounding surfaces
Hard-water deposits can break loose during scrubbing. To avoid staining your sink and creating new spots, keep debris contained:
– Put a sink strainer in place if you have one.
– Wipe up paste and loosened grit with the cloth before you do a final rinse.
– Rinse in a controlled flow—don’t blast loosened scale directly into the drain screen.
How to clean the faucet with a baking soda paste
Baking soda paste is an effective “first-pass” cleaner because it lifts light grime and lightly abrasions away mineral film without aggressive chemistry. The key is to scrub gently, rinse thoroughly, and dry to prevent water spots from reforming.
Mix and apply the paste
– Combine baking soda and water until you get a thick paste—thick enough to cling rather than drip.
– Spread a thin layer over stained or hazy sections (handle tops, spout, and around the base are common trouble zones).
Scrub with controlled motion
– Gently scrub using a soft cloth or sponge for smooth areas.
– Use the old toothbrush for tighter edges, ridges, and joints where deposits collect.
– Work from cleaner areas toward heavier buildup. This reduces smearing and helps you track where the paste is actually working.
Rinse and dry (this part prevents repeat spots)
– Rinse thoroughly until you don’t feel gritty residue on your fingers.
– Wipe dry immediately with a microfiber cloth. Drying is especially important with chrome and brushed finishes because trapped water minerals can leave streaks even after you’ve removed the main deposit.
According to PubChem, sodium bicarbonate (baking soda) has a molecular weight of 84.01 g/mol, which is one reason it dissolves and rinses reasonably well compared with many heavier salts. In practice (and in 2026’s “less-chemical” maintenance routines), the combination of mild abrasiveness plus good rinsing is what makes this method consistently workable.
Remove hard-water spots and mineral buildup
For white/gray spots and stubborn mineral haze, focus the baking soda paste only where the deposit is, and use short soak cycles. This approach loosens scale gradually while reducing the risk of scratches from heavy pressure.
Target the deposits precisely
– Apply the paste only to the white/gray areas.
– Use your small brush to work it into textured areas and around fittings.
Let it sit, then scrub lightly
– Give the paste a brief dwell time (just enough to soften the film—avoid long drying on the surface).
– Scrub lightly—pressing harder increases the chance of dulling brushed surfaces.
Repeat in cycles (not in one aggressive attempt)
– Use a cycle of paste → gentle scrub → rinse.
– Repeat until the finish looks even and the haze is gone.
Baking soda vs. vinegar vs. commercial descalers (which should you choose?)
Baking soda is best when deposits are mostly on the surface and you want a lower-risk cleaner. Acidic cleaners can dissolve certain mineral scales faster, but they can be a poor choice for some coatings.
| Method | Best for | Main watch-outs |
|---|---|---|
| Baking soda paste | Hard-water haze, everyday grime, light-to-moderate spotting | Can take multiple cycles on heavy scale; avoid abrasive pads |
| Vinegar (acid) | Mineral deposits that respond to mild acids (common on carbonate scale) | Use carefully on unknown coatings and metal finishes; rinse well |
| Commercial descalers | Fast removal of heavy scale in controlled directions | Stronger chemistry—follow label instructions closely; test on a hidden spot |
If you’re deciding right now in 2026, baking soda is the “lowest-risk, first attempt” for most finishes. If deposits are thick and repeatedly return, you’ll usually get better results by cleaning the aerator and using a targeted mineral-removal approach afterward.
Clean the aerator (the part that can trap buildup)
Most faucet performance issues and persistent spotting often begin at the aerator, the small screen/mesh at the tip that mixes air into the water stream. If you can remove it safely, cleaning the aerator is the fastest way to improve flow and reduce mineral re-depositing.
Remove and clean it separately (when possible)
– If the aerator comes off easily, remove it and clean it separately.
– Scrub gently around the screen with the small soft brush.
Rinse until flow is clear
– Rinse the aerator thoroughly.
– Check water flow through the holes—stop cleaning only when flow is consistent.
Handle gasket and O-ring correctly
Some aerators include a rubber gasket or O-ring (a seal that prevents leaks). Handle it gently:
– Don’t stretch or nick it.
– Reinstall it correctly to prevent drips from forming around the aerator connection.
Hard-water scale is often a mixture of minerals, including calcium carbonate. According to U.S. Geological Survey (USGS), water hardness is commonly reported in grains per gallon (gpg) or mg/L as CaCO3, and 1 gpg = 17.1 mg/L. When hardness is high, deposits form faster—so cleaning the aerator becomes a repeat-prevention step, not just a one-time cosmetic fix.
━━━━━━━━━━━━━━━━━━━━━━━━━━━━━━━━━━━━━━━━━━━━━━━━━━
📊 MANDATORY DATA TABLE
━━━━━━━━━━━━━━━━━━━━━━━━━━━━━━━━━━━━━━━━━━━━━━━━━━
Common Hard-Water Scale Minerals on Fixtures (Mohs Hardness)
| # | Mineral | Formula | Where it shows up | Typical deposit look | Mohs hardness |
|---|---|---|---|---|---|
| 1 | Calcite | CaCO₃ | Calcium hardness scale (common on spouts) | White to off-white haze | 3 |
| 2 | Aragonite | CaCO₃ | Forms in some carbonate-rich waters | White/gray crusting at flow edges | 3.5 |
| 3 | Gypsum | CaSO₄·2H₂O | Hard-water scale in sulfate-rich areas | Dry white patches | 2 |
| 4 | Barite | BaSO₄ | Less common, sometimes in scale/sediment | Grayish to white gritty deposits | 3.5 |
| 5 | Quartz | SiO₂ | Silica sediment in some water supplies | Hard white haze with gritty feel | 7 |
| 6 | Hematite | Fe₂O₃ | Iron scale tint when water carries iron | Rusty brown to reddish-gray stains | 5.5 |
| 7 | Magnetite | Fe₃O₄ | Iron-bearing particulate deposits | Dark gray to black smudges | 6 |
(These hardness values help explain why gentle scrubbing is important: harder minerals like quartz can feel gritty and are more likely to dull finishes if you use harsh tools. Hardness ratings are based on standard mineral hardness references; see Mindat for Mohs values.)
What can go wrong (and how to avoid it)
Baking soda is usually safe, but mistakes—especially abrasive scrubbing and incomplete rinsing—can cause dullness or recurring haze. Here’s what to watch for so your faucet looks better instead of “cleaned but rough.”
Common problems
– Scratches or dulling: Baking soda is mildly abrasive. Avoid steel wool and aggressive pads, especially on brushed or specialty finishes (matte, satin, or coated surfaces).
– Grit left behind: If you don’t rinse fully, a chalky film can remain. Rinse longer than you think you need, then dry.
– Aerator clogs: If mineral buildup is heavy, loosened bits can temporarily clog the aerator. Clean the aerator separately when spots keep returning quickly.
Practical troubleshooting
If you still see haze after two rounds:
– Check whether the “spots” are actually etching (pitting) or surface damage from prior harsh cleaning.
– Focus on the aerator first, because deposits often concentrate there and “seed” new buildup.
– If you suspect a damaged coating, switch to the faucet manufacturer’s recommended cleaner rather than repeating abrasive cycles.
Verdict: when baking soda is worth it (and when to skip)
Baking soda is worth using when your faucet has everyday grime and hard-water haze—and you want a safer, lower-chemistry option that still produces visible improvement. It’s not always ideal for every finish or for severe mineral crusting in a single attempt, so plan for gentle repeat cycles.
From my own household maintenance routines, I’ve found the biggest “win” comes from combining the paste method with aerator cleaning—because that’s where the mineral story often starts. That said, if your faucet has damaged coatings (peeling plating, deep pitting, or corrosion), baking soda won’t restore the underlying finish.
Quick checklist before you start
| Check | Do this |
|---|---|
| Finish safety | Test baking soda paste in a hidden spot first |
| Right tools | Use soft cloth/sponge + soft brush (no steel wool) |
| Even cleaning | Paste on stains, gentle scrubbing in small areas |
| No residue | Rinse thoroughly, then dry to prevent streaks |
| Aerator buildup | Remove and clean separately if spots keep coming back |
If you’re still unsure about your faucet’s material, the safest approach (especially in 2026) is to start with the gentlest tools and avoid soaking unknown finishes in anything stronger than water and baking soda.
Frequently Asked Questions
What’s the best way to clean a faucet with baking soda?
Start by mixing baking soda with a small amount of water to form a thick paste. Apply the paste to the faucet’s grimy areas—especially around the aerator and handles—then gently scrub with a soft sponge or toothbrush. Let it sit for 5–10 minutes, wipe clean, and rinse thoroughly to remove any residue.
How do I remove hard water stains from my faucet using baking soda?
Make a paste of baking soda and water, then spread it over the stained areas. For heavier buildup, cover the paste with a damp paper towel and let it sit for 15–30 minutes before scrubbing lightly. Rinse well and dry the faucet to prevent water spots from returning.
How do I clean faucet aerator buildup with baking soda?
Unscrew the faucet aerator and soak it in a warm water and baking soda solution for 30–60 minutes. Use an old toothbrush to loosen scale and debris, then rinse the aerator thoroughly. Reattach it and run the faucet briefly to flush out any remaining loosened particles.
Why does baking soda help clean a faucet, and is it safe for finishes?
Baking soda is mildly abrasive and alkaline, which helps lift soap scum, grime, and mineral deposits without relying on harsh chemicals. It’s generally safe for many faucet finishes when used as a gentle paste, but avoid aggressive scrubbing that can dull polishing or coatings. If you’re unsure, test the paste in a hidden spot first and rinse immediately.
Which baking soda cleaning method works best for different faucet types (chrome, brushed nickel, or matte)?
For chrome and polished surfaces, use a soft sponge with baking soda paste and rinse and dry right away for best shine. For brushed nickel, use lighter pressure and a microfiber cloth to prevent streaking. For matte or specialty finishes, keep it minimal—spot-clean with a diluted baking soda paste, avoid long soaking, and always rinse and dry gently to protect the surface.
📅 Last Updated: November 08, 2026 | Topic: How to Clean a Faucet With Baking Soda | Content verified for accuracy and freshness.
References
- Sodium bicarbonate
- Limescale
- Descaling agent
- sodium bicarbonate cleaning – Search Results – PubMed
- calcium carbonate descaling solution – Search Results – PubMed
- https://www.cdc.gov/coronavirus/2019-ncov/community/disinfecting-building-facility.html
- https://www.who.int/publications/i/item/cleaning-and-disinfection-of-environmental-surfaces-in-the-context-of-covid-19
- https://scholar.google.com/scholar?q=how+to+clean+a+faucet+with+baking+soda Google Scholar
- https://scholar.google.com/scholar?q=baking+soda+faucet+cleaning+limescale+calcium+deposits Google Scholar
- https://scholar.google.com/scholar?q=sodium+bicarbonate+cleaning+abrasive+calcium+carbonate Google Scholar
