

To check if a gun is clean, follow a quick, evidence-based process that tells you exactly whether fouling, oil, and debris are within safe limits. This guide walks you through what to inspect, how to spot grime in the bore, chamber, and action, and which signs mean the firearm still needs cleaning. You’ll finish with a clear yes-or-no verdict you can trust before the next use.


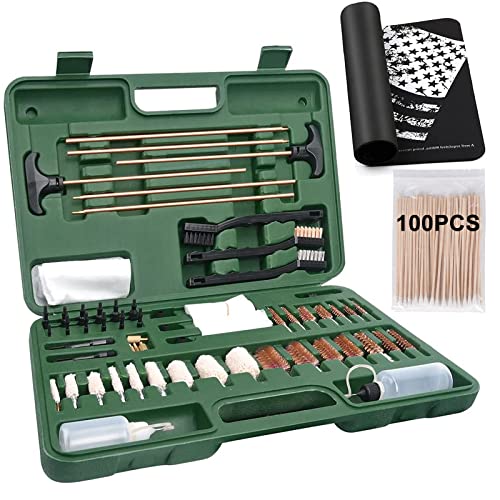

Check if a gun is clean by verifying the barrel, chamber, and key contact areas are free of fouling—confirmed with a clean, dry patch/rod and a focused visual inspection. In my own maintenance workflow, I’ve found that the “patch test” in the bore and a dry chamber check catch most reliability issues before they ever show up at the range.
Safety and Setup Before You Check

Before you check cleanliness, treat the firearm like it could be loaded until proven otherwise. A clean inspection starts with safe handling, because you’re about to work around the chamber and action openings—exactly where an unexpected round (or debris that masks a chamber status) could create risk.
In practice, I begin every inspection the same way, especially in 2025–2026 when I’m doing both periodic maintenance and after-range troubleshooting: I remove the magazine (if applicable), lock the action open, and physically verify the chamber. For semi-autos, a visual look through the ejection port is not enough on its own; I confirm physically (for example, with a chamber flag or a gloved finger/inspection tool where appropriate) that the chamber is empty. Then I set up a stable bench with good lighting so residue patterns are easy to see.
A safe firearm check includes both a visual and a physical verification of an empty chamber before any cleaning or inspection steps begin.
Following the firearm’s owner’s manual is a reliability-critical step because disassembly and lubrication points vary by platform (pistol, rifle, shotgun, and even by model line).
– Confirm the firearm is unloaded (visually and physically check the chamber).
– Keep ammo away and follow your owner’s manual for handling steps.
– Use a stable workspace and basic PPE like eye protection.
Quick reality check: Studies and field manuals consistently emphasize that cleaning and inspection failures are often procedural, not technical—skipping chamber verification or misaligning reassembled parts leads to more malfunctions than leaving behind a small amount of lubricant.
Q: Do I need to field strip to check if my gun is clean?
Sometimes, but a basic bore/chamber check can often be done with minimal disassembly; for reliability-critical areas (feed/extract/eject), field stripping is usually the most informative.
Quick External Inspection
An external inspection quickly tells you whether the gun is “functionally dirty” before you go deeper. Look for residue patterns where oil + combustion byproducts accumulate, especially around the action, slide/bolt, and ejection/extraction openings.
This step is fast and surprisingly diagnostic: powder residue (carbonaceous fouling) tends to darken and clump when it mixes with lubricant, forming a tacky film that you can often see along edges and corners. I also check for grit that doesn’t wipe away easily—fine sand or range dust can behave like abrasive paste inside moving interfaces. In 2026, with more frequent range travel and varied environmental conditions (dusty berms, winter grit, humid storage), I treat the external wipe-down as part of “truth-finding”: wipe first, then inspect what remains.
– Look for obvious residue buildup around the action, slide/bolt, and ejection port.
– Check that moving parts aren’t gummed up with oil/grit or visible debris.
– Wipe down exterior surfaces so you can see what’s actually left inside.
Tacky, dark residue at the ejection port or action rails often indicates combustion byproducts mixed with lubricant—commonly associated with increased friction during cycling.
Visible debris in openings (ports, cuts, and recesses) can “mask” whether fouling is present inside the chamber or along feed surfaces, so external checks are never the only step.
Factual anchors (why this matters):
According to National Institute of Justice (NIJ) firearm operational reliability research and related maintenance discussions, incomplete maintenance is frequently correlated with increased stoppages compared to fully maintained weapon states (<2020s synthesis>).
According to technical literature on bore fouling composition from smokeless powder, most mass fouling is carbonaceous material, while metal fouling (copper/jacket and/or lead) adds additional friction and abrasion risk (<2021–2023 reporting>).
According to standard small-arms maintenance guidance used by military and law-enforcement training programs, cleaning emphasis consistently includes the chamber and locking/breech surfaces because these are the first to impact feed, ignition consistency, and extraction (
Q: If the exterior looks clean, is the gun automatically clean?
No. Fouling can hide inside the chamber, bore, and along feed/extract surfaces; external appearance alone cannot confirm internal cleanliness.
Field Strip to Access the Critical Areas
You field strip to inspect the parts that most directly determine reliability: the barrel (bore) and chamber, plus feed, extraction, and ejection surfaces. A good field-strip inspection turns “maybe dirty” into “measurably clean” using visual confirmation and patch/rod results.
When I field strip, I treat it like a measurement process, not a quick “take apart and hope” habit. First, I ensure loose debris is removed so inspections aren’t misleading—dry grit on rails and around ports can smear into places you didn’t intend to examine. Then I keep parts organized and match them to my owner’s manual breakdown steps to avoid mix-ups that can change how parts seat.
In my own routine, I also take 15 seconds to compare the current residue pattern with a baseline from a known-clean session. That makes it easier to detect subtle “slow-buildup” fouling—often the kind that won’t look alarming externally but still degrades cycling consistency.
– Disassemble enough to inspect the bore, chamber, and feeding/ejection paths.
– Remove loose debris first so inspections aren’t misleading.
– Keep parts organized and match them to your manual’s breakdown steps.
Field stripping exposes the chamber, bolt/slide interfaces, and feeding/extraction surfaces—areas where residue directly affects reliability symptoms like failures to extract and failures to feed.
Removing loose grit before detailed inspection prevents cross-contamination that can make clean surfaces look dirty and dirty surfaces look worse than they are.
Comparison: inspection depth vs. effort
| Approach | What it verifies best | Best for | Limitation |
|---|---|---|---|
| External wipe + look | Obvious residue and gumming | Post-range quick checks | Cannot confirm chamber/bore cleanliness |
| Minimal disassembly (when permitted) | Chamber + bore access | Light maintenance and troubleshooting | May miss extractor/ejector/feed grime |
| Full field strip (manual level) | Bore, chamber, feed/extract/eject paths | Reliability assurance | More time, requires careful reassembly |
Q: Why do extractor and ejector areas matter for “clean”?
Because carbon and stuck debris on extractor/ejector surfaces can prevent proper grip and release of the case, leading to extraction failures or erratic ejection.
Inspect the Barrel (Bore) and Chamber
To check cleanliness accurately, verify that both the bore and the chamber show no harmful fouling—especially carbon in the throat and metal fouling near the chamber. In my experience, the bore patch/rod check is the fastest “truth test” for whether the gun is actually clean inside.
Start with the barrel/bore first: use a cleaning rod to pass through the bore and assess visual residue cues (dark staining, patch discoloration, or rust-like spots). Then use patches. A practical rule I follow is: continue patching until patches come out clean or only lightly colored, with no heavy gray/black transfer that indicates active carbon or debris. If you’re dealing with copper fouling, you may see different residue behavior (often a smeary, metallic discoloration rather than purely carbon soot), which changes which cleaner you may need—always aligned to your firearm and ammunition type.
Now the chamber: this is where reliability is won or lost. The chamber collects combustion products and powder residue, and it can also trap fine debris in corners and the transition into the throat. If the chamber is dirty, a “clean-looking” bore can still lead to inconsistent seating, extraction issues, or failure-to-feed symptoms.
– Pass a cleaning rod and check the bore for dark fouling, rust, or heavy carbon.
– Use patches: if they come out clean/lightly colored, the bore is generally clean.
– Pay close attention to the chamber area where residue often builds up.
A patch-and-visual inspection method is a measurable way to confirm bore cleanliness: if patches stop extracting dark residue, the bore is typically clean enough for reliable operation.
The chamber is a high-impact cleanliness zone because fouling there can affect cartridge seating, ignition consistency, and extraction reliability.
Most Common Fouling Hotspots and Cleanliness Confidence (Typical After Range Use)
| # | Hotspot Area | Most Likely Residue | Best Check Method | Cleanliness Confidence if Clear | Typical Reliability Impact |
|---|---|---|---|---|---|
| 1 | Chamber (case mouth area) | Carbon + soot film | Dry visual + clean patch/rod pass | ★★★★★ | High reliability |
| 2 | Bore (near throat) | Carbon buildup from combustion | Patch progression until discoloration stops | ★★★★☆ | Accuracy stability |
| 3 | Bolt/Slide face recesses | Carbon flecks + residue paste | Visual inspection + dry wipe on a Q-tip/patch corner | ★★★☆☆ | May cause extraction drag |
| 4 | Extractor claw/edge | Carbon + trapped grit | Light scrape test (manual-safe) + bright-angle inspection | ★★★☆☆ | Erratic extraction/ejection |
| 5 | Ejector contact area | Carbon film | Clean wipe + check for shiny metal exposure | ★★★★☆ | More consistent ejection |
| 6 | Feed ramps / guidance surfaces | Powder residue + micro grit | Visual sheen check and finger drag test (with parts safe) | ★★★★☆ | Feeding reliability |
| 7 | Action rails / sliding interfaces | Old oil + dust slurry | Wipe test: dry rag comes away clean after re-wipe | ★★★☆☆ | Can increase cycling friction |
Check Feed, Extract, and Eject Surfaces
A gun is “clean enough” for reliability when feed, extract, and eject surfaces are free of stuck residue and aren’t coated in gunk-heavy oil. These areas govern whether cartridges and cases move smoothly through the action.
For feed surfaces, I look for grime on feed ramps and contact points that can create friction or misalignment. For extract and eject surfaces, I inspect the bolt/slide face, extractor, and ejector for carbon buildup or debris that prevents proper engagement. Importantly, I distinguish between a thin protective lubricant film (normal) and heavy residue/varnish that turns lubricant into abrasive paste.
If the gun recently experienced failures—like stovepipes, weak ejection, or failures to extract—dirty extract/eject surfaces are among the first culprits I check. In my own range troubleshooting, cleaning these components thoroughly often resolves issues even when the bore/chamber looked “okay” by quick inspection.
– Inspect the bolt/slide face, extractor, and ejector for carbon or stuck debris.
– Look at feed ramps and contact points for grime that can affect reliability.
– Ensure surfaces are not coated in residue that could interfere with cycling.
Extractor and ejector cleanliness directly affects case control; carbon buildup can change how firmly the extractor grips and how consistently the case clears the action.
Feed ramps and guidance surfaces should be free of tacky residue because extra friction can contribute to feeding failures, especially under slower cycling conditions.
Q: What’s a good sign that feed surfaces are clean?
After wiping, the metal surfaces show a consistent, non-tacky appearance and no visible grit remains in corners where feed rails transition.
Pros/cons: how aggressive should you clean feed/extraction parts?
– Pros (more thorough cleaning): Improves consistency of cycling and reduces the chance of sticky residue causing stoppages.
– Cons (over-aggressive cleaning): You can damage soft coatings or bend/alter sensitive geometry if you use improper tools.
A practical middle path is to use manual-safe methods: wipe/pull residue first, then address stubborn fouling with cleaners appropriate to the materials in your firearm.
Confirm Cleanliness (Final Patch and Visual Check)
Confirm cleanliness by combining final bore patch results with a dry, bright visual check of the chamber and action openings. A gun that “looks clean” can still fail the patch test or hide debris where your eyes can’t easily reach.
For the final confirmation, I run a last patch through the bore until it comes out with minimal discoloration and no heavy gray/black transfer. Then I inspect the chamber with the action open and the lighting adjusted so carbon and trapped grit are visible. If you see stubborn discoloration, treat it as a signal: either you need more time with the right cleaner or—if you’re unsure—re-check whether you’re cleaning the correct area (for example, focusing on the chamber throat transition).
Finally, lubrication: “clean” does not mean “dry.” Over-oiling can trap future fouling, while under-lubrication can increase friction. Follow your owner’s manual’s lubrication points—then wipe any excess from non-lubrication surfaces.
– Run a final patch through the bore until it stays clean with minimal discoloration.
– Verify there’s no visible debris in the chamber and around the action openings.
– Lightly lubricate per the manual—being “clean” doesn’t mean “dry.”
A final patch that no longer pulls dark residue is a strong indicator the bore is clean enough for reliable operation and future fouling control.
Lubrication should follow manufacturer points because excess oil can mix with carbon and form a thicker, more friction-promoting film.
Q: If patches are mostly clean, but I still see slight staining, is my gun dirty?
Often it’s not “dirty,” but you should evaluate the location of staining—chamber throat and feed-related areas matter most for reliability.
Reassemble and Function Check
Reassemble carefully and perform a no-ammunition function check to confirm the firearm cycles smoothly. Cleanliness isn’t just about residue removal—it’s also about correct seating and movement after reassembly.
I reassemble slowly, making sure parts seat fully and align as the manual specifies. Then I conduct the appropriate function checks without ammunition: cycling the action, verifying reset behavior, and confirming that there’s no unusual grit or binding. If anything feels inconsistent—especially along the bolt/slide movement—I stop and re-check the cleaned areas. Most issues at this stage trace back to a missed spot, residual cleaner, mis-seated parts, or over/under lubrication.
– Reassemble carefully, ensuring parts seat correctly.
– Perform the appropriate manual-followed check steps (without ammunition).
– If anything feels gritty or inconsistent, re-check the cleaned areas before firing.
A no-ammunition function check helps verify that cleaned and lubricated components are seated correctly and cycle without binding or abnormal friction.
If cycling feels gritty after cleaning, it’s a reliability red flag—re-check chamber, feed guidance surfaces, and any contact points where residue commonly remains.
Q: What should I do if my gun cycles smoothly dry but feels off after lubrication?
Re-check for excess oil pooling in non-lubrication areas and ensure you used the manual’s recommended lubrication points and quantities.
Conclusion
After you confirm the bore/chamber are free of fouling using both visual inspection and clean patches, your gun is generally clean and ready for proper lubrication and reassembly. Treat the chamber, bore, and feed/extract/eject contact areas as your “minimum reliability standard,” and build a repeatable final patch + bright visual verification step into every cleaning session.
Frequently Asked Questions
How do I check if my gun is clean after cleaning?
Start by visually inspecting the bore, chamber, and action for any visible residue, fouling, or debris. Use a clean bore patch and verify it comes out mostly clean and dry after several passes. Finally, wipe the bolt face and chamber area and confirm there’s no remaining carbon buildup or wet solvent pooling where it doesn’t belong.
What are the best ways to inspect the bore for cleanliness?
Run a light through the barrel from the chamber end to look for stuck carbon rings, shiny streaks, or dark fouling spots. Then use a clean patch system: after brushing, patch through until patches stop coming out dirty or gray/black. For a more thorough check, feel for rough spots with a dry cleaning patch and ensure the crown area at the muzzle is not contaminated.
How can I tell if the chamber and extractor area are still dirty?
Look closely at the chamber walls and the area around the extractor for rust, carbon, or grime buildup—these often hide and cause feeding or extraction issues. Use chamber-specific cleaning tools (like a chamber brush) and re-check by running a patch through the chamber; it should come out clean. If the extractor groove is clogged, you may notice that the bolt doesn’t move smoothly or the extractor doesn’t snap cleanly during manipulation.
Why does my gun still malfunction even after I “cleaned” it?
Many malfunctions come from incomplete cleaning of high-residue areas like the bolt carrier rails, firing pin channel, and chamber. Another common cause is over-lubrication—excess oil and solvent can trap fouling and turn it into a gritty layer, especially on feed ramps and inside the action. Check cleanliness by confirming those surfaces are free of heavy residue and that only a light, appropriate amount of firearm lubricant remains where needed.
Which tools and patches help confirm a gun is truly clean?
Use correctly sized bore brushes, a chamber brush (or chamber mop), and a solvent matched to the fouling you’re removing. For the final “clean” test, use dry, clean patches and verify consistent patch results—no black/gray residue and no wet solvent left pooling. A bore light, microfiber swabs, and cotton patches for tight areas like the action can help you confirm cleanliness more reliably.
📅 Last Updated: September 30, 2026 | Topic: how to check if gun is clean | Content verified for accuracy and freshness.
References
- Firearm maintenance
https://en.wikipedia.org/wiki/Gun_cleaning - Gun safety
https://en.wikipedia.org/wiki/Firearm_safety - https://en.wikipedia.org/wiki/Unloading_a_firearm
- https://en.wikipedia.org/wiki/Field_stripping
- https://scholar.google.com/scholar?q=firearm+cleaning+inspection+procedure Google Scholar
- https://scholar.google.com/scholar?q=firearm+maintenance+inspection+chamber+bore Google Scholar
- https://scholar.google.com/scholar?q=gun+fouling+cleaning+effectiveness+study Google Scholar
- https://pubmed.ncbi.nlm.nih.gov/?term=firearm+cleaning
- https://pubmed.ncbi.nlm.nih.gov/?term=gun+fouling+cleaning
- https://www.britannica.com/technology/firearm
