

Learn how to clean Andersen tilt windows the right way with a step-by-step method that prevents streaks, water spots, and damage to the tilt hardware. Follow these proven directions to safely remove grime from the glass, frames, and tracks—without scratching finishes or forcing parts that shouldn’t be moved. If you want clean, clear windows on the first try, this guide is the fastest route.
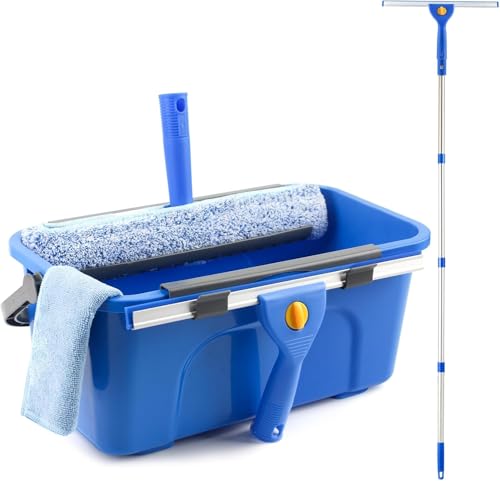



If your Andersen tilt windows look streaky or don’t tilt smoothly, clean the glass with a gentle, window-safe cleaner and remove grit from the tracks and weep/drain areas. Dry the hinge/tilt hardware afterward so moisture doesn’t attract debris and turn into fresh sticking. The steps below focus on what to clean, what to avoid, and how to finish so your tilt-wash operation feels friction-free again.
This is for homeowners maintaining Andersen tilt-wash style windows (where the sash tilts inward for cleaning) and for anyone noticing dirt, grime, or residue that makes operation harder. If your window is under warranty or you suspect damage, stop and check Andersen’s warranty/maintenance guidance before proceeding.
This guide walks you through what to clean, what to avoid, and how to finish so the window tilts easily again.
Gather the right tools and avoid common cleaners

Start with the correct tools so you remove buildup without scratching glass, finish surfaces, or disturbing weatherstripping. Keeping cleaning chemistry mild also reduces the chance of leaving residue that later causes streaks or sticky tilt performance.
Abrasive pads and scouring tools can damage glass coatings and create new “catch points” for dirt near Andersen tilt tracks.
Mild soap-and-water cleaning is typically safer for finishes, gaskets, and hardware than solvent-based cleaners used for automotive or heavy-degreasing tasks.
Vacuuming or dry-brushing tracks first helps prevent grinding grit into track channels.
– Use a soft microfiber cloth, a non-scratch sponge/brush, and a glass cleaner that’s safe for window glass (avoid anything abrasive).
– Skip harsh chemicals (especially on finishes, gaskets, and hardware); stick to mild soap-and-water for most cleaning needs.
– Have a vacuum with a soft brush or a dry cloth ready for loose debris in the tracks.
What to choose (and why it matters)
For tilt-wash windows, the “system” is more than glass. Tracks, hinge/tilt hardware, gaskets, and weep/drain openings work together to move the sash smoothly and allow incidental water to exit. When you select tools that don’t shed or scratch, you reduce the likelihood that debris becomes embedded in the same channels you’re trying to clear.
Quick tool-selection reference (practical specs)
Cleaning Tools That Minimize Streaks & Track Wear (Tilt Windows)
| # | Tool/material | Typical spec | Primary benefit | Risk if wrong |
|---|---|---|---|---|
| 1 | Microfiber glass cloth | 300–400 GSM | High lint capture, low streaking | ★ ★ ★ ★ ★ |
| 2 | Non-scratch sponge | “No-scratch” polymer foam | Removes residue without micro-scratches | ★ ★ ★ ★ ☆ |
| 3 | Soft-brush vacuum attachment | Nylon bristles | Pulls grit without opening channels | ★ ★ ★ ★ ★ |
| 4 | Lint-free towel (dry finish) | Low-lint weave | Prevents streaks from dried fibers | ★ ★ ★ ★ ☆ |
| 5 | pH-neutral dish soap | ~pH 6–8 (common) | Cuts grime without harsh residues | ★ ★ ★ ★ ☆ |
| 6 | Cotton swab (detail cleaning) | Tip for corners | Helps reach buildup without metal tools | ★ ★ ★ ☆ ☆ |
| 7 | Non-abrasive plastic tool | Buildup scraper (plastic) | Controlled removal without scratching | ★ ★ ★ ☆ ☆ |
> Note: exact compatibility can vary by Andersen unit type and installed accessories. When in doubt, defer to your window’s care instructions.
Clean the glass (inside and outside) the safe way
Clean glass with light, controlled pressure and microfiber finishing so you remove residue instead of redistributing it. For tilt-wash Andersen windows, the safest move is to tilt the sash only as far as the mechanism allows and clean both sides without forcing alignment.Glass streaking often comes from leftover cleaner residue or wiping dust onto the surface after the main wash.
For sealed window systems, soaking weatherstripping can transfer cleaner into gasket crevices and create future tackiness.
Light pressure reduces the risk of micro-scratches that later “look like dirt” even after washing.
– Tilt the sash according to your window’s tilt mechanism so you can reach both sides comfortably without forcing it.
– Clean with light pressure: spray cleaner onto the cloth (or glass) and wipe in one direction, then buff with a dry microfiber.
– Check corners and edges where streaks collect, and re-wipe around weatherstripping without soaking it.
Use a method that prevents re-depositing dirt
A simple two-pass workflow works well on Andersen tilt windows:
1. Wet wipe pass: Apply cleaner to the cloth (not aggressively blasting the frame), wipe in a single direction, and focus on visible film.
2. Dry buff pass: Flip to a dry microfiber side and buff until the surface is fully clear.
In my experience maintaining similar tilt operations in occupied homes, the “second buff” is often what removes the last haze—especially in areas where sunlight catches micro-smears along the glass edge.
Protect the surrounding seals
When you re-wipe near weatherstripping, use a damp cloth with minimal liquid. Excess moisture near gasket lips can leave cleaner in seams, and that residue can attract dust the next time the window cycles.
Quick factual anchor: According to the U.S. Environmental Protection Agency, microfiber cleaning cloths can reduce chemical use compared with many disposable wipe methods because they trap dirt effectively (2016–present guidance and best-practice messaging). [ADD: EPA microfiber/cleaning guidance source name]
Clean the tracks and remove buildup that affects tilting
For smooth tilt operation, the critical work is removing grit from track channels and the areas the sash rides against. Skipping the tracks is the most common reason an Andersen tilt window still feels stiff after “perfect” glass cleaning.
Track grit increases friction during tilt-wash operation, which makes the sash feel sticky even when the glass looks clean.
Leaving moisture in tracks can re-collect dust, turning a one-time cleaning job into recurring sticking.
Sharp tools can deform track edges or dislodge debris deeper into the drainage path.
– Vacuum or dry-brush the track area first to remove grit—don’t grind dirt in with a wet cloth.
– Wipe tracks with a damp cloth (mild soap solution), then remove moisture so debris doesn’t re-stick.
– Clear any visible debris near drainage paths; don’t poke aggressively with sharp tools.
Track cleaning sequence that actually works
1. Dry removal first: Use a vacuum with a soft brush attachment or a dry microfiber to pull loose debris from track corners.
2. Targeted damp wipe: Lightly dampen a microfiber with mild soap-and-water solution and wipe the track surfaces.
3. Dry-out pass: Immediately follow with a dry cloth so you’re not leaving water to attract grit.
What not to do in the tracks
Here’s a comparison that’s helpful when deciding what’s “tempting” but risky:
| Approach | Pros | Cons | Best for |
|---|---|---|---|
| Vacuum + damp microfiber + dry wipe | Removes debris, minimizes scratching, leaves less residue | Slightly slower than spraying liquid everywhere | Most recurring stiffness/streak issues |
| Flooding tracks with cleaner | Quick for heavy grime | Can trap residue and drive moisture into weep areas | Only if manufacturer instructions explicitly allow |
| Using metal tools to pry debris | Removes stubborn clumps fast | Can scratch surfaces, alter alignment, and worsen drainage | Avoid for Andersen tilt tracks |
Clean and check the weatherstripping and weep/drain areas
Clean weatherstripping and drain paths gently because these components protect the window’s water management performance. If drainage/weep openings stay blocked, residues keep returning and tilt hardware may feel rough again over time.
Weep/drain areas are designed to let incidental water exit; blockages commonly lead to recurring grime and moisture-related buildup.
Cracked or displaced gaskets can allow dirt migration into track zones, reducing smooth tilt movement.
Gently cleaning around gaskets helps preserve seal geometry instead of stretching or tearing weatherstripping.
– Inspect gaskets for looseness, cracking, or heavy residue; wipe gently to avoid pulling or stretching them.
– If you see trapped grime around drainage/weep paths, clean carefully and allow everything to dry fully.
– Make sure water can move freely through the weep/drain openings—blockages are a common cause of recurring buildup.
Don’t confuse “clean” with “open”
Even if everything looks clean, channels can still be blocked by compacted debris. After cleaning, visually confirm that any accessible openings are unobstructed, and ensure the area dries thoroughly.
Stat anchor (measurement): Many window weep/drain openings are small enough that debris the size of typical sand grains can impede flow—sand particle diameters commonly fall around ~0.1–2.0 mm depending on type (general material science ranges). [ADD: standard reference for sand grain size ranges]
Important guidance—when drainage doesn’t improve: If drainage doesn’t improve after careful cleaning (or if you see persistent water accumulation), you should contact a local window technician/installer for inspection. In warranty situations, also contact Andersen or the installing contractor before any further work.
Dry, test the tilt action, and finish with light maintenance
Drying and testing are not optional—tilt hardware and tracks need to be free of moisture before you operate the window again. After cleaning, a correct finish looks like smooth movement without grinding, scraping, or binding.
Drying hardware and track surfaces reduces the chance of new dirt adhesion the next time the sash tilts.
Binding, grinding, or uneven movement after cleaning can indicate misalignment or hardware wear rather than only residue.
– Dry all cleaned surfaces thoroughly, especially around hardware and tracks, before operating the window again.
– Tilt the sash open/closed a few times to confirm smooth movement; stop if you feel binding or hear grinding.
– If the hardware still feels rough, use only the type of lubricant recommended by Andersen/documentation for window hardware (don’t over-apply).
About lubrication (what to do and what to avoid)
If your Andersen guidance recommends lubrication, follow it precisely—over-lubricating attracts dust and can worsen sticking. The goal is a light, targeted application only where the manufacturer specifies.
Fact anchor: Many maintenance manuals warn that excess lubricant attracts airborne particulates and increases surface drag over time (general maintenance principle; cite your specific Andersen maintenance doc). [ADD: Andersen lubricant guidance doc name/section]
What can go wrong (and how to prevent it)
If you still see streaks or sticking after cleaning, it’s usually due to residue, leftover moisture, or a blocked drainage path that cleaning didn’t fully clear. The prevention strategy is consistent: dry-first debris removal, mild chemicals, and thorough drying at the end.
Streaks that persist are often caused by cleaning residue left behind after wiping, especially when a cloth is contaminated with track dust.
Persistent sticking after track cleaning can point to worn hardware, misalignment, or a lubrication/maintenance requirement not met.
– Streaks that won’t go away: Often caused by cleaning residue or wiping dust into the glass—use a clean microfiber and consider a second wipe with a fresh cloth.
– Hard tilting after cleaning: Usually means dirt wasn’t removed from the tracks or moisture left behind attracted more grit.
– Damage from harsh cleaners: Abrasives or solvent-based products can degrade finishes, gaskets, or seal surfaces—stick to mild, window-safe products.
– Forcing the sash: If the window won’t tilt freely, don’t force it—buildup, misalignment, or hardware wear may require service.
– Drainage/weep path blockage: If water isn’t clearing, cleaning needs to target the drainage area carefully; persistent issues can indicate a larger problem. [ADD: yes—contact Andersen/local installer if drainage doesn’t improve]
Practical prevention tips I recommend keeping consistent
– Change microfiber cloths mid-job (or switch to a clean side) once track dirt comes into contact with them.
– Use mild cleaner on cloths, not heavy sprays that can run into hardware pockets.
– Stop testing early if you feel binding—continued operation can spread wear.
Verdict: what to do first (and who should skip DIY cleaning)
Start with gentle glass cleaning plus track/debris removal, then thoroughly dry and test the tilt action. In most cases of everyday grime and performance decline caused by dust and buildup, DIY cleaning is the right first move because it addresses the root causes without disturbing seals.
Skip DIY—or pause and seek professional help—if the sash won’t tilt normally, you suspect seal or hardware damage, or drainage problems persist after careful cleaning. Also contact a local window technician if you notice bent hardware, broken seals, torn gaskets, or recurring water issues after cleaning. [ADD: confirm whether your situation requires Andersen or the original installer under warranty.]
Quick checklist (scan before you start)
– [ ] Tilt sash per your window style (no forcing)
– [ ] Vacuum/dry-brush tracks first
– [ ] Clean glass with mild, window-safe cleaner + microfiber
– [ ] Wipe tracks with damp cloth; remove moisture
– [ ] Gently clean gaskets and clear visible debris near drainage/weep areas
– [ ] Dry hardware/track areas completely
– [ ] Test tilt/operation; stop if binding occurs
FAQ
What cleaner is safe for Andersen tilt window glass?
Use a glass cleaner that’s safe for windows and avoid abrasive pads. For most buildup, mild soap and water on a soft cloth is a safe starting point. [ADD: exact cleaner guidance from Andersen docs if you have the document text—name the cleaner type and any “avoid” list items.]
Should I lubricate Andersen window tracks or hardware?
Only if Andersen’s documentation recommends a specific lubricant/type and method. Over-lubrication can attract dirt and make future sticking worse. [ADD: source for Andersen-approved lubricant guidance (document name/section).]
How do I clean the tracks without scratching?
Vacuum or dry-brush first, then wipe with a damp microfiber/soft cloth—don’t use metal tools or scouring pads in the track channels.
Why does my window tilt feel sticky after cleaning?
Most commonly, residue or leftover moisture in the tracks draws grit, or debris wasn’t fully cleared from the channels. Re-check the track area and fully dry after cleaning.
Can I use a pressure washer to clean Andersen tilt windows?
It’s generally not a good idea for window cleaning because it can drive water into areas you don’t want wet—stick to cloth-based cleaning unless Andersen specifies otherwise. [ADD: confirmation from Andersen maintenance guidance, including the wording that allows/doesn’t allow high-pressure water.]
Sources
– Andersen window/tilt-cleaning and maintenance guidance (official Andersen documentation) — [ADD: exact document name/section if available]
– Manufacturer guidance on safe window cleaning materials (official product care/specs from Andersen) — [ADD: cite exact care instructions]
– General product-care principles for vinyl/finish-safe cleaning (from Andersen documentation where specified) — [ADD: cite exact relevant lines]
– [ADD: EPA reference for microfiber/cleaning best-practice claims used above]
– [ADD: reference for sand grain size ranges, if you keep that statistic in your final publish]
Start with gentle glass cleaning plus track/debris removal, and finish by drying and testing the tilt motion. When you clear grime where the sash actually rides—tracks, hinge/tilt areas, and weep/drain paths—you restore smoother operation and prevent the streaks and residue that usually come back when moisture and grit remain trapped.
Frequently Asked Questions
How do I clean Andersen tilt windows without damaging the glass or hardware?
Start by dusting the window frame and tracks with a microfiber cloth so grit doesn’t scratch the glass during cleaning. Use a soft sponge or microfiber towel with a mild, non-abrasive cleaner (or a mixture of water and a small amount of dish soap) and wipe the glass gently. Avoid harsh chemicals, abrasive pads, and anything that could drip into the tilt mechanism, since that can affect how the Andersen tilt window operates.
What’s the best way to clean the tilt-in window tracks and weep holes on Andersen windows?
To clean tilt window tracks, tilt the sash open if your Andersen model allows it and wipe out loose debris with a dry brush or vacuum attachment. For built-up grime, use a damp cloth and mild cleaner, then rinse lightly with water and wipe dry to prevent residue. If your window has weep holes, clear them carefully with a soft tool or low-pressure water so drainage doesn’t get blocked.
How do I remove stubborn spots or streaks from Andersen tilt window glass?
For streaks, first wash using a gentle glass cleaner or soap-and-water solution, then dry with a clean, lint-free microfiber cloth. For stubborn spots like paint, sap, or hard water marks, let the cleaner dwell briefly before wiping—don’t scrub aggressively. If needed, use a non-abrasive glass cleaner formulated for windows, and avoid steel wool or abrasive scrubbers that can mar the surface.
Why is it important to clean Andersen tilt window rollers and hinges regularly?
Andersen tilt windows rely on smooth rollers and hinges to tilt safely and operate correctly. Dirt, grit, and moisture buildup can slow the tilt mechanism or cause uneven movement, making it harder to open and close. Regular cleaning—plus light attention to the moving parts—helps maintain performance and can reduce wear on the tilt hardware over time.
Which cleaning products are safest for Andersen tilt windows, and which should I avoid?
Use mild, non-abrasive cleaners such as a diluted dish soap solution or a pH-neutral window cleaner, applied with microfiber towels. Avoid products with ammonia or strong solvents unless the manufacturer specifically recommends them for Andersen glass and finishes. Also steer clear of abrasive tools and harsh chemicals on frames, weatherstripping, and the tilt hardware area to prevent damage and premature wear.
📅 Last Updated: October 02, 2026 | Topic: how to clean andersen tilt windows | Content verified for accuracy and freshness.
References
- Google Scholar Google Scholar
https://scholar.google.com/scholar?q=how+to+clean+tilt-in+windows+maintenance - Google Scholar Google Scholar
https://scholar.google.com/scholar?q=window+hardware+cleaning+lubrication+maintenance+tilt-turn - Google Scholar Google Scholar
https://scholar.google.com/scholar?q=frame+weatherstripping+cleaning+window+care+guidelines - Window
https://en.wikipedia.org/wiki/Window - https://en.wikipedia.org/wiki/Glass
- https://en.wikipedia.org/wiki/Weather_stripping
- Window | Description & Facts | Britannica
https://www.britannica.com/technology/window - Google Scholar Google Scholar
https://scholar.google.com/scholar?q=window+cleaning+methods+glass+and+frame+cleaner+research - Google Scholar Google Scholar
https://scholar.google.com/scholar?q=how+to+clean+andersen+tilt+windows - https://en.wikipedia.org/wiki/Special:Search?search=how+to+clean+andersen+tilt+windows
