

Learn how to clean brake dust safely and effectively, without damaging your wheels or risking brake system contaminants. You’ll get a straightforward step-by-step method that beats harsh scrubbing and guesswork, using the right cleaner, tools, and dwell times. Follow these safe steps for visibly cleaner wheels and a finish that holds up through your next drive.
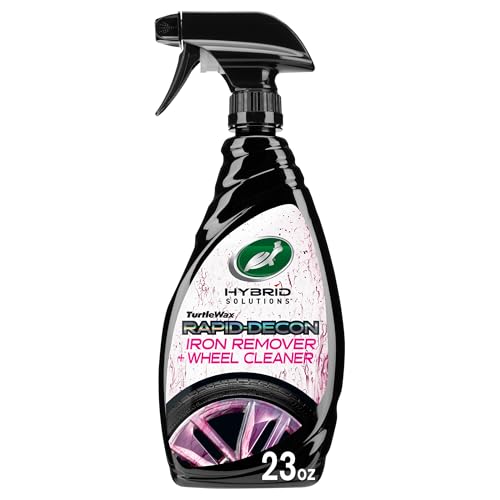

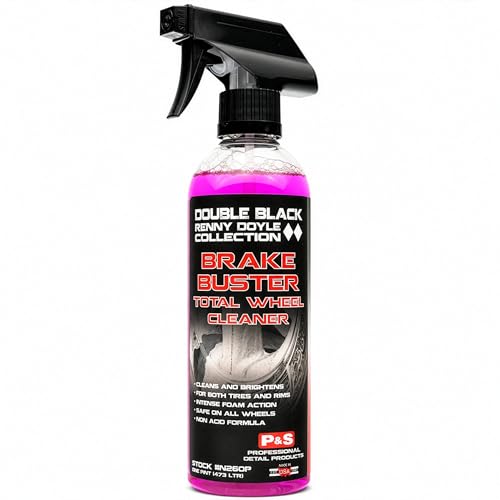

Cleaning brake dust safely comes down to using the right chemistry for iron/road contamination and avoiding abrasive scrubbing that scratches wheel finishes. Start with cooled brakes, rinse off loose grit, then apply a dedicated brake dust remover with a proper dwell time, gentle agitation, and a thorough rinse and dry—repeat in short cycles if the residue is baked on.
Brake dust isn’t just “dirt”—it’s typically a mix of metallic particles (including iron compounds) and road grime. If you’ve ever wiped your wheels and watched the residue smear, you’re likely dealing with contamination that needs a chemistry-based remover rather than stronger scrubbing. This guide walks through safe steps for alloy wheels, steel wheels, and brake calipers, with special attention to finishes that can be damaged by harsh cleaners or aggressive tools.
Gather the right supplies (and avoid the risky stuff)

The safest way to clean brake dust is to match the cleaner to the contamination (iron/metal vs. general grime) and use wheel-safe tools that won’t cut or dull the finish. You’ll get the cleanest result with the least risk by preparing the right brushes/mitts and a gentle rinse method before you apply any chemicals.
Brake dust removers work best when they’re left to dwell (sit) long enough for the chemicals to react, rather than being wiped off immediately.
Brake dust is often iron-rich; products marketed as “iron remover” or “iron fallout remover” are designed for iron contamination.
A wheel-safe brush or mitt reduces the chance of scratching because it uses softer materials than abrasive pads.
To keep this practical, here’s what to use—and what to avoid:
What to use
– A dedicated brake dust cleaner (spray or foam) designed to dissolve brake residue and road film.
– An iron-remover–type product if your brake dust looks dark/gray and especially if you see “bleeding” or color-change effects typical of iron chemistry (many iron removers do this).
– Wheel-safe brushes/mitts:
– A soft wheel brush for spokes and barrel edges.
– A separate tire brush (tire tread is rougher; using the same tool increases the risk of scratching and re-depositing grit).
– Microfiber towels for wiping and drying without grinding residue into the clear coat or paint.
What to avoid
– Abrasive pads (scouring pads, steel wool, “scrubbers” marketed for ovens) because they can micro-scratch wheel finishes.
– Household cleaners not intended for wheels, especially those containing strong degreasers or harsh solvents that can dull coatings.
– High-pressure blasting into tight wheel areas or caliper edges; it can force contaminants into seams and sensitive components.
A quick note on “why this matters”
Non-exhaust particles (including brake and tire wear) are a meaningful portion of urban particulate pollution. According to the European Environment Agency, non-exhaust sources contribute a large share of particulate matter in many cities (2019). That’s one reason “safe and thorough” cleaning is more than cosmetic: you want to remove the contamination, not aerosolize or grind it deeper into the finish.
Brake-Dust Cleaner Types: Typical Chemistry, Best Use, and Compatibility Risk
| # | Cleaner type | Typical chemistry focus | Best for | Compatibility risk |
|---|---|---|---|---|
| ★ | Iron-remover (iron fallout) spray | Iron-reactive chemistry (often acidic) | Iron-rich brake dust; “smearing” residue | ★★★☆☆ |
| 2 | Brake dust–specific pH-balanced cleaner | Brake residue + road film removal | All-around brake dust jobs on most finishes | ★★☆☆☆ |
| 3 | Wheel alkaline degreaser | Oil/grease lift (alkaline) | Heavy oily film plus brake residue | ★★★☆☆ |
| 4 | Gel/foam brake dust remover | Thickened contact chemistry | Vertical spokes and heavy buildup areas | ★★☆☆☆ |
| 5 | Iron remover + gentle surfactants (combo) | Iron reaction + grime lift | Baked-on dust mixed with road film | ★★★☆☆ |
| 6 | Wheels-only APC (all-purpose cleaner) diluted | General cleaner (non-iron-specific) | Light buildup and frequent maintenance | ★★★☆☆ |
| 7 | Acid wheel cleaner not labeled for your finish | Metal-dissolving strength | Only for verified compatibility | ★★★★☆ |
Note: The “compatibility risk” reflects general chemical handling risk based on chemistry class. Always follow the product label’s declared wheel finish compatibility.
Cool everything first, then rinse away loose grit
You should cool the brakes completely before you start cleaning because hot calipers and rotors increase splash and reduce control. After cooling, rinse away loose grit so the remover can work on brake dust—not on rocks and road sand.
Hot brakes increase the likelihood of chemical splash and uneven contact between cleaner and wheel surfaces.
Rinsing first prevents grit from acting like abrasive while you scrub.
Lug wells and textured areas hide brake dust; slower, more deliberate rinsing helps remove loose contamination before chemistry.
Let the brakes cool
If you just drove, wait until the wheel area feels cool to the touch. Hot surfaces can also cause some products to dry too quickly (reducing dwell effectiveness). This is especially important for gel/foam brake dust removers that depend on dwell time to stay in contact.
Rinse in a controlled way
– Use a hose or low-pressure sprayer to wash loose grime off the wheel face and barrel.
– Spend extra time on lug wells, spokes, and the inner barrel because dust clings there even when the outer face looks “clean.”
– Avoid blasting directly at caliper seals, rubber boots, or weather-sensitive edges—you’re aiming to remove loose dirt, not force it deeper.
Why this approach is more efficient
In practice, the best “sequence” is rinse → dwell → gentle agitation → rinse. Studies and monitoring efforts on non-exhaust emissions repeatedly highlight that particulate matter is stubborn and widespread in the environment; your goal is removal rather than redistribution. According to the European Environment Agency, non-exhaust emissions are a major source of particulate pollution in urban areas (2019).
Apply brake dust cleaner and let it do the work
The fastest path to cleaner wheels is to apply a brake dust remover evenly and respect the label dwell time. Chemistry needs contact time to react with iron-rich brake dust and loosen baked-on residue—scrubbing too early often just smears it.
Most brake dust removers require a label-specified dwell time to react with contamination effectively.
Even coverage matters because brake dust is rarely uniform; targeting visible buildup improves results with less agitation.
If the product dries on the wheel, reaction time can drop and residue can increase—reapply or rinse sooner per label instructions.
Apply correctly (and safely)
– Shake the product and spray evenly from a comfortable distance.
– Focus on visible dust bands on the face and the inner barrel where airflow and brake contact tend to deposit residue.
– Don’t let the cleaner run into areas you’re trying to protect (for example, unsealed surfaces on specialty wheels). When in doubt, cover, rinse, or follow the label’s caution section.
Use dwell time—not hope
Let it dwell for the time recommended on the product label. Since different chemistries vary (iron-reactive vs. pH-balanced vs. gel foams), you should not generalize dwell times from one product to another.
Separate tools by surface
This is where people often lose time. Have:
– One brush/mitt dedicated to wheel faces (metal surfaces).
– One tool for tires only.
– Clean microfiber towels for wiping and drying.
Cross-contamination can turn brake cleaning into “grit painting” on the finish.
Agitate gently: brushes for wheels, microfiber for finishes
You should agitate lightly because wheel finishes scratch more easily than many people expect. Use soft, wheel-safe tools to dislodge residue, then wipe with microfiber and rinse thoroughly to remove chemical and loosened particles.
Gentle agitation focuses on removing residue without driving contaminants into clear coats or coatings.
Using a microfiber towel after brushing helps lift remaining chemical residue before it re-deposits.
Dedicated brushes for spokes, barrels, and tires prevent the transfer of abrasive tire grime.
Scrub strategy that works
– Spokes and lug areas: Use a smaller wheel brush to reach behind spokes without scraping edges.
– Inner barrel: Dust tends to collect here; work slowly and don’t rush hard.
– Avoid aggressive pressure: Let the dwell chemistry do the heavy lifting.
Wipe instead of “power-scrub”
After brushing:
– Wipe with a clean microfiber towel to remove loosened residue.
– If you see smearing, it usually means either (1) insufficient dwell time or (2) you’re grinding contamination rather than dissolving it.
Rinse immediately after agitation
Don’t leave loosened residue to dry. Rinse while it’s still suspended so it can wash away rather than settle again.
Rinse, dry, and finish with protection (optional but helpful)
You should rinse until water runs clear and then dry with microfiber to prevent spotting and leftover cleaner films. Optional wheel protection—when compatible with your wheel finish—reduces how quickly future brake dust bonds to the surface.
Thorough rinsing reduces leftover cleaner residue that can attract or bind new grime.
Microfiber drying lowers the chance of water spots compared with air-drying on many finishes.
A compatible wheel sealant or wax can make future brake dust removal easier by reducing adhesion.
Rinse checklist
– Keep rinsing until no obvious chemical slickness or colored residue remains.
– Re-check lug wells, spoke corners, and inner barrel edges—these are repeat offenders for “leftover dust.”
Dry correctly
– Pat and wipe with microfiber rather than dragging a towel aggressively.
– Use a separate towel for wheels vs. tires so you don’t grind road film back onto the finish.
Optional protection (finish-dependent)
A wheel-safe sealant can help, but compatibility depends on your wheel finish (painted, clear-coated, powder-coated, matte, chrome). If you want to include specific brand guidance, use:
– Sealant type that matches your wheel finish (for example, matte-safe vs. glossy sealants), and
– The wheel manufacturer’s stated care guidance.
[ADD: recommend a specific product type and provide a source for compatibility with matte/powder-coated/chrome finishes if you choose to include brand guidance.]
What can go wrong (common mistakes and edge cases)
Brake dust cleaning can go wrong when you use the wrong chemistry, over-scrub, or blast pressure into sensitive areas. The goal is to remove contamination while preserving the wheel’s surface integrity.
Using cleaners not intended for your wheel finish can dull clear coats, damage matte textures, or harm protective coatings.
Scratches from aggressive tools create more “grip” for brake dust, making future cleaning harder.
High-pressure washing can force contaminants into seams and edges, especially on older vehicles and around calipers.
Wrong cleaner for the wheel finish
Different finishes respond differently:
– Matte finishes can get shiny or patchy if cleaners are too strong or if residues remain.
– Chrome can be sensitive to abrasive contact.
– Powder-coated and specialty coatings often need finish-specific care per the wheel or coating manufacturer.
Always check the label’s compatibility notes and the wheel manufacturer’s cleaning guidance.
Too much agitation
– Steel wool, scouring pads, and stiff brushes can leave micro-scratches.
– Micro-scratches aren’t always obvious immediately, but they increase dust adhesion, and residue can “stay” even after good cleaning.
Pressure washing too close
Keep pressure modest and avoid long direct streams into:
– Caliper boots and seals
– Wheel-to-hub edges
– Cracks and fastener points
Cleaning while brakes are hot
Hot brakes can:
– Increase splatter
– Shorten effective dwell time
– Create uneven chemical reaction because surfaces heat/dry quickly
Mixed contaminants: road grime + brake dust
If your wheel has both:
– Do a rinse first.
– Use short repeat cycles instead of one aggressive session.
This prevents grit from grinding and helps chemistry do its job.
For another anchor point, the World Health Organization highlights that particulate air pollution is a major health concern and that different sources contribute to exposure (2021). While this guide is about vehicle appearance and surface care, the underlying principle is the same: controlling contamination reduces re-aerosolization and re-deposition.
Verdict / tip: do it in cycles, and skip harsh shortcuts if you care about the finish
If you want reliable results without damaging wheels, use brake dust–specific chemistry, respect dwell time, agitate gently, and rinse thoroughly. The best practice for baked-on residue is repeating short cleaning cycles rather than leaning on harsh chemicals or abrasive methods.
Repeated short cycles usually outperform one aggressive attempt when brake dust is baked on.
Finish safety depends more on dwell time, rinsing, and tool softness than on “stronger scrubbing.”
When wheel finish compatibility is unknown (especially matte or specialty coatings), follow the wheel manufacturer’s care instructions first.
From a practical standpoint, I recommend treating brake dust removal like a controlled process: rinse to prevent grit grinding, let the chemistry react, and only then agitate. When you skip steps, the “smear” problem tends to return—because residue is being redistributed instead of dissolved and rinsed away.
Downsides to expect:
– This method takes more time than quick household wiping.
– You may need multiple cycles on neglected wheels.
– Specialty finishes may require extra caution and finish-specific products.
Who should skip or pause:
– If your wheel finish is matte/custom-coated/unknown, don’t experiment with aggressive chemicals—[ADD: source for wheel finish cleaning guidance] or follow the manufacturer’s published care instructions first.
– If a wheel has peeling clear coat or visible damage, aggressive cleaning will worsen appearance and potential coating failure.
Quick checklist (save this)
– [ ] Brakes fully cooled
– [ ] Rinse loose dirt first (especially lug wells and spokes)
– [ ] Use brake dust cleaner (dwell time per label)
– [ ] Agitate gently with wheel-safe tools
– [ ] Thorough rinse until water runs clear
– [ ] Dry with microfiber
– [ ] Optional: compatible wheel-safe protection for next time
FAQ
What’s the safest way to clean brake dust off wheels?
Use a brake dust–specific cleaner, let it dwell per the product label, agitate gently with wheel-safe tools, then rinse thoroughly and dry. This sequence reduces the risk of grinding contaminants into the finish.
Can I use dish soap to clean brake dust?
Dish soap can help with general road grime, but it usually isn’t formulated to dissolve iron/metallic brake dust effectively. If you rely on dish soap, you may end up scrubbing more and increasing the chance of smearing or micro-marring.
Is pressure washing okay for brake dust?
Low-pressure rinsing is generally safer than blasting. Avoid high pressure directed at calipers, seals, and tight gaps, since it can push contaminants into places you don’t want them.
How do I clean brake dust from wheels with spokes or tight gaps?
Rinse first to remove loose grit, then apply brake dust cleaner and use a dedicated spoke/lug brush. Let the product dwell, agitate lightly, and rinse slowly so the chemistry reaches inner edges.
How often should I clean brake dust?
Clean when you notice buildup or reduced appearance quality—more frequent, lighter cleanings usually prevent residue from becoming baked-on and harder to remove.
Sources
– European Environment Agency (EEA). Brake and tire wear / non-exhaust emissions contribution to urban particulate pollution (2019).
– World Health Organization (WHO). Health effects and risk context for particulate air pollution (2021).
– Manufacturer label instructions for the brake dust remover you use (for label dwell time and surface compatibility).
– [ADD: source for wheel finish cleaning guidance from wheel manufacturer or coating manufacturer (e.g., matte, powder-coated, chrome care instructions)].
– [ADD: general safety/cleaning limitations from relevant manufacturer documentation for wheel cleaners and wheel brushes (e.g., “not for matte finishes” or “avoid high-pressure application”).]
Brake dust cleaning is straightforward when you let chemistry do the work and you protect the wheel finish from grit and abrasive contact. Cool the brakes, rinse loose contamination, apply a brake dust remover with the right dwell time, agitate gently, and rinse/dry thoroughly—then repeat in short cycles when needed. If you match the method to your wheel finish and follow product/wheel manufacturer guidance, you’ll get cleaner wheels with fewer scratches and less recurring smearing over time.
Frequently Asked Questions
What is the safest way to clean brake dust from wheels?
Use a dedicated wheel cleaner or brake dust remover that’s designed to dissolve iron particles without damaging finishes. Start by rinsing the wheel to remove loose debris, then apply the cleaner and let it dwell for the time stated on the label. Scrub gently with a microfiber or soft wheel brush, rinse thoroughly, and dry with a clean towel to prevent water spots. Avoid harsh chemicals or abrasive pads that can strip wheel coatings.
How do you clean brake dust off alloy wheels without damaging the finish?
Rinse the wheel first to reduce grit that can scratch the clear coat. Apply a pH-neutral cleaner (or a wheel-safe brake dust remover) and work it in with a microfiber cloth or non-metallic brush, focusing on spokes and lug areas. Never use steel wool or strong acid-based products unless the product explicitly says it’s safe for your wheel type. After cleaning, rinse well and dry to keep brake dust from sticking again.
How can you clean brake dust from painted brake calipers and rotors?
For brake calipers, use a brake-safe cleaner and a soft brush to remove dust while keeping chemicals off brake pads and rotors as much as possible. Avoid soaking the caliper and let everything dry fully before driving. For rotors, brake dust typically comes off with normal braking, but you can gently wipe the surface with a brake-cleaning solution; do not coat rotors with wax or sealants. If you see heavy buildup or rust, consider professional cleaning to maintain braking performance.
Why does brake dust build up, and what’s the best way to prevent it?
Brake dust is created when brake pads and rotors wear, and it clings to wheels due to heat, moisture, and fine iron particles. It builds up faster with aggressive driving, hard braking, and certain pad compounds. To prevent buildup, apply a wheel sealant or ceramic wheel coating that creates a slick surface for easier cleaning, and use a regular rinse schedule. Keeping tires inflated and avoiding prolonged brake dragging can also reduce dust generation.
Which brake dust cleaner is best for iron particles and stubborn buildup?
For stubborn brake dust, look for an iron-remover product (often labeled for “iron particles” or “rail dust”) that chemically dissolves the gritty deposits. Choose a cleaner that matches your wheel type—most products specify compatibility with alloy, chrome, painted, or clear-coated wheels. Apply, allow proper dwell time, agitate with a brush if needed, then rinse thoroughly. If residue remains, repeat the process rather than using harsher abrasives that could damage the finish.
📅 Last Updated: October 02, 2026 | Topic: how to clean brake dust | Content verified for accuracy and freshness.
References
- Google Scholar Google Scholar
https://scholar.google.com/scholar?q=how+to+clean+brake+dust - Google Scholar Google Scholar
https://scholar.google.com/scholar?q=brake+dust+safe+cleaning+HEPA+vacuum - Google Scholar Google Scholar
https://scholar.google.com/scholar?q=brake+wear+particles+cleaning+methods+wet+cleaning - https://en.wikipedia.org/wiki/Brake_dust
- https://pubmed.ncbi.nlm.nih.gov/?term=brake+wear+particles+health+effects
- https://pubmed.ncbi.nlm.nih.gov/?term=brake+dust+occupational+exposure
- https://www.cdc.gov/niosh/topics/dust/
- https://www.cdc.gov/niosh/topics/metalworking/
- https://www.epa.gov/air-research/non-exhaust-emissions
- https://www.osha.gov/dust-fume-mist-and-vapor-exposures
