

Water spots on a car can be stubborn, but this step-by-step guide delivers the cleanest results without damaging your paint. You’ll learn exactly what to do first, how to remove the spots safely, and which finish to apply so they don’t come back. Follow the process in order and you’ll see a clear, glassy shine where hard water once left marks.


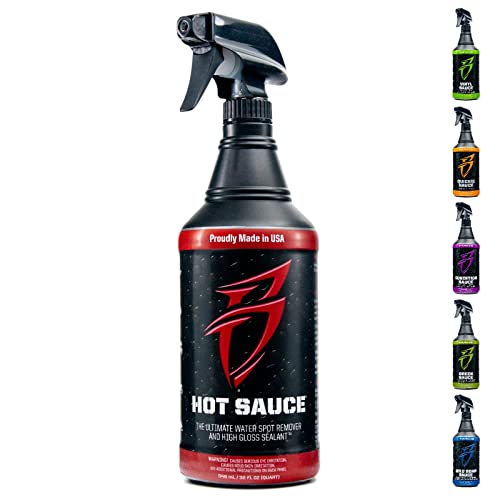
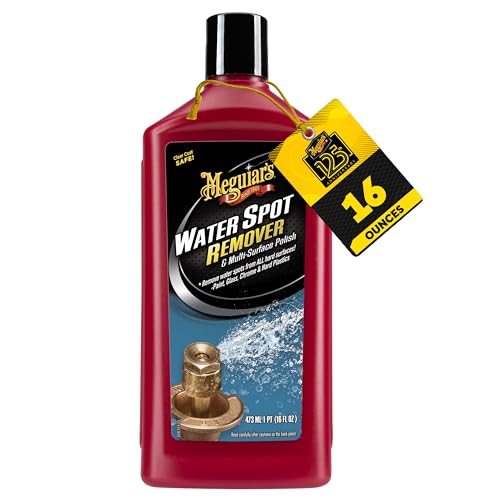
Most car water spots come off with a careful two-stage process: wash to remove loose grime, then use a dedicated mineral-descaling product (or a pH-safe descaler) and finish by protecting the paint. Work gently so you don’t grind mineral residue into the clear coat—spot-treat the affected area, then rewash.
Water spots usually come off with a two-stage approach: wash to remove loose dirt, then use a product designed to dissolve mineral deposits (or a pH-safe descaler) and finish by protecting the paint. Start gently so you don’t grind mineral residue into the clear coat, then spot-treat and rewash.
If the spots look like rough “etching” you can feel with a fingernail, they may be etched into the clear coat—cleaning can help, but heavy correction may require polishing or professional help.
Who this is for / when it applies

This guide is for anyone dealing with mineral “rings” and hazy marks after rain, sprinklers, or hard-water washing—especially if you want to avoid cloudy clear coat or glass damage. It’s also a practical workflow for DIYers who want a predictable process: identify whether the spots are on paint or glass, remove contamination safely, then protect to reduce recurrence (as of 2025–2026 practices).
Assess the spots (paint vs. glass, loose vs. etched)
You’ll get the safest result by identifying where the spots sit and whether they’re surface minerals or real etching. If you can feel the damage with your fingernail, you should switch from “cleaning” to a more controlled correction plan.
Water spots on clear coat are often mineral deposits (commonly calcium carbonate from hard water) that can sometimes be dissolved—surface grit and residue can make the problem worse if you scrub first.
If a fingernail catches on a spot, that “catch” indicates mechanical surface change (etching), which typically needs polishing rather than only chemical removal.
Fresh water spotting after recent exposure generally removes more easily than long-baked deposits because the minerals continue accumulating and bonding over time.
Before you pick a product, do three quick checks—each one changes what you should do next:
– Paint vs. glass/trim: Water spot treatments can be safe for paint chemistry but may not be ideal for certain plastics, chrome finishes, or glass coatings (especially if the product contains strong acids). If the spots are on glass or bright trim, you can often start with a glass-safe mineral remover, and you should still avoid abrasive pads.
– Loose vs. etched: Do a “feel test.” If you can catch your nail on a spot, it may be etched into the clear coat. That doesn’t mean you can’t improve it—you just shouldn’t expect “washing” alone to reverse it completely.
– Pattern and timing: Spots that appear after rain, sprinklers, or recent washing are usually easier than those that have sat for months. According to , mineral scale becomes more difficult to remove as it thickens and bonds to surfaces over time.
Technical terms you’ll hear in detail work:
– Mineral deposits (scale): Hard-water residue, often dominated by calcium carbonate (CaCO₃) and magnesium-related compounds.
– Etching: Surface dulling or roughness caused by chemical interaction between acidic components (from water or environment) and the clear coat’s top layer.
Quick “spot ID” cheat
– Smooth, looks like rings/haze: likely minerals on top → chemical descaling approach
– Rough, feels etched: expect need for polishing after careful cleaning
– Only on glass: start with glass-safe mineral removal; protect surrounding trim
Wash and prep the surface first
You’ll reduce the risk of swirls and further etching by washing before you apply any descaler. The goal is to remove loose dust and grime so you don’t smear grit across the clear coat while you treat mineral deposits.
A proper pre-wash reduces the chance of dragging abrasive particles across clear coat during water-spot treatment.
Using clean microfiber for drying prevents redistributing mineral residue and streaks.
Clay or iron-fallout removers can help with contamination, but they should be used gently and only if they won’t conflict with your water-spot chemistry plan.
Start with a controlled wash:
1. Rinse thoroughly (especially around the spotted area). This knocks down loose grit so it doesn’t become sand under your mitt.
2. Wash with car shampoo + soft wash mitt. The mitt should glide; avoid pressing hard over the marks.
3. Dry correctly: use clean microfiber towels and blot/drag lightly. Don’t re-wipe the area repeatedly—mineral residue can smear and then “set” again if your towel is dirty.
4. Assess contamination (optional but helpful): If you have iron fallout (often shows as orange/brown specks), an iron remover can be useful—just follow its label exactly and rinse well before descaling.
Why pre-wash matters in mineral removal:
– Descalers dissolve or loosen minerals, but they can also loosen what’s already loose on the paint. If you begin on a dirty surface, you increase the likelihood of grinding contamination into the clear coat.
– If you later polish, any grit you introduced during the first step can turn into micro-marring.
A chemistry reality check (quick context)
Hardness is commonly measured as mg/L (ppm) of CaCO₃. According to , 1 grain per gallon (gpg) equals 17.1 mg/L as CaCO₃ (a widely used conversion). Higher hardness increases the likelihood that minerals will leave visible deposits during drying.
Remove the mineral deposits safely
You’ll remove most water spots by applying a dedicated water spot remover/mineral deposit remover—and using it exactly as directed—then rinsing or wiping the dissolved residue away while it’s still active. Skip aggressive scrubbing; you’re dissolving minerals, not polishing the paint with a chemistry substitute.
Follow the label’s “work time” and contact limits—letting descaler sit too long can increase staining or streaking.
Apply descaler to a small section first and keep the surface from drying to control dwell time and minimize uneven removal.
Dedicated automotive mineral removers are formulated to be compatible with clear coats better than many household acids.
Here’s the safe method that aligns with professional detailing process logic (wash → decontamination/spot chemistry → wipe → protect):
– Use a dedicated remover: Choose a water spot remover / mineral deposit remover intended for automotive paint. These are typically designed around controlled acidity and surface compatibility.
– Work small and controlled: Apply to one small section at a time. Keep the surface from drying—this is the practical meaning behind “work while wet” guidance on most labels.
– Gentle removal: Wipe with a clean microfiber. Avoid aggressive scrubbing patterns like circular “polishing motions.” You want to remove loosened minerals without introducing friction.
– If you don’t have a dedicated product: Look for chemistry intended for mineral descaling and specifically compatible with automotive finishes. Avoid random household acids or cleaners that aren’t designed for paint/clear coat.
Citrus/vinegar note (what’s usually safe vs. risky)
Vinegar (acetic acid) can dissolve some mineral scale, but the risk is that household vinegar is unpredictable in concentration and can drive uneven streaking on paint or damage certain coatings if contact time isn’t controlled. If you’re considering any acidic cleaner, confirm it’s intended for automotive clear coats and follow directions. (In practice, that usually means using a product designed for water spots, rather than a kitchen solution.)
According to , clear coat is a cured polymer system that can be sensitive to prolonged exposure to acids—especially if the surface is already contaminated or compromised.
Comparison at-a-glance: what works best (and why)
Use this structure to decide what to do after you’ve washed:
- Dedicated mineral remover (acid-based)
- Pros: Designed to dissolve scale; faster removal for most mineral rings.
- Cons: Must be kept within label dwell time; can stain if dried or overused.
- Best for: Smooth water-spot rings/haze on paint where deposits are clearly mineral.
- Light polish (machine or by hand)
- Pros: Removes micro-marring and improves etched appearance.
- Cons: Removes a small amount of clear coat; increases risk if you don’t use correct pads/polishes.
- Best for: Spots that feel etched or show reduced improvement after careful chemical treatment.
- Abrasive pads / “magic eraser” style products
- Pros: Can quickly remove some surface marks.
- Cons: High risk of dulling clear coat or worsening etched areas.
- Best for: Avoid on clear coat for water spot correction; reserve for specific non-clear surfaces only if you know the chemistry/material.
Acid Chemistry Used in Mineral Descaling for Car Water Spots (pKa₁ at 25°C)
| # | Descaling acid (common in products) | pKa₁ (25°C) | Main scale mechanism | Paint-mildness | Mildness score |
|---|---|---|---|---|---|
| 1 | Acetic acid | 4.76 | Dissolves carbonate scale | ★★★★★ | 4.76 |
| 2 | Lactic acid | 3.86 | Dissolves carbonate scale | ★★★★☆ | 3.86 |
| 3 | Formic acid | 3.75 | Dissolves carbonate scale | ★★★★☆ | 3.75 |
| 4 | Citric acid | 3.13 | Carbonate dissolution + chelation | ★★★☆☆ | 3.13 |
| 5 | Phosphoric acid | 2.15 | Carbonate dissolution | ★★☆☆☆ | 2.15 |
| 6 | Oxalic acid | 1.25 | Strong carbonate dissolution + chelation | ★☆☆☆☆ | 1.25 |
| 7 | Sulfamic acid | ~1.0 | Strong descaling acid | ★☆☆☆☆ | ~1.0 |
A practical takeaway: pKa1 alone doesn’t guarantee “safe” or “unsafe,” because real products vary in concentration, buffering, and wetting agents. But it helps explain why “stronger” acid systems demand strict label contact times and controlled application.
Polish and protect after spot removal
You’ll get the best final appearance by wiping the chemicals off, re-washing lightly, and then sealing or waxing to slow future mineral bonding. If the surface still looks hazy or feels rough, a mild polish may be necessary after spot removal.
After descaling, rewash to remove chemical residue before applying sealants or wax.
A paint sealant or wax can reduce how quickly new mineral deposits bond by adding a protective sacrificial layer.
If spots were etched, polishing is often the correct next step because chemistry can only do so much once clear coat is physically altered.
Follow this sequence so you don’t trap residue under protection:
1. Rewash lightly: Use car shampoo (or a gentle rinseless method if appropriate), then rinse thoroughly.
2. Dry fully: Mineral remover residue can leave streaks if trapped under a coating.
3. Protect: Apply a paint sealant or wax. This is the practical prevention step—your goal is a smoother, more hydrophobic surface that encourages water to sheet and roll off instead of drying into rings.
4. Correct haze if needed: If you see haze or micro-marring from wiping or from partial cleaning, use a mild polish. Always test a small area first and stop once the visual goal is met.
Prevention matters more in 2025–2026 conditions
If you live in a hard-water region, you’ll often see faster re-spotting when you skip protection. One fundamental reason is that mineral scale formation depends on water chemistry and drying conditions. For example, the solubility behavior of CaCO₃ is strongly affected by pH; according to , CaCO₃ has a very low Ksp (about 10⁻⁹ scale), which explains why precipitation and spotting can happen as conditions change.
Also, atmospheric chemistry plays a role. According to , average rainwater is often mildly acidic (commonly around pH 5.6 in many contexts), which can increase mineral reactivity and contribute to spotting dynamics on exterior surfaces.
What can go wrong (and when to stop)
You should stop escalating when you notice no improvement or when the surface feels more rough than before. The biggest mistakes are using the wrong cleaner, letting acids dry on the paint, or repeatedly treating without addressing etched clear coat.
Aggressive chemicals or abrasive pads can dull clear coat and make etched spots more visually obvious.
Letting a mineral remover dry can increase streaking and staining, especially on high-contact-area panels.
If careful chemical descaling doesn’t improve etched appearance, polishing (or a pro inspection) is the more logical next step.
Common failure points:
– Wrong cleaner / wrong material: Household cleaners may contain additives not intended for automotive clear coat. They can cause gloss loss or leave residue.
– Dry dwell: Many descalers rely on controlled contact time. If you let the remover dry, you can create uneven staining or force extra wiping—both increase the chance of marring.
– Over-scrubbing: Even if the chemistry is correct, repeated wiping with grit can create micro-marring.
– Assuming “it’s just dirt” after long exposure: Long-baked water spots sometimes require polishing, not only descaling.
When to stop and pivot:
– No improvement after careful descaling + rewash: That’s your cue to stop chemical escalation.
– The spot remains rough to the touch: Expect etching; polish may be needed.
– The paint is compromised: Peeling clear coat, bare spots, or failed coatings are not a DIY “chemical spot-clean” scenario.
Pros/cons: chemical-only vs. correction-first
- Chemical-only (descaler + protect)
- Pros: Lower risk than polishing if spots are truly mineral deposits; faster for light to moderate rings.
- Cons: Won’t fully fix clear-coat etching; may lead to repeated chemical cycles that can still dull the finish.
- Correction-first (cleaning + polishing)
- Pros: Better for rough/etched spots; restores surface smoothness when chemistry can’t reverse damage.
- Cons: Involves clear coat thickness considerations; requires correct pads/polishes and technique.
Verdict: do this first, and avoid unnecessary damage
Do the safe, effective order: wash → mineral-focused spot remover (per label) → rewash → protect. If spots are etched (feelable roughness) or refuse to improve with careful chemistry, switch to polishing or get a pro’s assessment rather than repeating harsh treatments.
The most reliable workflow for water spots is to remove loose contamination first, then dissolve mineral deposits with a compatible automotive descaler, then protect the finish.
Deep etching is not just “dirt”—once clear coat is altered, it cannot be fully washed off; polishing or professional correction may be required.
Repeated chemical descaling can wear or dull the clear coat if contact time is uncontrolled, so progress should be measured after each careful treatment pass.
What to do first (recommended order):
– Best approach: wash → mineral-dissolving spot remover (per label) → protect with a sealant.
– Skip DIY chemical removal if: the paint is already damaged (deep etching with persistent roughness, peeling clear coat, exposed substrate) or you can’t confidently test a small area.
– Downsides to know:
– Deep etching won’t fully “wash off.”
– Overdoing treatments can wear clear coat or create additional haze if wiping becomes abrasive.
Quick checklist (scan before you start)
| Step | What to do | Goal |
|---|---|---|
| 1 | Rinse and wash with a soft mitt | Remove loose dirt before treatment |
| 2 | Identify spot type (paint vs. glass; smooth vs. etched) | Choose the right method |
| 3 | Apply water-spot/mineral remover as directed | Dissolve mineral deposits |
| 4 | Wipe with clean microfiber, then rewash | Remove chemical residue |
| 5 | Seal/wax | Reduce future bonding and speed cleanup |
Verdict / tip (final guidance)
If you want the best odds with the least risk, treat water spots like a controlled decontamination task: keep everything clean, keep dwell time precise, and stop escalating once you’ve measured results. Start with the chemistry designed for mineral deposits, then protect—because prevention is what reduces repeat work. If you tell me whether the spots are on paint or glass (and whether you can feel them with your fingernail), I can suggest the safest next step.
Frequently Asked Questions
What’s the best way to remove water spots from a car without damaging the paint?
Start by washing the car thoroughly with a pH-balanced car wash soap to remove loose dirt, then try a dedicated water spot remover or mineral deposit remover designed for automotive paint. If the spots are still visible, use a microfiber towel and a gentle swirl-free approach rather than heavy scrubbing. For stubborn etching, you may need a clay bar or mild polish to level the surface safely.
How do you clean water spots on a car using vinegar or distilled water?
Mix white vinegar with distilled water (commonly a 1:1 ratio) and lightly apply it to the affected area using a clean microfiber cloth. Let it sit for 30–60 seconds, then gently wipe and rinse immediately with clean water so the acid doesn’t dwell too long. Dry the area with a separate towel to prevent new water marks, and avoid using vinegar on bare metal or on freshly applied wax/sealant unless you’re testing first.
Why do water spots form on cars even after washing?
Water spots happen when water minerals like calcium and magnesium dry on the paint, leaving behind hard deposits. In many cases, the minerals bond tightly as the water evaporates, especially if you let the car air-dry or dry it with a towel that spreads residue. Areas near sprinklers, hard-water regions, and humid weather conditions can increase the frequency of water spotting.
Which products work best for hard water spots and etching on car paint?
For mineral deposits, a chemical water spot remover or lime-scale remover formulated for cars typically works best with minimal effort. If the spots have etched into the clear coat, polishing compounds or a light machine polish may be necessary to restore smoothness. For ongoing prevention, consider a ceramic spray, paint sealant, or hydrophobic spray after cleaning to make future water spot removal easier.
How can you prevent water spots after washing and drying your car?
Dry your car promptly using high-quality microfiber drying towels or a car blower, and avoid air-drying whenever possible. If you live in a hard-water area, a rinse aid designed for spot-free drying or a reverse-osmosis deionized (DI) water rinse can help reduce mineral buildup. After that, applying a protective wax or sealant creates a barrier that makes water spots easier to clean without rubbing the paint.
📅 Last Updated: October 17, 2026 | Topic: how to clean water spots on car | Content verified for accuracy and freshness.
References
- https://www.usgs.gov/special-topic/water-science-school/science/hard-water
- Hard water
- Limescale
- Calcium carbonate
- Vinegar
- Etching (disambiguation)
- https://pubmed.ncbi.nlm.nih.gov/?term=hard+water+scale+calcium+carbonate+surface+cleaning
- https://scholar.google.com/scholar?q=remove+water+spots+from+car+paint Google Scholar
- https://scholar.google.com/scholar?q=calcium+carbonate+water+spot+removal+automotive+clear+coat Google Scholar
- https://scholar.google.com/scholar?q=hard+water+stains+automotive+finish+cleaning Google Scholar
