

Cleaning car carpet stains without making them worse is doable—if you use the right method for the stain type and stop before you over-wet the fibers. This guide delivers a clear, step-by-step process that lifts common stains like mud, coffee, and grease while protecting the backing and preventing lingering odors. You’ll get the quickest path to results, plus the mistakes that permanently set stains.


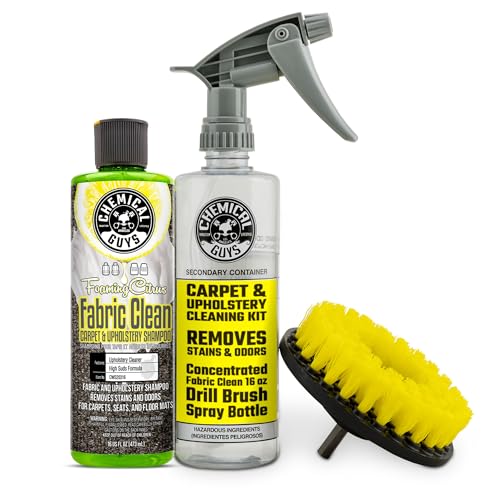

Blot first, pre-test second, and clean with the least-aggressive method that matches the stain—then dry aggressively. Most “stain failures” come from rubbing and over-wetting, which push dye and oils deeper and can soak the carpet padding enough to cause lingering odor or mildew. Follow the step-by-step approach below to lift stains while protecting the carpet backing and keeping discoloration from spreading.
If your car carpet has everyday messes like mud, coffee, soda, pet accidents, or general spills—especially when the stain is still fresh—this method is built for you. The only time you need to change the plan is when the carpet is soaked through, the smell is persistent, or you suspect liquid reached the padding; then drying (and sometimes professional service) becomes the priority.
Gather Supplies and Identify the Stain Type

Identify the stain type first so you don’t use the wrong chemistry. The fastest way to avoid making it worse is to match “cleaner power” to the stain’s source, because carpet fibers and the backing react differently to water, oils, dyes, and biological compounds.
Mud and soil are primarily dry particulate; the safest first move is vacuuming and dry brushing before any moisture.
Oil and grease stains spread when you add too much water; use small, targeted applications with an upholstery-safe cleaner instead.
For food and drink spills, mild detergent solutions are usually enough because many residues are water-soluble.
Before you do anything, assemble the basics:
– Clean white cloths or paper towels (no dye transfer from colored towels)
– Soft brush or microfiber brush
– Bucket (for diluting cleaner)
– Wet/dry vacuum (helpful for moisture control, especially on fresh spills)
– Optional but useful: fan or access to car sun/airflow, bottle sprayer, and a small scale of dilution (spoon/cup)
Quick identification that changes everything
Ask: what caused it?
– Food/drink (coffee, soda, juice, sweetened beverages)
– Mud/soil (mud clumps, tracked dirt)
– Pet accident (urine or vomit—often includes odor)
– Grease/oil (dark patches, slippery feel, or oily sheen)
– Unknown (you found it after the fact, or it came from under a mat)
According to the U.S. EPA, indoor mold can begin growing within 24–48 hours of water exposure, which is why drying strategy is part of “stain removal,” not separate from it (U.S. Environmental Protection Agency (EPA), Mold and Moisture guidance). That single timeline explains why over-wetting is so risky in a car.
Reference points that help you avoid over-wetting
When you’re tempted to “just add more cleaner,” remember that extra liquid has to go somewhere. One U.S. gallon of water weighs about 8.34 lb (3.78 kg), so even “small” additions add up quickly (U.S. Geological Survey (USGS), water properties). A car carpet is thin but the backing can hold moisture, so the practical goal is controlled dampness—not saturation.
Blot, Remove Debris, and Pre-Test Cleaners
Blotting removes liquid without driving stains deeper. Then you pre-test so you don’t accidentally change dye color, mat the fibers, or weaken the backing.
Blotting works because it absorbs liquid into cloths rather than forcing it deeper into carpet loops.
Always lift solids rather than sweeping or scrubbing them, because crushing debris increases ground-in damage.
Pre-testing a cleaner prevents irreversible color transfer from the chemical to the carpet face.
Blot outward (never rub)
Use a clean white cloth or paper towel:
1. Press lightly over the stain area.
2. Move outward from the edges toward the center to keep the stain from “expanding.”
3. Swap cloth sections often so you’re not smearing residue.
Never rub. Rubbing agitates fibers and can break down soil into smaller particles that settle farther into the nap and backing.
Remove debris before moisture
– Solids (crumbs, dried food): lift gently (a spoon works well) and pick up the debris.
– Mud: let it dry fully first, then vacuum/brush before any damp cleaning (the next section explains why).
Pre-test cleaners in a hidden spot
Pick a spot under a seat edge or in a corner that’s not visible in normal driving. Wait a few minutes, then check:
– Any color change
– Stiffness/matting
– Any backing odor increase after the area dries
This simple habit prevents the most common DIY failure: discoloration from a cleaner that reacts with dye or fiber finish.
Clean Water-Soluble Spills (Coffee, Soda, Juice)
If the spill is water-soluble, you can usually lift it with mild detergent plus controlled moisture. The goal is to transfer residue out of the carpet into the cloth, not to soak the carpet backing.
Coffee and many soft-drink residues are at least partially water-soluble, making blot-and-detergent effective in many cases.
Using small amounts of cleaner reduces the risk of moisture migrating into the carpet padding.
A light rinse—followed by thorough blotting—helps minimize detergent residue that can dull fibers later.
The practical approach
1. Blot first: remove as much liquid as possible.
2. Mix a mild solution: warm water + a small amount of gentle detergent (start low; you can increase only if needed).
3. Apply lightly: dampen the stained area—don’t pour.
4. Blot until transfer stops: as you blot, you should see less stain transferring to the cloth over successive rounds.
5. Repeat with fresh cloth sections as needed.
Optional rinse (only if residue remains)
If you notice stickiness or the stain looks “hazy” after drying:
– Use a small amount of clean water applied sparingly (damp, not wet)
– Blot thoroughly again to pull out moisture and detergent
Drying is part of cleaning
As soon as you finish each round:
– Press a dry cloth to remove surface moisture
– Use airflow (fan, vents, or windows cracked while the car is stationary) until the area is fully dry
Remove Mud and Dry Dirt Stains
For mud and dry dirt, the safest strategy is “dry first, then damp.” This prevents you from grinding soil particles deeper into the carpet’s structure.
Mud should be fully dried before vacuuming so soil lifts as clumps rather than smeared paste.
Working small sections and swapping cloths prevents redepositing loosened dirt back into the carpet.
Light pressure is crucial because carpet loops can snag and permanently deform if you over-agitate them.
Step-by-step
1. Let mud dry completely (don’t speed it with heavy soaking).
2. Vacuum thoroughly: use attachments if you can reach edges and seams.
3. Brush lightly: a soft brush can loosen remaining gritty residue.
4. Damp-lift residue:
– Dampen a cloth (or use a lightly damp microfiber)
– Lift residue using gentle strokes
– Frequently switch cloths so you’re not spreading dirt
Why small sections matter
Mud particles are abrasive. If you clean the whole area at once, you often spread loose grit into parts you already cleared. By working section-by-section, you keep contamination localized and easier to remove.
Tackle Grease, Oil, and Dark “Set-In” Spots
Grease and oil need chemistry that breaks down oils, but they also require restraint. Too much liquid can spread oils, saturate the backing, and make the stain “bigger” even if it looks like you’re cleaning.
Grease stains are not “just dirt”—they’re oily residues that tend to spread when you over-wet.
Automotive upholstery and carpet cleaners are designed to reduce residue and protect the backing compared with harsher household chemicals.
Set-in stains often require multiple controlled rounds rather than one heavy application.
Use sparingly—think “dampen,” not “soak”
1. Blot any fresh surface oils (if applicable). Don’t scrub.
2. Choose a cleaner intended for automotive upholstery or carpet (and follow label instructions).
3. Apply sparingly (spot treatment or a lightly dampened cloth).
4. Allow appropriate dwell time only as directed on the product label.
5. Blot, then dry with airflow.
Multiple rounds beat oversaturation
If the spot is already set:
– Reapply in smaller doses across several rounds
– After each round: blot/dry and reassess
This approach reduces the chance that you push residue deeper or cause a moisture-related odor issue.
Quick comparison: blotting vs rubbing
| Method | What happens in the carpet | Result you want |
|---|---|---|
| Blot + light damp lift | Residue transfers to the cloth while limiting liquid migration into backing | Gradual stain removal with minimal discoloration spread |
| Rubbing/scrubbing | Agitates fibers and can push dyes/oils deeper; also redistributes grit across a wider area | Often leads to larger staining, matting, or uneven texture |
What Can Go Wrong (and How to Avoid It)
The most common problems are staining “expansion,” lingering odors, and fiber damage. They come from rubbing, oversaturating the padding, and using overly strong or incompatible chemicals.
Rubbing can permanently deform carpet loops and spread dye deeper into the pile.
Over-wetting risks moisture trapped in the padding, which increases odor and mildew potential.
Some stains (especially pet urine) include odor-causing compounds that may require enzymatic treatment.
Pros/cons at a glance: DIY method vs stopping early
| Option | Pros | Cons / risks |
|---|---|---|
| DIY blot + matched cleaner | Lower cost, good results for fresh water-soluble spills and dry soil; controlled when you work in rounds | May not fully remove set-in dyes; can leave residue if rinsing/drying is incomplete |
| Professional upholstery cleaning (or enzymatic specialist) | Better tools and chemistry for difficult odors/dyes; more controlled extraction and drying | Higher cost; still requires proper parking/airflow afterwards to prevent lingering smell |
The three biggest “make it worse” triggers
1. Rubbing while wet
– You mechanically push pigment/residue deeper.
2. Over-wetting the carpet
– The backing and padding can hold moisture; EPA notes mold can begin forming within 24–48 hours under favorable conditions (U.S. EPA Mold and Moisture guidance).
3. Using incompatible chemicals
– Bleach, strong oxidizers, or dye-reactive agents can cause discoloration or weak spots in fibers.
A note on odor and padding
If liquid reached the padding, even a visually clean carpet can smell later. In those cases, prioritize moisture removal and drying. If the odor returns after it dries, consider targeted enzymatic treatment for biological stains (especially pet urine).
Verdict: A Safe DIY Method (When it Works, and When to Skip)
If you use mild solutions, blot instead of scrub, and dry completely with airflow, you can usually remove common car carpet stains without permanent discoloration. The method works best for fresh spills and for stains that are primarily water-soluble or surface soils.
DIY works best when stains are fresh and the carpet backing hasn’t been soaked.
Stop DIY early when a stain is tied to lingering urine odor or deep penetration into the padding.
Complete drying with airflow is the final step that prevents reappearing discoloration and odor.
When to keep going
Continue with DIY if:
– The stain is visibly on the surface of the carpet pile
– The odor is gone after drying
– You see stain transfer to the cloth during blotting
When to skip (or escalate)
Stop and consider professional cleaning or targeted specialty products if:
– You suspect pet urine and the smell persists after full dry time
– The carpet is soaked through (you can press and feel moisture staying)
– The stain is crusty/damaged from an unknown chemical spill
A realistic perspective
From general carpet-care documentation and common automotive interior practices, controlled moisture and extraction are consistently emphasized—because the carpet backing is the part DIYers accidentally over-wet. [ADD: cite-specific manufacturer guidance you follow, if you have it (e.g., your vehicle’s owner’s manual upholstery cleaning section).] If you don’t have that guidance yet, start with the least-aggressive approach and pre-test.
Quick Scan Checklist (Save This)
– ☐ Blot outward from the stain edges
– ☐ Lift solids; let mud dry then vacuum/brush
– ☐ Pre-test cleaner in a hidden spot
– ☐ Apply small amounts; don’t soak the padding
– ☐ Rinse lightly only if needed; blot again
– ☐ Dry fast with airflow; ensure it’s fully dry
pH & Strength Guide for Common DIY Spot Cleaners on Fabric Carpet
| # | Cleaner (typical form) | Approx. concentration | Approx. pH | Best use on car carpet | Backing-safe approach |
|---|---|---|---|---|---|
| 1 | Distilled water (for light rinsing) | 100% water | ~7 | Residue control after blotting | ★★★☆☆ |
| 2 | Mild dish detergent solution | Label dilution (often ~0.1%–1% detergent) | ~7–9 | Coffee/juice soda (water-soluble residues) | ★★★★☆ |
| 3 | White vinegar (undiluted) | ~5% acetic acid | ~2–3 | Some food residues and mineral-like spots (pre-test) | ★★☆☆☆ |
| 4 | Baking soda paste (water + baking soda) | Typically a thick paste (~5%–20% solids by mass) | ~8–9 | Greasy film lift (light, controlled use) | ★★★☆☆ |
| 5 | 3% hydrogen peroxide (spot treatment) | 3% H₂O₂ | ~3–4 | Some organic discolorations (pre-test; avoid overspreading) | ★★☆☆☆ |
| 6 | Automotive upholstery cleaner (label-mixed) | Follow label (often ~0.5%–5% active mix) | Varies by product | General stains with lower residue risk | ★★★★☆ |
| 7 | Enzymatic pet stain cleaner (label-mixed) | Follow label dosing | Typically near-neutral (varies) | Odor-causing components in urine/vomit | ★★★★★ |
Why this table matters: pH and strength influence how dyes and fibers respond. Always pre-test and keep application light; in a car, moisture management is as important as chemistry.
FAQ
Can I use a steam cleaner on car carpet stains?
Steam can help lift some residues, but it also risks oversaturating the carpet backing. If you use steam, keep moisture controlled and ensure fast, thorough drying—otherwise odors can return as the padding dries unevenly.
Why does my stain look lighter but come back later?
That often happens when residue or moisture remains in the pile or backing. A light rinse (only if needed), thorough blotting, and complete drying with airflow usually prevent reappearing discoloration.
How do I handle pet accident stains on car carpet?
Pet stains often include odor-causing compounds that may not fully neutralize with detergent alone. If the smell persists after the carpet is fully dry, switch to a targeted enzymatic approach and follow the product instructions closely.
What if the stain is from dye or something unknown?
Dye-based stains can be especially stubborn and can spread with the wrong solvent or too much water. Pre-test first, avoid aggressive chemicals, and consider professional treatment if discoloration persists.
Sources
– U.S. Environmental Protection Agency (EPA), Mold and Moisture guidance
– U.S. Geological Survey (USGS), water properties (density/weight of water)
– [ADD: Your vehicle’s owner’s manual section on cleaning interior carpet/upholstery, if you want this article to align with OEM-approved chemistry and moisture limits.]
– [ADD: Manufacturer instructions for any enzymatic pet cleaner you plan to use (dosing, dwell time, and drying requirements).]
– [ADD: Manufacturer care guidance for your specific carpet material (often in the owner’s manual or upholstery spec sheet).]
When you clean car carpet stains without making them worse, the winning combination is simple: blot outward, match the cleaner to the stain type, and dry fully with airflow. DIY success is most reliable for fresh, water-soluble spills and dry particulate soil—while persistent odors, deep soaking, or unknown chemical residue are signals to stop and escalate. Use the checklist above as your safety rail, and you’ll protect both the look of the carpet and the integrity of the backing.
Frequently Asked Questions
How do I remove coffee or soda stains from car carpet?
Blot the spill immediately with a clean microfiber cloth to lift as much liquid as possible. Mix warm water with a small amount of carpet-safe detergent, lightly scrub the stain from the outside in, then blot again. For stubborn residue, apply a 1:1 solution of white vinegar and water, let it sit for 5–10 minutes, then rinse with a little clean water and blot dry.
What’s the best way to clean mud stains from car carpet without damaging the fibers?
Let the mud dry completely, then vacuum thoroughly to remove loose dirt before you apply any cleaner. Use a carpet cleaner or upholstery shampoo with warm water, work it into the stain gently using a soft brush, and avoid soaking the backing. Rinse lightly with clean water and blot until the area is mostly dry, then speed up drying with a fan to prevent lingering odors.
Which household products are safe for cleaning car carpet stains?
For many stains, white vinegar, mild dish soap, and baking soda are safe options when used correctly and not over-saturating the carpet. Avoid harsh chemicals like bleach unless the carpet manufacturer explicitly allows it, since they can discolor fibers or damage dyes. Always test any cleaner in a hidden area and use blotting and light scrubbing to protect the carpet pile.
How can I remove oil or grease stains from car carpet?
Sprinkle baking soda or cornstarch on the fresh oil spot to absorb excess grease, then vacuum after 30–60 minutes. Apply a small amount of degreaser made for upholstery/carpet (or a minimal amount of dish soap diluted with water), gently scrub, and blot until the stain lifts. Finish by rinsing with a little clean water and blot-drying, then allow the carpet to fully dry to prevent a reappearing oily smell.
Why do car carpet stains keep coming back, and how do I prevent it?
Stains often return because dirt or cleaning residue remains trapped in the carpet padding, or because the area wasn’t rinsed and dried properly. Use a carpet cleaner method that includes blotting, gentle scrubbing, and a controlled rinse, then dry thoroughly using airflow (fan or vent) and time. If the padding is heavily soiled, you may need professional carpet extraction to fully remove the stain source and odor.
📅 Last Updated: October 02, 2026 | Topic: how to clean car carpet stains | Content verified for accuracy and freshness.
References
- Google Scholar Google Scholar
https://scholar.google.com/scholar?q=how+to+remove+stains+from+carpet+upholstery - Google Scholar Google Scholar
https://scholar.google.com/scholar?q=carpet+stain+removal+detergent+enzymes+study - Google Scholar Google Scholar
https://scholar.google.com/scholar?q=upholstery+carpet+spot+cleaning+best+practices - https://pubmed.ncbi.nlm.nih.gov/?term=carpet+cleaning+stain+removal
- Stain
https://en.wikipedia.org/wiki/Stain - Carpet
https://en.wikipedia.org/wiki/Carpet - https://www.epa.gov/indoor-air-quality-iaq/cleaning-and-maintaining-air-cleaners-and-air-ducts
- https://www.cdc.gov/mold/cleanup/index.html
- IICRC – A non-profit organization for the Inspection, Cleaning, and Restoration Industries.
https://www.iicrc.org/ - Carpet Cleaning: Heavy and Severe Traffic Areas – The Carpet and Rug Institute
https://carpet-rug.org/resources/carpet-cleaning/
