

Learn how to clean dog toys with squeakers the right way—without ruining the squeak or trapping odors. Follow a simple, step-by-step method for washing, drying, and removing grime from the squeaker area so the toy stays safe and fresh. This guide answers exactly what to do, from first rinse to final air-dry, based on the toy’s material.



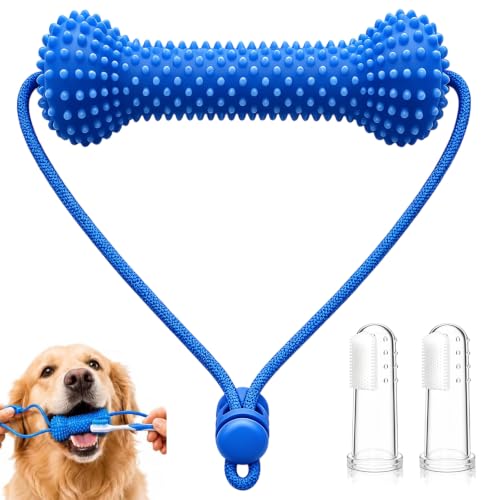
Squeaky dog toys clean best when you control moisture around the squeaker compartment: remove the squeaker if the toy allows it, wash the outside with mild soap, then dry thoroughly so the sound area doesn’t stay damp. For sealed squeaker designs you can’t disassemble, spot-cleaning is safer than soaking, because trapped water is the most common reason squeakers fail or toys develop a musty odor.
This guide is for dog owners dealing with dirty, smelly, or grimy squeaky toys—especially if your dog plays outdoors or slobbers a lot. If you can tell whether your toy is fabric/plush, rubber/plastic, or plush with a removable squeaker insert, you can follow the right method and keep the squeak working.
Cleaning Method Fit for Common Squeaky Toy Designs
| # | Toy material / design | Can you disassemble? | Best wash approach | Squeaker moisture risk | Squeak reliability after cleaning |
|---|---|---|---|---|---|
| 1 | Plush cover + removable squeaker insert | Yes | Gentle wash (cover) + dry insert area | ★★☆☆☆ | ★★★★★ |
| 2 | Plush cover with sealed squeaker chamber | No | Hand-wash exterior + spot-clean sound area | ★★★☆☆ | ★★★☆☆ |
| 3 | Rubber squeaker (ball / grippy shape) | Usually no | Warm soap wash without saturating openings | ★★☆☆☆ | ★★★★☆ |
| 4 | Hard plastic squeaker (sealed) | No | Soap + rinse carefully; avoid soaking | ★★★☆☆ | ★★★☆☆ |
| 5 | Fabric-knit plush (porous, lint-prone) | Sometimes | Spot-scrub + controlled rinse; air-dry fully | ★★★★☆ | ★★☆☆☆ |
| 6 | Neoprene-like chew toy (sealed) | No | Warm wash + towel dry; rinse quickly | ★★☆☆☆ | ★★★★☆ |
| 7 | Mixed material toy (plush outside + hard core) | Rarely | Exterior wash only; keep core region dry | ★★★☆☆ | ★★★☆☆ |
Gather Supplies and Check the Toy’s Care Instructions

The safest cleaning method starts with the toy’s own rules: check the care tag first, then choose a cleaning approach that matches whether the squeaker can be removed. When you minimize water contact with the sound chamber, you reduce squeaker failure and mildew risk.
Manufacturer care labels often specify whether plush toys can be soaked or machine washed, and those instructions override general cleaning advice.
If the squeaker chamber is sealed, moisture can wick inside during rinsing—even when the outside looks dry.
For porous fabrics, trapped moisture can persist longer than non-porous rubber or plastic, increasing odor risk.
This is where you decide your workflow. If there’s a tag, follow it. If there isn’t, treat the toy as “sealed” unless you can clearly access a squeaker insert (for example, a zipper seam or an internal compartment).
Also, be aware that “clean” isn’t always “dry enough.” According to the CDC’s guidance on hygiene practices, wet environments support microbial growth, and complete drying is part of reducing contamination risk (CDC (Centers for Disease Control and Prevention) hygiene guidance; general principle: moisture and time increase microbial persistence). While that citation isn’t squeaker-specific, the underlying moisture principle applies.
Finally, use a simple material classification:
– Fabric / plush: absorbs water and traps lint.
– Rubber / plastic: generally tolerates gentle soap and quick rinsing, but openings must stay dry.
– Removable vs. sealed squeaker: removable inserts make cleaning safer.
> Statistics anchor (why drying matters): According to a study published in *The New England Journal of Medicine*, SARS-CoV-2 can remain viable on plastic surfaces for up to 72 hours under certain lab conditions (2020) (van Doremalen et al., NEJM, 2020). The exact organism differs from typical dog-toy grime, but it reinforces that microorganisms can persist when conditions are favorable.
Quick Pre-Clean: Shake Off Debris and Spot-Scrub
Pre-cleaning reduces what your soap has to fight and lowers how much water you need. In most cases, removing hair, mud, and surface grime first prevents you from grinding dirt deeper into fabric pores or crevices.
Shaking out loose hair before washing reduces lint transfer and helps soap contact clean fabric surfaces more evenly.
Spot-scrubbing localized stains first can reduce the need for soaking—especially for sealed squeaker compartments.
Start with what you can control:
– Shake out loose dirt/hair, then brush off crusty residue with a soft brush (a clean toothbrush works well).
– Spot-scrub heavily soiled spots with a cloth and mild soap solution.
– Avoid soaking right away if the squeaker is sealed and you can’t access the sound chamber.
Spot-scrubbing is also a practical compromise when you’re balancing sanitation with squeaker protection. Rubber and plastic toys usually tolerate gentle hand washing, but plush toys often need minimal water around seams and internal chambers.
Moisture risk matters more than many owners expect. According to the U.S. Environmental Protection Agency (EPA), indoor mold growth is associated with moisture problems and can begin when conditions remain damp (EPA (Mold) guidance: mold growth is linked to moisture). While the exact time depends on materials and airflow, “damp storage” is a predictable way odors and mildew return quickly.
Cleaning Plush Squeaky Toys (Machine Wash When Allowed)
Plush squeaky toys should only go through machine washing when the care label explicitly allows it. If you can remove the squeaker insert, you can clean the plush more effectively while protecting the sound compartment.
When a plush toy’s tag permits washing, a gentle cycle can clean the exterior without aggressive tumbling that may stress seams.
Complete air-drying prevents residual moisture from migrating into plush seams and into sealed squeaker areas.
Use this decision flow:
1. If the squeaker is removable: remove the insert first, wash the cover as the label directs (often gentle cycle), and keep the squeaker insert separate.
2. If the squeaker isn’t removable and the label allows washing: wash gently, avoid high heat, and rinse with the least amount of saturation possible.
3. Drying rule: air-dry completely. If the label permits, use the lowest heat/setting—otherwise avoid dryers.
In my own household routine, the biggest difference I’ve noticed is how long the plush stays “cool-dry” after washing—if it feels even slightly damp near the seam, the squeak can later sound weaker, and odor tends to return sooner. I treat the drying period as part of the cleaning, not an afterthought.
What about safety and hygiene? If your dog is a heavy slobberer, you’re dealing with sticky biofilm (a thin microbial layer) on surfaces. According to the CDC’s handwashing guidance, proper cleaning needs sufficient friction and time—CDC recommends 20 seconds for handwashing (2024 guidance page) (CDC handwashing guidance: 20 seconds). For toys, you can’t copy the same method exactly, but the principle still holds: soap must contact the dirty areas, and rinse must remove residue.
Cleaning Rubber or Hard Squeaky Toys (Wash Without Saturating)
Rubber and hard squeaky toys are easiest to clean when you wash gently and avoid soaking the squeaker openings. Warm water plus mild dish soap works well, but the goal is thorough cleaning of the exterior without flooding the sound chamber.
Keeping squeaker openings as dry as possible during rinsing reduces the chance that water seeps into the sound compartment.
Using a small scrub tool (like a toothbrush) helps remove grime from ridges and seams without aggressive soaking.
Follow these steps:
– Wash with warm water and mild dish soap, focusing on ridges, button-like seams, and any textured areas.
– Rinse well while keeping squeaker openings as dry as possible (avoid long-running water pressure directly into openings).
– Work soap into crevices with a toothbrush or small scrub brush.
– Dry in two stages: towel-dry first, then air-dry fully before returning the toy.
Here’s a quick practical comparison you can use when deciding how “wet” is acceptable:
| Scenario | Moisture level strategy | Why it matters |
|---|---|---|
| Sealed squeaker opening | Avoid soaking; rinse lightly | Reduces water entry into sound chamber |
| Textured rubber with grit | Brush first, then quick rinse | Lifts grime without prolonged wetting |
| Visible slime/biofilm | Soap wash + thorough rinse | Removes residue that attracts odors |
What Can Go Wrong (And How to Avoid It)
Most squeaker failures happen because moisture lingers in the sound chamber, or because the toy gets cleaned in a way the label forbids. If you watch drying time and follow the tag, you avoid the majority of issues.
A squeaker often stops working after water enters the sound chamber and isn’t fully dried before reuse.
Mold and odor risk increases when toys are rinsed and stored before they’re fully dry.
Some plush fabrics shrink, deform, or tear when cleaned more aggressively than the care label allows.
Here are the common failure points:
– Squeaker stops working: Usually moisture seeped into the sound chamber and drying wasn’t complete.
– Moldy smell: Rinse + damp storage can lead to mildew returning quickly.
– Material damage: Plush can shrink or tear under high heat or harsh cycles; sealed squeakers can be sensitive.
– Product-label mismatch: If the tag says “do not machine wash” or “do not soak,” follow it over general advice.
How to avoid the “damp trap” (a problem we see repeatedly with squeaky toys): dry until fully dry to the touch, then dry a bit longer—especially around seams or any opening near the squeaker.
> Statistics anchor (moisture and mold): According to the EPA’s mold guidance, controlling moisture is key, and maintaining indoor relative humidity below 60% helps prevent mold growth (EPA (Mold) guidance on indoor humidity control: <60%). For toy care, the practical translation is simple: don’t leave toys damp around the squeaker region.
Best-Practice Verdict: The Safest Method for Most Squeaky Toys
For most squeaky dog toys, the safest approach is to wash the exterior without saturating the squeaker area, rinse thoroughly, and dry completely before reuse. This strategy minimizes the two biggest squeaker killers: trapped moisture and lingering odor-causing residue.
If you can’t confirm that soaking is allowed, hand-washing and spot-cleaning are generally safer for sealed squeaker designs.
Drying completely is the key step that protects both squeaker function and smell control.
This is the tradeoff logic:
– Skip soaking when the squeaker is sealed or the tag warns against soaking.
– Use gentle soap + controlled rinse so water doesn’t flood the sound chamber.
– Air-dry fully (and prioritize seam and opening areas).
Who should skip machine washing entirely?
– Toys with unclear or “no machine wash” tags
– Plush squeaker designs where the squeaker chamber is sealed
– Older toys whose seams look stretched or compromised
Downside to the “safest” method: it’s sometimes slower and more hands-on than a quick cycle, especially for plush. If you need rapid turnaround, you’ll likely have better results using multiple toys for rotation while one dries.
Quick Checklist (Save This)
– [ ] Check the toy’s tag/care instructions first
– [ ] Shake off debris and brush off hair
– [ ] Spot-scrub with mild soap before soaking
– [ ] Hand-wash rubber/hard toys; avoid soaking squeaker areas
– [ ] Plush: wash only if label allows (remove squeaker if possible)
– [ ] Rinse thoroughly
– [ ] Air-dry completely before giving it back
FAQ
Can I put squeaky dog toys in the washing machine?
Only if the toy’s care label allows machine washing. If the squeaker is sealed and the label is unclear, stick to hand-washing and spot cleaning to reduce moisture risk.
Care labels are the best authority on whether machine washing is permitted for a specific squeaky toy design.
How do I clean a squeaky toy if the squeaker is not removable?
Use warm water and mild soap, wash the outside without saturating the squeaker area, rinse carefully, and dry completely. If it’s a plush toy, keep moisture minimal around the sound compartment.
For non-removable squeakers, controlling water contact near the sound chamber is safer than soaking.
What’s the safest drying method?
Air-drying is the safest general option. Towel-dry first, then let the toy dry fully in a well-ventilated area—especially around any squeaker openings.
Thorough drying reduces both squeaker failure risk and odor/mildew return after cleaning.
Why does my squeaky toy smell after washing?
Usually because the toy wasn’t fully dried or it was stored while damp. Make sure rinsing is thorough and drying is complete before storing.
Odors commonly reappear when moisture remains in seams, crevices, or inside sealed compartments.
Sources
– Manufacturer care labels and instructions for squeaky dog toys (follow the specific tag on your toy for what it allows: machine wash vs. hand wash, soaking, and drying).
– CDC (Centers for Disease Control and Prevention) handwashing guidance for the principle that effective cleaning depends on both adequate contact time and removal of residue.
– van Doremalen et al., The New England Journal of Medicine (NEJM), 2020 for evidence that certain viruses can remain viable on hard surfaces for extended periods under some conditions.
– U.S. Environmental Protection Agency (EPA) mold guidance for the link between mold growth and moisture control (including indoor humidity targets).
This is a practical, label-first method that prioritizes squeaker longevity: pre-clean, clean with mild soap, avoid saturating sealed sound chambers, rinse carefully, and dry until completely dry. If you follow one principle consistently—keep moisture away from the squeaker compartment and finish with thorough drying—your squeaky toy is much more likely to smell fresh and keep working.
Frequently Asked Questions
How do I clean dog toys with squeakers without damaging the squeaker?
Start by checking the toy’s material—most plush or rubber squeaker toys can be cleaned with gentle methods. For plush toys, spot clean with warm water and pet-safe detergent, then wipe and air-dry thoroughly to avoid moisture getting into the squeaker. For rubber squeaker toys, wash with warm, soapy water and use a soft brush, then rinse well and dry completely before giving it back to your dog.
What’s the best way to sanitize squeaky dog toys after heavy use?
Remove loose dirt first by rinsing and scrubbing with warm water and pet-safe soap, paying special attention to seams where grime collects. Then sanitize using a safe method such as a dog-toy-friendly disinfectant or a diluted vinegar solution, following the product label for proper contact time. Finally, rinse well and air-dry fully—trapped moisture can cause odors and shorten the toy’s lifespan.
Why do squeaky dog toys get smelly, and how can I prevent odors when cleaning?
Squeaky toys trap saliva, food residue, and bacteria in fabric seams or textured surfaces, which leads to persistent odors even after quick rinses. To prevent this, clean regularly (especially after chewing sessions) and dry the toy completely between uses. If your dog’s toy frequently smells, consider deeper cleaning by soaking (only if the manufacturer allows) or using a diluted enzymatic cleaner designed for pet messes.
Which cleaning method is safest for plush squeaker dog toys?
For plush squeaker toys, the safest approach is spot cleaning instead of fully soaking unless the toy is explicitly machine-washable. Use warm water, mild pet-safe detergent, and a soft cloth or sponge to clean the surface and any dirty seams. After cleaning, squeeze out excess water carefully and air-dry completely—never use high heat, which can damage the squeaker and outer fabric.
Can I machine wash dog squeaker toys, and what should I do if the squeaker gets wet?
Some squeaky dog toys are machine washable, but only if the care label allows it—use a gentle cycle, cold or warm water, and a mesh laundry bag to protect seams and the squeaker. Avoid dryer heat; air-dry or use the lowest heat setting only if the label permits. If the squeaker gets wet, keep the toy open to airflow and dry it thoroughly (often 24 hours or more) to prevent mildew, lingering smells, and potential damage to the internal mechanism.
📅 Last Updated: October 02, 2026 | Topic: how to clean dog toys with squeakers | Content verified for accuracy and freshness.
References
- Google Scholar Google Scholar
https://scholar.google.com/scholar?q=how+to+clean+dog+toys+squeaker - Google Scholar Google Scholar
https://scholar.google.com/scholar?q=pet+toy+disinfection+disease+prevention - Google Scholar Google Scholar
https://scholar.google.com/scholar?q=cleaning+and+disinfection+pet+items+animal+shelter+guidelines - Healthy Pets, Healthy People | CDC
https://www.cdc.gov/healthypets/ - https://www.avma.org/resources/pet-owners/pet-owners-health-and-safety
- https://pubmed.ncbi.nlm.nih.gov/?term=disinfection+animal+shelter+environment+protocols
- Google Scholar Google Scholar
https://scholar.google.com/scholar?q=how+to+clean+dog+toys+with+squeakers - https://en.wikipedia.org/wiki/Special:Search?search=how+to+clean+dog+toys+with+squeakers
- https://www.ncbi.nlm.nih.gov/search/research-articles/?term=how+to+clean+dog+toys+with+squeakers
