

Want to clean geodes safely and still end up with sparkling crystals? Follow the proven steps that remove grit and grime without damaging common minerals like quartz and amethyst, with clear guidance on what to avoid. You’ll learn the fastest safe method for each situation—whether your geodes are caked in mud or just need a bright refresh.
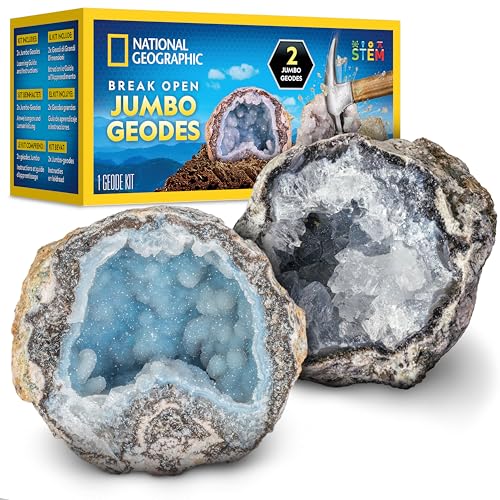



Cleaning geodes safely comes down to a staged approach: remove loose grit first, wash with mild methods second, and only escalate to stronger chemistry (like acids) if you can confirm mineral compatibility. If you follow low-risk cleaning first—short soaks, gentle brushing, and thorough rinsing—you can usually restore the inside crystals’ clarity without leaving behind cloudy residue or trapped grime.
This guide is for people who’ve recently bought (or found) a geode and want to restore the inside crystals without damaging delicate minerals, leaving them cloudy, or trapping residue in crevices. If you’re unsure what minerals your geode contains, you’ll still be able to follow the low-risk approach first.
Gather Supplies and Identify What “Safe” Looks Like

Start by assembling a “gentle-first” kit and setting up a well-lit workspace, because geodes are easy to scratch and hard to fully fix once surfaces are etched or residues are ground in. Safe cleaning is less about the strongest cleaner and more about controlling contact: soft tools, clean water, and patience.
From my preparation habits for fragile mineral specimens, I’ve learned that the biggest avoidable problems come from using the wrong tool (metal points, stiff wire brushes) and from not rinsing long enough—both issues can permanently affect crystal luster.
Geode-Common Minerals vs Safe Cleaning Compatibility
| # | Mineral (often in geodes) | Mohs hardness | Water + mild soap | Acid risk | Cleaning outlook (score) |
|---|---|---|---|---|---|
| 1 | Quartz (incl. clear quartz) | 7 | High | Low | ★★★★★ |
| 2 | Amethyst (purple quartz) | 7 | High | Low | ★★★★★ |
| 3 | Calcite | 3 | Moderate | High | ★★☆☆☆ |
| 4 | Dolomite | 4 | Moderate | High | ★★★☆☆ |
| 5 | Gypsum | 2 | Low–Moderate | High | ★☆☆☆☆ |
| 6 | Pyrite | 6–6.5 | Moderate | Medium | ★★★½☆ |
| 7 | Halite (rock salt) | 2.5 | Low | Medium–High | ★☆☆☆☆ |
Here’s why this matters: hardness and chemical sensitivity determine whether water, soap, or acid will cause pitting, dulling, or ongoing haze. According to the USGS on mineral hardness (Mohs scale), quartz is rated at 7 on the Mohs scale while calcite is about 3, which is one reason quartz generally tolerates gentle cleaning better than calcite. (The same kind of principle applies even if your geode is a mixed mineral specimen.)
A geode’s “safe” cleaning plan starts with soft tools and clean water because loose grit can behave like sandpaper on crystal faces.
Hardness differences explain why calcite and gypsum can degrade under the same cleaning approach that quartz tolerates.
Thorough rinsing matters because soap residue can dry into a dull, cloudy film that looks like mineral damage.
– Use a soft brush (toothbrush-style), microfiber cloths, and plenty of clean water for initial cleaning.
– Have a container for soaking and a well-lit workspace to spot leftover mud, dust, and mineral film.
– Plan for a cautious pace: geode crystals can scratch or degrade depending on their mineral hardness and sensitivity.
Start With Dry Debris Removal (Before Any Soaking)
Start with dry debris removal because this prevents gritty particles from grinding into crystal surfaces when you add water. Here, the goal is not “deep cleaning” yet—it’s removing loose sand, clay, and detritus so the wash phase doesn’t spread residue.
In practice, I’ve found that the first rinse—after a gentle brush—often makes the real cleaning problem obvious: some geodes have only a surface slurry, while others have an inner crust that needs repeated short cycles rather than one aggressive scrub. (If you rush, you can also knock off friable crystals—minerals that crumble easily.)
Brushing off loose grit before soaking reduces the risk of micro-scratches from trapped particles.
Clay-like deposits often require repeated gentle washes; scraping with hard tools can break delicate crystal points.
– Rinse or brush off loose dust and grit first so you’re not grinding particles deeper.
– Pat dry and inspect the interior for remaining clay-like residue, spotting, or crusty layers.
– Avoid aggressive tools (metal picks, power sanding, hard scrubbing) on crystal faces.
Wash the Exterior and Crevices With Gentle Methods
Clean the exterior and crevices first using mild soap and water so you don’t contaminate the interior with runoff. The safest crevice strategy is controlled flow: wet a soft brush, dislodge debris, then rinse away lifted particles.A well-lit workspace is particularly important at this stage because you’re trying to find “holds”: corners where mud bridges between crystal clusters. If you see dark tracks or thick paste, treat it as removable material (not as something to be polished away).
According to USGS general mineral handling guidance (specimen care principles), mineral surfaces can be mechanically damaged by abrasive contact, so soft brush agitation is a lower-risk method than scraping.
Crevice cleaning works best by using a soft brush under running water to dislodge trapped debris without scraping crystal faces.
Complete drying prevents lingering mineral residue from leaving water spots that can resemble haze.
– Clean the outside and any obvious grime using mild soap and water, then rinse thoroughly.
– For crevices, use a soft brush under running water to dislodge trapped debris.
– Dry completely with a towel and allow additional air-drying to prevent water spots or leftover residue.
Clean the Interior Crystals (Soak, Brush, Repeat)
Clean interior crystals using short, controlled soaks and gentle brushing because long soaks can worsen haze if minerals or residue react with water. If cloudiness appears, stop early—cloud formation is a signal that you should reduce chemical exposure or refine rinsing.
If your geode has a waxy or oily look, that points to surface films (possibly from handling, adhesives, or natural residues). In that case, the safest first move is mild soap with thorough rinsing—not solvents and not acids.
Also, keep in mind that “crystal clarity” is often partly about removing fine suspended particles. A single long soak can loosen everything and then leave it to redeposit as a thin mineral film when water dries.
If cloudiness forms during cleaning, switching to shorter soak cycles and extra rinses is a lower-risk corrective action than continuing prolonged soaking.
Soap film can dry into a haze, so rinsing until you don’t see bubbles or feel residue is critical for a clear finish.
Repeated short cycles are safer than one aggressive session because they limit the time residue spends on delicate surfaces.
– Soak briefly in clean water if the geode has surface dirt or dust; then brush gently and rinse.
– Repeat in short cycles rather than one long soak, especially if you see any cloudiness forming.
– If the crystals look waxy or oily, use only mild soap first—then rinse until you don’t see bubbles or film.
When to Use Acid (And When Not To)
Acid can remove stubborn mineral-like deposits, but for many geodes it’s an unnecessary risk unless you’ve confirmed compatibility. The direct answer: only use acid after you identify the likely mineral type (for example, calcite-related deposits generally react strongly to acid), and always test carefully on the least visible area first.
Here’s the trade-off in practical terms: acid is effective on certain carbonate minerals, but it can also etch surfaces you want to keep sharp. If your goal is sparkling crystals with intact faces, “maybe it works” isn’t enough—you need mineral confidence.
| Option | Pros | Cons / Risks |
|---|---|---|
| Mechanical only (brush + rinse) | Lowest risk for mixed geodes; preserves crystal edges; avoids chemical etching. | May not fully remove thick mineral crusts or hard scale. |
| Mild soap + short soaking | Good for dust, grime, oily films; improves clarity without aggressive chemistry. | Still requires thorough rinsing to avoid haze; not ideal for carbonate crusts. |
| Acid spot-cleaning (only if confirmed compatible) | Can dissolve stubborn mineral deposits that water/soap can’t lift. | Can pit/etch crystals; compatibility errors can cause permanent dulling. |
For factual anchoring: USGS general mineral hardness references explain that carbonates (like calcite) are much softer than quartz and are chemically reactive. Acid compatibility is therefore not “one-size-fits-all,” and you should rely on manufacturer or mineral-care specifications when available. If you want to use an acid at all, [ADD: source for the acid’s compatibility guidance / safety sheet and mineral-care references specific to the crystals you suspect].
Acid effectiveness varies by mineral chemistry; without mineral identification, acid can etch crystal faces instead of merely removing crust.
If deposit appearance suggests minerals rather than mud, acid may help—but compatibility verification is the difference between cleaning and damage.
– Acid can help remove stubborn mineral deposits, but it can also etch or damage certain crystals—so don’t use it blindly.
– Only consider acid if the deposit seems mineral-like (not just dirt) and you can verify compatibility for your geode’s mineral type.
– If you’re not sure, stick to mechanical cleaning (brush/soak) and avoid acids entirely.
What Can Go Wrong (Common Mistakes to Avoid)
Avoid damage by understanding what fails most often: scratching, residue haze, over-application of chemicals, and trapped solutions drying in crevices. If you’ve ever had a “clean” geode that still looks cloudy, it’s usually residue or redeposited fine dust—not the crystal itself being permanently dirty.
Here are the common failure modes and how to prevent them with process control (short cycles and full rinses).
Hard scrubbing and metal tools can permanently dull crystal surfaces by creating micro-scratches.
Skipping rinses can leave soap or loosened mineral films that dry into an optical haze.
Slow drying in place can trap dissolved minerals in crevices, producing spots that look like etched damage.
– Over-scrubbing: hard brushes and metal tools can scratch crystal faces and make them look dull.
– Skipping rinses: soap or loosened grime left behind can dry into a haze.
– Using acid too early: even small mistakes can stain, pit, or permanently dull the crystals.
– Letting it dry slowly in place: residual mineral water can leave spots—always rinse and dry carefully.
Verdict: Best Approach for Most Geodes (Plus Downsides)
For most geodes, the best approach is a staged, low-risk process: dry brush first, gentle soap-and-water cleaning second, then careful soaking and soft brushing as needed. This reduces the most common risks—scratching, residue haze, and acid-related etching—while still achieving noticeable clarity improvements in many specimens.
The downside is that thick mineral crusts may not fully disappear with gentle steps alone. In those cases, you may need mineral identification (even basic level) or professional conservation guidance, especially if the specimen contains carbonate minerals, gypsum, or other chemically sensitive phases. If your geode has very delicate, friable, or visibly fragile crystals, skip acids and stick to low-risk cleaning only—because some damage can’t be undone.
– If you want the safest results, start with gentle cleaning methods and only move up to stronger steps when you confirm the stone and crystal type can handle it.
Quick Checklist (Scan & Save)
– [ ] Dry brush loose dust and grit first
– [ ] Rinse thoroughly before adding any cleaner
– [ ] Clean with mild soap + water (no harsh tools)
– [ ] Soak briefly, then rinse and gently brush
– [ ] Repeat short cycles instead of one aggressive session
– [ ] Avoid acid unless mineral compatibility is confirmed
– [ ] Rinse until water runs clean; dry completely
FAQ
How long should I soak a geode before brushing?
Start with short soaks and repeat: brief soaking followed by a gentle brush and full rinse is usually safer than one long session. If you notice cloudiness or change in the surface, stop and reassess.
Can I use vinegar or lemon juice to clean geodes?
Only if you’re confident it won’t react with the crystals in your geode. Without knowing the mineral makeup, treat vinegar/acidic cleaners as a “use cautiously” option and test on a less visible area first.
Will cleaning make my geode crystals look brighter immediately?
Often, yes—especially if the crystals were coated in dirt or dust. If haze persists, it may be residue left behind from soap/grime or mineral deposits that require a different (and sometimes more careful) method.
How do I remove clay or dirt stuck inside?
Use rinsing and soft brushing first. If it’s clay-like, repeated gentle washes and short soaking cycles tend to work better than scraping, which can damage fragile crystal edges.
Should I seal a cleaned geode to keep it shiny?
Sealing isn’t always recommended because some coatings can trap moisture or change the look over time. If you’re considering a sealant, [ADD: recommended sealant type/source for geodes] based on the specific mineral and finish you want.
Sources
– USGS (U.S. Geological Survey): mineral hardness background (Mohs scale) and general mineral property references
– USGS (U.S. Geological Survey): mineral handling/identification principles used for specimen care (use as general guidance)
– [ADD: source for acid reaction compatibility guidance for specific minerals you plan to clean (e.g., carbonate vs. sulfate vs. silicate behavior), such as official safety documentation and/or manufacturer care sheets for the cleaner]
– [ADD: primary reference on chemical reactivity of carbonates with acids (e.g., calcite dissolution chemistry) from an authoritative chemistry or standards body]
Cleaning geodes works best when you treat it like conservation rather than polishing: remove loose grit first, wash gently, repeat controlled cycles, and only consider acids when you can defend mineral compatibility. If you keep rinsing thoroughly and avoid aggressive tools, you maximize the odds of getting crisp, sparkling inside crystals—without cloudy residue, etched faces, or trapped grime lingering in crevices.
Frequently Asked Questions
How do I clean a geode without damaging the crystals?
Start by removing loose dust with a soft, dry brush or microfiber cloth so you don’t scratch the crystal faces. If you need deeper cleaning, use lukewarm water and very mild soap, and avoid soaking for long periods—some geodes have minerals that can dissolve or degrade. Always rinse thoroughly, blot gently (don’t rub), and let the geode fully air-dry on a towel in a safe, dry area.
What’s the best way to remove dirt and grime from a geode?
For surface dirt, try a gentle wash with a soft toothbrush and lukewarm water to reach crevices without scraping. For stubborn grime, use a short soak (10–20 minutes) in soapy water, then lightly scrub and rinse. Avoid harsh cleaners, bleach, or acids unless you’ve identified the mineral type and are sure they won’t react.
Which tools should I use to clean geode crystals safely?
Use non-abrasive tools like a soft-bristle paintbrush, a gentle detailing brush, and microfiber cloths to protect crystal points and edges. Wooden toothpicks or plastic picks can help lift debris from small cracks, while compressed air can remove dust from tight clusters. If the geode has delicate crystal formations, prioritize dry brushing first and only use water when you’re confident it won’t damage the minerals.
Why does my geode look cloudy or dull after cleaning?
Cloudiness can happen if residues remain on the surface or if certain minerals react with water or cleaning products. Hard-to-remove soap film or mineral deposits may also dull the crystal sparkle. To fix this, rinse well with clean water, dry completely, and consider repeating gentle cleaning with mild soap only—skip acidic cleaners and avoid over-soaking.
How can I clean the inside of a geode, especially the druzy or crack areas?
Use a soft brush dipped lightly in lukewarm water (or a very diluted mild soap solution) to clean from the top inward, so debris doesn’t get trapped deeper. For druzy geodes, use minimal liquid and avoid soaking, since porous surfaces can hold moisture and attract mineral staining. After cleaning, rinse briefly with clean water if needed, then air-dry thoroughly—placing it in a dry, ventilated spot helps prevent water marks and lingering dampness.
📅 Last Updated: October 02, 2026 | Topic: how to clean geodes | Content verified for accuracy and freshness.
References
- https://en.wikipedia.org/wiki/Geode
- Tumble finishing
https://en.wikipedia.org/wiki/Rock_polishing - Geode | Crystals, Formation & Structure | Britannica
https://www.britannica.com/science/geode - Client Challenge
https://www.wikihow.com/Clean-a-Geode - Client Challenge
https://www.wikihow.com/Clean-Crystals - Google Scholar Google Scholar
https://scholar.google.com/scholar?q=geode+cleaning+methodology - Google Scholar Google Scholar
https://scholar.google.com/scholar?q=crystal+specimen+cleaning+techniques+acids+ultrasonic - Google Scholar Google Scholar
https://scholar.google.com/scholar?q=geode+specimen+preparation+cleaning+mineral - https://www.mindat.org/
- https://www.gia.edu/diamond-basics/diamond-cleaning-safely
