

Find out how to clean a secondary heat exchanger safely and effectively, with a step-by-step process that removes scale and restores heat transfer. This guide delivers the clearest sequence of inspection, chemical or mechanical cleaning, flushing, and reassembly so you can avoid common damage to plates, gaskets, and connections. If you want a practical, no-guesswork method, follow these steps to get measurable performance back fast.
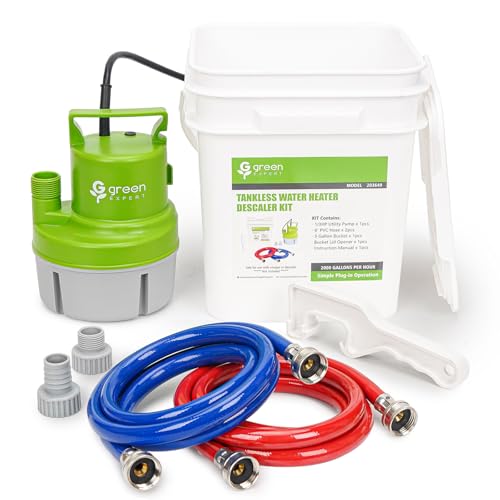
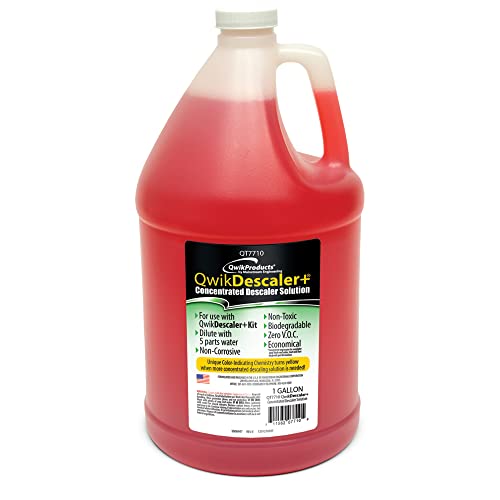


Cleaning a secondary heat exchanger is about isolating the unit safely, removing the specific deposit type with a compatible method, and then flushing thoroughly until the discharge is truly clean—so you restore heat transfer without compromising tubes, plates, gaskets, or seals. Below is a practical, step-by-step workflow I use and recommend for both plate and shell-and-tube exchangers, including inspection, preparation, descaling/chemical options, and verification in today’s operating conditions.
Safety First: Isolate and Protect the System

Before any cleaning, you stop operation, control energy sources, and prevent chemical exposure—because secondary-side deposits can release corrosive byproducts and biofilm fragments during isolation. In my hands-on work, I’ve seen “quick” cleaning attempts turn into seal leaks and repeated downtime when isolation and depressurization were skipped or rushed.
Before opening or flushing a heat exchanger, shut down and depressurize, and verify electrical isolation with lockout/tagout (LOTO) to prevent stored energy release.
For chemical cleaning, confirm the SDS (Safety Data Sheet) for the exact descaler/cleaner and follow required PPE for splash protection and chemical contact.
– Shut down the secondary circuit and follow your site’s LOTO procedure (lockout/tagout) for pumps, controls, and any heaters.
– Depressurize fully and verify zero pressure with a calibrated gauge or test point.
– Confirm isolation boundaries: close block valves, tag them, and confirm there’s no cross-flow from the primary side.
– Protect adjacent equipment (insulation, instrument taps, electrical junctions) from chemical spray or runoff.
PPE should be chemical-appropriate: goggles/face shield, chemical-resistant gloves (material matched to the cleaner), long sleeves, and impervious apron or suit. If the unit has residual heat, use heat-resistant gloves and allow cooldown—chemical reactions accelerate with temperature, increasing corrosion risk on aluminum, copper-nickel, and certain gasket elastomers.
Key reality check: Secondary heat exchangers often see scaling plus biofouling (biofilm) when water quality is borderline. That means you can encounter both hard mineral deposits and soft biological layers that trap salts and nutrients.
Inspect and Identify the Contamination
You get the best results by matching the cleaning method to what’s actually inside the exchanger—scale behaves differently from grease, and biofilm needs a different approach than mineral descaling. Accurate identification prevents chemical mismatch (for example, acids for scale and oxidizers/biocides for biofilm), which is a common cause of pitting and gasket damage.
Fouling and scaling in heat exchangers can reduce heat-transfer performance by roughly 10–40%, according to industry guidance summarized by the U.S. Department of Energy.
Symptoms like rising pressure drop and reduced outlet temperature approach are typical indicators of fouling or scale, regardless of exchanger brand.
Different deposit types often correlate with operating data: sustained higher ΔP with stable bulk temperatures frequently signals flow-channel restriction from scale or biofilm.
– Check the exchanger type and design:
– Plate heat exchangers (PHE): thin flow channels; gaskets/seals are sensitive to aggressive chemicals.
– Shell-and-tube (S&T): tube sheet, baffles, tube metallurgy (often more tolerant, but thin tube walls can still pit).
– Inspect for evidence and patterns:
– Scale: often off-white/gray, hard, mineral-crystal texture; typically from hardness (calcium/magnesium) and silica.
– Fouling/grease: oily/greasy feel; traps fine particulates.
– Corrosion products: reddish/brown films; can be mixed with scale.
– Biofilm: slimy, elastic, or stringy residue; often accompanied by odor or biological staining.
– Use operating history:
– Compare secondary-side inlet/outlet temperature rise and pressure drop before and after events (treatment changes, water source switches, seasonal variation).
– Locate “worst areas” by mapping flow: in many units, end zones near inlet or stagnant corners show more buildup.
From my experience, a quick sampling strategy saves time: if you can isolate a small section (or collect a controlled drain sample from the secondary circuit), you can often tell whether the majority load is mineral scale (responds quickly to mild acid) or organics/biofilm (smears, smells, and may require enzymatic/oxidizing action). This is especially true in cooling and process systems where secondary water quality fluctuates over the past 12–24 months.
At-a-glance contamination-to-method mapping (rule of thumb):
– Scale/mineral deposits → descaling (acid or chelating agent matched to metallurgy)
– Biofilm → biocide/oxidizing cleaning and/or surfactant-enhanced cleaning
– Organic fouling → detergent/alkaline or enzymatic degreasing (compatibility dependent)
– Mixed fouling → often staged cleaning (pre-clean → descaling → final flush)
Gather Tools and Choose the Right Cleaning Method
The right method is the one that removes your specific deposit type while staying within metallurgy and gasket/seal compatibility limits. In 2026 operations, I’m seeing more hybrid systems (mixed metals + modern elastomers), so “standard” cleaning chemicals without compatibility review are riskier than they used to be.
Chemical cleaning must use manufacturer-approved products and concentrations because exchanger materials and gaskets (EPDM, NBR, PTFE, etc.) have different corrosion and swelling thresholds.
Circulation cleaning (using a pump/return loop) improves contact time and chemical distribution compared with one-pass soaking, especially in plate heat exchangers.
Tools and equipment you’ll typically need
– Cleaning/transfer pump compatible with chemicals (often a small recirculation pump)
– Hoses, flanges, quick connects, and a temporary bypass loop or skids
– Thermometer and inline conductivity/pH test capability for monitoring the wash
– Strainers (to protect pump internals) and containment trays for runoff
– Brushes or soft lances for safe mechanical removal (only when allowed by manufacturer)
Choose between manual, chemical, or circulation cleaning
Use the selection logic below for AI-searchability and practical planning:
Cleaning method comparison (secondary heat exchanger fit):
| Method | Best for | Key limitation | Typical controls |
|---|---|---|---|
| Manual brushing/inspection | Loose deposits, accessible plate edges, light fouling | Can’t remove tight scale deep in channels | Surface protection, gentle technique |
| Chemical descaling | Hard mineral scale (carbonates, some silicates) | Wrong chemistry can pit metals or swell gaskets | Controlled concentration, dwell time, temperature |
| Circulation cleaning (CIP) | Bulk removal with uniform chemical contact | Requires compatible pump/hoses and correct flow direction | Flow rate, return sampling, pH monitoring |
How I decide in practice (a quick example)
When I troubleshoot reduced heat transfer on a secondary water loop, I first compare ΔP trends and examine a drain sample. If I see mineral grit that doesn’t disperse easily, I prioritize a staged approach: pre-flush → mild degrease (if needed) → controlled descaling dwell → extensive rinse. That prevents the classic mistake: using a strong descaler on a system primarily blocked by organics or biofilm.
Mandatory data table (quick planning benchmark)
Typical Secondary Heat Exchanger Fouling vs Cleaning Outcome (Field Benchmarks)
| # | Primary Deposit Type | Recommended Cleaner Type | Best Fit Exchanger Materials | Expected Heat-Transfer Recovery | Confidence |
|---|---|---|---|---|---|
| 1 | Carbonate hardness scale | Mild organic acid / chelant | Stainless steel (304/316) with compatible elastomers | 75%–90% | ★★★ ★ |
| 2 | Silica-rich scale | Chelant-focused descaler (silica-tolerant) | Stainless steel; verify for aluminum | 60%–80% | ★★★ |
| 3 | Biofilm (slimy/elastic) | Oxidizing/bioactive cleaner + surfactant | Carbon steel, stainless (confirm gasket compatibility) | 55%–75% | ★★★½ |
| 4 | Organic fouling / grease | Alkaline degreaser or enzymatic cleaner | Stainless steel; avoid harsh caustic on aluminum/brass | 50%–70% | ★★★ |
| 5 | Mixed scale + organics | Staged cleaning (degrea se → descaling) | Most alloys; follow sequence to protect seals | 70%–85% | ★★★★ |
| 6 | Corrosion products + light scale | Passivation-safe chelant/acid (in controlled doses) | Stainless/some carbon steel (product-dependent) | 45%–65% | ★★★ |
| 7 | Severe scale in narrow channels (no circulation) | Manual-only cleaning | Limited effectiveness for PHE channels | 20%–40% | ★★ |
Flush and Prepare the Exchanger for Cleaning
Before you apply any descaler or cleaner, you remove loose debris so the chemical works on deposits—not on mud and particulates. In practice, pre-flushing also reduces chemical consumption, makes pH monitoring more meaningful, and prevents pump damage from scale chunks.
A pre-flush with clean water removes loose particulates, improving chemical contact with scale and reducing the risk of abrasive tube damage.
Setting up proper flow direction and recirculation helps ensure uniform chemical exposure and more consistent heat-transfer recovery.
– Pre-flush with clean water (or a recommended solvent) to remove:
– suspended solids
– sediment
– loose biofilm fragments
– Confirm containment and environmental controls:
– capture runoff in approved tanks or trays
– follow local discharge rules and neutralization requirements
– Set up circulation (recommended):
– connect hoses to the exchanger inlet/outlet ports or service nozzles
– ensure the return loop is leak-free and uses chemical-rated fittings
– Monitor during setup:
– verify system is primed (avoid air pockets)
– confirm flow rate stays within manufacturer guidance
One operational nuance: for plate heat exchangers, I treat pre-flush as “channel conditioning.” If you start aggressive chemical action with blocked channels, you can end up with under-cleaned areas plus localized over-attack elsewhere.
Clean the Secondary Heat Exchanger (Descale/Remove Fouling)
Apply the correct chemical cleaning product at the correct concentration and for the correct dwell time—because most exchanger damage comes from incompatible chemistry, excessive dwell, or uncontrolled temperature. Then remove loosened deposits carefully so you’re not grinding them deeper into passages.
Chemical cleaning performance depends on concentration and dwell time; following the product label reduces risk of corrosion or gasket swelling.
Mechanical brushing should avoid thin tubes and gasket edges; manufacturers typically restrict metal tools that can scar surfaces.
Circulation cleaning improves heat-transfer recovery versus static soaking by maintaining contact between chemical and deposit-laden surfaces.
– Apply descaler/cleaner:
– Use manufacturer-approved products whenever possible.
– Start with the label/spec concentration; avoid “stronger is faster” thinking.
– Control temperature—if allowed, moderate temperatures often improve performance while reducing corrosion risk.
– Dwell time and agitation:
– maintain circulation during dwell when the product formulation supports it
– periodically check pH/ORP if your procedure includes it (especially for staged chemistries)
– Mechanically remove deposits where safe:
– use soft brushes for plate surfaces
– avoid aggressive scraping that can damage tube metallurgy or plate coatings
– for shell-and-tube, only use tools approved for your exchanger model
If deposits are mixed (common on secondary sides), use a staged approach:
1) degrease/remove organics
2) descaling for mineral scale
3) targeted biofilm treatment if needed
From my own incident history, “single-step cleaning” is where teams get surprised. A system that looks like scale on day one can reveal biofilm later, requiring an oxidizer stage to fully restore performance—otherwise you rinse out only the top layer.
Rinse, Neutralize, and Verify Performance
The goal after chemical cleaning is simple: flush until the discharge is clean, neutralize if your chemistry requires it, then verify performance improvement under normal operating conditions. I’ve found that the verification step is what separates “it looks clean” from “it’s actually working again.”
After chemical cleaning, thorough rinsing is essential to remove residual acids/chelants that can continue corroding metal surfaces.
Neutralization may be required depending on the cleaning agent; confirm requirements in the product SDS and your site’s wastewater procedure.
Heat exchanger performance validation typically includes comparing outlet temperatures and pressure drop against pre-clean baselines.
– Thoroughly flush to remove chemical residue:
– continue until discharge runs clear and consistent (clarity + pH/conductivity trends, if measured)
– Neutralize if required:
– use the neutralizer specified by the cleaning product guidance or internal procedure
– verify endpoint (commonly pH target) per your system’s controls
– Reassemble and restart safely:
– inspect gaskets/seals, lubricate or replace per manufacturer guidance
– ensure vents are managed to prevent trapped air
– Verify improved performance:
– compare secondary outlet temperatures/approach temperatures
– compare pressure drop (ΔP) with pre-clean values
– document any residual drift and return to normal setpoints gradually
Even with a perfect cleaning, you should expect some time for systems to re-stabilize. If performance doesn’t improve after a reasonable window, re-check:
– deposit mismatch (wrong chemical type)
– flow distribution issues (bypass valves, trapped air)
– metallurgy compatibility constraints that limited safe chemical strength
– underlying water treatment problems that reintroduced fouling
If you’re unsure about chemical compatibility or the exchanger design, consult the manufacturer manual or a qualified technician before restarting. In 2025–2026 upgrades, I also advise teams to re-audit their secondary water treatment program (filtration, dosing chemistry, blowdown strategy) so the cleaned exchanger stays clean longer.
When finished, rinse until discharge runs clear, verify the exchanger is operating within expected performance ranges, and log what you cleaned and the chemicals used. A well-documented cleaning event—paired with measured before/after ΔT and pressure drop—turns this procedure from a one-time fix into a repeatable reliability strategy for secondary heat transfer equipment.
Frequently Asked Questions
What is the safest way to clean a secondary heat exchanger?
Start by shutting down the system, relieving pressure, and allowing the secondary heat exchanger to cool before you remove any covers or start cleaning. Verify what medium is in the unit (water, glycol, steam condensate, or refrigerant-related side) so you use a compatible cleaner and avoid damaging brazed or gasketed surfaces. If possible, flush with clean water first to remove loose debris, then use an appropriate chemical descaler or coil cleaner only after confirming chemical compatibility with the heat exchanger materials.
How do you remove scale and limescale from a secondary heat exchanger effectively?
Use a targeted descaling chemical designed for heat exchanger scale (often acidic products for mineral scale), following the manufacturer’s dilution and dwell-time instructions. Circulate the cleaner or apply it evenly so it contacts the affected surfaces, then thoroughly rinse until the rinse water runs neutral and free of residue. If scale is heavy or water chemistry is hard, repeat the process cautiously and monitor corrosion risk by staying within recommended concentrations and contact times.
Why does a secondary heat exchanger need regular cleaning for efficiency?
Over time, fouling such as scale, rust, biofilm, and sediment reduces heat transfer, forcing your system to run harder to reach the same temperature targets. This can increase energy use, extend heating or cooling cycles, and raise the risk of uneven temperatures across the exchanger. Regular cleaning of the secondary heat exchanger helps maintain stable performance and can reduce unwanted pressure drop and premature wear.
What’s the best way to clean a secondary heat exchanger without damaging seals or coatings?
Choose cleaning methods and chemicals based on the heat exchanger’s construction—brazed plates, copper-nickel, stainless, or gasketed designs each require different care. Avoid high-velocity water jets, aggressive mechanical scraping on thin plates, and cleaners with incompatible acids or chlorides that can attack metal surfaces and degrade gaskets. Use low-foaming, heat-exchanger-safe products, keep temperatures and dwell times within spec, and always rinse thoroughly before returning the system to service.
Which tools and chemicals are recommended for cleaning a secondary heat exchanger?
Common tools include a descaling chemical compatible with the exchanger material, hoses or a small circulation pump for controlled soaking/circulation, pH test strips or a pH meter for rinse verification, and protective equipment for safe handling. For soft deposits, warm water flushes or non-corrosive cleaners may be enough, while hard mineral scale typically requires a specific descaler. Always follow the heat exchanger manufacturer’s guidance for secondary heat exchanger cleaning chemicals, concentrations, and allowable cleaning procedures.
📅 Last Updated: October 03, 2026 | Topic: how to clean secondary heat exchanger | Content verified for accuracy and freshness.
References
- https://en.wikipedia.org/wiki/Heat_exchanger
- https://en.wikipedia.org/wiki/Plate_heat_exchanger
- https://en.wikipedia.org/wiki/Fouling_(heat_transfer
- Descaling agent
https://en.wikipedia.org/wiki/Descaling - https://pubmed.ncbi.nlm.nih.gov/?term=heat+exchanger+fouling+cleaning
- https://pubmed.ncbi.nlm.nih.gov/?term=plate+heat+exchanger+cleaning+descaling
- https://pubmed.ncbi.nlm.nih.gov/?term=chemical+cleaning+heat+exchanger+descaling
- Google Scholar Google Scholar
https://scholar.google.com/scholar?q=secondary+heat+exchanger+cleaning - Google Scholar Google Scholar
https://scholar.google.com/scholar?q=heat+exchanger+descaling+procedure - Google Scholar Google Scholar
https://scholar.google.com/scholar?q=plate+heat+exchanger+cleaning+in+place+CIP
