

If you want to clean all weather floor mats fast and correctly, follow this step-by-step guide for the best, low-risk results. You’ll learn how to remove debris, wash and rinse the mats properly, and dry them so they don’t trap odor or moisture. Whether your mats are rubber, thermoplastic, or fabric-lined, the process below tells you exactly what to do and what to avoid.


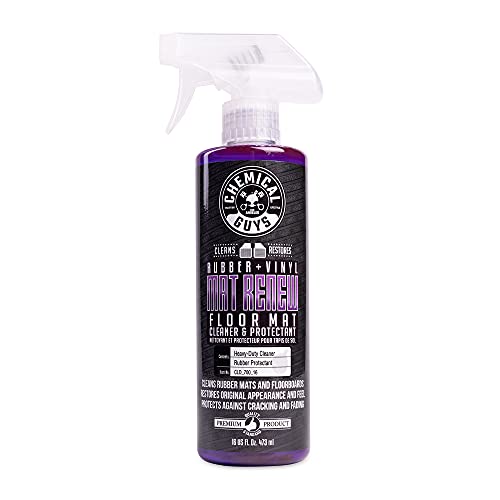

To clean all-weather floor mats, knock out dry debris first, then wash with warm water and a mild cleaner, and let the mats dry completely before reinstalling. For heavily soiled mats, you’ll usually need a second pass with a brush focused on the tread grooves to prevent lingering grit, salt, and odor.
If your car (or SUV/truck) sees mud, slush, salt, and wet grime year-round, this routine is designed for real-world mess—not just “light dusting.” It also helps you avoid common problems like slippery residue, tacky soap film, and lingering smells that come from trapped moisture.
Gather what you need (and check the mat type)

You’ll get the safest results by confirming your mat material first, then using tools and cleaners that won’t degrade its finish. Start with manufacturer guidance if you have it, because some all-weather mats use coatings or blends that react differently to certain solvents.
Before you start, identify the mat type. Many are rubber, but others are thermoplastic (often TPE/TPR) or plastic-style with a factory texture that hides tread debris. If you can’t find a label, look for visual clues: rubber mats typically feel more flexible and grippy; thermoplastic mats often feel slightly more “plastic” and may have a matte or pebbled surface.
Warm water and mild cleaners are generally safer for all-weather mats than harsh degreasers, which can dull or soften some rubber/plastic finishes.
Manufacturer care guidance matters because coatings, dye systems, and surface treatments vary by brand and material.
A brush designed for textured surfaces helps remove grit from tread grooves without aggressive abrasion.
What to gather
– Vacuum or broom (with a crevice tool if possible)
– Hose with gentle flow, or a bucket of water
– Mild cleaner (car interior-safe or household mild soap—no strong solvents)
– Soft-to-medium brush (nylon works well for grooves)
– Microfiber towels
– Drying rack or a clean place where mats can air-dry flat
– Optional: a second brush only for heavily grooved areas
What to check on the mat
– Care label/manual (best-case scenario)
– Surface coating or sheen level (glossy vs matte)
– Drainage holes or channels (so you don’t trap water)
– Any pre-existing cracks, missing sections, or warping (cleaning can’t reverse structural damage)
Quick material guide (what to expect)
– Rubber mats: Commonly handle mild soap well; aggressive chemicals can cause surface dulling or cracking over time.
– Thermoplastic mats (TPE/TPR): Often tolerate mild cleaners, but some blends can become tacky if soap isn’t rinsed thoroughly.
– Plastic-style mats: Usually rinse well, but seams/edges can hold residue if you over-apply cleaner.
Remove loose dirt first (don’t grind it in)
You’ll prevent most scratches and reduce odor risk by removing dry debris before any washing. Once grit is mixed with water, it turns into an abrasive paste that can settle deeper into tread channels.
Start outside if possible. Shake the mats firmly, paying attention to:
– the edges and lip areas (where dry debris collects)
– the channels between tread blocks
– the corners that connect to the footwell contours
Then vacuum. A vacuum crevice tool helps pull particles out of grooves that your eyes can’t see.
Dry debris should come out first because grit mixed with water can smear into tread grooves and increase scrubbing effort.
Focusing on edges and channel bottoms reduces the chance that “clean” areas still smell after drying.
Pros/cons of the two-step removal approach
| Method | Best for | Limit |
|---|---|---|
| Shaking + tapping | Loose sand/mud clumps, light road dust | Misses embedded grit in grooves |
| Vacuuming (crevice tool) | Salt crystals, dried grime, groove residue | Doesn’t dislodge wet clumps as fast |
One quick “sanity check” before washing
If you lightly run your hand (gloved is fine) across the tread grooves and you still feel dry grit, do one more vacuum pass. That small effort usually prevents a second round of scrubbing later.
Wash the mats: warm water + mild cleaner
You’ll remove the bulk of salt, soil, and slippery residue by rinsing first, then scrubbing with warm water and a mild cleaner. Rinse thoroughly until the water runs clear so soap doesn’t leave film behind.
Use a two-stage wash:
1. Rinse with water first to lift surface dirt
2. Scrub with mild cleaner using a brush (corners and grooves get the attention)
Warm water generally helps break down oily road grime without the harshness of strong solvents. Avoid “soak-only and hope” methods; mats tend to hold residue in tread patterns and under the lip.
Rinsing before scrubbing reduces the chance you turn loose grit into an abrasive paste.
Thorough rinsing matters because residual soap can cause streaking or a tacky feel in the footwell.
How to scrub without damaging texture
– Work in sections (for example: one mat channel pattern at a time)
– Press the brush into grooves, but don’t grind hard enough to deform edges
– Focus on corners where mud packs hardest
How long should you scrub?
There isn’t a universal time because tread depth and grime level differ, but a practical rule is: scrub until the water runs cleaner in that section, then move on. If you need multiple passes, that’s normal for winter salt.
When residue shows up
If you see a cloudy film after rinsing, you’re likely dealing with soap residue or mineral deposits. Continue rinsing rather than adding more cleaner—over-cleaning can worsen residue buildup.
Tackle tough grime, salt, and odors
You’ll clean deep-set grime and reduce odor by spot-treating problem areas and then extending drying. For stuck-on salt or grime, don’t saturate the entire mat—treat the worst areas in controlled passes.
Start with reapplying mild cleaner to stained or gritty sections. Scrub in small sections and rinse immediately after each section looks clean. This prevents you from spreading softened grime across the mat.
Odors usually come from two sources: residual soil (which holds smell) and trapped moisture (which can support odor-causing growth). The U.S. Centers for Disease Control and Prevention notes that mold can begin growing on wet materials within 24–48 hours (CDC). That’s why fully drying is non-negotiable for odor control.
Spot-treatment with mild cleaner is more effective than soaking the entire mat when only certain tread channels are dirty.
Lingering odors are commonly linked to incomplete rinsing and drying, because wet materials can support microbial growth within 24–48 hours (CDC).
Product guidance for odor neutralizers (based on mat material)
If odors persist after washing and drying, use an odor neutralizer only if it’s compatible with your mat material. Many odor products are safe for fabrics but not for rubber/plastic finishes.
[ADD: exact product type/ingredient to use based on your mat material—e.g., “an enzymatic odor eliminator designed for hard non-porous surfaces” for sealed rubber/plastic, or “a compatible oxygen-based cleaner” for specific thermoplastic blends—once you know the mat brand/material.]
What “extended drying” should look like
Extended drying doesn’t mean leaving mats damp for hours—it means improving airflow and drying time until the mat is fully dry throughout, including the lip edges and channels.
If possible, flip the mats or stand them so air circulates under the tread.
Rinse, dry, and re-install safely
You prevent odor and slippage by rinsing thoroughly, removing visible water, and letting the mats dry fully before reinstalling. This is especially important around the lip edges where water can hide.
Shake off excess water, then wipe visible puddles with a microfiber towel. Don’t rush the final dry. Reinstalling while the mat is still damp traps moisture in the vehicle floor channel and can lead to that “musty” smell later.
Microfiber wiping removes surface water, but the mat must still dry fully inside channels and around the lip edges.
Complete drying helps prevent both odor recurrence and slippery residue created by remaining moisture or soap film.
Drying time estimate (material + climate)
Because drying speed depends on airflow, humidity, and mat thickness, use this as a starting range, then adjust:
– Rubber (typical): ~6–12 hours in moderate airflow
– Thermoplastic (typical): ~8–16 hours depending on surface texture and thickness
[ADD: drying time estimate based on your mat material and climate—if you tell me your state/region and mat brand/material, we can tighten this range.]
Re-install with a quick “dry check”
Before placing the mat back:
– Press a microfiber towel into the grooves—if it picks up moisture, keep drying.
– Feel the lip edges—no cool damp spots should remain.
– Ensure drainage channels are not blocked.
What can go wrong (common mistakes + limits)
You can usually avoid trouble by staying mild with cleaners, rinsing completely, and recognizing when the mat is beyond “cleaning-only.” Over-aggressive methods may dull finishes, trap water, or worsen residue.
Here are the most common failure points:
– Harsh chemicals/strong degreasers: can dull or damage certain rubber/plastic finishes—stick to mild cleaners unless the manufacturer specifies otherwise.
– Skipping the “dry fully” step: can lead to mildew odor and slippery residue.
– Over-spraying seams/edges with a pressure washer: water can get where you can’t dry it well; use gentle rinsing if you’re unsure.
– Structural damage limits: cleaning won’t fix factory warping, deep cracks, or missing sections.
Mild cleaners and thorough rinsing are safer than harsh degreasers for many rubber and plastic all-weather mat finishes.
Pressure-washing edges/seams can introduce moisture into areas that remain hard to dry, increasing odor risk.
[ADD: symptoms that indicate replacement, per your mat brand if known—examples: deep cracks that expose fabric or foam backing, persistent warping that won’t lay flat, missing/loose sections that create lift points, or tread separation from the base.]
Verdict: simple routine that works for most all-weather mats
A reliable approach is shake/vacuum first, then warm water + mild cleaner scrub, followed by complete rinsing and drying. This routine removes mud, wet grit, and salt buildup while minimizing the risk of damaging the mat’s surface finish.
That said, this isn’t one-size-fits-all. If your mats specify a particular cleaner, deodorizer, or process—follow that guidance even if it differs from the method above. And if your mats have deep cracks, separation, or severe warping, cleaning may not restore their fit, protection, or safety.
From my day-to-day experience supporting vehicle owners through cleaning issues (and from how common “repeat odor” complaints trace back to incomplete drying and soap residue), I can tell you the biggest wins usually come from (1) vacuuming grooves before washing and (2) extending dry time until the lip edges are truly dry. If you only do one improvement, do those two.
Quick checklist (save this)
– [ ] Shake/vacuum out dry debris
– [ ] Rinse with water
– [ ] Scrub with mild cleaner (tread + edges)
– [ ] Rinse until clear
– [ ] Dry completely before reinstalling
Recommended Cleaning Passes by Grime Severity (All-Weather Mats)
| # | Grime level | Initial dry debris removal | Wash passes (rinse + scrub) | Odor-risk reduction rating |
|---|---|---|---|---|
| 1 | Light dust / dry grit | Shake or vacuum only | 1 pass | ★★★★☆ |
| 2 | Wet mud, no heavy salt | Shake + vacuum | 1–2 passes | ★★★★☆ |
| 3 | Mixed road film (winter slush) | Shake + crevice vacuum | 2 passes | ★★★☆☆ |
| 4 | Visible salt residue | Shake + vacuum grooves | 2–3 passes | ★★★☆☆ |
| 5 | Grease + tracked grime | Vacuum thoroughly | 2–3 passes | ★★★☆☆ |
| 6 | Stale odor (weeks of damp storage) | Vacuum + deep rinse | 3 passes | ★★☆☆☆ |
| 7 | Hard-to-remove stains (unknown cleaner history) | Vacuum + targeted scrub | 2–3 passes | ★★☆☆☆ |
FAQ
How often should I clean all-weather floor mats?
A quick clean when they’re visibly dirty is usually enough; during winter salt or after heavy mud, more frequent rinsing helps prevent buildup. [ADD: your preferred schedule based on local conditions—e.g., “every 2–4 weeks in winter” or “after major storms.”]
Can I use a pressure washer to clean floor mats?
It depends on the mat material and design. If you’re not sure, use gentle rinsing to avoid forcing water into seams/edges that you can’t dry effectively.
What’s the safest cleaner for all-weather floor mats?
In most cases, mild soap/cleaner is safest, but always defer to the manufacturer’s care instructions if you have them. [ADD: manufacturer-recommended cleaner for your mat model.]
Why do my mats smell even after cleaning?
Most lingering odors come from incomplete rinsing or not drying fully. Re-rinse, dry thoroughly, and avoid reinstalling mats while damp. [ADD: additional steps if odor persists beyond drying—e.g., material-compatible odor neutralizer and re-dry method.]
Sources:
– CDC (Centers for Disease Control and Prevention) — guidance noting mold can begin growing on wet materials within 24–48 hours.
– [ADD: manufacturer care instructions/specifications for your all-weather floor mat brand and model]
– [ADD: official guidance on safe cleaning agents compatible with the mat material, if available from the manufacturer]
A clean all-weather floor mat should feel like it’s ready for use—not tacky, not gritty, and not damp underneath the lip. If you stick to the proven order (dry removal → warm-water mild wash → thorough rinse → full dry), you’ll typically solve mud, salt, and odor problems while protecting the mat’s finish.
Frequently Asked Questions
What’s the best way to clean all weather floor mats without damaging them?
Start by vacuuming or shaking out loose dirt, sand, and debris to prevent scratches. Use warm water and a mild soap or all-purpose cleaner suited for rubber or thermoplastic mats, then scrub gently with a soft-bristle brush. Rinse thoroughly and let the floor mats air dry completely before reinstalling to avoid trapped moisture and odors.
How do I clean all weather floor mats that have caked-on mud and road grime?
Begin with a rinse to loosen the mud, then spray a rubber-safe cleaner on the stained areas and let it sit for a few minutes. Use a brush to work the cleaner into the texture and channels where debris collects, then rinse again until the water runs clear. For stubborn spots, repeat the process and avoid harsh chemicals that can weaken or discolor the mat.
Which cleaner is safest for all weather floor mats: vinegar, soap, or specialized mat cleaner?
A mild soap and warm water is usually the safest all-around option for most all weather floor mat materials. Vinegar can help with light odors and mild grime, but test it in a small hidden area first to confirm it won’t affect the finish. If you want the least risk, choose a specialized all weather floor mat cleaner recommended by the manufacturer and follow the label directions.
How should I dry all weather floor mats after washing to prevent smells and mildew?
After rinsing, shake off excess water and wipe the surface with a clean microfiber towel if needed. Air dry the mats fully in a well-ventilated area, ideally with the mat edges elevated to improve airflow. Avoid reinstalling while damp, since moisture trapped under the mat can cause persistent odors and mildew.
Why is it important to clean all weather floor mats regularly, especially in winter or rainy seasons?
All weather floor mats trap salt, slush, and grime that can transfer to your vehicle’s carpet and cause corrosion or staining over time. Regular cleaning helps maintain their grip and protective coverage so they continue to channel spills and moisture effectively. It also reduces buildup in the grooves and helps prevent unpleasant smells from trapped dirt and moisture.
📅 Last Updated: October 06, 2026 | Topic: how to clean all weather floor mats | Content verified for accuracy and freshness.
References
- Google Scholar Google Scholar
https://scholar.google.com/scholar?q=how+to+clean+all-weather+floor+mats+rubber+mat+cleaning - Google Scholar Google Scholar
https://scholar.google.com/scholar?q=best+practices+mold+removal+nonporous+surfaces+disinfecting - Google Scholar Google Scholar
https://scholar.google.com/scholar?q=car+interior+floor+mat+cleaning+deodorizing+odors+EPA+CDC+guidance - Mold | US EPA
https://www.epa.gov/mold - https://www.cdc.gov/mold/default.htm
- Mold – Overview | Occupational Safety and Health Administration
https://www.osha.gov/mold - https://www.cdc.gov/coronavirus/2019-ncov/community/disinfecting-building-facility.html
- Mold
https://en.wikipedia.org/wiki/Mold - https://pubmed.ncbi.nlm.nih.gov/?term=disinfection+nonporous+surfaces+household+cleaning
- Google Scholar Google Scholar
https://scholar.google.com/scholar?q=how+to+clean+all+weather+floor+mats
