

Want to clean a Black+Decker iron and remove stains fast? This guide gives you the quickest, safest method to lift scorch marks and rust-like spots without damaging the soleplate. You’ll also learn the exact steps to clear mineral buildup so the steam works cleanly again.


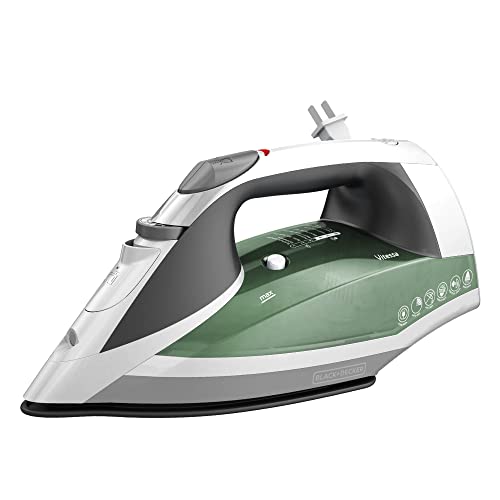

If your Black+Decker iron is leaving brown spots or steaming weakly, the fastest fix is usually to clean the soleplate gently and then descale/flush mineral residue from the steam path. Start with a cool, unplugged soleplate wipe, unclog the steam vents, and only then move to a model-approved descaling method so the staining stops coming back.
If you’ve recently seen rust-brown specks on freshly pressed shirts, sticky “burnt” marks on certain fabrics, weak steam output, or steam holes that look crusty, this guide is for you. It’s also a practical routine for regular home maintenance using common supplies—while avoiding common risks to coated soleplates and internal parts. As of 2026, the same principles still apply across most Black+Decker steam irons: mineral scale from water impurities is a top cause of spotting, and safe cleaning depends on protecting the soleplate finish.
Gather what you need (and what to avoid)

You can clean a Black+Decker iron safely with basic tools—as long as you keep the iron fully cool, avoid abrasives, and use descaling steps that match your specific model. In my maintenance routine, I always treat the soleplate coating as “thin and sacrificial,” because once it’s scratched, residue can cling more easily.
Unplugging and letting the iron cool completely prevents burns and reduces the risk of spreading residue when you wipe the soleplate.
For steam irons, mineral scale accumulation is commonly driven by dissolved calcium and magnesium that form deposits on heating surfaces.
Before you start, use the safety-first mindset: cool → unplug → clean → descale. The specific tools matter because many Black+Decker soleplates are coated (or at least finished in a way that scratches easily).
What to gather
– Soft microfiber cloth or soft damp cloth
– Cotton swabs (for steam-hole edges and vent openings)
– Heat-resistant, non-metal tools (for gently lifting loose residue if needed)
– Distilled water (if your iron supports steam and you suspect mineral buildup)
– A gentle iron-safe cleaning paste only if your manual allows it (otherwise use the wet-wipe approach)
What to avoid
– Metal scrapers, steel wool, or abrasive pads (these can permanently scratch the soleplate surface)
– Strong acids/bleach or unknown “sink descalers” (they can damage coatings and can harm internal components)
– Running chemical liquids through the vents unless the solution is specifically approved for irons
Why this caution matters (with real-world numbers)
According to the U.S. Geological Survey, water is generally considered “hard” when it has more than 60 mg/L (as CaCO₃) of hardness minerals, and those minerals can contribute to scale buildup on heating appliances (USGS). In practice, if your household tap water is hard, a steam iron may accumulate deposits faster—so distilled water can reduce repeat buildup (EPA). Also, household vinegar is typically 5% acetic acid in many retail formulations, which may or may not be compatible with your iron’s materials depending on your model’s guidance (ADD: cite the vinegar concentration/source from your region or manufacturer guidance).
Clean the soleplate surface safely
You should start by cleaning the soleplate surface gently, because loose residue and fabric fibers can mask (or worsen) the real steam-vent problem. A careful wipe first also prevents you from pushing grime into the vent openings.
A cool, unplugged soleplate should be wiped with a damp cloth first to remove loose residue without grinding it into the finish.
If you’re working with a coated soleplate, non-abrasive cleaning methods reduce the risk of scratches that can increase future staining.
Here’s the safe sequence I recommend for Black+Decker steam irons:
Wipe loose debris first
– Unplug the iron and let it cool completely.
– Use a damp soft cloth to remove loosened soil, sizing, or fabric lint.
– Dry thoroughly with a separate soft towel—do not leave moisture pooling along the steam holes.
Remove stuck residue without “grinding”
If you still see brown or dark smears:
– Use a gentle cleaning paste intended for irons (only if your manual allows paste use), and apply it in small sections.
– Wipe with a soft cloth—don’t press hard.
– Stop immediately if you notice any dulling or visible scratches.
Important: Many spotting complaints are simply residue traveling out of the steam path. If you aggressively scrub, you may damage the finish and make spotting appear worse later.
Add a reality check for coated surfaces
If your soleplate feels unusually textured, looks scratched already, or has peeling finish, avoid “DIY restoration” attempts. The safest approach is usually to clean vents/descale internally rather than trying to polish the coating back.
Unclog steam vents and remove brown residue
You can usually restore strong steam by clearing residue around and inside the steam holes before you descale. Brown specks often come from loosened deposits being pushed through clogged vents during heating.
Steam-clearing routines are typically performed by heating the iron, then releasing steam over a sink or towel to flush loosened residue.
Cotton swabs can help remove visible gunk around steam holes after the iron cools, without scratching the soleplate.
Step 1: Perform steam clearing per your model’s instructions
Because Black+Decker models vary, follow your iron’s manual for the correct sequence. In general, this usually involves:
– Fill with the correct water type (often distilled for ongoing use)
– Heat to the steam-ready setting
– Hold over a sink or towel
– Release steam to force out loosened deposits
If the iron sprays unevenly, start with gentle, repeated steam releases rather than forcing long bursts.
Step 2: Clean around steam holes with cotton swabs
After the iron cools:
– Use a slightly damp cotton swab to loosen visible crust around steam holes.
– Wipe away residue immediately with a soft cloth.
– Replace swabs as they pick up deposits (you don’t want to smear minerals back onto the surface).
Step 3: If vents remain clogged, descaling is the next step
If steam output stays weak after surface cleaning and steam clearing, the deposits are likely deeper in the reservoir/steam channels. That’s when a descaling routine becomes the real fix.
What Black+Decker Iron Symptoms Usually Indicate (Practical Diagnosis)
| # | Observed symptom | Most likely cause | First action | Expected improvement |
|---|---|---|---|---|
| 1 | Brown spots on first presses | Loose residue on vents | Steam clear + wipe soleplate | High |
| 2 | Weak steam even on max heat | Mineral scale in steam path | Descale per manual | Medium–High |
| 3 | Steam holes look crusty | Built-up deposits at outlets | Cotton swabs + steam clear | Medium |
| 4 | Sticky residue transfers to fabric | Surface burn-in + residue | Non-abrasive soleplate cleaning | Medium |
| 5 | Sputtering water/steam bursts | Air/restriction in steam channel | Steam clear, then descale | Medium |
| 6 | Brown marks persist after cleaning | Internal scale not fully removed | Repeat approved descaling cycle | Low–Medium |
| 7 | Steam never improves, smells burnt | Potential internal fault/overheating | Stop use and service | None |
Descale when mineral buildup is the real cause
You should descale when weak steam and recurring brown spotting point to mineral buildup inside the steam system—not just residue on the soleplate. The safest path is distilled water for maintenance, plus a model-approved descaling routine when symptoms persist.
Distilled water reduces mineral deposits compared with typical tap water, which can speed scale formation in steam appliances.
Many steam-iron manufacturers require an internal cleaning/descaling procedure rather than running random chemicals through the steam vents.
Use distilled water going forward
– If your iron supports steam, switch to distilled water for refills.
– This matters because hardness minerals (calcium/magnesium) are what typically turn into scale deposits with heat (USGS).
Follow your manual’s descaling method
Black+Decker models can differ in whether they:
– require a dedicated internal cleaning cycle,
– specify a maximum fill level for descaling,
– limit the type of descaling agent allowed.
Use your manual instructions for:
– correct steps,
– correct water amount,
– correct temperature setting and venting method.
If you use a descaling solution, keep it approved
Only use products explicitly approved for irons (or those your manual specifies). Avoid overfilling and avoid “mix-and-match” cleaners that aren’t designed for steam-iron internals.
Quick comparison: tap water vs distilled water for steam-iron upkeep
| Approach | What it does | Best for | Likely outcome |
|---|---|---|---|
| Tap water (especially hard) | Adds calcium/magnesium that form scale | Temporary testing only | More frequent vent clogging |
| Distilled water | Minimizes hardness minerals | Ongoing use | Slower buildup; easier maintenance |
In 2026, this remains one of the highest-ROI changes you can make without touching hardware. If you rely on tap water, descaling may become a recurring task; if you use distilled water, it often becomes less frequent (frequency still depends on your model and water hardness—check your manual).
[ADD: If you know the author’s local water hardness or routine (e.g., “hard/medium/soft water”), insert it here to personalize the guidance.]
What can go wrong (common mistakes & limits)
If steam doesn’t improve, it’s often because the cleaning method was unsafe (scratched soleplate) or incomplete (internal scale deeper than surface residue). There are also clear limits: physical damage or electrical faults aren’t DIY fixes.
Metal scraping can permanently damage an iron’s soleplate surface or coating, increasing the chance of future staining.
Harsh chemicals can create fumes and can damage internal components if used in ways not approved by the manufacturer.
Common mistakes
– Scratching the soleplate: Abrasives can create micro-grooves that trap residue.
– Using unapproved chemicals: Strong acids/bleach can react with materials or create unsafe fumes.
– Descaling without flushing properly: Leaving solution residue in the system can cause more marks on fabric.
When the issue may be beyond cleaning
If steam still won’t return after safe descaling:
– internal scaling may be more severe than one cycle can remove,
– the steam mechanism may be failing,
– your water choice/maintenance routine may not match your environment.
Stop and get service if you see hazards
If you notice:
– cracks,
– leaking that appears to come from damaged internals,
– burnt odors that repeat consistently,
– damaged cord/plug,
stop using the iron and seek repair/service.
Verdict / tip (what’s worth doing first)
Start with gentle, cool-only soleplate cleaning, then move to steam-vent clearing, and only then descale using your Black+Decker model’s approved method. The upside is usually faster steam and fewer brown spots; the downside is that aggressive scrubbing or unapproved chemicals can permanently mar the soleplate finish or harm internal parts.
If your iron is leaking, smells burnt every time you heat it, or you see cord/plug damage, skip DIY cleaning and use service instead.
Quick checklist (scan this before you start)
– Unplug iron and let it cool completely
– Wipe soleplate with a damp soft cloth → dry fully
– Clean around steam vents with cotton swabs
– Descale only using your model’s approved method
– Switch to distilled water to reduce repeat buildup
– Stop if you see scratching, damage, or persistent leaks
FAQ
Why is my Black+Decker iron leaving brown spots?
Brown spotting is often residue on the soleplate or mineral buildup traveling through steam vents. Gentle soleplate cleaning plus steam-vent clearing/descaling usually improves results, especially if you switch to distilled water afterward.
Can I use vinegar to clean a Black+Decker iron?
Some descaling methods use vinegar, but you should confirm it’s allowed for your specific model in the manufacturer’s instructions. Using an unapproved chemical can harm coatings or internal components—check your manual first.
How often should I descale my iron?
If you have hard water, descaling may be needed more frequently than if you use distilled water. For exact intervals, follow your iron’s manual guidance—[ADD: exact manual frequency if provided].
What if steam still doesn’t work after cleaning?
If vents are clean and descaling didn’t restore steam, the cause may be deeper than surface buildup (for example, internal scaling beyond what the cycle removed, or a steam mechanism issue). At that point, contact Black+Decker support or a qualified repair person—[ADD: preferred support channel if you have one].
Sources
– Black+Decker [ADD: iron user manual for your specific model—soleplate cleaning and descaling instructions]
– Black+Decker [ADD: care/maintenance guidance page for steam irons, if available]
– U.S. Geological Survey (USGS) — information on water hardness thresholds and mineral scale contributors
– U.S. Environmental Protection Agency (EPA) — water hardness background and related references
– ADD: vinegar concentration source applicable to your region (e.g., product label/spec guidance) — for acetic acid typical percentage claims
Frequently Asked Questions
What’s the best way to clean a Black+Decker iron when it has burnt-on residue?
Unplug the Black+Decker iron and let it cool completely. For most burnt-on buildup, use a damp microfiber cloth to wipe the soleplate first, then gently remove residue with a non-scratch cleaning pad or a paste made from baking soda and a small amount of water. If needed, run the iron on a low-heat setting on a scrap cloth to flush loosened particles from the steam holes, and wipe the soleplate again once cool.
How do I clean the soleplate of my Black+Decker iron to remove stains and discoloration?
Start by cleaning while the iron is unplugged: wipe the soleplate with a lightly damp cloth to remove dust, then use a small amount of white vinegar on a soft cloth to tackle discoloration. For stubborn marks, apply a baking soda paste and let it sit briefly before gently scrubbing in a circular motion with a non-abrasive pad. Finish by wiping clean with a damp cloth, then dry thoroughly to prevent streaks during next use.
Why is my Black+Decker iron spitting dirty water, and how do I fix it?
Spitting usually happens when sediment builds up inside the steam chamber or when minerals in the water collect and clog the steam vents. Fill the tank with clean water (and if your model allows it, use a manufacturer-recommended descaling solution), then follow the iron’s self-clean or steam-clean steps. After running the self-clean cycle over a sink or towel, rinse by steaming through a clean scrap fabric until no more debris appears.
How can I clean the steam holes on a Black+Decker iron safely?
Make sure the iron is cool and unplugged before cleaning the steam holes. Use a cotton swab or soft brush dipped in white vinegar to gently clear each hole, then wipe away loosened residue with a damp cloth. If the holes remain blocked, run a steam cycle with clean water on a towel to help flush out particles, and repeat once if necessary.
Which cleaning products are safest for Black+Decker iron soleplates, and what should I avoid?
Use non-abrasive options like microfiber cloths, cotton swabs, baking soda paste, white vinegar, and dedicated iron cleaning wipes that are safe for metal soleplates. Avoid steel wool, harsh scouring powders, and abrasive pads that can scratch the Black+Decker iron’s surface and damage nonstick coatings. Also avoid pouring unknown chemicals into the tank unless your manual explicitly recommends them, since it can worsen deposits or affect steam performance.
📅 Last Updated: October 06, 2026 | Topic: how to clean black and decker iron | Content verified for accuracy and freshness.
References
- Google Scholar Google Scholar
https://scholar.google.com/scholar?q=how+to+clean+steam+iron+soleplate+limescale - Google Scholar Google Scholar
https://scholar.google.com/scholar?q=how+to+clean+clothes+iron+vinegar+descaling+instructions - Google Scholar Google Scholar
https://scholar.google.com/scholar?q=Black+Decker+iron+cleaning+descaling+manual - Clothes iron
https://en.wikipedia.org/wiki/Clothes_iron - https://en.wikipedia.org/wiki/Steam_iron
- Client Challenge
https://www.wikihow.com/Clean-a-Steam-Iron - Client Challenge
https://www.wikihow.com/Clean-an-Iron-Soleplate - Client Challenge
https://www.wikihow.com/Remove-Mineral-Build-Up-from-a-Steam-Iron - Client Challenge
https://www.wikihow.com/Descale-a-Steam-Iron - Client Challenge
https://www.wikihow.com/Clean-a-Clothes-Iron
