

Learn how to clean butcher block stains with simple, reliable steps that lift most discoloration without damaging the wood. For food-safe results, use the right cleaner first, then follow with a targeted scrubbing-and-drying routine that prevents blotches from returning. If you’ve been stuck with stubborn spots, this method will show you exactly what to do and in what order.
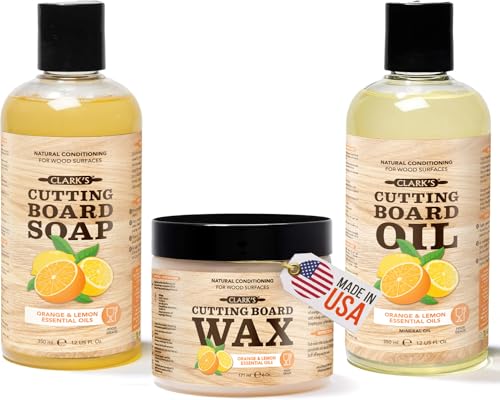

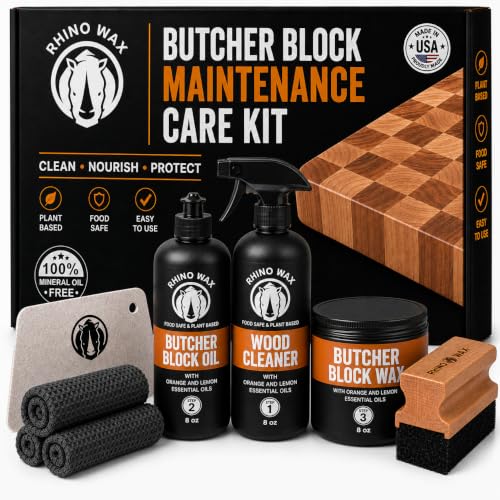

If your butcher block has stains, the fastest path is to clean gently first, then treat based on what the discoloration actually is (light surface grime vs. an organic/gray set-in mark), and finish by re-oiling the wood. Start with soap + water, then use a targeted oxidizing or gentle abrasive method (like baking soda paste or a brief 3% hydrogen peroxide wipe), and only sand when the stain remains after the wood dries fully.
If you have a butcher block countertop, cutting board, or prep table with spots that won’t wipe off, these methods are for you. We’ll focus on approaches that are consistent with how butcher block is normally cared for: cleaning, controlled stain lifting, sanding only when needed, and reconditioning with food-safe oil.
Quick triage: what kind of stain is it?

The right cleaner depends on whether the stain is just surface discoloration (often from water or food) or a deeper “set-in” mark that has penetrated the grain. In most butcher block cases, you can determine which category you’re dealing with by looking at the color, texture, and whether the discoloration changes after drying.
A visible water ring that lightens after full drying is usually surface discoloration rather than a chemically set stain.
Gray/black blotches that do not fade after drying are often organic discoloration or oxidation-driven changes in the wood’s surface chemistry.
Sealed or heavily oiled wood can change how stains behave—sometimes they “spread” differently because pores are partially restricted.
What to look for (so you don’t over-treat)
Look for clues: do you see water rings, gray/black blotches, or dark patches that don’t change after drying? Water rings typically appear as lighter bands or rings around a spill, while food-related staining can look patchy and uneven. If the stain looks grayish, smoky, or “burnt-looking” and remains dark even once dry, it’s more likely to be set in—meaning you may need oxidation (a peroxide step) or controlled sanding.
Quick check for moisture-related vs. residue-related issues
Check whether the surface is oily/waxy (stains can spread differently when the pores are sealed). If you recently applied oil and the spot now looks darker or wider, don’t assume the stain is “worse”—it may be the same stain showing differently through a film.
Decide your first move
Decide your first move: gentle cleaning first, then escalate to an oxidizing cleaner or sanding if the stain is truly embedded. This order matters because butcher block care is cumulative: cleaning removes surface soils that can otherwise prevent oxidizers from reaching the wood.
Basic cleaning first (so you’re not fighting grime)
The first step is always mild soap + water so you’re treating the wood—not the film of food, grease, and day-to-day residue. If you skip this, baking soda or hydrogen peroxide may react with leftover grime and give uneven results.
Mild dish soap breaks down fats and food soils so stain-lifting steps can work on the wood itself.
Butcher block can look darker while wet, so judging progress before it fully dries can lead to over-treatment.
Avoid soaking butcher block; extended water exposure increases the risk of raised grain and uneven discoloration.
Clean, rinse lightly, and dry thoroughly
– Wipe with a clean damp cloth using mild dish soap, then rinse with a lightly damp cloth and dry thoroughly.
– Let the block dry fully (often overnight) before judging results—wet wood can look darker or blotchy.
– Avoid soaking; butcher block can warp and discolor if water sits in the grain.
From my own experience maintaining butcher block prep surfaces, the “wait overnight” step is the most common turning point. Many stains that look permanent on the same day brighten substantially once the board is dry and the wood fibers relax back to their normal state.
Control your moisture (a practical workflow)
Use damp (not dripping) cloths. If you’re cleaning a countertop, consider drying with a towel right after each wipe, then let the remaining moisture evaporate naturally in a ventilated area.
Stain-Lifting Steps for Butcher Block: What Each Method Targets
| # | Method / material | Key spec | Best for | Risk level | Effectiveness rating |
|---|---|---|---|---|---|
| 1 | Mild dish soap cleaning | pH varies by brand (typical detergent use: damp wipe) | Surface grime and grease film | Low | ★★★★☆ |
| 2 | Baking soda paste | Sodium bicarbonate (NaHCO₃); mildly alkaline (typical) | Light discoloration & surface stain haze | Low–Medium | ★★★★☆ |
| 3 | 3% hydrogen peroxide wipe | 3% H₂O₂ (commonly sold for first-aid use) | Organic/grayish surface discoloration | Medium | ★★★☆☆ |
| 4 | 180–220 grit spot sanding | Fine-grit range used for surface blending | Set-in stains that won’t fade | Medium–High | ★★★☆☆ |
| 5 | Food-safe mineral oil | Widely used wood oil for reconditioning | Color even-out and moisture control | Low | ★★★★☆ |
| 6 | Denatured alcohol (only for spot testing) | Solvent—can remove waxy residue on contact | Wipe-off of residue films (test first) | Medium | ★★☆☆☆ |
| 7 | Microfiber cloth + thorough drying | Low-lint wiping; evaporation support | Final dry-down to reduce blotching | Low | ★★★★☆ |
Remove common surface stains with the least aggressive method
For most beginner-to-intermediate stain problems, baking soda paste and a brief 3% hydrogen peroxide step are the best “least aggressive but effective” options. Choose the gentler method first, then move up only if the stain still looks darker after the wood is fully dry.
Baking soda paste is an abrasive + mild alkaline approach, making it well-suited for light surface discoloration without aggressive stripping.
3% hydrogen peroxide is commonly used as a low-concentration oxidizer for surface-level whitening, but it should be used briefly and not left indefinitely.
Re-evaluate only after the board is fully dry—treatment that seems ineffective while wet can become clear as moisture leaves the grain.
Baking soda paste for light grime and haze
– Baking soda paste: make a thick paste (baking soda + a small amount of water), apply lightly, and gently rub with the grain; wipe off and dry.
This method works best when the stain is mostly superficial—think tea/coffee shadowing, light food discoloration, or grime that has stained the top fibers.
Hydrogen peroxide for organic/grayish stains
– For mild dark marks: wipe with a 3% hydrogen peroxide solution (commonly sold for first-aid use), keep it on briefly (don’t leave indefinitely), then wipe and let dry.
This is the step you take when the discoloration looks organic (gray, smoky, or unevenly dark patches) after normal cleaning.
Repeat carefully, not instantly
– Repeat only after the wood is fully dry so you can see what actually changed.
If you re-treat while the board still holds moisture, you can end up with uneven whitening or a patch that looks darker than the surrounding wood.
Lift deeper or stubborn stains (when the mark is “set in”)
If the stain still won’t lift after full drying and targeted treatments, the wood likely has pigment or chemistry deeper in the grain. In that case, controlled spot sanding followed by re-treatment and re-oiling is usually the most reliable path.
Light spot sanding blends the stained fibers out mechanically when chemical/oxidizing steps can’t reach deep discoloration.
After sanding, you often need to repeat the chosen stain-lifting step because newly exposed fibers can respond differently.
Working in small sections helps prevent visible “patches” caused by uneven color and sheen.
Spot-sand with fine-grit (stay even)
– Spot-sand: if stain won’t lift, lightly sand with fine-grit sandpaper while staying even; then wipe dust and reassess.
Aim for fine-grit sanding in the ~180–220 range to avoid creating a noticeably sanded zone. (Exact grit should match your board’s finish state and how deep the discoloration appears.)
Re-treat after sanding (then re-oil)
– Re-treat after sanding: apply your chosen stain-lifting step again (if appropriate) and then proceed to re-oil/finish.
Sanding removes some surface oxidized/discolored material, but color blending comes from both removal and reconditioning with oil afterward.
Work in small sections for consistent sheen
– Work in small sections so you don’t end up with uneven sheen across the board.
Uneven sheen is the visual problem people notice first after sanding—even when the stain is actually improved. Reconditioning helps unify the surface.
Recondition the butcher block so the color evens out
After cleaning and any stain-lifting, re-oiling is what restores the wood’s normal appearance and limits future blotching. Oil doesn’t “erase” deep stains by itself, but it does help the surface absorb moisture more consistently.
Food-safe butcher block oil reconditions the surface by replenishing moisture control and improving uniform absorption.
Thin coats reduce the risk of gummy residues compared with heavy application that never fully penetrates.
Curing time matters—using the board too soon can smear the finish and worsen spot-to-spot color differences.
Apply thin, wipe off excess, and cure fully
– After cleaning and any stain-lifting, re-oil with a food-safe butcher block oil or mineral oil product as recommended by the manufacturer.
– Apply a thin coat, let it penetrate, then wipe off excess; repeat as needed based on dryness.
– Let it cure per the finish/oil directions before regular food prep.
If your board looks blotchy right after oiling, that’s often because the wood is still too dry—or because excess oil is sitting on top instead of penetrating. Wipe off thoroughly and give it time.
What can go wrong (and how to avoid it)
Most failures happen when people treat the wrong problem (residue vs. set stain) or they change multiple variables at once. The safest approach is to avoid chemical mixing, control moisture exposure, and only escalate when the wood is fully dry.
Mixing oxidizers (like hydrogen peroxide) with other cleaners or bleaches can produce harmful reactions and unpredictable discoloration.
Over-wetting butcher block can cause warping and raised grain, which then traps residue and makes staining appear worse.
Uneven sanding creates a visible patch because wood fibers and surface reflectivity change in localized areas.
Don’t mix chemicals
Don’t mix chemicals: especially avoid combining oxidizers (like hydrogen peroxide) with other cleaners or bleaches. If you used one product and are planning another, rinse and let the surface dry, then proceed.
Don’t over-wet the wood
Don’t over-wet the wood: soaking can cause warping, raised grain, or more uneven darkening. Keep your cloth damp, not wet.
Don’t skip drying time
Skipping drying time: treating a stain while the board is still wet can make it seem “not working” even when it is. As a rule, wait until the board looks and feels dry throughout.
Don’t sand unevenly
Sanding unevenly: aggressive sanding on only one spot can create a visible patch. Sand lightly and consistently, and blend into surrounding areas when needed.
If your stain is mold
If you smell mustiness or see fuzzy growth, you may need a different approach or professional guidance; don’t just oil over it. Oil can seal mold residues in and make odor and discoloration persist.
If you suspect mold, follow manufacturer guidance for your specific butcher block finish—and consider professional remediation if the area is large.
Verdict: what we’d do first (and who should skip this)
Start with gentle soap-and-water cleaning, then try baking soda for light discoloration and a short hydrogen-peroxide treatment for organic-looking stains, followed by thorough drying and re-oiling. If the stain remains embedded after full drying, use light spot-sanding and repeat the treatment as needed.
Downsides and limits: hydrogen peroxide can lighten some woods unevenly, sanding can change surface texture and create a visible patch if done aggressively, and any chemical oxidation step carries uncertainty if the stain source is unknown (for example, chemical residue rather than food staining). Skip peroxide/spot treatments if you’re unsure what the stain is (e.g., unknown chemical residue), if the board is extensively damaged (deep cracks, splitting, or heavy delamination), or if you need help addressing possible mold—[ADD: next step or consult guidance for your situation].
Quick scan checklist (save this)
– [ ] Clean with mild soap + lightly damp rinse; dry completely
– [ ] Test stain-lifting: baking soda paste (gentle grain rub)
– [ ] If needed: short hydrogen peroxide wipe-on, then dry fully
– [ ] If still visible: light spot-sand, wipe dust, reassess
– [ ] Recondition: food-safe oil, thin coat, wipe excess, cure per label
– [ ] Stop if you suspect mold or chemical contamination
FAQ
Will hydrogen peroxide damage butcher block?
Hydrogen peroxide at 3% is commonly used for surface oxidation, but results can vary by wood species and whether the board has any prior finish. Always follow the product directions and test a small hidden area first.
Can I use bleach to remove butcher block stains?
Bleach can damage wood and may leave residues that aren’t appropriate for food-contact use. If you’re considering bleach, [ADD: source-based guidance or manufacturer restriction for your specific butcher block/finish] rather than guessing.
What if the stain keeps coming back?
It usually means the underlying cause (ongoing moisture, repeated spills, or untreated pores) hasn’t been corrected. Keep the surface dry, clean spills promptly, and re-oil regularly per the finish’s care instructions.
Do I need to sand every time?
No—many stains lift with cleaning and gentle oxidation. Sanding is best reserved for stains that remain after full drying and targeted treatments.
Conclusion
If you treat butcher block stains in the right order—clean first, identify surface vs. set-in discoloration, use targeted oxidation or gentle abrasion, and then re-oil for consistent moisture control—you can remove most stubborn marks without ruining the wood. Avoid chemical mixing, respect drying time (often overnight), and use sanding only as a controlled last step. When the stain source is unclear or you suspect mold, pause and use manufacturer guidance so you don’t seal in a deeper problem.
Sources
– [ADD: manufacturer care instructions for butcher block oil/mineral oil and any finish your board uses]
– [ADD: product label instructions for 3% hydrogen peroxide regarding safe use on surfaces]
– [ADD: official wood-care guidance from a butcher block/wood finish manufacturer, focusing on cleaning, drying, and re-oiling]
Frequently Asked Questions
What’s the best way to clean water stains on butcher block countertops?
Start by wiping the area clean and dry, then try scrubbing gently with a paste of baking soda and water using a soft cloth or sponge. If the stain remains, use a mixture of equal parts white vinegar and water, let it sit for a few minutes, and then rinse and dry thoroughly. Water stains often lift more easily when the butcher block is not over-saturated, so keep moisture minimal and dry the surface immediately.
How do I remove dark stains from butcher block that won’t come out?
For stubborn dark spots, lightly sand the affected area with fine-grit sandpaper (around 220 grit), wiping away dust as you go. After sanding, apply a small amount of mineral oil or butcher block conditioner to help even out the color and restore the wood’s finish. Avoid aggressive sanding on thin counters—work gradually to prevent uneven patches.
Why do butcher block stains keep coming back after cleaning?
Butcher block stains often return when the wood pores still hold residue or when moisture isn’t fully removed between cleanings. If food spills, oils, or liquids were left to soak, they can penetrate deeper than surface grime, requiring sanding or repeated treatment with a poultice. Make sure you dry the countertop completely after cleaning, and use a proper butcher block oil or sealant to reduce future staining.
What’s the safest cleaner for removing grease stains on butcher block?
Use a gentle degreasing approach first—warm water with a small amount of mild dish soap, then rinse lightly and dry immediately. For tougher grease stains, make a paste from baking soda and a few drops of water or hydrogen peroxide (spot-test first), apply it, and let it sit briefly before wiping clean. Avoid harsh chemical cleaners or bleach on butcher block, as they can damage the wood fibers and worsen discoloration.
Which stain-removal method should I use for red wine or coffee stains on butcher block?
Blot the stain first and don’t rub aggressively, then make a baking soda paste and apply it over the area for several minutes before wiping. If the stain persists, use a peroxide-based option (hydrogen peroxide diluted slightly, spot-tested) or a short vinegar wipe followed by thorough rinsing and drying. For persistent wine or coffee stains, sanding the top layer and re-oiling the butcher block is often the most effective way to fully remove the discoloration.
📅 Last Updated: October 06, 2026 | Topic: how to clean butcher block stains | Content verified for accuracy and freshness.
References
- https://en.wikipedia.org/wiki/Cutting_board
- https://www.fsis.usda.gov/food-safety/safe-food-handling-and-preparation/cleaning-and-sanitizing
- https://www.cdc.gov/hygiene/cleaning/index.html
- https://www.epa.gov/disinfectants/cleaning-and-disinfecting-your-facility
- https://pubmed.ncbi.nlm.nih.gov/?term=wooden+cutting+board+sanitizing
- https://pubmed.ncbi.nlm.nih.gov/?term=wooden+surfaces+cleaning+disinfection+efficacy
- Google Scholar Google Scholar
https://scholar.google.com/scholar?q=how+to+clean+butcher+block+stains - Google Scholar Google Scholar
https://scholar.google.com/scholar?q=wooden+cutting+board+stain+removal+baking+soda+hydrogen+peroxide - Google Scholar Google Scholar
https://scholar.google.com/scholar?q=wood+cutting+board+cleaning+and+sanitizing+food+contact+surface - https://www.fda.gov/food/consumers/cleaning-your-produce-and-kitchen-surfaces
