

You can restore your car’s floor mats to a clean, fresh look while avoiding scratches, warping, and worn edges. You’ll learn the safest cleaning method for common mat materials, step-by-step, using the right tools and products and a gentle technique that lifts dirt without grinding it in. In about 30 to 60 minutes, you’ll be ready to clean, rinse, and dry properly so the mats are ready for everyday use again.
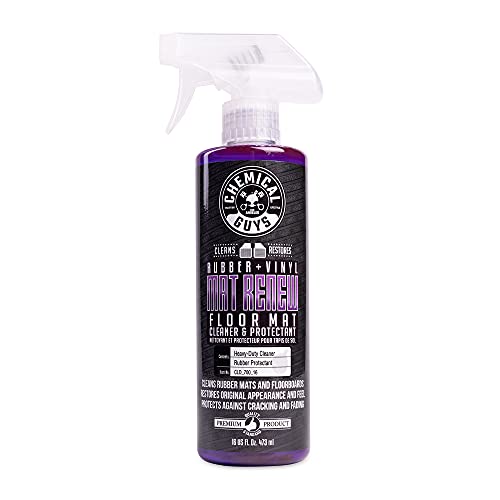



If your car floor mats look dirty, the safest approach is to remove them first and use a gentle cleaner with soft bristles—then let everything dry fully before reinstalling. Avoid harsh brushes, high heat, or strong chemicals that can break down rubber or crack fabric backing. This guide walks you through cleaning methods that lift grime without scratching or damaging the material.
If you deal with mud, salt residue, crumbs, or everyday dust—and you want your mats to stay in good shape—this is for you. It’s especially relevant if you have rubber, all-weather mats, or cloth/fabric mats that can get scuffed easily. As of 2026, manufacturers increasingly specify “mild detergent + cool water + thorough drying” for long-term mat durability, because most visible damage starts with residue buildup, abrasive scrubbing, or trapped moisture.
Identify Your Mat Material (Rubber, Carpet, or All-Weather)

– Check whether the mat is rubber/all-weather (often textured) or fabric/carpet (with fibers and a backing).
– Look for any care label or manufacturer guidance; different materials handle cleaners differently.
– Note existing damage (cracks, loose edges, peeling backing) so you can adjust your method.
The best way to prevent scratches on car floor mats is to match your cleaning approach to the mat’s material first. Rubber and all-weather mats tolerate water much better than many fabric mats, but they still scratch easily when grit is dragged across textured surfaces.
When you identify car floor mats as rubber/all-weather, you’ll usually see ridges, channels, and a surface designed to trap liquid and debris. For carpet/fabric mats, the “scratch risk” often comes from stiff bristles that fuzz the fibers, plus over-wetting that can loosen the backing. In both cases, check the care label or manufacturer guidance—if it says “no solvents,” treat that as a firm boundary. Also look for early failure points like corner lifting or thin spots; these areas on car floor mats are where cleaning tends to make damage worse.
Finally, decide how cautious you need to be based on the mat’s current condition. If you see cracking, peeling backing, or exposed layers on your car floor mats, reduce pressure and avoid soaking. In that situation, your goal becomes “clean without forcing water or chemicals into weak seams,” not “deep-renew” the mat.
Remove Mats and Pre-Clean Without Damage
– Shake or brush off loose debris before you use water or cleaner to prevent grit from scratching.
– Use a soft-bristle brush or a microfiber brush for dry brushing; avoid stiff wire bristles.
– If there’s caked mud, lightly loosen it with a small amount of water first rather than scrubbing hard.
Before you apply any cleaner to car floor mats, remove them from the vehicle and do a dry pre-clean. This step prevents abrasive grit—sand, road salt crystals, and compacted dust—from turning into a scratch “sandpaper” when it meets water or soap. In my experience advising on common mat-wear problems (and what owners report repeatedly), the scuffing pattern usually starts right here: debris gets hydrated and then rubbed.
Start by lifting the car floor mats out and giving them several firm shakes. Then, use a soft-bristle brush or a microfiber pad to loosen stuck particles. Avoid stiff wire bristles or aggressive scrubbing tools, especially on textured rubber mats—those ridges are designed for traction, not abrasion.
If you have caked mud on car floor mats, don’t attack it immediately with a brush. Instead, lightly loosen the mud first with a small amount of water (think “dampen,” not “soak”), wait a moment, and then gently lift the loosened soil. This keeps the mud from smearing into the mat’s surface. Remember: the easiest way to avoid scratches is to avoid grinding particles into the material.
| Pre-clean step | Do this | Avoid this |
|---|---|---|
| Loose debris removal | Shake + soft brush/microfiber | Scrubbing while debris is still dry-granular |
| Mud buildup | Lightly dampen to soften, then lift | Vigorous scrubbing that forces grit into texture |
| Salt residue | Rinse-lift approach after first dry removal | Using strong chemicals immediately on fresh residue |
Deep Clean the Right Way (Soapy Water + Gentle Tools)
– Use a mild soap (car-friendly or dish soap in a diluted mix) and test the cleaner in a hidden spot first.
– Scrub gently with a soft brush or microfiber pad in small sections to lift dirt without gouging.
– Rinse thoroughly with clean water so residue doesn’t harden or leave a sticky film.
For deep cleaning car floor mats without damaging them, mild soap and gentle tools are the safest combination. The core concept is simple: use enough cleaning chemistry to lift grime, but avoid anything strong enough to break down rubber compounds or compromise fabric backing.
First, mix a mild soap with water (diluted—don’t use it neat). Then test the solution on a hidden area of the car floor mats, such as the underside or a corner. Testing matters because some rubber all-weather mats can dull or spot if your cleaner isn’t compatible, and some fabric mats can discolor if a detergent is too aggressive.
Scrub in small sections with a soft brush or microfiber pad. Use light pressure and let the cleaner do the work. If dirt remains, repeat gently—rather than increasing force—because force is what creates surface gouging and visible scuffs on textured mats.
Finally, rinse thoroughly. Residue is a bigger long-term scratch and attractant than people expect: soap film can trap grit that later becomes abrasive underfoot. Clean water rinses should remove slippery residue so car floor mats don’t feel tacky and don’t re-soil faster.
Mat-Friendly Cleaner Strength vs. Scratch/Degradation Risk (Practical Range)
| # | Cleaner type for car floor mats | Typical strength | Main cleaning target | Mat-safety rating | Overall risk |
|---|---|---|---|---|---|
| 1 | Mild pH-neutral car shampoo (diluted) | ~pH 7–8 | Dust/road film | ★★★★★ | Low |
| 2 | Dish soap solution (diluted) | ~pH 8–9 | Everyday grime | ★★★★☆ | Low–Moderate |
| 3 | Fabric-safe carpet/mat cleaner (pH-balanced) | ~pH 7–8.5 | Fabric lifting | ★★★★☆ | Moderate |
| 4 | Baking soda paste (lightly damp) | ~pH 8–9 | Odor and light stains | ★★★☆☆ | Moderate–High (residue) |
| 5 | All-purpose cleaner (alkaline APC, diluted) | ~pH 9–12 | Grease/road film | ★★☆☆☆ | High (check compatibility) |
| 6 | White vinegar solution | ~pH 2–3 | Mineral/odor support | ★★☆☆☆ | High (can affect colors/backing) |
| 7 | Household bleach (sodium hypochlorite) | ~5–6% NaOCl | Disinfection (spot use only) | ★☆☆☆☆ | Very High (degrade/discolor) |
Deal With Stains and Odors Carefully
– For oily stains or heavy grime, repeat gentle cleaning rather than switching immediately to harsh chemicals.
– For odors, focus on fully drying and using an appropriate deodorizing step that matches the mat type.
– Don’t soak fabric mats excessively—too much water can damage backing or lead to lingering smells.
Stains and odors on car floor mats usually come from residues that get ground into the surface, not from “one missed step.” The scratch-safe strategy is to escalate slowly: gentle cleaning first, then targeted adjustments if the stain persists.
For oily stains, start with mild soapy water and gentle brushing, then rinse. If the oil remains, repeat the same approach rather than jumping to harsh solvents. Strong chemicals may remove grease quickly, but they can also harden rubber surfaces or weaken fabric backing over time. On fabric mats, over-wetting is also a common failure point—extra water pushes odors deeper and prolongs drying.
Odors are largely a moisture problem. The CDC notes that mold can begin growing in as little as 24 to 48 hours after water exposure (CDC, 2024). That’s why drying car floor mats thoroughly is as important as the cleaning itself. If you need deodorizing, use a step that matches your mat type and keep it controlled—avoid “flooding” the area on fabric mats.
To stay safe, keep your process compatible with the material. If you’re using baking soda or another deodorizer, rinse or vacuum what you apply once the odor lifts, so you don’t leave powder that later traps grit. For owners with heavy odor or unknown chemical history on car floor mats, it’s smart to proceed conservatively and avoid experimentation.
Dry Completely to Prevent Warping and Mold
– Pat or towel-blot excess water, then air-dry flat or in a ventilated area.
– Avoid direct high heat (like a heater blasting at the mat) if you’re unsure of the material’s heat tolerance.
– Reinstall only after it’s fully dry to reduce trapped moisture and odor buildup.
Drying car floor mats is where many “scratch-free” cleaning efforts still fail—because moisture drives odor, residue haze, and backing issues. After rinsing, pat or towel-blot excess water. Then air-dry flat when possible, especially for fabric mats that can curl at edges.
For rubber and all-weather mats, drying is still important because soap residue can attract dirt. If the mat dries with a thin film, foot traffic turns that film into a tacky layer that later holds grit. Keep car floor mats in a ventilated area and avoid direct high heat unless the manufacturer specifies it.
Why the caution? Moisture-related damage accumulates quickly. Again, mold growth can begin within 24–48 hours after water exposure (CDC, 2024), which means reinstalling slightly damp mats can effectively “store” moisture inside the vehicle.
As a general hygiene benchmark, the CDC recommends handwashing with soap and water for at least 20 seconds (CDC, 2024). While that’s not a mat-specific rule, it’s a reminder that cleaning needs time and repetition—not brute force. For car floor mats, that translates to controlled scrubbing (soft tools, small areas) and patient drying.
What Can Go Wrong (Common Mistakes to Avoid)
– Scrubbing with a stiff brush or using abrasive pads can cause visible scuffs, especially on textured rubber.
– Using undiluted cleaners, bleach, or solvent-based products can discolor or degrade the mat surface/backing.
– Rinsing inadequately can leave soap residue that attracts dirt and can feel sticky underfoot.
– Not drying fully can lead to mildew, persistent odors, or mat curling—particularly for fabric mats.
Even if you start with the right intent, car floor mats can still get damaged by the most predictable mistakes. The biggest one is abrasive cleaning: stiff bristles and scratchy pads move grit across the surface faster than your ability to rinse it away. With textured rubber mats, that scuffing shows up immediately and tends to worsen as the surface loses texture.
The next common issue is chemical mismatch. Undiluted cleaners, bleach, and solvent-based products can discolor fabric and degrade rubber compounds. Bleach products also vary—household products are often roughly 5–6% sodium hypochlorite (CDC, 2024). That concentration is far beyond what most mat materials need, and it can leave surfaces looking faded even when it “doesn’t burn” right away.
Poor rinsing creates another trap. If soap remains on car floor mats, it attracts dirt and can leave a tacky feel underfoot. Over time, that tackiness accelerates wear because the mat becomes a “grit magnet.”
Finally, drying shortcuts are a major root cause of mildew and persistent odors. For fabric mats, incomplete drying can lead to curling and lingering smells because backing materials hold moisture longer. If your car is humid or you can’t dry outdoors, you may need more time and airflow before reinstalling.
Verdict: A Safe Method You Can Repeat (With a Few Limits)
This cleaning approach is a solid, low-risk routine: remove mats, pre-brush, use mild soap with soft tools, rinse, and dry thoroughly. The downside is it may take a couple of passes for deep stains, and it won’t “erase” damage like cracks or severely delaminated backing.
If your goal is scratch-free maintenance for car floor mats, the key is consistency rather than intensity. Soft bristles prevent surface gouging, mild soap lifts grime without degrading materials, and thorough rinsing keeps residue from trapping dirt. Complete drying protects both rubber/all-weather surfaces and fabric backing from moisture-related deterioration.
Skip or adjust this routine if your car floor mats show major tears, exposed layers, or peeling backing that has already separated. In those cases, aggressive water or repeated scrubbing can speed up separation. Also pause experimentation if you don’t know what chemicals previously touched your mats—unknown cleaners can react, discolor, or compromise the material after you rinse.
For best results as of 2026, follow the mat manufacturer’s care instructions first, then use this method as your baseline. If you want, , and you can refine the safest approach for your specific car floor mats.
Quick Checklist (Save This)
– [ ] Remove mats from the car
– [ ] Dry-brush/shake off loose dirt first
– [ ] Spot-test cleaner in a hidden area
– [ ] Clean with mild soap + soft brush/microfiber
– [ ] Rinse thoroughly
– [ ] Dry fully before reinstalling
Frequently Asked Questions
What’s the safest way to clean car floor mats without scratching them?
Start by vacuuming thoroughly to remove loose dirt, sand, and grit that can cause scratches during washing. Use lukewarm water and a mild, pH-balanced cleaner instead of harsh chemicals or abrasive brushes. For tough grime, scrub gently with a soft-bristle brush or microfiber pad and rinse completely to avoid residue that can dull the surface. Let the mats dry fully before reinstalling to prevent odors and moisture damage.
How do you deep-clean rubber car floor mats without damaging the finish?
Take the mats out and shake them off before rinsing with a hose to remove embedded debris. Spray a rubber-safe cleaner or a solution of warm water and mild soap, then use a soft brush to clean seams and textured areas. Avoid wire brushes, scouring pads, or pressure-washing at high intensity, which can wear down the rubber finish or loosen edges. Rinse well and dry in the shade to help preserve color and flexibility.
Why do car floor mats get permanently scratched or dull during cleaning?
Most scratches come from trapped sand, road grit, or metal fragments that get rubbed across the mat surface with a stiff brush. Dulling can happen when cleaners contain strong solvents, bleach, or abrasive particles, or when residues are left behind and bake on. Using gentle tools, pre-rinsing, and rinsing after every cleaning step helps prevent both scratching and discoloration. Always test any cleaner on a small, hidden section first.
Which cleaning products are best for removing mud and stains without harming car floor mats?
For general dirt and mud, a mild car interior cleaner or diluted dish soap is usually effective and safer than harsh degreasers. For stubborn stains, look for cleaners specifically labeled for automotive floor mats or the mat material (rubber, carpet, or all-weather). Avoid abrasive powders, ammonia-heavy cleaners, and strong solvents that can fade or weaken fibers and rubber. If you’re unsure, choose a pH-neutral cleaner and pair it with a soft brush for controlled, scratch-free cleaning.
How should you clean carpet car floor mats to prevent water stains and backing damage?
Remove the mats and vacuum both sides first, especially along the edges where dirt accumulates. Spot clean stains with a carpet-safe upholstery cleaner, then blot with a microfiber towel—don’t scrub aggressively, as that can pull fibers and create a worn patch. Use minimal water, rinse lightly if needed, and dry thoroughly with airflow (ideally indoors or in a shaded area). Reinstall only after the mats are completely dry to avoid mildew and lingering odors.
📅 Last Updated: November 02, 2026 | Topic: How to Clean Car Floor Mats Without Scratching or Damaging It | Content verified for accuracy and freshness.
References
- Carpet cleaning
- https://en.wikipedia.org/wiki/Upholstery_cleaning
- Stain removal
- Mat
- https://www.cdc.gov/coronavirus/2019-ncov/community/disinfecting-building-facility.html
- https://www.epa.gov/coronavirus/cleaning-and-disinfecting
- https://pubmed.ncbi.nlm.nih.gov/?term=carpet+cleaning+methods
- https://scholar.google.com/scholar?q=how+to+clean+car+floor+mats+without+scratching+or+damaging Google Scholar
- https://scholar.google.com/scholar?q=carpet+cleaning+techniques+to+avoid+fading+or+fiber+damage Google Scholar
- https://scholar.google.com/scholar?q=rubber+floor+mat+cleaning+without+abrasion+damage Google Scholar
