

Get mildew off pool floats fast with a simple step-by-step cleaning method that actually removes black and green buildup without damaging the material. This guide tells you exactly what to use, how to scrub, and how to rinse so your floats look clean and stay that way. Follow these easy steps and you’ll stop mildew from returning before your next swim.


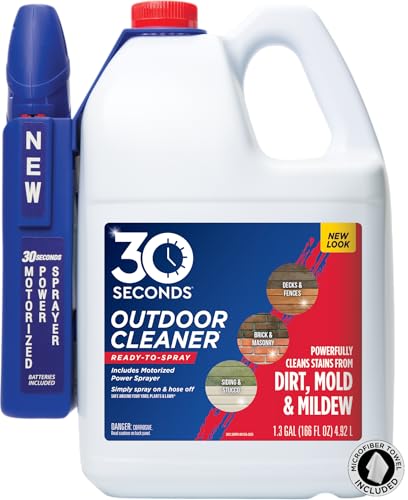
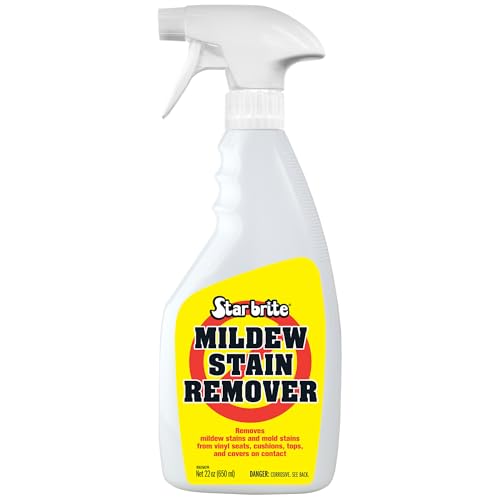
Scrub mildew off pool floats using a mildew cleaner or diluted disinfectant meant for non-porous surfaces, then rinse thoroughly and dry completely. The key is to match the cleaner to the float material, avoid harsh abrasives, and keep the float fully dry afterward so it doesn’t return. If your floats smell musty, have visible black/gray spots, or feel “slimy,” this guide walks you through a safe cleaning routine and what to avoid so you don’t damage the foam/vinyl/rubber.
If you manage a home pool (or maintain guest amenities) and you’re seeing recurring mildew on float storage racks, this is for you. The steps below focus on practical cleaning while protecting the float’s seams, coatings, and foam structure—especially important when mildew keeps coming back.
What You’ll Need (and Safety First)

You can clean mildew safely by using mild soap plus a mildew/mold product that explicitly says it’s safe for the float’s surface type (vinyl, rubber, or foam) and by avoiding bleach-and-scrub shortcuts. The goal is to remove the biofilm (the slimy layer mildew spreads on) without degrading the float material or leaving irritant residue behind.
According to CDC, cleaning visibly dirty surfaces before disinfecting improves results because disinfectants are less effective on grime and organic material.
According to EPA, mold can begin to grow on damp materials within 24–48 hours, which is why drying and moisture control matter as much as the cleaner.
According to EPA, maintaining indoor relative humidity below 60% helps inhibit mold growth; the same moisture-control principle applies when you store floats.
Choose tools and chemicals that match the float material
For pool floats, “mildew remover” needs more specificity than “something that smells strong.” Look for products that list mold/mildew and are intended for non-porous surfaces (vinyl/rubber coatings). For foam, you typically need extra care because foam is more sensitive to solvents, aggressive oxidizers, and prolonged saturation.
Use:
– Mild dish soap
– Soft sponges, microfiber cloths, or soft-bristle brushes (no wire bristles)
– A mildew remover that states it’s safe for the float surface type (vinyl/rubber/foam)
Avoid:
– Abrasive pads that can scratch coatings and open tiny channels for mildew to return
– “Unknown mixes” (mixing cleaners can create hazardous gases)
– Cleaning over an active pool or without controlling runoff (disinfectant runoff is not what you want in pool water)
Safety setup that prevents irritation and mess
– Wear gloves and ventilate the area (mold odors and disinfectant fumes are irritants).
– If you use bleach-type products, rely on the label for dilution and contact time—don’t “eyeball” strength.
– Do the work on a driveway/patio with controlled drainage, not directly where runoff can flow into your pool.
A practical bleach example (for non-porous surfaces only)
If you’re using a bleach-type disinfectant on an appropriate surface (often vinyl or rubber), CDC provides guidance for mixing household bleach solutions. For reference:
– CDC lists a commonly used dilution of 1/3 cup bleach per gallon of water (or 4 teaspoons per quart) for hard, non-porous disinfection, while emphasizing label/contact-time follow-up. CDC
(Always verify your float manufacturer’s care instructions before using bleach, especially on foam.)
Step-by-Step: Clean Mildew Off Pool Floats
You get the best results by pre-rinsing, washing with dish soap first, applying a label-approved mildew treatment, scrubbing gently during the product’s dwell time, then rinsing and drying fully. This sequence removes both the visible film and the microscopic residue that causes “return mildew.”
According to CDC, disinfectants should be used according to label dilution and contact (wet) time for effectiveness.
According to EPA, mold growth is moisture-driven, so incomplete drying after cleaning can lead to rapid reappearance.
According to CDC, never mix cleaning chemicals; mixing disinfectants can create dangerous byproducts.
Step 1: Remove and pre-rinse
Rinse the float with clean water to knock off loose growth and dirt. This matters because mildew stain removal is much harder once grime bonds to the surface.
Tip: Use a moderate flow—not a high-pressure blast—because seams, glued edges, and coatings can fail.
Step 2: Wash the surface first
Use warm water + dish soap and scrub gently to remove the film that mildew “feeds on.” Mildew often looks superficial, but a slimy layer can remain and block the next cleaner from contacting the surface properly.
– Work in small sections
– Focus on seams, folds, valve areas, and any textured areas where moisture traps happen
Step 3: Apply a mildew treatment
Apply your mildew treatment and follow the label exactly for:
– Dilution
– Contact/dwell time (how long the product must stay wet on the surface)
Don’t guess ratios. Pool float mildew is stubborn, but chemistry needs precision.
If you’re using a bleach-type disinfectant: use only dilution and timing guidance consistent with your product label and CDC-type dilution examples. Then proceed to thorough rinsing.
Step 4: Gently scrub, then let it sit
Use light pressure with a soft sponge or sponge-brush combo. Many mildew removers work better after a short dwell time rather than constant “elbow grease.”
– Reapply if the label allows it and mildew remains visible
– If you see coating whitening, bubbling, or peeling, stop and rinse—your cleaner may be too aggressive for that material
Step 5: Rinse well
Rinse until there’s:
– No slippery residue
– No chemical smell lingering
– No slick “film” that can trap odor and moisture
If you skip rinsing, disinfectant residue can irritate skin and can also create conditions where staining reappears faster.
Rinse, Dry, and Prevent Mildew From Coming Back
You prevent mildew return by drying completely—especially in seams and folds—then storing the float dry and ventilated. Cleaning only the visible black/gray spots doesn’t fix the moisture problem that drives new growth.
According to EPA, mold can begin growing on damp materials within 24–48 hours, so “mostly dry” is often not enough.
According to EPA, keeping moisture low (including humidity control) is a core strategy to prevent mold.
Dry completely (this is non-negotiable)
Wipe off excess water, then air-dry in a shaded-but-ventilated spot. Sun drying can help, but only if your float’s care instructions allow it—some foams and printed finishes can fade or degrade with prolonged heat.
Key checks before storage:
– Seams and welded edges: look and feel for dampness
– Valve areas and any folds: mildew often “hides” here
– Touch test: the float should feel fully dry, not cool-wet
Store dry and flat/ventilated
– Avoid stacking floats when they’re even slightly damp.
– If you use a storage bin, choose one that doesn’t trap moisture or allow airflow (or store in a way that prevents condensation).
Reduce future moisture triggers
– Don’t leave floats submerged for long periods when you can avoid it.
– If the float material tolerates it, rinse off chlorinated/salty water after use, then dry before storage.
– After any cleaning, treat the storage location like part of the process—closed closets and sealed bags can restart mildew even after a perfect wash.
Pros/cons: choose prevention tactics based on what’s causing the return
Some mildew “returns” because the cleaning is incomplete; other times it returns because the storage environment is damp.
What Can Go Wrong (Common Mistakes)
You can damage floats or make mildew come back faster when you use harsh chemicals, skip rinsing, or store floats while any moisture remains. The most common issues are material incompatibility and incomplete drying.
According to CDC, residues left on surfaces can reduce safety and can undermine disinfection outcomes, which is why thorough rinsing (when required by the label) is important.
According to EPA, moisture control is central to preventing mold; if moisture remains after cleaning, mold can recur quickly.
Common mistakes that actually cause problems
– Using the wrong chemical for the material. Strong solvents, abrasive pads, and “heavy-duty” cleaners can discolor vinyl/rubber or degrade foam coatings.
– Not rinsing enough. Leftover residue can irritate skin and may make surfaces more prone to future staining.
– Leaving moisture behind. Mildew often reappears within days if the float is stored damp or in a closed bag/container.
Edge cases: when the “cleaning” isn’t the real fix
– Peeling, cracking, or delaminating areas: cleaning can’t stop ongoing damage. If the float surface is breaking down, mildew can colonize deeper layers.
– Mildew in seams you can’t reach: surface cleaning helps, but trapped moisture can persist.
– Strong odors that return quickly: recurring odor after proper cleaning often means storage conditions or hidden moisture issues are the main driver.
A note on bleach and disinfectants
Bleach-type products are effective for hard non-porous surfaces when used correctly, but they’re not universally safe for foam finishes or damaged coatings. If your float label says not to use bleach/disinfectants, follow that guidance.
And regarding real-world outcomes:
Verdict: Best Approach for Mildew on Pool Floats
The best approach is soap-and-water pre-wash, then a label-approved mildew product matched to the float material, followed by thorough rinsing and complete drying before storage. This method balances stain removal with material safety.
According to CDC, disinfecting products must be used according to the label for dilution and the time the surface remains wet.
According to EPA, mold remediation strategies focus on removing sources of moisture and cleaning contaminated materials; drying is not optional.
Choose based on float material (and move cautiously)
– If the float is vinyl or rubber: start with dish soap + a label-approved mildew/mold product, scrub gently, rinse thoroughly, then dry completely.
– If the float is foam or has a delicate finish: go slower—test any cleaner in a small hidden spot first and avoid anything the label doesn’t explicitly cover.
– If you see peeling/cracking: skip aggressive DIY chemicals. If the surface is already failing, you may be cleaning a “moving problem,” where damage continues under the mildew.
Downsides and who should skip this
– If the float is heavily degraded (tearing seams, exposed foam, coating flaking), cleaning may not restore it and can increase skin irritation risk.
– If you’re unsure about product compatibility, use only mild soap and follow the manufacturer’s care label. When in doubt, replacing a damaged float is often safer than repeatedly treating it.
Common Household Cleaner Strengths Used for Mold/Mildew Cleaning
| # | Cleaner / Active | Typical Consumer Strength | Best For (Surface Use) | Float Material Compatibility | Strength Rating |
|---|---|---|---|---|---|
| 1 | Household bleach (sodium hypochlorite) | 5–6% | Hard non-porous disinfection (per label) | ★★☆☆☆ | 5–6 |
| 2 | Hydrogen peroxide | 3% | Light mildew staining (label-based) | ★★★☆☆ | 3 |
| 3 | White distilled vinegar (acetic acid) | ~5% | Mild odor/stain support | ★★☆☆☆ | 5 |
| 4 | Isopropyl alcohol | 70% | Spot cleaning of residues (not a mildew remover) | ★☆☆☆☆ | 70 |
| 5 | Ethanol (ethyl alcohol) | 70% | Surface wiping of grime | ★☆☆☆☆ | 70 |
| 6 | Baking soda (sodium bicarbonate) | ~100% | Light scrubbing aid | ★★★☆☆ | 100 |
| 7 | Borax (sodium borate) | ~100% | Laundry booster; limited mildew use on floats | ★★☆☆☆ | 100 |
How to read this: Higher “strength” is not always better for pool floats. Vinyl/rubber coatings can handle some cleaners; foam and delicate finishes often need gentler chemistry and shorter dwell times.
Quick Scan Checklist (Print/Save)
Do a fast run-through before you start: rinse loose growth, wash with dish soap, use a label-approved mildew product, scrub gently during contact time, then rinse and dry completely.
According to EPA, mold control relies heavily on drying and preventing moisture re-accumulation after cleaning.
According to CDC, always follow disinfectant label instructions for dilution and wet contact time instead of improvising ratios.
| Step | Do this | Watch for |
|---|---|---|
| Pre-rinse | Rinse off loose growth | Don’t blast at high pressure |
| Wash | Dish soap + gentle scrub | Don’t scratch seams |
| Mildew treatment | Use product label directions only | Don’t mix cleaners |
| Scrub + dwell | Light scrubbing during contact time | Avoid wire brushes |
| Rinse | Rinse until no residue remains | Chemical smell returning |
| Dry | Air-dry fully before storage | Storing in damp areas |
Frequently Asked Questions
What is the safest way to clean mildew off pool floats?
Start by removing the float from the pool and rinsing it thoroughly with clean water to knock off loose mildew. Use a mild cleaning solution such as warm water mixed with dish soap, then scrub gently with a soft brush or sponge. Avoid harsh solvents or abrasive scrubbers that can damage the float’s surface coating.
How do I remove mildew stains from foam or fabric pool floats?
For mildew stains, make a solution of equal parts water and white vinegar, then apply it to the affected areas and let it sit for 10–20 minutes before scrubbing. Rinse well and repeat if needed, especially for stubborn spots. Let the float dry completely in the shade with good airflow to prevent new mildew from forming.
Why does mildew keep coming back on pool floats, and how can I prevent it?
Mildew returns when floats are stored wet or when they remain in humid, shaded areas that don’t dry quickly. After pool use, rinse off chlorine and sunscreen residue, then dry the float fully before storing it. Store floats in a cool, dry place with ventilation, and consider periodically cleaning them even when they don’t look dirty.
Which cleaning products work best to kill mildew on pool floats?
For most pool float materials, vinegar and mild soap are effective for mildew removal and are generally safer than stronger chemicals. If mildew is heavy, a diluted bleach solution can work—use only if the float material allows it, and always test a small hidden area first. After any disinfecting step, rinse thoroughly and dry completely to protect the float and prevent chlorine odor from lingering.
What’s the best way to clean mildew off pool floats without damaging the material?
Use gentle methods first: rinse, wash with dish soap, and scrub with a non-abrasive sponge, then use vinegar for mildew spots. Keep soaking times short and avoid soaking foam or fabric floats too long, which can weaken seams and encourage trapped moisture. Always rinse, dry fully, and store the float upright or flat so water doesn’t pool in creases.
📅 Last Updated: October 16, 2026 | Topic: how to clean mildew off pool floats | Content verified for accuracy and freshness.
References
- https://www.cdc.gov/mold/default.htm
- Mold | US EPA
- https://www.who.int/publications/i/item/9789289002133
- Mold – Overview | Occupational Safety and Health Administration
- https://www.cdc.gov/niosh/topics/mold/default.html
- https://pubmed.ncbi.nlm.nih.gov/?term=household+mold+cleanup+bleach+detergent
- https://scholar.google.com/scholar?q=how+to+remove+mildew+from+vinyl+pool+toys Google Scholar
- https://scholar.google.com/scholar?q=mold+cleanup+nonporous+surfaces+bleach+detergent Google Scholar
- https://scholar.google.com/scholar?q=disinfection+of+mold+on+plastics+hydrogen+peroxide Google Scholar
